Advertisement
Available languages
Available languages
Quick Links
・・
・・・
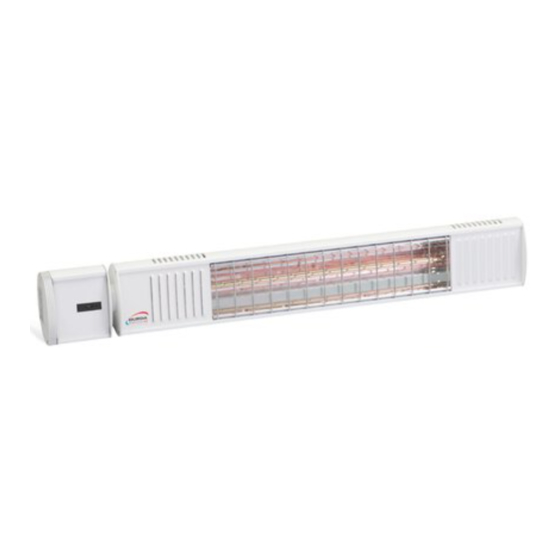
TERM2000
IOURCAC200V
M
-
ONTAGE
UND
I
NSTRUCTIONS FOR USE
M
I
STRUZIONE PER L
I
NSTRUCCIONES DE MONTAJE Y USO
IO
G
EBRAUCHSANWEISUNG
'
ODE D
EMPLOI
'
USO
IP67
Advertisement

Related Manuals for Burda TERM2000 IOURCAC200V Series


Summary of Contents for Burda TERM2000 IOURCAC200V Series
- Page 1 TERM2000 IP67 IOURCAC200V ONTAGE EBRAUCHSANWEISUNG NSTRUCTIONS FOR USE ’ ODE D EMPLOI ’ STRUZIONE PER L NSTRUCCIONES DE MONTAJE Y USO ・・ ・・・ ...
- Page 2 Sehr geehrte Kunden, Verbrennungsgefahr! bitte lesen Sie folgende Hinweise vor Zum Verstellen das Gerät erst abkühlen lassen. Inbetriebnahme aufmerksam durch. Sie • Kindern und Personen unter geben wichtige Informationen für Ihre Medikamenteneinfluß ist die Benutzung nur Sicherheit und den Gebrauch des Gerätes. unter Aufsicht zu gestatten! Achten Sie darauf, dass Kinder keine Gelegenheit haben, mit elektrischen Geräten zu spielen!
- Page 3 Technische Informationen: MODEL NAME: IOURCAC200V9010 IOURCAC200V9005 IOURCAC200V7016 Spannung: 230-240V~, 50Hz 230-240V~, 50Hz 230-240V~, 50Hz Leistung (Watt): 2000 W 2000 W 2000 W Montage: Wand und Decke Wand und Decke Wand und Decke Min. Abstand vom Boden (m): Elektrische Schutzklasse IP Schutzklasse IP67 IP67 IP67...
- Page 4 1. Beschreibung Somfy Funkhandsender a: LED Anzeige Batteriestatus b: LED-Anzeigen Kanalauswahl c: Auswahl: Funkkanäle d: Variationszifferblatt e: Auto / Man-Modus-Wahlschalter f: Wandbefestigung g: Einschalten h: Taste MY i: Ausschalten j: Wandhalterung k: PROG-Taste l: LEDs 1,2,3,4 (Betriebsmodus-Anzeige-LEDs) m: Betriebsmodus-Auswahltaste n: Autonome Modus Wahltaste. Sie wird bei Verwendung der io-Heizstrahler nicht betrieben o: Batteriefachdeckel und Einstelltasten Bitte beachten Sie die Sicherheits- und Warnhinweise der SOMFY Funkhandsender Gebrauchsanleitung...
- Page 5 3. IO auf ursprüngliche Konfiguration zurücksetzen, Achtung! Dieser Reset entfernt alle Fernbedienungen. Um eine neue Fernbedienung hinzuzufügen, lesen Sie bitte Abschnitt 2.5 und 2.6. 3.1. Schalten Sie das Gerät 2 Sekunden lang aus. 3.2. Schalten Sie die Stromversorgung für 10 Sekunden ein (länger als 5 Sekunden und kürzer als 15 Sekunden).
- Page 6 4.3 Bewegen Sie das Scrollrad nach oben oder unten und variieren Sie die Heizung zwischen LOW (NIEDRIG)-MED (MITTEL)-HIGH (HOCH) oder HIGH-MED-LOW. HIGH 5. Stellen Sie Ihre bevorzugte Leistungsstufe ein: 5.1. Wählen Sie den Kanal für die Heizung mit Ihrer bevorzugten Leistungsstufe (LOW, MED oder HIGH) und drücken Sie dann die Taste „MY“...
- Page 7 6. TIMER 6.1 Drücken Sie gleichzeitig die Tasten «MY» und Down, bis die Lampe in einem Zyklus EIN/AUS ist. Wenn die Timer-Funktion inaktiv war, ist sie aktiviert. War die Funktion „Timer“ aktiv, ist sie deaktiviert. 6.2 Drücken Sie nach Schritt 6.1 kurz gleichzeitig die Tasten „MY“ und „DOWN“. 6.3 Drücken Sie nach Schritt 6.2 die Tasten „MY“...
- Page 8 TANDORT • Der Strahler ist u.a. für Wandbetrieb mit Festanschluss geeignet und muss mindestens 2,1 m über dem Boden angebracht werden! • Das Gerät darf nur in Betrieb genommen werden, wenn es waagerecht montiert wurde. Das Anbringen des Strahlers an der Decke ist ebenfalls gestattet. •...
- Page 9 • Die Montage und der Anschluss des Gerätes darf nur von qualifiziertem Fachpersonal durchgeführt werden. Vor Beginn aller Elektroarbeiten ist die Installation spannungsfrei zu schalten! • Bei Montage des Gerätes ist auf Leitungen zu achten, die unter Putz verlegt sind. Vorsicht beim Anbringen der Bohrlöcher! Gerät erst nach vollständiger Montage in Betrieb nehmen.
- Page 10 Dear Customer, • The appliance is not intended for use by please read the following information young children or infirm persons without carefully before using the appliance for the supervision! Young children should be first time for your own safety and to ensure supervised to ensure that they do not play correct use.
- Page 11 Technical Specification: MODEL NAME IOURCAC200V9010 IOURCAC200V9005 IOURCAC200V7016 Voltage 230-240V~, 50Hz 230-240V~, 50Hz 230-240V~, 50Hz Rated power (W) 2000 W 2000 W 2000 W Installation wall and ceiling wall and ceiling wall and ceiling Min. Mounting height Electric protection class Water splash proof rate IP67 IP67 IP67...
- Page 12 Description of remote-control panel a: Weak battery LED b: Channel selection indicator LEDs c: Select, Channel select switch d: Variation dial e: Auto/man mode selector f: Wall mount g: Power ON h: key MY; i: Power OFF j: Wall mount recess k: PROG button l: EDs 1,2,3,4 (operating mode indicator LEDs) m: perating mode select button...
- Page 13 3.6. Press the button UP and DOWN simultaneously until the lamp is ON/OFF in one cycle. 3.7. Briefly press the PROG button: the lamp is ON/OFF one time, to indicate that the remote control had been matched with the heater. 4.
- Page 14 6. TIMER 6.1 Press the «MY» and Down buttons simultaneously until the lamp is ON/OFF in one cycle. If the “timer” function was inactive, it is activated. If the “timer” function was active, it is deactivated. 6. TIMER 6.1 Press the «MY» and Down buttons simultaneously until the lamp is ON/OFF in one cycle. If the “timer”...
- Page 15 OCATION • The radiating element is designed for wall-and ceiling type operation with permanent connection and must be installed at least 2,1 m above the ground! • The appliance should only be used mounted horizontally on a wall. • A minimum distance of 150 cm must be maintained between the front grille and flammable items (e.g.
- Page 16 NSTALLATION • The appliance should be fitted and connected by a qualified electrician. • Prior to starting any electrical work, the voltage must be switched off to make sure that the wiring is dead! Only switch on the appliance when installation is complete. WITCHING ON FOR THE FIRST TIME •...
- Page 17 Cher client, d'abord l'appareil. veuillez lire attentivement les consignes • Les enfants et les personnes sous influence suivantes avant la mise en service. Elles vous de médicaments ou d'alcool ne peuvent apportent des informations importantes pour utiliser l'appareil que sous surveillance: Veillez votre sécurité...
-
Page 18: Nom Du Modèle
Spécifications techniques: NOM DU MODÈLE IOURCAC200V9010 IOURCAC200V9005 IOURCAC200V7016 Voltage 230-240V~, 50Hz 230-240V~, 50Hz 230-240V~, 50Hz Puissance (W) 2000 W 2000 W 2000 W Installation Mur, Plafond Mur, Plafond Mur, Plafond Hauteur de montage minimale (M) Classe de protection électrique Gamme de protection contre les projections IP67 IP67... - Page 19 Attention ! L'utilisation d'un appareil radio (p. ex. casque sans fil Hi-Fi) fonctionnant sur la même fréquence peut provoquer des interférences et affecter les performances de l'appareil. 2. Description Émetteur radio Somfy a : Voyant LED de l'état de la batterie b : Voyant LED de sélection du canal c : Sélection du canal radio d : Cadran des variations...
- Page 20 2.3. Appuyez sur le bouton (E) comme indiqué sur la figure de droite. Appuyez une fois sur le bouton et la LED passera successivement sur 1, 2, 3 et 4. Attention! Réglez la télécommande sur le mode de fonctionnement 2 (LED 2 allumée) qui permet de réguler le chauffage.
- Page 21 HIGH 5. Définissez votre niveau de puissance préféré : 5.1. Sélectionnez le canal de chauffage de la puissance de votre choix (LOW, MED ou HIGH) et appuyez sur la touche « MY » pendant 5 secondes environ. La lampe sera allumée / éteinte pendant un cycle.
-
Page 22: Installation
IEU D INSTALLATION • Le radiateur est pour l'exploitation au plafond et murale avec branchement à demeure et doit être placé au moins 2,1 m au-dessus du sol! • L'appareil ne doit être mis en service que s'il a été monté horizontalement sur un mur et au plafond. - Page 23 • Ne pas coincer le câble, ne pas le tirer sur des bords coupants, ne pas le poser au-dessus de plaques de cuisinière ou de flammes ouvertes! ONTAGE • Le montage et le branchement de l'appareil ne doivent être réalisés que par du personnel spécialisé.
- Page 24 Cari clienti, Prima di modificare l'angolazione far vi preghiamo di leggere attentamente le raffreddare l'apparecchio. seguenti avvertenze prima di mettere in • Ai bambini ed alle persone sotto l'influsso di funzione l'apparecchio. farmaci è permesso usare l'apparecchio solo sotto sorveglianza. Fare attenzione a non far giocare i bambini con apparecchi elettrici.
- Page 25 Informazioni tecnici: IOURCAC200V9010 IOURCAC200V9005 IOURCAC200V7016 MODEL NAME 230-240V~, 50Hz 230-240V~, 50Hz 230-240V~, 50Hz Voltaggio 2000 W 2000 W 2000 W Potenza Parete, Soffitto Parete, Soffitto Parete, Soffitto Installazione Altezza installazione a muro Elektrische Schutzklasse Classe di protezione IP67 IP67 IP67 elettrica 1900 1900...
- Page 26 1. Descrizione telecomando Somfy a: LED display stato della batteria b: Indicatori LED selezione canali c: Selezione: canali radio d: Quadrante Variation e: Selettore modalità Auto / Man f: Montaggio a parete g: Accensione h: Tasto MY i: Spegnimento j: montaggio a parete k: Tasto PROG m: Tasto di selezione modalità...
- Page 27 3. Ripristina IO alla configurazione originale Attenzione! Questo ripristino rimuove tutti i telecomandi. Per aggiungere un nuovo telecomando, leggere le sezioni 2.5 e 2.6. 3.1. Spegnere l'alimentazione per 2 secondi. 3.2. Accendere l'alimentazione per 10 secondi (più di 5 secondi e meno di 15 secondi). 3.3.
- Page 28 4.2. Premi il pulsante UP. Il riscaldamento inizia con l'impostazione al massimo livello di potenza. Premere il pulsante DOWN per spegnere il riscaldatore. 4.3 Spostare la rotella di scorrimento verso l'alto o verso il basso e variare il riscaldatore tra LOW-MID (MEDIUM) -HIGH o HIGH-MED-LOW.
- Page 29 6. TIMER 6.1 Premere contemporaneamente i pulsanti "MY" e DOWN fino a quando la lampada si accende / spegne in un ciclo. Se la funzione timer era inattiva, è attivata. Se la funzione "Timer" era attiva, è disattivata. 6.2 Premere brevemente i tasti "MY" e "DOWN" contemporaneamente dopo il punto 6.1. 6.3 Dopo il passaggio 6.2, premere i pulsanti "MY"...
- Page 30 UOGO DI INSTALLAZIONE • Il radiatore è idoneo solo per il funzionamento a parete con allacciamento fisso e deve essere fissato ad una altezza di almeno 2,1 m dal pavimento. • L'apparecchio deve essere messo in funzione solo dopo averlo montato orizzontalmente sulla parete.
- Page 31 • Il montaggio e l'allacciamento dell'apparecchio devono essere eseguiti solo da tecnici specializzati e qualificati. • Prima di effettuare qualsiasi intervento sulle parti elettriche togliere tensione all'installazione! Mettere il funzione l'apparecchio solo dopo averlo montato completamente. ESSA IN FUNZIONE • Accendendo l'apparecchio per la prima volta o dopo un lungo periodo di inattività si possono sviluppare degli odori.
- Page 32 Estimado cliente, quemaduras! por favor lea atentamente las instrucciones Antes de modificar la posición, deje enfriar el siguientes, ya que le proporcionarán aparato. importantes informaciones acerca de la • Niños y personas bajo tratamiento con seguridad y el uso del aparato. medicamentos sólo pueden hacer uso del aparato bajo supervisión.
- Page 33 Informaciónes técnicas: IOURCAC200V9010 IOURCAC200V9005 IOURCAC200V7016 MODEL NAME 230-240V~, 50Hz 230-240V~, 50Hz 230-240V~, 50Hz Voltaje 2000 W 2000 W 2000 W Energía Pared, techo Pared, techo Pared, techo Instalación Altura de montaje del suelo (m) Clase de protección eléctrica Grado de resistencia a IP67 IP67 IP67...
- Page 34 Descripción telemando Somfy a: Pantalla LED de estado de la batería b: Selección de canal de indicadores LED c: Selección: canales de radio d: Variación de línea e: Selector de modo automático / manual f: Montaje en la pared g: encender h: Boton MY i: Apagar j: Soporte de pared...
- Page 35 3. Restablecer IO a la configuración original ¡Precaución! Este reinicio elimina todos los controles remotos. Para agregar un nuevo control remoto, lea las secciones 2.5 y 2.6. 3.1. Apague la alimentación durante 2 segundos. 3.2. Encienda la alimentación durante 10 segundos (más de 5 segundos y menos de 15 segundos). 3.3.
- Page 36 4.2. Presione el botón UP. El calentamiento comienza con el ajuste al nivel de potencia más alto. Presione el botón DOWN para apagar el calentador. 4.3 Mueva la rueda de desplazamiento hacia arriba o hacia abajo y varíe el calentador entre LOW- MID (MEDIUM) -HIGH o HIGH-MED-LOW.
- Page 37 6. TIMER 6.1 Simultáneamente, presione los botones "MY" y Down hasta que la lámpara se encienda / apague en un ciclo. Si la función del temporizador estaba inactiva, se activa. Si la función "Temporizador" estaba activa, se desactiva. 6.2 Después del paso 6.1, presione brevemente los botones "MY" y "DOWN" simultáneamente. 6.3 Después del paso 6.2, presione los botones "My"...
- Page 38 BICACIÓN • El radiador es apto para colocar en la pared con conexión fija y debe ubicarse como mínimo a 2,1 m por encima del suelo. BICACIÓN • El aparato sólo puede ponerse en funcionamiento si ha sido montado horizontalmente. También es •...
- Page 39 Antes de realizar cualquier trabajo de electricidad interrumpa siempre el circuito de tensión. • Para el montaje del aparato hay que tener cuidado con los cables tendidos en la pared. Preste atención al realizar las perforaciones. Ponga en funcionamiento el aparato sólo después de finalizado el montaje. UESTA EN FUNCIONAMIENTO •...
- Page 40 ...
Need help?
Do you have a question about the TERM2000 IOURCAC200V Series and is the answer not in the manual?
Questions and answers