Table of Contents
Advertisement
Quick Links
Advertisement
Table of Contents

Related Manuals for Bosch EPS 807


Summary of Contents for Bosch EPS 807
- Page 1 EPS 807 / 815 en Repair instructions Injection pump test bench...
-
Page 2: Table Of Contents
2 | EPS 807 / 815 | Contents English Symbols used Repair works In the documentation Change Flywheel 1.1.1 Warning notices - Replacing the drive motor Structure and meaning Change Test oil heating 1.1.2 Symbols – Designation and 6.3.1 Change Float switch explanation 6.3.2... -
Page 3: Symbols Used
Symbols used | EPS 807 / 815 | 3 Symbols used Important notes Installation and/or repair work may only be performed In the documentation by trained and instructed Service personnel at Robert 1.1.1 Warning notices - Structure and meaning Bosch GmbH or by organizations appointed to do such Warning notices warn of dangers to the user or people in work by Robert Bosch GmbH. -
Page 4: Safety Instructions
4 | EPS 807 / 815 | Symbols used Safety instructions 1.4.4 Pressures 1.4.1 Mains voltages and High voltages Damage under high pressure can cause Hazardous voltages occur in both the leak of oil. network and the electrical system. If con-... -
Page 5: Assembly And Disassembly
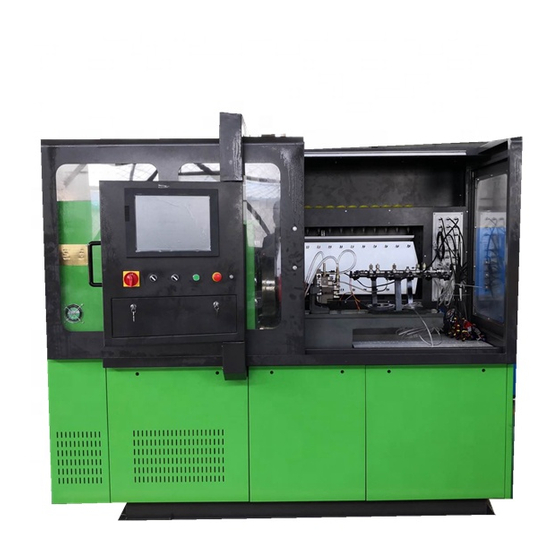
Assembly and Disassembly | EPS 807 / 815 | 5 Assembly and Disassembly Drive assembly Test-bench housing Fig. 1: Test-bench housing Fig. 2: Drive assembly Robert Bosch GmbH 1 689 975 140 2013-07-01... -
Page 6: Test Oil Heating
6 | EPS 807 / 815 | Assembly and Disassembly Test oil heating Test oil circulation Fig. 4: Test oil circulation Fig. 3: Test oil heating 1 689 975 140 2013-07-01 Robert Bosch GmbH... -
Page 7: Control Valve Test Oil
Assembly and Disassembly | EPS 807 / 815 | 7 Lubricating oil circulation 2.4.1 Control valve Test Oil 2.5.1 1. Generation Fig. 5: Control valve Test Oil 2.4.2 Cut-off valve Fig. 7: Lubricating oil circulation Fig. 6: Cut-off valve Fig. 8:... -
Page 8: Generation
8 | EPS 807 / 815 | Assembly and Disassembly 2.5.2 2. Generation 2.5.3 3. Generation Fig. 9: Lubricating oil circulation Fig. 11: Lubricating oil circulation Fig. 10: Test Oil tank Fig. 12: Test Oil tank 1 689 975 140... -
Page 9: Lubricating Oil-Control Valve
Assembly and Disassembly | EPS 807 / 815 | 9 Cabinet 2.5.4 Lubricating oil-Control valve 2.6.1 Complete Fig. 13: Lubricating oil-Control valve Fig. 14: Cabinet up to FD 05-2002 Fig. 15: Cabinet from FD 06-2002 Robert Bosch GmbH 1 689 975 140... -
Page 10: Mounting Panel
10 | EPS 807 / 815 | Assembly and Disassembly 2.6.2 Mounting panel Fig. 17: Mounting panel from FD 06-2002 Fig. 16: Mounting panel up to FD 05-2002 1 689 975 140 2013-07-01 Robert Bosch GmbH... -
Page 11: Economic Transformer
Assembly and Disassembly | EPS 807 / 815 | 11 Economic transformer Multiway tap with purge valve Fig. 19: Multiway tap up to FD 05-2000 Fig. 18: Economic transformer Fig. 20: Multiway tap 1 687 010 126 from FD 06-2000... -
Page 12: Structure
12 | EPS 807 / 815 | Structure Structure Block diagram 3.1.1 EPS 815 up to date of manufacture 05-2002 458741-17_Pal Fig. 21: Block diagram 3.1.2 EPS 815 from date of manufacture 06-2002 458741-17_Pal Fig. 22: Block diagram 1 689 975 140... -
Page 13: Injection Pump Test Bench
Structure | EPS 807 / 815 | 13 Injection pump test bench Code Designation Function Detecting lamp Drive motor "ON" Detecting lamp Program Test oil heating "ON" Code Designation Function Detecting lamp Lubricating oil engine "ON" Speed sensor Speed sensing... -
Page 14: Overview Of Possible Fluctuations
14 | EPS 807 / 815 | Overview of possible fluctuations Overview of possible fluctuations EPS815 EPS815 BOSCH EPS815 458726P Fig. 23: Overview 1 689 975 140 2013-07-01 Robert Bosch GmbH... -
Page 15: Troubleshooting
Troubleshooting | EPS 807 / 815 | 15 Troubleshooting Kurzzeichen Benennung Funktion Besondere Hinweise Tip switch S2 (UE) 230 VAC supply is not available Checking transformer T3, without efficiency (measuring on A1_X03 Terminals Safety fuse F11, F8 (Interruption LL0 and LL1) -
Page 16: Repair Works
16 | EPS 807 / 815 | Repair works Repair works Replacing the drive motor Change Flywheel Bosch does not operate the lifting and removal tool. Fig. 24: Lifting and removal tool for the flywheel 1 Eye bolt DIN 580-M12 2 Hexagon nut M12 3 Hexagon screw M10 x 35-8.8... -
Page 17: Change Test Oil Heating
Repair works | EPS 807 / 815 | 17 Change Test oil heating 6. Unscrew the hexagon nut (Fig. 3, Pos. 7) (2x) to the end of the threaded bolt. 7. Remove the hexagon nut (Fig. 3, Pos. 6) (2x). -
Page 18: Change Float Switch
18 | EPS 807 / 815 | Repair works 6.3.1 Change Float switch 6.3.2 Change Temperature sensor Fig. 30: Temperature sensor with connecting cable When lifting the fastening panel (Fig. 28, Pos. 7) and demounting or mounting of the temperature sensor ensure that the temperature sensor is not damaged, Fig. -
Page 19: Readjusting The Shut-Off Valve
Repair works | EPS 807 / 815 | 19 Readjusting the shut-off valve Change Heating exchanger When mounting the shut-off valve ensure that the pressure lines are not mistaken for pressure testers (Danger of pressure testers destruction. See also section 2.4). -
Page 20: Replacing The Rotary Encoder B1
20 | EPS 807 / 815 | Repair works Replacing the rotary encoder B1 The following description only applies to the drive motor 1 687 220 905. 6.6.1 Preparatory work 1. Turn off the EPS 815 at the master switch. 2. Disconnect the EPS 815 from unit from the mains and secure to prevent renewed switch-on. -
Page 21: Removing The Flange With Rotary Encoder
Repair works | EPS 807 / 815 | 21 6.6.5 Removing the flange with rotary encoder 4. Remove the hexagon socket head bolt (Fig. 37, 1. Carefully loosen all clamping bolts (Fig. 35, Pos. 2) Pos. 1). counterclockwise by half a rotation. -
Page 22: Mounting The Flange With Rotary Encoder
22 | EPS 807 / 815 | Repair works 4. Push the plug insert (Fig. 38, Pos. 3) into the plug 6.6.8 Mounting the flange with rotary encoder housing, with consideration for the plug coding. The 1. Carefully push the flange with the rotary encoder plug housing must click in audibly. -
Page 23: Mounting The Rotary Encoder B31
Repair works | EPS 807 / 815 | 23 6.6.11 Mounting the rotary encoder B31 The rotary encoder B31 is not contained as standard in the EPS 815 and is retrofitted in conjunction with the test sets VPM 844 and CAM 847. In it's as-deliv- ered condition, the EPS 815 has a cover in place of the rotary encoder B31. -
Page 24: Adjustment And Functional Test
24 | EPS 807 / 815 | Adjustment and Functional Test Adjustment and Functional Testing temperature sensors Test ¶ Resistance measurement on X2 (connection measur- ing system) with switched on EPS: Between Pin 16/17: tank temperature sensor Test the operating unit Between Pin 18/19: inlet temperature sensor "... -
Page 25: Testing Speed Monitoring A5 (Dze)
Adjustment and Functional Test | EPS 807 / 815 | 25 Testing speed monitoring A5 (DZE) 7.4.1 Printed circuit board 1 688 400 009 (up to FD 12-2000) If main switch Q1 is on the following LED’s must lit on... -
Page 26: Printed Circuit Board 1 688 400 251 (From Fd 01-2001)
26 | EPS 807 / 815 | Adjustment and Functional Test 7.4.2 Printed circuit board 1 688 400 251 (from FD 01-2001) If main switch Q1 is on the following LED’s must lit on A5 (DZE): V55 - 24V-Supply (control signal on converter) V68 - 5V- Supply (computer, logic, interface etc.) -
Page 27: Sensor Compensation On Amkasyn-Converter (Up To Fd 05-2002)
Adjustment and Functional Test | EPS 807 / 815 | 27 Sensor compensation on AMKASYN- 7.5.2 Performing sensor compensation Converter (up to FD 05-2002) 1. Press the key The following message appears: ENC.ADJUST. SERVICE Tools required: AZ-Terminal (AZB) 1 687 023 427 ERR.RESET... -
Page 28: Sensor Compensation On Ku-Converter (From Fd 06-2002)
28 | EPS 807 / 815 | Adjustment and Functional Test Sensor compensation on KU-Convert- 11. Change direction occassionally using the er (from FD 06-2002) <Shift> + <F1> (Drehen +) key or <Shift> + <F2> (Drehen -) until the following message appears on... -
Page 29: Appendix
Appendix | EPS 807 / 815 | 29 Appendix Hydraulic diagram Circuit diagram Robert Bosch GmbH 1 689 975 140 2013-07-01... - Page 34 400 - 500V = 35A 230Vac Steckdosen- Lfter Leiste Option: T1 = 1 687 224 253 (200,220,230,240V) T1 = 1 687 224 256 (440,460,480,500V) Datum 06.10.04 Robert Bosch GmbH Hauptstrom 68Y2370-04 05.10.04 EPS 815 R 017 68Y3133-02 24.06.02 Bearb. EHW3-Ge. EPS815R...
- Page 35 1.8A 0.7A -F9.1 -F9.2 -F9.3 -X1.1 -X1.1 Option: Prf”l- Schmier”l- Prf”l- Pumpe Pumpe Heizung Datum 06.10.04 Robert Bosch GmbH Steuertrafo,Pumpen,Heizung 68Y2370-04 05.10.04 EPS 815 R 017 24.06.02 68Y3133-02 Bearb. EHW3-Ge. EPS815R Stromlaufplan 1 689 911 376 1680S00052 29.08.11 Gepr. 19.09.11...
- Page 36 /7.0 12V= 24V= 28VAC1 28VAC0 BED-SL /7.6 2 4.7 Signal- & Spannungsversorgung Meásystem 4 4.7 6 4.7 Datum 06.10.04 Robert Bosch GmbH Steuertrafo/Klemmleiste 68Y2370-04 05.10.04 EPS 815 R 017 68Y3133-02 24.06.02 Bearb. EHW3-Ge EPS815R STROMLAUFPLAN 1 689 911 376 1680S00052 29.08.11...
- Page 37 X03 UZN X04 RBP Schirm RTB2 RTB1 /7.0 WBA/EF /7.0 /7.0 /7.0 /7.0 SCHIRM-X07 /7.0 Datum 06.10.04 Robert Bosch GmbH Kompakt-Umrichter, Motor 68Y2370-04 05.10.04 EPS 815 R 017 68Y3133-02 24.06.02 Bearb. EHW3-Ge EPS815R Stromlaufplan 1 689 911 376 1680S00052 29.08.11 Gepr.
- Page 38 4 4.3 4 4.5 6 4.7 6 4.3 6 4.5 14 5.5 14 5.7 68Y3133-02 24.06.02 Datum 06.10.04 Robert Bosch GmbH DZE und EPS-Bedienger„t EPS 815 R 017 68Y3019-01 31.01.01 Bearb. EHW3-Ge EPS815R Stromlaufplan 1 689 911 376 1680S00052 29.08.11 Gepr.
- Page 39 Historie 2013-07-01 Pal Kapitel 2 Montage / Demontage erweitert mit Varianten Schmierölversorgung Kapitel 3.1 Blockschaltbild hinzugefügt. Kapitel 6.6 Drehgeber B1 wechseln neu hinzugefügt Kapitel 7.4 erweitert mit DZE LP Versionen...
- Page 40 Robert Bosch GmbH Diagnostics Franz-Oechsle-Straße 4 73207 Plochingen DEUTSCHLAND www.bosch.com bosch.prueftechnik@bosch.com 1 689 975 140 | 2013-07-01...
Need help?
Do you have a question about the EPS 807 and is the answer not in the manual?
Questions and answers