Best Barns Cypress R Assembly Book
10' x 16'
Hide thumbs
Also See for Cypress R:
- Assembly book (19 pages) ,
- Assembly book (16 pages) ,
- Assembly book (16 pages)
Advertisement
Quick Links
Best Barns
Assembly Book
revised September 29, 2016
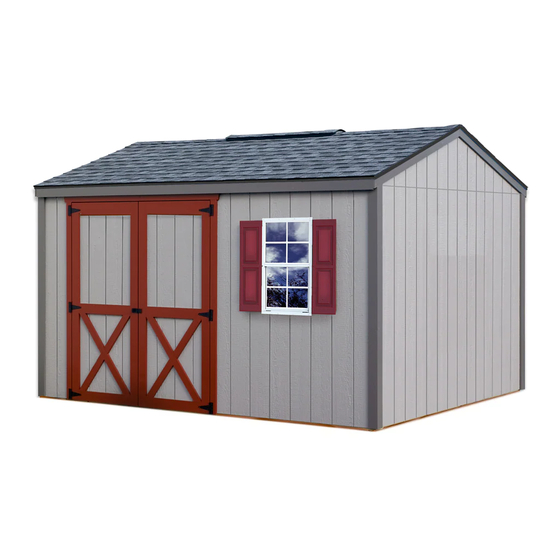
10' x 16'
the Cypress R
Manufactured by Reynolds Building Systems, Inc.
205 Arlington Drive - Greenville, PA 16125
This manual is copyrighted. Under the copyright laws, this manual
may not be copied, in whole or in part, without consent from Reynolds
Building Systems, Inc.
© Copyright 2016
Advertisement

Related Manuals for Best Barns Cypress R


Summary of Contents for Best Barns Cypress R
- Page 1 Best Barns Assembly Book revised September 29, 2016 10' x 16' the Cypress R Manufactured by Reynolds Building Systems, Inc. 205 Arlington Drive - Greenville, PA 16125 This manual is copyrighted. Under the copyright laws, this manual may not be copied, in whole or in part, without consent from Reynolds Building Systems, Inc.
-
Page 2: Read This First
- Read This First MPORTANT NFORMATION Thank you for your purchase. I want you to be completely satisfied with your building. The 2x4s are imported from Europe because they grade lumber four sides. If you are dissatisfied with lumber you receive we will replace it. Read the instructions before starting the assembly of the building. - Page 3 Construction Details for Optional Floor System Check local building codes in your area, the construction may have to change. For a concrete slab, install sill sealer as a moisture barrier between the concrete and the wall plates. Foam sill sealer can be purchased at home centers in rolls 3-1/2"...
- Page 4 Step 1 Assemble Roof Trusses Building Tip: Temporarily screw 2x4 blocks to the floor. There are short 2x4s, that may have an angle on one end, supplied in the kit for this purpose. This will secure the truss boards in position so all the trusses will be assembled the same.
- Page 5 Step 2 Assemble End walls 1. Position (4) four 60" boards together and indicate with 'X' marks, where the wall studs will be located. Mark the ends that will butt together with the letters 'A' and 'B'. 60" Wall Plate 60"...
- Page 6 Step 2 Assemble End Walls Continued 8. Install a 60" long 2x4 in the center of the wall panel, at the top. Use 10d sinkers. 9. Select the other end wall frame. 10. Square wall frame. Select a 12-1/2" wide siding panel with a 'tongue' edge. Install this panel with the 'Cut' edge flush with the end of the wall frame.
- Page 7 Step 3 Assemble Back Wall 1. Position (2) two 68-1/2" and (2) two 48" long 2x4s together and indicate with 'X' marks, where the wall studs will be located. Mark the ends that will butt together with the letters 'A' and 'B'. 68-1/2"...
- Page 8 Step 3 Assemble Back Wall Continued 68-1/2" Wall Plate 5. Position (2) two 68-1/2" long 2x4s together and indicate with 'X' marks, where the wall studs will be located. Mark the left ends with the letters 'C'. 23-1/4" 24" 6. Install 72" wall studs between the top and bottom plates.
- Page 9 Step 4 Assemble Front Wall Frames 60-1/4" Top Plate 1. Cut (2) two 72" 2x4s to a length of 69-1/2". 2. Cut (4) four 68-1/2" long 2x4 to a length of 60-1/4". 3. Mark spacing as shown on left and assemble a wall frame using (4) four 72"...
- Page 10 Step 5 Set Walls Continued 3. Install front wall frames between the end walls. 4. Disassemble the shipping pallets and remove the (4) four 2x4s from each pallet. The bit for the screws is in the hardware bag. Use (2) two of the 2x4s to brace the door walls to hold them straight.
- Page 11 Step 6 Install Siding on Front Wall 1. Select a full with siding panel and install at the front left corner. 2. Install a 15-3/4" siding panel with a 'LAP' edge next. 3. Install (2) two 4-3/4" x 32-1/4" siding panels over the door opening. Trim will cover where the siding panels butt together in the center.
- Page 12 Step 7 Install Tie Plates Continued 5. Cut (4) four 26-1/2" long 2x4s from (2) two 60" long 2x4 boards. 6. Install the 26-1/2" boards on the both end walls, see below. 26-1/2" Tie Plate 26-1/2" Tie Plate Step 8 Install Roof Gable 1.
- Page 13 Step 9 Install 'Z' Flashing Install (2) two 60” pieces of 'Z' flashing across the top Roof Gable of the siding on the end wall siding. Secure in place using 6d galv. nails spaced 12” apart. The ends will be covered by corner trim.
- Page 14 Step 11 Install 2x4 Truss Headers 1. Place a 72" long 2x4 on top of the siding on the front wall. It will butt against the siding on the roof gable. Nail this 2x4 to the 2x4 tie plate with 10d sinkers. 2.
- Page 15 Step 12 Install Trusses Continued Toe nail truss into 2x4 tie plate using 10d sinkers. Using a 2-1/2" screw, secure truss to 2x4 Truss Header installed in Step 11. 2x4" Truss Header Detail 'A' Step 13 Install 1x4 Fascia 1. Install 72" long 1x4 fascia trim over the 2x4 Truss Headers that were installed in Step 11. Install 1x4 trim boards flush with the bottom of the 2x4 and siding on the gable.
- Page 16 Step 14 Install Roof Sheathing Install roof sheathing with 7d sinkers, space nails 12" apart. When installing sheathing across the top, insert a plyclip into the roof sheathing between each truss. The top row of sheathing will be about 1" below the ridge to allow for optional ridge venting. See detail below.
-
Page 17: Install Trim
Step 15 Install Trim 1. Install 64-1/4" long 1x4 gable trim flush with the top of the roof sheathing on both end walls. Use 8d galv. nails 1x4 Gable Trim 2. Install 75-3/4" long 1x3 corner trim, on the front wall, flush with the face of the siding on the end walls. - Page 18 Step 16 Install Doors & Hardware 1. Before you fasten the hinges to the door trim, temporarily prop the doors in the opening. Leave a space at the top of the doors and between the doors and the side trim to allow room for the doors to expand when they absorb moisture.
- Page 19 Packing List for 10' x 16' Cypress R Qty. Qty. Description Size Whie Pine Trim Size Gable Trim 64 3/8" 2x4 Framing Tie Plates (attached to pallet) " Corner Trim 77 1/4" 18 Truss Rafters " Corner Trim 75 3/4"...
Need help?
Do you have a question about the Cypress R and is the answer not in the manual?
Questions and answers