Advertisement
Advertisement
Table of Contents

Related Manuals for Pumpex P 601


Summary of Contents for Pumpex P 601
- Page 1 P 601 - P 3001 SERVICE INSTRUcTION...
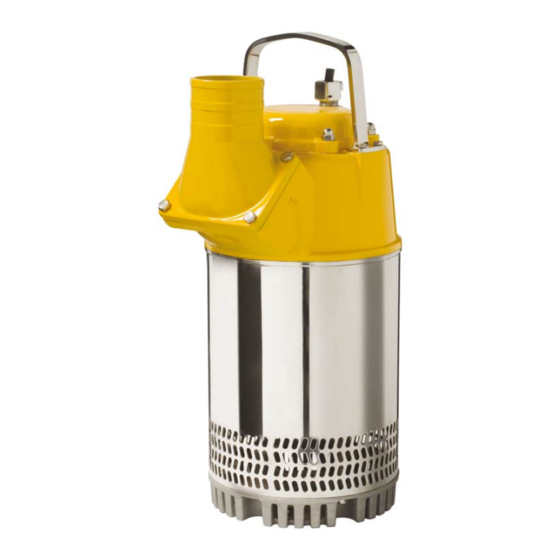
- Page 2 SERVICE INSTRUCTION P 601 - P 3001 P 601/701/801/1001/1501/2001/3001.58.0308.Eng/Digital These Service Instructions apply to PUMPEX electric submersible drainage pump models P 601-701-801-1001-1501-2001 and 3001. All configurations; including, centerline, high volume, normal head, and high head. Pump models P601 P 701 and P 1001 and P 2001 are available in either 3-phase or single-phase operation;...
-
Page 3: Maintenance
SERVICE INSTRUCTION P 601 - P 3001 P 601/701/801/1001/1501/2001/3001.58.0308.Eng/Digital If the seals are worn so severely that the oil has leaked out and only water mixed with mud and sand remains, the pump must be dis- mantled for a complete overhaul. -
Page 4: Troubleshooting
SERVICE INSTRUCTION P 601 - P 3001 P 601/701/801/1001/1501/2001/3001.58.0308.Eng/Digital Inspection of Hydraulic Parts Remove the diffuser, and check the rubber coating for wear, missing or heavly scored material, and deposits. Minor wear is easily compensated by tightening the nuts for the diffuser thus reducing the clearance from the impeller to .0004 in. - Page 5 SERVICE INSTRUCTION P 601 - P 3001 P 601/701/801/1001/1501/2001/3001.58.0308.Eng/Digital C. Water inside top cover, and /or main cover May be caused by: 1. Pump cable damaged or cut permitting water to penetrate into top of pump 2. Loose cable gland or faulty assembly of gland. 3. Damaged 0-ring , foreign matter between motor housing and main cover, or top cover 4.
- Page 6 SERVICE INSTRUCTION P 601 - P 3001 P 601/701/801/1001/1501/2001/3001.58.0308.Eng/Digital Complete overhaul A complete overhaul of the pump should be carried out if there has been water or oil in the motor housing, or if the pump has been in daily operation for one year or 2000 operating hours.
-
Page 7: Shaft Seals
SERVICE INSTRUCTION P 601 - P 3001 P 601/701/801/1001/1501/2001/3001.58.0308.Eng/Digital Impeller Remove the rubber covers from the stud bolts. Hold the impeller with a large screwdriver or similar between the vanes and unscrew the impeller nut with an 8 mm Allen key. -
Page 8: Rotor Unit
SERVICE INSTRUCTION P 601 - P 3001 P 601/701/801/1001/1501/2001/3001.58.0308.Eng/Digital Cut the lock washer part No. 00471 with a pair of nippers. Pull out the lock washer carefully in order to avoid scratching the shaft. Remove any possible scratches before pulling out the rotating part of the secondary shaft seal. -
Page 9: Ball Bearing
SERVICE INSTRUCTION P 601 - P 3001 P 601/701/801/1001/1501/2001/3001.58.0308.Eng/Digital Remove the external circlip on the shaft (inside secondary seal) with a pair of circlip pliers for Dia. 25 mm. The rotor shaft has to be pressed out of the ball bearing. Put the rotor into a tube of the same length as the rotor shaft and with an inner dia- meter slightly larger than the outer diameter of the bearing seat. - Page 10 SERVICE INSTRUCTION P 601 - P 3001 P 601/701/801/1001/1501/2001/3001.58.0308.Eng/Digital Cover and Cable Gland Unscrew the cap nuts for the cover. Lift off the cover and disconnect the cable from the contactor (3-phase units only). If water has penetrated through the cable gland, the cable seal should be replaced.
-
Page 11: Removal Of Stator
SERVICE INSTRUCTION P 601 - P 3001 P 601/701/801/1001/1501/2001/3001.58.0308.Eng/Digital The insulation between the separate turns in the winding should also be checked. This can be done by measuring the resistance of the phase windings, which should give the same reading for all three win- dings for 3-phase motors. - Page 12 SERVICE INSTRUCTION P 601 - P 3001 P 601/701/801/1001/1501/2001/3001.58.0308.Eng/Digital Note!! Locate the holes for the terminal cables in the housing about 4 inches from the exit of the cable groups on the winding head. When the housing has been mounted it may be cooled with compressed air.
-
Page 13: Ball Bearings
SERVICE INSTRUCTION P 601 - P 3001 P 601/701/801/1001/1501/2001/3001.58.0308.Eng/Digital Cable Gland and Cover Measure inner diameter of cable rubber bushing to see that it corresponds to cable diameter. Place rubber bushing and washers (one on each side of the bushing) on the cable. -
Page 14: Secondary Seal
SERVICE INSTRUCTION P 601 - P 3001 P 601/701/801/1001/1501/2001/3001.58.0308.Eng/Digital Secondary seal Clean and grease the seal seat in the oil casing and mount the stationary ring with 0-ring part No. 00461. Push it down to the bottom of the seat with tool part No. 00478. - Page 15 SERVICE INSTRUCTION P 601 - P 3001 P 601/701/801/1001/1501/2001/3001.58.0308.Eng/Digital Primary Seal Mount stationary ring of primary seal with 0-ring in its seat in the oil casing. The clearance between the lock washer and the stationary ring of the primary shaft seal should be about .001".
- Page 16 Mount the impeller on the shaft, securing it with key, spring washer and nut. Check that impeller runs free of wear plate with a clearance of 0.5- 1 mm (0.02"-0.04"). For P 601/801 the clearance should be 1-2 mm (0.04"-0.08"). Adjust the clearance with shims between impeller and shaft if necessary.
- Page 17 SERVICE INSTRUCTION P 601 - P 3001 P 601/701/801/1001/1501/2001/3001.58.0308.Eng/Digital Testing Connect power cable to power supply and start the pump. Check the direction of rotation. Seen from above, the pump should make a counter-clockwise jerk. If possible, operate the pump in water and measure the head against a PSI gauge.
- Page 18 SERVICE INSTRUCTION P 601 - P 3001 P 601/701/801/1001/1501/2001/3001.58.0308.Eng/Digital P 3001 H - 50 Hz Assembly and adjusting the diffuser and impellers (two impellers). Please note that the second impeller, 353477, is adjusted by washer 03176 and locked by a distance sleeve, having the same length as the hub of the first impeller, 03016.
- Page 19 SERVICE INSTRUCTION P 601 - P 3001 P 601/701/801/1001/1501/2001/3001.58.0308.Eng/Digital 46 (Oil) 72 (Motor) 19 (22)
- Page 20 SERVICE INSTRUCTION P 601 - P 3001 P 601/701/801/1001/1501/2001/3001.58.0308.Eng/Digital 50 / 60 Hz Ä 350072 AC 350071 AC Y+FSV 82 Ä+FSV 82 Ä Green/ Green/ Yellow Yellow TERMINAL BOARD TERMINAL BOARD MOTOR MOTOR 350074AA 350073 AA 20 (22)
- Page 21 SERVICE INSTRUCTION P 601 - P 3001 P 601/701/801/1001/1501/2001/3001.58.0308.Eng/Digital 50 / 60 Hz Star-delta starter Cable 9-leads Green/ (of ten) Yellow Terminal board Thermal contacts Motor 350078 AA 350077 AB Option Option 230 V 230 V XENON DT230 BRUN RÖD...
- Page 22 SERVICE INSTRUCTION P 601 - P 3001 P 601/701/801/1001/1501/2001/3001.58.0308.Eng/Digital 60 Hz, 230/460 V, 1~115/230 V Y-parallell 230 460 V serie-Y 460V Option 230 V Y-parallell 230V 7 1 8 2 9 3 Option serie-Y 460 V 351039 AC 353687 AA...
Need help?
Do you have a question about the P 601 and is the answer not in the manual?
Questions and answers