Hayward AquaVac 6 Series Troubleshooting Manual
Hide thumbs
Also See for AquaVac 6 Series:
- Manual (90 pages) ,
- Quick manual (2 pages) ,
- Quick start manual (13 pages)

Related Manuals for Hayward AquaVac 6 Series


Summary of Contents for Hayward AquaVac 6 Series
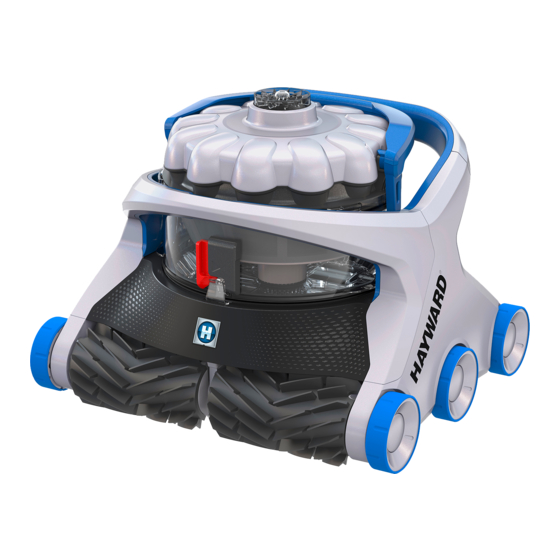
- Page 1 AquaVac® 6 Series Troubleshooting Guide TSG-AV650a Copyright 2019 Hayward Industries Inc.
- Page 2 Safety Precautions Warning High Voltage Electrocution Hazard Hazardous voltage can shock, burn, cause serious injury and or death. To reduce the risk of electrocution and or electric shock hazards: • Only qualified technicians should repair the cleaner • Replace damaged cords/wiring immediately •...
-
Page 3: Table Of Contents
Table of Contents Operation Instructions Pg. 4-5 Power Supply Icons Pg. 6 How To: Pg. 7-27 Clean debris from the canister Replace Rollers Disassemble cleaner 11-20 Customize wireless settings Rename cleaner Use direct drive and spot clean Update Firmware 25-27 Turn lights on and off Reset Wi-Fi and Unit Troubleshooting AV650:... -
Page 4: Operation Instructions
Operation Instructions READ BEFORE USING THE CLEANER • Do not operate outside the pool. This will damage the motor seal and void the warranty. • Do not drag the cleaner out of the pool against the side wall. This could damage the cleaner and/or the pool wall. RISK OF EQUIPMENT DAMAGE •... - Page 5 Operation Instructions OPERATING CONDITIONS • Water temperature operation range: min 50°F / 10°C, max 95°F / 35°C. Maximum operating depth: 3 m (10 ft.) • Operating the cleaner in temperatures above or below this range may affect performance, and cause premature wear or failure.
-
Page 6: Power Supply Icons
AV650 Power Supply Icons Single Cleaning Cycle WiFi LED Canister Cleaning Reminder Weekly Calendar Cycle Full Cycle Recurring Cycle Waterline Mode Timer Select Floor Mode Start / Stop Menu Select... -
Page 7: How To
AquaVac® 6 Series How To:... -
Page 8: Clean Debris From The Canister
How To: Clean Debris from the Canister Some water is kept inside the canister to enable the self cleaning and flushing function for a true touch-free debris disposal. If desired most of the water can be removed by tilting the canister toward the inlet check valve. Doing so may result in having to rinse the canister after flushing the debris. - Page 9 How To: Clean Debris from the Canister Twist canister right and left Squeeze red latch to flush Step 3 Step 4 Twist the canister right and left to agitate water and When above desired disposal area, squeeze the red loosen debris, which may be packed inside canister. latch so bottom lid opens and debris is flushed out.
-
Page 10: Replace Rollers
How To: Replace Rollers Remove bottom throat Remove bottom throat Step 29 Step 30 Turn the cleaner upside down and remove the three Once the three screws are removed, lift the bottom T-20 Torx screws (shown above). throat (as shown above) to remove. Remove bottom roller brushes Remove roller brush catches Step 32... -
Page 11: Disassemble Cleaner
How To: Disassemble Cleaner Turn Power off and Lift handle Remove canister from cleaner Step 1 Step 1 Step 2 Step 2 Grab the handle on the canister and lift upright to a 90 Lift the canister out of the cleaner by holding the degree position. - Page 12 How To: Disassemble Cleaner Remove screws from wheels Remove wheels from cleaner Step 5 Step 6 Using a T-20 Torx screwdriver remove the screw from Remove the wheel assembly from the cleaner. Repeat each of the 3 wheels. these steps on the opposite side of cleaner.
- Page 13 How To: Disassemble Cleaner Step 7: Using a T-20 Torx screwdriver Remove the 17 screws on the cleaner, see locations below:...
- Page 14 How To: Disassemble Cleaner Remove Side Covers 8 Tabs total on each side Step 8 Step 9 Locate cleaner on its side and locate the eight tabs that There are 3 locking tabs on each end of the cleaner and hold the side covers on.
- Page 15 How To: Disassemble Cleaner Pry middle tabs on side cover Release 2 middle tabs Step 12 Step 13 Once the ends of the cover are loose, lightly pry out on As you pry out you will hear a “click” and the side cover the two middle tabs of the side cover.
- Page 16 How To: Disassemble Cleaner Remove rear handle cover Remove front handle Step 16 Step 17 Release the tab on both sides of the cleaner and pull Remove the front handle by pushing each side away straight sway from the cleaner. from the cleaner.
- Page 17 How To: Disassemble Cleaner Remove front shell cover Pull straight away from cleaner Step 20 Step 21 Using a flat screwdriver pry tab loose on the rear cover Remove rear shell cover by pulling straight back away shell from both sides. from cleaner.
- Page 18 How To: Disassemble Cleaner Remove screws from motor box Remove motor box Step 24 Step 25 Remove the four screws (using a T-20 Torx screwdriver) Once the four screws are removed from the motor box from the motor box assembly. assembly, you can lift the motor box out of the cleaner.
- Page 19 How To: Disassemble Cleaner Remove screws from rollers Remove bottom throat Step 29 Step 28 Remove the T-20 Torx screws from the end of each Turn the cleaner upside down and remove the three roller and remove the gear wheels. T-20 Torx screws (shown above).
- Page 20 How To: Disassemble Cleaner Remove bottom roller brushes Remove roller brush catches Step 32 Step 33 Turn cleaner upside down and remove the four screws Pivot each catch, that you removed the screws from to from the locations indicated above. release the roller brushes to be removed.
- Page 21 AquaVac® 650 Series How To:...
-
Page 22: Customize Wireless Settings
How To: Customize wireless settings • You can customize 3 settings on the wireless setting page Resetting the Power Supply to factory default settings will rename the SSID and password to factory settings and move back security to WEP 1- Renaming 2- Disabling the 3- Change The Wi-Fi... -
Page 23: Rename Cleaner
How To: Rename the cleaner • At anytime, you can rename your cleaner – Just enter the new name (Default is AV650) – Press OK to confirm and go back to previous menu – Press Cancel to go back to previous menu Resetting the Power Supply to factory default settings will erase the cleaner name... -
Page 24: Use Direct Drive And Spot Clean
How To: Use direct drive & spot clean • On the AquaVac Connect App main page, press the direct drive icon (Bottom left) • To drive the cleaner where you want, simply use the joystick (Remember that the right and left commands will be reversed if the cleaner is driving toward you) •... -
Page 25: Update Firmware
How To: Update firmware • When updating your app, if a new firmware update is available, it will be loaded to your app to be pushed to the cleaner or power supply on your next connection • A yellow number will appear close to the settings icon on the App if a new firmware is available •... - Page 26 How To: Update firmware (cont.) 1. Press the Upgrade tab for the power supply 2. It will display the version that you are about to install, press on it 3. You need to reset your Wi-Fi connection by pressing the settings button 4.
- Page 27 How To: Update firmware (cont.) Back in the AquaVac Connect app, the progress bar will show the upgrade progress When done, reset your Wi-Fi connection again by pressing the settings button In your Wi-Fi setting, turn Wi-Fi off and back on Verify that the connection with the AquaVac network is re-established then go back to the AquaVac connect App In the AquaVac Connect app, you should have an upgrade complete check mark.
-
Page 28: Turn Lights On And Off
How To: Turn lights on and off Lights On Lights Off Press and hold the Schedule button down for 3 Press and hold the Cleaning Mode button down for 3 seconds. seconds. -
Page 29: Reset Wi-Fi And Unit
How To: Reset Wi-Fi and Unit WiFi Reset Unit Reset Press and hold the Schedule and Cleaning Mode Press and hold the Start, Schedule, and Cleaning Mode buttons down for 10 seconds. buttons down for 10 seconds. -
Page 30: Troubleshooting Av650
AquaVac® 650 Series Troubleshooting... -
Page 31: Lights On Power Supply
Lights on power supply No Lights Flashing Blue LED Flashing Yellow LED Flashing Red LED Flashing Yellow LED Solid Red LED Slow Flashing LED Medium Flashing LED Fast Flashing LED Solid LED 1s / 1s 0.5s / 0.5s 0.1s / 0.5s... - Page 32 Lights on PS: No lights • Connect Power Supply to appropriate GFCI Outlet • If connected and still no power – Verify that the power outlet works properly • GFCI not tripped • Main breaker not tripped • Try another power outlet •...
- Page 33 Lights on PS: Fast flashing blue light time AC Power Up) • The Power Supply can’t detect or communicate with the cleaner • Causes – Floating cable not properly connected to Power Supply – Floating cable connection issue with motor box –...
- Page 34 Lights on PS: Fast flashing red light • The cleaner is experiencing an issue that can be resolved by the user, unable to communicate with cleaner after it has established a good connection – Cleaner stuck on an obstacle – Relocate the cleaner –...
- Page 35 Lights on PS: Medium flashing yellow Light • The Power Supply is overheating (Limp Mode) cleaner is still operating at reduced power • Causes – Power Supply is exposed for a long period of time to very high temperature or excessive solar load •...
- Page 36 – Disconnect the Power Supply – Disconnect the cleaner power cord from the Power Supply – Reconnect the Power Supply – Reconnect the cleaner • Your cleaner may require to be serviced by a Hayward Authorized Service Center (HASC) Solid Red LED...
- Page 37 Lights on PS: Slow flashing yellow light • The System is stuck in Bootloader mode • Symptoms: – Power Supply does not respond to any action – Impossible to established Wi-Fi connection – This happened during or just after the Power Supply Firmware Update •...
-
Page 38: Cleaning Pump And Thrust Sleeve
Cleaning the pump and thrust sleeve – Symptoms • Flashing Red on Power Supply • Cleaner not moving • AquaVac Connect App displays Pump error message (AV650 Only) – Causes 1. Debris is getting stuck in the shaft/bearings or impeller of the pump (Canister) –... -
Page 39: Reset Wi-Fi Connection On Mobile Device
Reset Wi-Fi connection on mobile device 1. Go on your mobile device Wi-Fi settings – Select AquaVac network – Forget the AquaVac network 2. Identify the corresponding Aquavac SSID as shown on label on power supply (AQUAVAC650_XX:XX) – Choose the AquaVac Wi-Fi network and enter password (Default: HaywardAVC650 ) –... -
Page 40: Forgot/Wrong Wi-Fi Password
Forgot/Wrong Wi-Fi Password • You forgot or have entered the wrong 13 character password 1. Go on your mobile device Wi-Fi settings – Select AquaVac network – Forget the AquaVac network 2. Identify the corresponding AquaVac SSID as shown on label on power supply (AQUAVAC650_XX:XX) –... -
Page 41: Ps Wi-Fi Not Connected To Mobile Device
PS Wi-Fi not connected to mobile device • Open the Wi-Fi settings on the mobile device • Make sure Wi-Fi is enabled • Identify the corresponding Aquavac SSID as shown on label on power supply (AQUAVAC650_XX:XX) • Choose the AquaVac Wi-Fi network and enter password (Default: HaywardAVC650 ) •... -
Page 42: Wi-Fi Is Off On Mobile Device
Wi-Fi is off on mobile device 1. Go to your mobile device Wi-Fi settings 2. Turn Wi-Fi on 3. Reconnect to the AquaVac network if not connecting automatically (auto login enabled) -
Page 43: Re-Initialize Communication With Power Supply
Re-initialize comm. with power supply 1. Go to your mobile device Wi-Fi settings 2. Turn Wi-Fi off 3. Turn Wi-Fi on 4. Reconnect to the AquaVac network if not connecting automatically (auto login enabled) NOTE: For further assistance please contact our technical support center at (908) 355-7995. -
Page 44: Replacement Part Numbers
Replacement Part Numbers RCX361331782237 SHELL FRONT HANDLE ASSEMBLY, GRAY RCX361178234 POWER SUPPLY KICKSTAND, BLUE RCX361134 PUMP MOTOR SHAFT COUPLING RCX361480W POWER SUPPLY AV650, WIFI RCX36111060X MOTOR BOX ASSEMBLY RCX361470 POWER SUPPLY AV600, NO WIFI RCX36111065X MOTOR BOX ASSEMBLY, WIFI RCX361191 55 FT.
Need help?
Do you have a question about the AquaVac 6 Series and is the answer not in the manual?
Questions and answers
My Aqua vac 600 just quit working. It has a red circle light on the control box.
@A. Lou Benassi My red light is solid and not flashing so the questions provided do not help me.
The red circle light on the control box (Power Supply) indicates a pump error for the Hayward AquaVac 600. This is often caused by debris stuck in the shaft, bearings, or impeller of the pump.
This answer is automatically generated
@Mr. Anderson Thank you. I will check that.
Hi, I’m having problems with my Hayward AV650 not working. I’ve taken apart everything to inspect and make sure all moving parts are not blocked which they all move freely. Thrust shaft spins fine.. I have downloaded updated firmware etc but when I press start on the controller nothing happens I get the red blinking light on the controller. Does the Motor Box Assembly, WiFi RCX36111065X need to be replaced?
A red blinking (flashing) light on the Hayward AV650 power supply indicates the unit is overheating and in "Limp Mode." The solution is to move the power supply to a cooler or shaded area and allow it to cool down. This does not indicate a need to replace the Motor Box Assembly, WiFi RCX36111065X.
This answer is automatically generated
My Aqua Vac 6 red ight is on and is solid and no debris is in it help!!
My red light is on and there is no debris in my Aqua Vac 6
why id my red light coming on on my Aqua Vac 6 right away
How do I make that the Vac doesn't just go back and forth for about 3 feet
Why does the Vac only go back and forth a short way
Пылесос АкваВак - 650. Постоянно горит синий мигающий, перезагрузка не помогает. Что делать?