
Related Manuals for Tru-Test EziWeigh5i


Summary of Contents for Tru-Test EziWeigh5i
- Page 1 EziWeigh5i, EziWeigh6i, EziWeigh7i, WOW2 and Dairy Automation Systems (DAS) WOW2 Scale Indicator LEVEL 1 SERVICE MANUAL Issue 2, 7/2017...
-
Page 2: Table Of Contents
EziWeigh5i, EziWeigh6i, EziWeigh7i, WOW2, DAS WOW2 Contents Service centre requirements........................ 3 Product feedback ........................... 3 Technical bulletins.......................... 3 Returning a product........................3 Fault report card..........................4 Service equipment ......................... 5 Parts diagrams............................ 6 Parts list ............................10 Troubleshooting ..........................12 Error messages .......................... -
Page 3: Service Centre Requirements
Cell codes Returning a product Before a product or assembly is returned to Tru-Test for service or analysis, please advise us beforehand so that a Return Authorisation (RA) number can be allocated. The RA number will ensure that we are ready for the product when it is received and assist us in providing efficient and prompt service. -
Page 4: Fault Report Card
EziWeigh5i, EziWeigh6i, EziWeigh7i, WOW2, DAS WOW2 Fault report card Email to: From: Service Department (Distributor) Tru-Test Ltd service@trutest.co.nz (Tru-Test Ltd representative) Date Return authority (RA) number Warranty Product returned: Indicator Model: Serial number Configuration Load bar/Load cells... -
Page 5: Service Equipment
EziWeigh5i, EziWeigh6i, EziWeigh7i, WOW2, DAS WOW2 Service equipment To service Tru-Test indicators, you will require the following equipment: Item Description Multi-meter Good quality digital type with 300 mA and 300 mV range. Screwdrivers Pozi-drive, size 1 (for connectors, PCA and LCDs – torque setting 0.5 Nm (4 lb-in.)). -
Page 6: Parts Diagrams
EziWeigh5i, EziWeigh6i, EziWeigh7i, WOW2, DAS WOW2 Parts diagrams Figure 1a: EziWeigh5i Parts Issue 2, 7/2017... - Page 7 EziWeigh5i, EziWeigh6i, EziWeigh7i, WOW2, DAS WOW2 Figure 1b: EziWeigh6i Parts Issue 2, 7/2017...
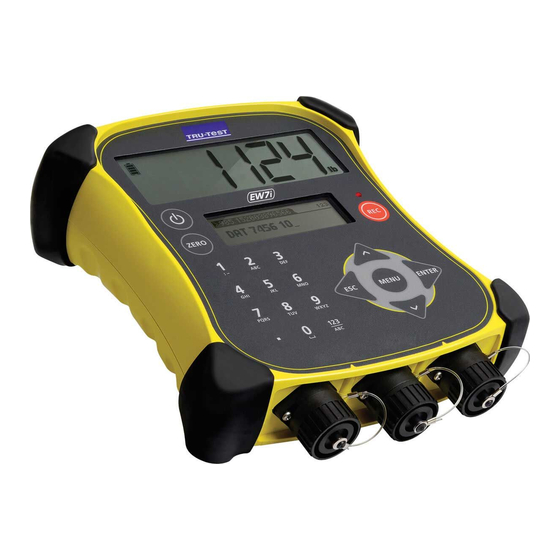
- Page 8 EziWeigh5i, EziWeigh6i, EziWeigh7i, WOW2, DAS WOW2 816752P 828690P 816753P 828686P 828688P 816753P 828687P 815787P 816749P 830459P 816748P 819797P 830037P SSS20416P 816747P 816597P 829036P 816604P EKZ31070P 830036P Figure 1c: EziWeigh7i Parts Issue 2, 7/2017...
- Page 9 EziWeigh5i, EziWeigh6i, EziWeigh7i, WOW2, DAS WOW2 816752P 828690P 816753P 829037P or 830504P 828688P 816753P 828687P 815787P 816749P 830459P 816748P 830037P SSS20416P 816747P 816597P 829038P 816604P EKZ31070P 830036P Figure 1d: WOW2 and DAS WOW2 Parts Issue 2, 7/2017...
-
Page 10: Parts List
EziWeigh5i, EziWeigh6i, EziWeigh7i, WOW2, DAS WOW2 Parts list Quantity Description Contents per indicator Part number LCD 7 segment All models 828687P LCD dot matrix EziWeigh6i, EziWeigh7i, WOW2 and DAS 815787P WOW2 Load bar connector and Male connector. All models 830037P Power/communication Female. - Page 11 EziWeigh5i, EziWeigh6i, EziWeigh7i, WOW2, DAS WOW2 Quantity Description Contents per indicator Part number Rubber bumper kit EziWeigh6i and EziWeigh7i 819797P (protective corners) Kit of 4 rubber bumpers Load bar connector All models EKZ31070P dust cap Power/communication All models 816604P connector dust cap...
-
Page 12: Troubleshooting
EziWeigh5i, EziWeigh6i, EziWeigh7i, WOW2, DAS WOW2 Troubleshooting Symptom Possible Fault Action Indicator does not Battery fault. Check battery voltage – if < 2.7 V, try recharging for at least switch on. ten hours. If the battery voltage has not risen above 3.3 V then replace battery. - Page 13 EziWeigh5i, EziWeigh6i, EziWeigh7i, WOW2, DAS WOW2 Symptom Possible Fault Action Back light very LCD FPC or Try reconnecting the LCD FPCs. See page 22. Reconnect dim or not backlight loom the LCD backlight loom. See page ? working. not connected properly.
- Page 14 EziWeigh5i, EziWeigh6i, EziWeigh7i, WOW2, DAS WOW2 Symptom Possible Fault Action Stable LED not Weight never Check indicator settings for Damp System and Resolution: working. stabilizes. Damp System - set to SuperDamp III (Cattle) or SuperDamp III (Sheep) Resolution may be set to too small. Set to a coarser resolution.
- Page 15 EziWeigh5i, EziWeigh6i, EziWeigh7i, WOW2, DAS WOW2 Symptom Possible Fault Action ® Bluetooth Bluetooth Check that the indicator is on. wireless wireless Check Bluetooth wireless connection (see page 19). connection not connection not working. established. EziWeigh7i, Problem with When connected to another Bluetooth enabled device, the WOW2 and DAS master device.
-
Page 16: Error Messages
EziWeigh5i, EziWeigh6i, EziWeigh7i, WOW2, DAS WOW2 Error messages EziWeigh6i, EziWeigh7i, EziWeigh5i WOW2, DAS WOW2 Error code Error message Meaning Solution Er 01 Factory calibration Calibration data lost. Perform factory calibration procedure. lost See page 37. Er 02 Model number lost Model number lost. - Page 17 EziWeigh5i, EziWeigh6i, EziWeigh7i, WOW2, DAS WOW2 EziWeigh6i, EziWeigh7i, EziWeigh5i WOW2, DAS WOW2 Error code Error message Meaning Solution Er 15 Possible capacity A load equal to the capacity Check the entered test weight was overload! would cause an output signal correct.
-
Page 18: Testing The Indicator
• The latest firmware may include some new load cell codes for new models of load bars. If in doubt, update firmware to the latest version from the Tru-Test website. See technical bulletin Upgrading firmware. For more information about load cells, refer to the technical bulletin Cell Codes. -
Page 19: Checking The Power Connection
Checking the USB connection (EziWeigh6i, EziWeigh7i, WOW2 and DAS WOW2 only) Run Data Link (supplied with the indicator, or available for downloading from the Tru-Test Livestock website www.livestock.tru-test.com). Communication with Data Link indicates that the USB interface is functioning correctly. - Page 20 EziWeigh5i, EziWeigh6i, EziWeigh7i, WOW2, DAS WOW2 EziWeigh5i Power Zero Backlight Auto zero Resolution EziWeigh6i, EziWeigh7i, WOW2 and DAS WOW2 Power Zero Record Keypad (all numbers) Escape Menu Enter Up arrow Down arrow The keypad may fail due to an internal short circuit.
-
Page 21: Checking The Battery
EziWeigh5i, EziWeigh6i, EziWeigh7i, WOW2, DAS WOW2 Checking the battery The indicator has a lithium iron phosphate (LiFePO4) battery fitted. The charging circuit on the PCA controls charging. Charge indication is by measurement of the battery voltage. Caring for the indicator battery Charge the indicator overnight before and after use (especially after storage). -
Page 22: Repair Procedures
EziWeigh5i, EziWeigh6i, EziWeigh7i, WOW2, DAS WOW2 Repair procedures LCD handling and storage precautions The LCD is made of glass. Do not subject it to mechanical shock. If the LCD is damaged and the liquid crystal substance inside it leaks out, be sure not to get any in your mouth. -
Page 23: Protecting The Case Front
EziWeigh5i, EziWeigh6i, EziWeigh7i, WOW2, DAS WOW2 Figure 3: Dot matrix LCD FPC connector open Locking bar on the FPC connector open With your fingertips on either side of the FPC, gently slide the FPC out of the connector body without bending or crumpling the FPC. -
Page 24: Removing And Refitting The Case Back
EziWeigh5i, EziWeigh6i, EziWeigh7i, WOW2, DAS WOW2 Removing and refitting the case back To remove the case back (EziWeigh6i and EziWeigh7i only) Remove the rubber corner bumpers by peeling them off, starting at the front. Manually unscrew the 11 screws securing the case back to the case front (see Figure 5 below). - Page 25 EziWeigh5i, EziWeigh6i, EziWeigh7i, WOW2, DAS WOW2 Figure 6: Case back exploded view Tighten screws using a torque-limited screwdriver set to 0.9 Nm (8 lbf-in), or hand screwdriver. The screws must be tightened in the same order as shown in Figure 7 in order to obtain a consistent pressure on the o-rings.
-
Page 26: Replacing The Case Seal
EziWeigh5i, EziWeigh6i, EziWeigh7i, WOW2, DAS WOW2 Replacing the case seal Remove the case back. See page 24. Use a fine screwdriver to lever out the seal and remove it from the case. Be careful not to damage the mating surfaces of the case. Do not use a knife to remove the seal as it may damage the case, even a small cut can create sealing problems. -
Page 27: Replacing The Case Front
See pages 29, 29, 30, 31 and 33 respectively. Replace the bezel, keypad and overlay. See below. EziWeigh5i – fit a round label over the sound hole (sound hole not required on the EziWeigh5i as it doesn’t have a piezo speaker fitted). -
Page 28: Replacing The Bezel, Keypad And Overlay
EziWeigh5i, EziWeigh6i, EziWeigh7i, WOW2, DAS WOW2 Replacing the bezel, keypad and overlay The overlay can be replaced separately from the keypad and the bezel. If the keypad is faulty, the overlay and keypad must be replaced. If the bezel is faulty (usually stripped screw threads), the bezel and overlay must be replaced. -
Page 29: Replacing The Battery
EziWeigh5i, EziWeigh6i, EziWeigh7i, WOW2, DAS WOW2 Replacing the battery Figure 10: Battery location. Remove the case back. See page 24. Disconnect and remove the old battery. Plug in the new battery and place into its cradle. The battery sits on top of the power/communication FPC and the two keypad FPCs.. -
Page 30: Replacing The Piezo Speaker
EziWeigh5i, EziWeigh6i, EziWeigh7i, WOW2, DAS WOW2 Removing a connector Remove the indicator case back. See page 24. Remove the two screws securing the connector and dust cap. Disconnect the FPC and remove the connector. See Using flexible printed circuits (FPCs) on page... -
Page 31: Removing And Refitting The Pca
EziWeigh5i, EziWeigh6i, EziWeigh7i, WOW2, DAS WOW2 Removing and refitting the PCA Removing the PCA Remove the case back. See page 24. Disconnect the battery loom, the piezo speaker loom, the dot matrix LCD backlight loom, the three connector FPCs, the two LCD FPCs and the two keypad FPCs (see Figure 13: PCA connections). - Page 32 Figure 14: PCA retaining screws Refitting the PCA EziWeigh5i – if necessary, replace the foam block which sits between the case front and the PCA. This prevents unwanted movement inside the case. Position the PCA in the case front.. Hint: EziWeigh6i, EziWeigh7i, WOW2 and DAS WOW2 - It is easier to fit the LCD FPCs to the PCA before fitting the PCA into the case.
-
Page 33: Replacing The Lcd
EziWeigh5i, EziWeigh6i, EziWeigh7i, WOW2, DAS WOW2 Replacing the LCD The procedure for replacing the seven segment LCD and the dot matrix LCD is the same. Figure 15: LCD locations and fixing screws. Remove the case back. See page 24. Remove the PCA. See page 31. -
Page 34: Accessing The Hidden Menus
EziWeigh5i, EziWeigh6i, EziWeigh7i, WOW2, DAS WOW2 Accessing the hidden menus These menus provide access to indicator settings. They are for Tru-Test staff and authorised service personnel only. Warning! Changing settings in these screens may change the operation of the indicator. - Page 35 EziWeigh5i, EziWeigh6i, EziWeigh7i, WOW2, DAS WOW2 ChnGd (current load cell code has had its calibration settings changed from factory defaults YES/NO – if yes, probably span or sensitivity calibrated), CELL (current load cell output signal in mV/V. This feature can be used to observe faults with the load bars, or determine sensitivity for a certain change in weight.
-
Page 36: Eziweigh6I, Eziweigh7I, Wow2 And Das Wow2 Esc+Menu Hidden Menu
EziWeigh5i, EziWeigh6i, EziWeigh7i, WOW2, DAS WOW2 EziWeigh6i, EziWeigh7i, WOW2 and DAS WOW2 ESC+MENU hidden menu Hold and press to access the ESC menu. Press to exit from menu once changes have been made. Span calibration It displays See the technical bulletin Span Calibration Guide to perform span and sensitivity calibrations. -
Page 37: Factory Calibration Screen
The factory calibration screen allows the indicator to be recalibrated with factory settings. This procedure requires the use of calibration plugs (0 mV/V and 2 mV/V). Performing factory calibration procedure – EziWeigh5i only Use an EziWeigh6i or EziWeigh7i overlay on top of EziWeigh5i overlay. Hold and press cALib The indicator displays (factory calibration). -
Page 38: Bluetooth ® Settings (Eziweigh7I, Wow2 And Das Wow2 Only)
EziWeigh5i, EziWeigh6i, EziWeigh7i, WOW2, DAS WOW2 Bluetooth settings (EziWeigh7i, WOW2 and DAS WOW2 only) ® If you are troubleshooting a Bluetooth wireless connection, you may require the following information. MAC Address To display the indicator’s MAC address: Press Press repeatedly to display Setups.
Need help?
Do you have a question about the EziWeigh5i and is the answer not in the manual?
Questions and answers
faults 29. Ew 5
Fault 29 on the Tru-Test EziWeigh5i indicates a possible load cell fault due to the load cell reading zero voltage. The suggested action is to check for faulty load bars, wiring, or moisture.
This answer is automatically generated
UndEr, I'd displayed, correct weight not given
The Tru-Test EziWeigh5i may not be displaying the correct weight due to several possible issues:
1. Load Cell Wiring Issues (Er 11) – The load cell wiring may be reversed, or the load cell may be mounted upside-down. Correcting the wiring or mounting may resolve the issue.
2. No Test Load on Platform (Er 12) – If no test load is placed on the platform, the scale may not provide accurate readings. Checking the mV/V response in the diagnostic menu can help identify the problem.
3. Large No Load Negative Offset (Er 13) – If the load cell has a large negative offset when no load is applied, the load bars may need to be replaced.
4. Processor Reset (Er 14) – Electrical supply issues or software faults can cause the scale to reset, affecting weight accuracy. If this persists, returning the unit for analysis may be necessary.
5. Capacity Issues (Er 15) – If a load equal to the scale's capacity is applied, verifying the entered test weight is correct may help resolve discrepancies.
Checking these potential issues and following the recommended solutions should help restore accurate weight readings.
This answer is automatically generated