Araknis Networks AN-510-AP-I-AC Quick Start Manual

Araknis Networks AN-510-AP-I-AC Quick Start Manual

Wave 2 ac wireless access point

Advertisement

AN-510-AP-I-AC
AN-810-AP-I-AC
WAVE 2 AC WIRELESS ACCESS POINT
Quick Start Guide

Advertisement

Table of Contents
loading
Need help?

Need help?

Do you have a question about the AN-510-AP-I-AC and is the answer not in the manual?

Questions and answers

Robert gargano
March 9, 2025

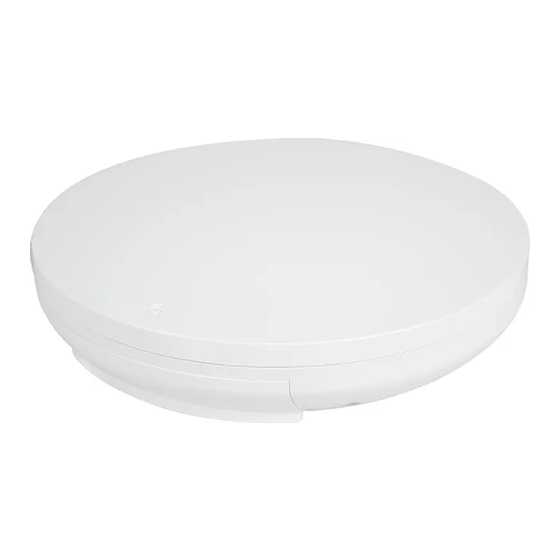
I just bought a condo and it has a model an-510-ap-I-ac I want to activated to my wireless network

1 comments:
Mr. Anderson
March 9, 2025

To activate the Araknis Networks AN-510-AP-I-AC on your wireless network, follow these steps:

1. Unbox the Device – Ensure you have the Wireless Access Point (WAP), mounting hardware, and necessary cables.
2. Mount the WAP – Install it on a ceiling or wall using the provided mounting bracket and hardware.
3. Connect to Power and Network – Use the Gigabit LAN port with 802.3at PoE-IN to connect to a PoE switch or injector for power and data.
4. Access the Web Management Interface – Connect a computer to the network and access the WAP’s web interface through its assigned IP address.
5. Configure Wireless Settings – Set up SSIDs, security settings, and network preferences.
6. Enable OvrC Services (Optional) – Use OvrC for remote management.
7. Save and Apply Settings – Ensure all configurations are saved before use.

For additional support, contact Araknis Networks technical support.

This answer is automatically generated

Summary of Contents for Araknis Networks AN-510-AP-I-AC

  • Page 1 WAVE 2 AC WIRELESS ACCESS POINT Quick Start Guide AN-510-AP-I-AC AN-810-AP-I-AC...
  • Page 2 Araknis Networks Wireless Access Point Quick Start Guide Federal Communication Commission Interference Statement This equipment has been tested and found to comply with the limits for a Class B digital device, pursuant to Part 15 of the FCC Rules. These limits are designed to provide reasonable protection against harmful interference in a residential installation.
  • Page 3 Araknis Networks Wireless Access Point Quick Start Guide Industry Canada Statement This device complies with Industry Canada’s licence-exempt RSSs. Operation is subject to the following two conditions: (1) This device may not cause interference; and (2) This device must accept any interference, including interference that may cause undesired operation of the device.
  • Page 4 This is a product with CE certification. In a domestic environment, this product may cause radio interference, in which case the user may be required to take adequate measures. These products are intended to be powered by either PoE/PoE+ or a 12V/2A power supply. These products use PoE/PoE+ IN(48V/0.53A) for both the AN-510-AP-I-AC and AN-810-AP-I-AC. Support: 866.838.5052...
  • Page 5 Araknis Networks Wireless Access Point Quick Start Guide CE Statement This equipment complies with EU radiation exposure limits set forth for an uncontrolled environment. This equipment should be installed and operated with minimum distance 20 cm between the radiator & your body.
  • Page 6 1 x Gigabit LAN Port (w/802.3at PoE-IN) • 1 x Gigabit LAN Port (data only) AN-510-AP-I-AC • 1 x USB 2.0 (power only) • Multi-User MIMO • AN-510-AP-I-AC: 2x2 Dual-Band Wave 2-AC 1300Mbps • AN-810-AP-I-AC: 4x4 Dual-Band Wave 2-AC 2600Mbps • OvrC Enabled AN-810-AP-I-AC Support: 866.838.5052...
  • Page 7 Araknis Networks Wireless Access Point Quick Start Guide Step 1: Unbox Wireless Access Point Mounting Bracket Tile Ceiling Backing Plate Quick Start Guide (WAP)* Male-to-Female Tile Ceiling Drywall Wood Surface Mounting Hardware Mounting Hardware Mounting Hardware Category Jumper Cable (510 has 2 screws) *This manual uses the 810 WAP for illustrative purposes throughout.
  • Page 8 Araknis Networks Wireless Access Point Quick Start Guide Step 2: Install Ceiling Mount Wall Mount NOTE: Use the ceiling back plate on top of acoustic ceiling tiles to prevent the mounting nuts from pulling through. Support: 866.838.5052...
  • Page 9 Araknis Networks Wireless Access Point Quick Start Guide Position the Ceiling Mount Ceiling Tiles Ceiling Mount Center Center Line* Line* Position 2 Position 1 Position A Position B * Center line of the bracket is not necessarily the center line of the WAP when installed. Please use the guide above to understand the center line of the WAP when installing the bracket.
  • Page 10 Araknis Networks Wireless Access Point Quick Start Guide Recommended use of the Jumper Cable You can mount your access point to the electrical box in one of two positions, shown below. These options are provided to provide cable bend relief for cables of different lengths and thicknesses. Illustrations do not reflect pre-install steps—please run the wire or jumper prior to connecting the access point.
  • Page 11 Araknis Networks Wireless Access Point Quick Start Guide Step 3: Connect AN-310-SW-F-8-POE Internet Router PoE Switch AN-ACC-INJ-30W DC 48V Input Power DATA (IN) AN-310-SW-F-8-POE Internet Router Switch PoE Injector (not included) AN-310-SW-F-8-POE Internet Router Switch DC Power Supply (not included)
  • Page 12 Araknis Networks Wireless Access Point Quick Start Guide Step 4: Verify LED* LED* *NOTE: The LED is located on the side of the device. LED Status: • Blinking: WAP is not working correctly. Contact Araknis technical support. • Solid White: WAP is booting up (810 only).
  • Page 13 Araknis Networks Wireless Access Point Quick Start Guide Step 5: Log Into Web Interface Log in using the default credentials: Username araknis Password araknis NOTE: If you can’t connect to the WAP using this method, or need to configure the device before connecting it to the network, try these options for accessing your device: •...
  • Page 14 Araknis Networks Wireless Access Point Quick Start Guide Pro Tip: Save and Apply Changes After making changes to settings on a menu page, click the “Save” button on the menu to hold the new settings in the Apply Changes field.
  • Page 15 Araknis Networks Wireless Access Point Quick Start Guide Other Access Methods: DHCP IP Address The WAP is configured to DHCP by default so that the DHCP server can assign an IP address when the WAP is connected to the network (the DHCP server is usually the router). This address can be used for accessing the web interface.
  • Page 16 Araknis Networks Wireless Access Point Quick Start Guide Other Access Methods: Default IP Address If the WAP is not issued an IP address on the network, or needs to be accessed while not connected to a network, you can configure your computer's network connection to allow access using the default IP address, “192.168.20.253”.
  • Page 17 Araknis Networks Wireless Access Point Quick Start Guide Other Access Methods: Default IP Address Windows 7 screenshots shown for reference. In the left bar, left-click “Change Right-click the icon for the Left-click to highlight “Internet adapter settings”. wired network connection and Protocol Version 4 (TCP/IPv4), left-click "Properties".
  • Page 18 Araknis Networks Wireless Access Point Quick Start Guide Other Access Methods: Default IP Address Windows 7 screenshots shown for reference. In the “General” tab, left-click Left-click “OK” to close Internet Open a browser and navigate "Use the following IP address:"...
  • Page 19 Araknis Networks Wireless Access Point Quick Start Guide Other Access Methods: OvrC OvrC gives you remote device management, real-time notifications, and intuitive customer management, right from your computer or mobile device. Setup is plug-and-play, with no port forwarding or DDNS address required.
  • Page 20 Araknis Networks Wireless Access Point Quick Start Guide Specs AN-510-AP-I-AC AN-810-AP-I-AC Diameter 7.25' X 1.53" 9.25' X 1.91" Weight 0.9 lbs 1.6 lbs Antenna Wireless Mode(s) 802.11 a/b/g/n/ac Wave 2 802.11 a/b/g/n/ac Wave 2 RJ-45 1000BASE-T Ports PoE Features PoE 802.3af Compliant PSE PoE 802.3at Compliant PSE...
  • Page 21 Araknis Networks Wireless Access Point Quick Start Guide Specs Continued AN-510-AP-I-AC AN-810-AP-I-AC Max TX Power 25dBm @ 2.4GHz 22dBm @ 2.4GHz 26dBm @ 5GHz 24dBm @ 5GHz Wireless Features Auto Channel Selection Auto Channel Selection Operation Modes: Access Point, Operation Modes: Access Point,...
  • Page 22 Araknis Networks Wireless Access Point Quick Start Guide Specs Continued AN-510-AP-I-AC AN-810-AP-I-AC Management Features Web Management Web Management Telnet Telnet SNMP v1, v2c, v3 SNMP v1, v2c, v3 DHCP Client DHCP Client System Log System Log Bonjour Bonjour UPnP UPnP...
  • Page 23 2-Year Limited Warranty Araknis Networks® products have a 2-Year Limited Warranty. This warranty includes parts and labor repairs on all components found to be defective in material or workmanship under normal conditions of use. This warranty shall not apply to products that have been abused, modified, or disassembled. Products to be repaired under this warranty must be returned to SnapAV or a designated service center with prior notification and an assigned return authorization (RA) number.

This manual is also suitable for:

An-810-ap-i-ac

Table of Contents

Save PDF