Table of Contents

Related Manuals for Rockler Create-A-Bed


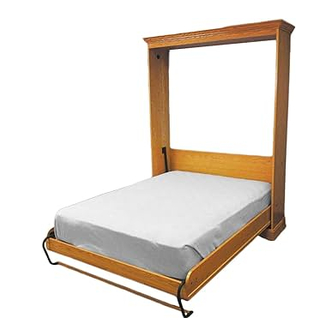
Summary of Contents for Rockler Create-A-Bed
- Page 1 Adjustable Twin Vertical Bed Instructions Effective December 2019 Review full instructions prior to use for important safety information. Always check Rockler.com to confirm that you are using the most recent version of instructions for your product.
- Page 2 Instructions and safety warnings for your product (see the safe use of this product and for ensuring product suitability for Instructions link on the product page at Rockler.com). the intended application. > Before using another tool with this product, always read, >...
- Page 3 SAFETY WARNING KEY Danger indicates a hazardous situation that, if not avoided, will result in death or serious injury. Warning indicates a hazardous situation that, if not avoided, could result in death or serious injury. Caution indicates a hazardous situation that, if not avoided, may result in minor or moderate injury or property damage.
- Page 4 PRODUCT SPECIFIC SAFETY WARNINGS > To avoid serious injury, keep hands and fingers away from the spinning router bit. Maintain awareness of the bit at all times. > TO AVOID THE RISK OF SERIOUS INJURY, DO NOT > The Top Header Rear Rail (L) MUST be attached securely ALLOW CHILDREN TO PLAY ON THE BED UNIT OR to the Top Header with glue and #8 x 2"...
- Page 5 Elevation Drawings Side View 83" ⁄ " Front View ⁄ " ⁄ "...
- Page 6 > The Right and Left Side Rails (C and D) MUST be made with 3/4" plywood (nominal thickness) because of the stress placed on these parts and the need for greater strength and structural integrity. Bed Cabinet Components T x W x L Qty.
- Page 7 3/4" Plywood 3/4" Plywood 3/4" Plywood 1/4" Plywood 8' Hardwood 8' Hardwood 6' Hardwood - Must match species of plywood Bed Cabinet Cut List T x W x L Qty. 3/4" Plywood 3/4" x 4' x 8' 1/4" Plywood 1/4" x 4' x 8' 6' Hardwood 1"...
- Page 8 Bed Cabinet Parts List Qty. Qty. Right Metal Pivoting Leg 11 Male Pivot Plate Left Metal Pivoting Leg 12 Plastic Pivot Plate Spacer 13 E-Clip #10 x 3/4" Black Screw 14 #12 x 3/4" Silver Screw T-Nut 15 Upper Ball Stud Plate Machine Screw 16 Ball Stud 1/4"...
- Page 9 Other Required Materials Qty. Qty. Veneer Edge Banding 13/16" x 75' 6d x 2" Finish Nails 1 box Wood Glue 8 oz. bottle #8 x 1 ⁄ " Coarse-thread Screws 3d x 1 ⁄ " Finish Nails 1 box #8 x 1 ⁄...
- Page 10 ⁄ " ⁄ " Fig. 1 Build the Inner Bed Frame 1. Cut the Inner Frame Strut Pieces (A) to size and organize 2. Cut the rounded corners with a jigsaw and sand smooth. them into pairs. Apply veneer edge banding along the top edges and rounded ends of the Side Rails (C and D).
- Page 11 Inside face ⁄ " 5/8" diameter x 1/2" deep 1/4" diameter Flush with back edge of Right Side Rail (C) Fig. 3 ⁄ " Inside face Fig. 2 Fig. 4 7. Repeat Steps 4-6 for the Left Metal Pivoting Leg (2) and facing the front end of the rail.
- Page 12 Attach Head, Foot and Side Rails to Frame 1. Position the Foot Rail (F) against the foot end of the 7. Attach the Side Rails (C and D) to the Head Rail (E) inner frame, making sure that the bottom edges are aligned by driving the included #10 x 1 ⁄...
- Page 13 4. To show where to apply glue, trace pencil lines along the inside of the Inner Frame Struts (A) and Sides (B). 5. Remove the bed frame assembly and apply glue to the Bed Face Panel (G) inside the trace lines you drew in Step 4. The edges of the Bed Face Panel (G) MUST extend 1/4"...
- Page 14 Install the Upper Ball Stud Plates on the Bed Cabinet Verticals 1. On the inside face of each Bed Cabinet Vertical (I), make a vertical mark 10" in from the front edge. Make additional horizontal marks 29 ⁄ " and 32 ⁄...
- Page 15 Build the Top Header Assembly 1. Apply Veneer Edge Banding to the bottom edges of the Top Header Front Rail (K) and Top Header Rear Rail (L). 1/2" Trim excess. Fig. 9. 2. Use 1/2" deep spacer blocks to raise the Top Header (J) #8 x 2"...
- Page 16 Install Mattress Support Panels and Retaining Straps 1. With the help of another adult, if necessary, turn the bed 2. Slide a Plastic Pivot Plate Spacer (12) on the bar of the frame assembly over or position it upright and install the Male Pivot Plate (11) on each Bed Cabinet Vertical (I).
- Page 17 15" 18" 28" Fig. 12 #8 x 1 ⁄ " Coarse-Thread Screws Fig. 13 Attach the Top Header Assembly to the Cabinet Verticals 2. Position the Top Header assembly (J,K, L and M) between the Cabinet Verticals (I), making sure that the Top Header Rear Rail (L) is at the back.
- Page 18 Install the Gas Springs 2. With an adult helper holding the bed cabinet, lift the front of the bed frame so it pivots up into the cabinet. Go at least 3" beyond flush at the top. Fig. 14. > The components of this wall bed unit operate with stored mechanical energy, which can cause serious Be sure to properly orient the Gas injury if mishandled.
- Page 19 Outer Edge of Stud 3. Securely attach the bed cabinet to the wall using one of the following methods. You will need to use at least three fasteners to secure the cabinet. Centerline For walls with wood studs: Outer Edge of Stud You MUST attach the bed cabinet assembly to the wall by driving at least three 1/4"...
- Page 20 And make adjustments in small increments. Even small adjustments can make a big difference in the bed’s lifting power. Check Rockler.com for updates. If you have further questions, please Fig. 19. contact our Technical Support Department at 1-800-260-9663 or support@rockler.com...
Need help?
Do you have a question about the Create-A-Bed and is the answer not in the manual?
Questions and answers