Table of Contents
Advertisement
ENGLISH
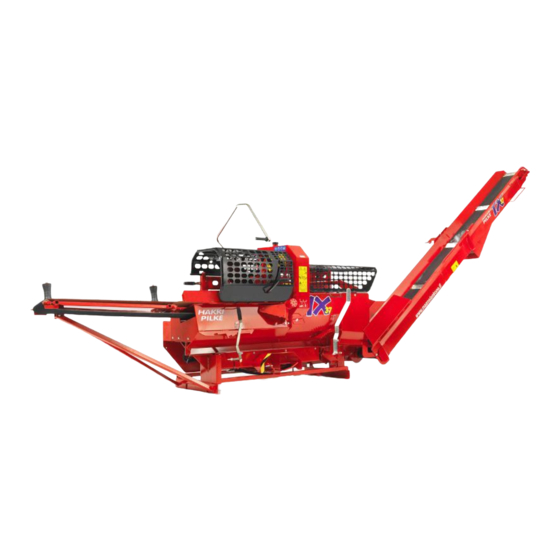
HakkiPilke 37
LOG SPLITTER
- Instructions for assembly, operation and maintenance
- EU Declaration of Conformity
- Safety instructions
- Warranty terms
The operator must read and understand these
instructions before operating the log splitter!
Tel. +358 (0)8 7727300, Fax +358 (0)8 7727320
Expert/Easy
MAASELÄN KONE OY
Valimotie 1, FI-85800 Haapajärvi, Finland
info@maaselankone.fi
www.maaselankone.fi
1
Original
Version 1-2011
Advertisement
Table of Contents

Summary of Contents for Maaselan Kone Oy Hakki Pilke 37 Series
- Page 1 ENGLISH HakkiPilke 37 Expert/Easy LOG SPLITTER - Instructions for assembly, operation and maintenance - EU Declaration of Conformity - Safety instructions - Warranty terms The operator must read and understand these instructions before operating the log splitter! MAASELÄN KONE OY Valimotie 1, FI-85800 Haapajärvi, Finland Tel.
-
Page 2: Table Of Contents
Table of contents General information ........................4 1.1. Introduction ............................4 1.2. The machine's purpose of use ......................4 1.3. Machine model and basic information ..................... 4 1.4. Operating conditions ......................... 5 1.5. Safety instructions ..........................5 1.6. Noise and vibration ........................... 5 1.7. - Page 3 Adjusting the length of the splitting motion ................... 36 5.10 Operation of the valve/splitting levers ..................38 5.11 Automatic acceleration valve ...................... 39 5.12 After use ............................40 Maintaining the machine ......................40 6.1 Cutting blade and drive end ....................... 40 6.2 Replacing, tightening and sharpening the blade chain ..............
-
Page 4: General Information
General information Introduction 1.1. The purpose of this manual is to ensure that the machine is used in the manner intended by the manufacturer with consideration to safety. Every person operating the machine or working in close proximity to it must carefully study this manual. Operators of the machine are expected to have basic skills in tractor handling, such as utilising the cardan shaft drive and the tractor's lifting equipment. -
Page 5: Operating Conditions
The machine's serial number, manufacturing date, weight, operating voltage (electrically-operated machine) and model are indicated on the type plate located on the left-hand side of the machine from the operator's perspective. Operating conditions 1.4. The temperature range within which the machine can be operated is -20 – +30 °C. In the winter, the operator must ensure that there is no risk of slipping in the working area. -
Page 6: Warning Symbols
Warning symbols 1.7. DANGER ZONE BEWARE OF THE CHAIN ONLY ONE PERSON AT A TIME IN THE WORK AREA SHUT DOWN BEFORE BEWARE OF MOVING PARTS RISK OF ENTANGLEMENT WITH THE CARDAN SHAFT MAINTENANCE TR/combi models only RISK OF CRUSHING DO NOT GO UNDER THE BEWARE OF THE SPLITTING CONVEYOR... - Page 7 READ THE MANUAL BEFORE USE PROTECTIVE EQUIPMENT USE PROTECTIVE EQUIPMENT SCALE MAX RPM ALWAYS GRAB A LOG BY THE SIDES HYDRAULIC OIL LEFT ROTATION CHAIN OIL LIFTING POINT FOR HOOK EMERGENCY STOP LIFTING POINT FOR FORKLIFT Original Version 1-2011...
-
Page 8: Reception And Assembly
Reception and assembly Reception inspection Dispose of the packaging in an environmentally friendly manner, and check that the machine has not been damaged during transit. Use the following list to ensure that you have received all parts included in the delivery. If you encounter defects or damage, contact the retailer immediately. The splitter should include the following machine-specific components: Component name and number 1X37... -
Page 9: Lifting And Moving The Machine
Figure 2 Lifting and moving the machine When moving machine, make sure that the moving and lifting capacity of your tractor or forklift is sufficient for the machine’s weight. Only lift the splitter by the indicated lifting points or with the lifting equipment of a tractor. -
Page 10: Main Components Of The Machine
When connecting the machine to a tractor's lifting equipment, the tractor cabin must be free of people in order to prevent any accidental contact with the controls. Check all connecting devices of the tractor and log splitter before connecting them. Never use faulty equipment. The pins that are used to connect the pushbars and drawbars to the log splitter must be of the correct size, and the appropriate locking pins must be used to ensure that they remain secure. -
Page 11: Preparing The Machine For Operation
Preparing the machine for operation Install the components supplied with the machine as follows: Attach the lugs (2 pcs), which have pins for the tractor drawbars (no. 1 in Figure 1), to the frame of the machine with three bolts. Tighten the bolts with a spanner. - Page 12 Attach the height adjustment lever for the splitting blade (no. 7 in Figure 2) as shown in the figure. Install the spring that holds the lever in its slot on the outside of the lever, under the head of the bolt. Place the spring that enables the blade's movement under the nut.
- Page 13 Additional parts to be installed in Easy models: Install the pedal guard (no. 5 in Figure 1) with four bolts as shown in the figure. Figure 13. Lift the control panel into place, and fasten it with Attach the valve guard to four bolts.
- Page 14 Parts to be installed in machines with a pivoting output conveyor: Attach the conveyor turning lever (no. 12 Figure 2) with the accompanying spring as shown in the figure. Figure 16. Install the winch support, place the winch (no. 11 in Figure 2) in its slot and tighten the bolts (2 pcs).
-
Page 15: Control Functions And Preparation
Control functions and preparation Arranging the machine for operation and transport Before arranging the machine for transport, ensure that the operating conditions detailed in Section 1.4 are met and consider the safety instructions in Section 1.5. Original Version 1-2011... -
Page 16: Placing The Input Conveyor In The Operating Or Transport Position
Note! Inspect and clean the machine according to Sections 2.1 and 9.0 before arranging it for transport. Placing the input conveyor in the operating or transport position Locking handle 1. Remove the split pin 2. Remove the from the locking handle. locking handle from the support. - Page 17 1. Use the winch to loosen the 2. Push the conveyor towards the splitter, and strap. release the conveyor lock by lifting the locking handle. 4. Use the winch to lower the conveyor. 3. Pull the conveyor until the winch strap tightens.
- Page 18 5. Lift the conveyor extension by the handle. 6. Extend the conveyor to its full length. 7. Use the winch to adjust the conveyor to the desired inclination, and lock the extension with the lock at the bottom of the conveyor and with a ring pin.
- Page 19 3.4 Placing the output conveyor in the transport position Arrange the conveyor for transport by reversing the order of the steps in Section 3.3. 1X37 log splitter in the transport position Always ensure that the transport position is locked! Do not transport the machine if it cannot be locked! Repair or replace faulty parts! Original Version 1-2011...
-
Page 20: Control Devices
Control devices The control devices of the Hakki Pilke 1X37 log splitter (basic model) are presented in Figure 19. The names and functions of the control devices are as follows: A. Operating lever for the cutting flange, which also controls the feed motion of the input conveyor B. -
Page 21: Tractor Drive
In the Hakki Pilke 1X37 Easy model, the controls A, E and H have been replaced with the control levers A and B in Figure 20. A. Height adjustment of the splitting blade and control of an auxiliary device B. Conveyor belt forward/back and cutting flange up/down Figure 20. -
Page 22: Electrical Drive
When utilising the cardan shaft, observe any instructions provided by the shaft's manufacturer. The splitter requires at least 7.5 kW of power (10 kW for the Easy model), which must be taken into account with regard to the capacity of the cardan shaft. A suitable shaft would be, for example, B1080CEACOA60. Check that the shaft is properly locked to the splined shaft of the angle transmission! The chain that prevents the guard from rotating must be attached to point C of the angle transmission's base. - Page 23 The actual starter box is located behind the splitter, under a protective cover You can open the cover by removing the locking bolt. Figure 24. The splitter will not start with the green switch unless the stop switch at the front of the machine is disengaged.
-
Page 24: Adjusting The Log Length And The Height Of The Splitting Blade
4.3 Adjusting the log length and the height of the splitting blade The Hakki Pilke 1X37 is equipped with a mechanical log measurement device with an incremented adjustment range of 20–60 cm. 1. To adjust the length of the wood to be cut, set the operating lever C (Figure 19) to the Stop position, which enables you to open the guard of the splitting blade. -
Page 25: Operating And Adjusting The Output Conveyor
4.4 Operating and adjusting the output conveyor The belt of the Hakki Pilke 1X37 log splitter's output conveyor is driven by a V-belt, which means that the conveyor belt will begin running immediately when the splitter is activated. The V-belt transmits the power from the splined shaft of the angle transmission to the output conveyor's belt pulley, where an automatic tightening mechanism maintains the V-belt at an optimal tension. - Page 26 If the Hakki Pilke 1X37 log splitter is equipped with a pivoting output conveyor, the belt of the output conveyor is driven by a hydraulic motor. To change the speed of the belt, use the adjuster F shown in Figure 19. The following describes how the conveyor can be turned laterally by using the turning lever A and handle B: Release the lock of the conveyor by pushing the lever A towards the conveyor, and turn the conveyor to the desired position with the handle B.
-
Page 27: Using The Blade Chain's Oil Adjuster
The following things significantly affect the operation of the debris removal device: the angle of the discharge conveyor, the speed of the belt and the distance of the separation plate A from the upper roller of the conveyor. In other words, the debris separation result is better the steeper the angle (however, no more than 40 degrees), the lower the speed and the longer the distance between the separation plate A and the upper roller. -
Page 28: Operating And Adjusting The Input Conveyor
4.6 Operating and adjusting the input conveyor The input conveyor is activated when the cutting lever is moved up from its initial position. Note! In the Easy model, the conveyor can be activated with the control lever B (in Figure 20) by pushing the lever to the up/right position. - Page 29 The lever handle can be changed to suit left or right handed users, and the handle can be lifted to the desired height. sensitivity input conveyor's movement adjusted with the lever mechanism valve controlling conveyor. adjustments lever movement are located behind the valve cover.
-
Page 30: Using The Input Conveyor Guard And Wood Press
4.7 Using the input conveyor guard and wood press The wood press keeps the logs in place when they being sawed. Do not put your hand between the wood press roller and the input conveyor belt! When opening the input conveyor guard: Set the splitter control lever to STOP. - Page 31 Ensure that the feed conveyor guard is properly locked in the raised position! When opening the input conveyor guard, ensure that the locking handle locks the guard in the raised position! To close the input conveyor guard, push the guard backwards and release the lock.
-
Page 32: Operating The Machine
5.0 Operating the machine 5.1 Test running the machine The machine must not be used before carrying out a test run and testing all the functions. Both the test run and testing can only be performed by a person who has studied the machine's manual. Before the test run, all the components of the log splitter must be checked. -
Page 33: Feeding And Sawing Wood
Note! Placing logs directly on the input table with a loader is strictly prohibited. 5.3 Feeding and sawing wood The input conveyor feeds the wood that is to be processed into the splitter. To drive a log into the machine, use the lever A in Figure 19 of Section 4.0. To reverse the feed, use the reverse pedal E. In the Easy model, wood can be fed with the control lever B (in Figure 20) by pushing the lever to the up/right position. -
Page 34: Jamming The Cutting Blade
Lower the guard, place the splitter's operating lever to the Run position and re-activate the splitting process with the activation pedal G (in Figure 19). 5.4 Jamming the cutting blade If the cutting blade is jammed in the wood, stop sawing and try again in another position. If the cut is misaligned because the flange drags to one side, the sharpness of the blade chain must be checked. -
Page 35: Splitting Wood
5.6 Splitting wood Perform the splitting motion as follows: 2. Press the lever A to 3. Ensure that the splitting beam 1. Move the splitter's the lower position and moves close to the splitting blade operating lever C to the RUN then let it return to the and returns to the initial position –... -
Page 36: Jamming Wood On The Splitting Blade
5.7 Jamming wood on the splitting blade If a piece of wood gets jammed in the splitting blade in a situation where the splitting force is insufficient to push the piece past the blade, do the following: Return the splitting beam to the initial position by turning the operating lever C to the far right position. - Page 37 The starting position of Moving the right-hand stopper the splitting beam can adjusts the return motion of the be adjusted by moving splitting beam, i.e. how close to the the left-hand stopper. splitting blade the splitting beam is brought. Halkaisupalkki Halkaisupalkki jää...
-
Page 38: Operation Of The Valve/Splitting Levers
5.10 Operation of the valve/splitting levers 3. After cutting the wood, when the cutting lever is lifted up, the trigger lever is also raised lifting up the trigger rod. When the trigger rod 1. In the initial position, the jointed is up, the spring presses the jointed lever to the lever is in the middle position. -
Page 39: Automatic Acceleration Valve
6. When the splitting 7. The depressed beam returns to the trigger rod stops the initial position, the jointed lever in the valve lever forcing middle position the spring turns to halting the splitting the left and forces system. the spring to press the jointed lever to the right. -
Page 40: After Use
The acceleration valve accelerates the splitting motion by 33%. NOTE! Speeding up the splitting motion reduces the splitting force. Warning! Never leave the acceleration valve's adjustment bolt fully closed! Open the bolt at least one rotation from the closed position. 5.12 After use 1. -
Page 41: Replacing, Tightening And Sharpening The Blade Chain
6.2 Replacing, tightening and sharpening the blade chain Sharpening and replacing the blade chain: WEAR GLOVES WHEN HANDLING THE BLADE CHAIN! Always shut down the splitter when preparing for blade sharpening. 1. Set the splitter's 2. Open the splitting groove operating lever to Stop. - Page 42 6. Loosen the two fastening bolts of the blade flange and the chain tensioning screw in order to remove the chain. 7. Replace the dull blade by reversing the above steps or sharpen the blade by filing it in a vice or sharpening device. Tightening the blade chain 1.
-
Page 43: Replacing The Cutting Flange
Do not use the machine if the cutting blade is visible through the cutting opening and the blade is not completely raised inside the guard! If the blade is not completely raised, tighten the spring pulling the blade by turning its adjustment nut. -
Page 44: Replacing And Tightening The V-Belts
6.4 Replacing and tightening the V-belts Replacing and tightening the belts of the electric motor 1. Shut down the splitter and disconnect it from its power sources. 2. If necessary, slide the cover of the electrical connector and angle transmission into a position where the angle transmission is visible. -
Page 45: Replacing And Tightening The Belts Of The Angle Transmission
6.6 Replacing and tightening the belts of the angle transmission 1. Perform steps 1–2 of Section 6.4. 2. Use the adjustment screws A (in Figure 42, 4 pcs) to lift the transmission bed high enough to enable you to slip the V-belts (3 pcs A38) off the angle transmission's belt pulley. -
Page 46: Changing The Oil Of The Angle Transmission
6.7 Changing the oil of the angle transmission Change the oil of the angle transmission as follows: 1. Loosen the fastening bolts (4 pcs, in Figure 43). 2. Remove the belts from the belt pulley (3 or 6 pcs, depending on the model). 3. -
Page 47: Changing The Hydraulic Oil
Changing the hydraulic oil 1. Shut down the splitter and disconnect it from its power sources. 2. Open the filler cap C. This will allow the oil to drain more easily. The filler cap is located on the oil tank in the middle section splitter. -
Page 48: Conveyor Maintenance
7.0 Conveyor maintenance 7.1 Replacing and tightening the belt of the input conveyor Replace the belt of the input conveyor as follows: 1. Shut down the splitter and disconnect it from its power sources. 2. Raise lock input conveyor into the transport position. - Page 49 a single hydraulic circuit. If necessary, the pressure can be adjusted as follows: loosen the locking nut A and turn the hex socket screw B clockwise/anti-clockwise. The pressure increases when turning the screw clockwise and vice versa. Note! The design value is 40 bars. This limit must not be exceeded! Figure 48.
-
Page 50: Replacing And Tightening The Belt Of The Output Conveyor
7.3 Replacing and tightening the belt of the output conveyor Replace the belt of the output conveyor as follows: 1. Pull out the pin locking the conveyor in place, and lower the conveyor to the ground. 2. Shut down the splitter and disconnect it from its power sources. 3. -
Page 51: Lubricating Moving Parts
1. Shut down the splitter and disconnect it from its power sources. 2. Loosen the locking nut B and adjust the motor pressure with the adjustment screw A. (The pressure increases when turning the screw clockwise and vice versa.) 3. Note! The maximum pressure for the motor is 85 bars. -
Page 52: Washing And Cleaning
6. Grease nipple for the input conveyor's drive roller 7. Grease nipple for the main shaft bearing (saw side) 8. Upper nipple for the cutting lever's adjustment rod 9. Outer nipple for the drive end shaft 10. Lower nipple for the cutting lever's adjustment rod... -
Page 53: Storage
be cleaned from the machine with pressurised air, for example. The machine can also be washed with a pressure washer, as long as the water jet is not aimed directly at the bearings or electrical equipment. Always ensure that the machine and the working area are sufficiently clean when operating the splitter. The machine must always be cleaned after use. -
Page 54: Failures And Remedial Measures
12.0 Failures and remedial measures Failure Cause Remedial measure The splitting force is insufficient to The V-belts are loose or too 1. Tighten or replace the V- split the wood. worn. belts. 2. The acceleration valve's outer 2. Clean or replace the check or inner check valve is leaking. -
Page 55: Electrical Diagrams
13.0 Electrical diagrams Original Version 1-2011... -
Page 56: Guarantee Terms And Declaration Of Conformity
14.0 Guarantee terms and declaration of conformity We grant a guarantee for our machines with the following conditions: 1. This guarantee covers such defects that are caused by manufacturing or material failures, except for those that are the components classified as parts that sustain wear. -
Page 57: Eu Declaration Of Conformity For The Machine
15.0 EU Declaration of Conformity for the machine (Machinery Directive 2006/42/EC, Appendix II A) Manufacturer: Maaselän Kone Oy Address: Valimotie 1, FI-85800 Haapajärvi, Finland Name and address of person who is authorised to compile the technical file: Name: Juha Autio Address: Valimotie 1, FI-85800 Haapajärvi, Finland The above person assures that HakkiPilke 37 Easy/Expert...
Need help?
Do you have a question about the Hakki Pilke 37 Series and is the answer not in the manual?
Questions and answers