Table of Contents
Advertisement
Quick Links
Advertisement
Table of Contents

Related Manuals for Tridonic LCO EXC3


Summary of Contents for Tridonic LCO EXC3
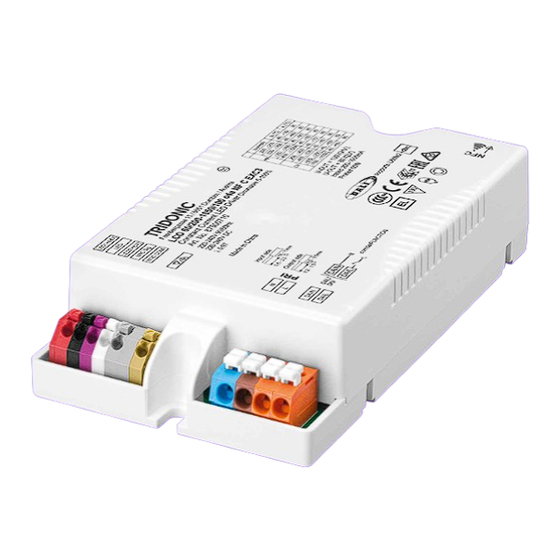
- Page 1 LED-Driver LCO EXC3/ADV3 OTD Product Manual...
-
Page 2: Table Of Contents
Manual LCO EXC3/ADV3 OTD | 03-2020 | 1.2 | en Table of Contents 1. Validity 4 1.1. Copyright ....................... . . 4 1.2. - Page 3 Manual LCO EXC3/ADV3 OTD | 03-2020 | 1.2 | en Table of Contents 6.12. ready2mains ......................56 6.13.
-
Page 4: Validity
CO NFC C EXC3 and LCO NFC C ADV3 series. TRIDONIC GmbH & Co KG is constantly striving to develop all its products. This means that there may be changes in form, equipment and technology. Claims cannot therefore be made on the basis of information, diagrams or descriptions in these instructions. -
Page 5: General Safety Instructions
LCO NFC C ADV3 series from Tridonic are able to detect potential risks on time and take the necessary preventative measures. The operator must ensure that all users fully understand these instructions and follow them. This device may only be installed and configured by suitably qualified personnel. -
Page 6: Additional Instructions
Manual LCO EXC3/ADV3 OTD | 03-2020 | 1.2 | en General safety instructions Additional instructions ½ CAUTION! Electromagnetic compatibility (EMC) Although the device meets the stringent requirements of the appropriate directives and standards on electromagnetic compatibility, it could potentially interfere with other devices under certain circumstances! -
Page 7: Description And Key Features
Manual LCO EXC3/ADV3 OTD | 03-2020 | 1.2 | en Description and key features Description of key features LCO NFC C EXC3 and LCO NFC C ADV3 is a specially designed portfolio for outdoor and industrial applications. It has been optimised to meet the hardest requirements in outdoor LED applications. -
Page 8: Main Values And Functions
Manual LCO EXC3/ADV3 OTD | 03-2020 | 1.2 | en Main values and functions Main values and functions Dimming Portfolio Description Dimmable Dimming method Amplitude dimming Dimming range 100 to 5 % Dimming curve Logarithmic dimming curve (standard) Switching to linear dimming curve via masterCONFIGURATOR is possible. - Page 9 Manual LCO EXC3/ADV3 OTD | 03-2020 | 1.2 | en Main values and functions Technical data Portfolio Description Rated supply voltage 220-240 V Standby losses < 0.16 W 9 / 63...
-
Page 10: Housing Variants
Manual LCO EXC3/ADV3 OTD | 03-2020 | 1.2 | en Housing variants Housing variants LCO one4all NFC C EXC3 is available in the following housing variants: Image Description Housing variant compact Compact shape for installation inside the luminaire casing (in-built) - Page 11 Manual LCO EXC3/ADV3 OTD | 03-2020 | 1.2 | en Housing variants Housing variant compact potted Compact shape for installation inside the luminaire casing (in-built) Typical area of application: Road, street, industry 11 / 63...
-
Page 12: Adjustable Output Current Exc3
Manual LCO EXC3/ADV3 OTD | 03-2020 | 1.2 | en Adjustable output current Adjustable output current EXC3 The output current can be adjusted via NFC, DALI V2-DT6, ready2mains Adjustable output current ADV3 The output current can be adjusted via NFC, ready2mains... -
Page 13: Compatibility Between Led Module And Led Driver
Manual LCO EXC3/ADV3 OTD | 03-2020 | 1.2 | en Compatibility between LED module and LED Driver There are two stages involved in the check for compatibility between the LED module and the LED Driver. The requirements for operating together can be checked by comparing the data sheets... - Page 14 Manual LCO EXC3/ADV3 OTD | 03-2020 | 1.2 | en Compatibility between LED module and LED Driver Comparison Value in LED Value in LED of… module Driver Detailed procedure Check whether voltage range of LED module is completely within the (2) Voltage Min.
-
Page 15: Practical Tests
Manual LCO EXC3/ADV3 OTD | 03-2020 | 1.2 | en Compatibility between LED module and LED Driver Practical tests ½ CAUTION! Following the comparison of the data sheet values a practical test is required. Only a practical test can ensure that the system... -
Page 16: Application Of The 5-Point Guideline
Manual LCO EXC3/ADV3 OTD | 03-2020 | 1.2 | en Compatibility between LED module and LED Driver Application of the 5-point guideline The compatibility check with the 5-point guideline is shown here using two examples. Example 1 Comparison data for LED Driver... - Page 17 Manual LCO EXC3/ADV3 OTD | 03-2020 | 1.2 | en Compatibility between LED module and LED Driver Comparison data for LED module LED module Designation RLE G1 49x223mm 4000lm 830 PL1 EXC OTD Manufacturer Tridonic Data sheet values of LED module...
- Page 18 Manual LCO EXC3/ADV3 OTD | 03-2020 | 1.2 | en Compatibility between LED module and LED Driver Procedure Comparison of data sheet values Comparison Value Value in of… in LED module LED Driver Result Explanation To produce a luminous flux of 3,000 lm, the two LED modules...
- Page 19 Manual LCO EXC3/ADV3 OTD | 03-2020 | 1.2 | en Compatibility between LED module and LED Driver Example 2 Comparison data for LED Driver LED Driver Designation LCA 75W 250–750mA one4all C PRE OTD Manufacturer TRIDONIC Data sheet values of LED Driver...
- Page 20 Manual LCO EXC3/ADV3 OTD | 03-2020 | 1.2 | en Compatibility between LED module and LED Driver Comparison data for LED module LED module Designation Fictitious LED module Manufacturer Other manufacturer Data sheet values of LED module Forward current 700 mA Max.
- Page 21 Manual LCO EXC3/ADV3 OTD | 03-2020 | 1.2 | en Compatibility between LED module and LED Driver Procedure Comparison of data sheet values Comparison Value Value in of… in LED module LED Driver Result Explanation To produce a luminous flux of 1,800 lm the LED module must be...
-
Page 22: Installation Notes
To avoid failures due to ground faults protect the wiring against mechanical loads from sharp-edged metal parts (e.g. cable penetrations, cable holders, metal frames, etc. LED Drivers from Tridonic are protected for a maximum of 48 hour against overvoltage of up to 320 V. Make sure that the LED Driver is not exposed to overvoltages for long periods! LED Drivers of the LCO OTD series from Tridonic have type of protection IP 20. -
Page 23: Function Of The Earth Terminal
Manual LCO EXC3/ADV3 OTD | 03-2020 | 1.2 | en Installation notes Function of the earth terminal The earth connection is conducted as protection earth (PE). The LED Driver can be earthed via earth terminal or metal housing (if device has metal housing). If the LED Driver will be earthed, protection earth (PE) has to be used. There is no earth connection required for the functionality of the LED Driver. - Page 24 Manual LCO EXC3/ADV3 OTD | 03-2020 | 1.2 | en Installation notes Figure: Voltage peaks for LED driver without earthing (left) and with earthing (right) NOTICE Irrespective of whether the LED Driver is earthed or not, LED modules must be insulated in accordance with the requirements of the luminaire protection class.
-
Page 25: Routing The Wires
NOTICE Tridonic recommends performing an insulation test because a dielectric strength test may damage the device irreparably. Type testing Type testing of the luminaire is performed according to IEC 60598-1 Section 10. -
Page 26: External Fuse For Dc Operation
Manual LCO EXC3/ADV3 OTD | 03-2020 | 1.2 | en Installation notes Wiring guidelines The cables should be run separately from the mains connections and mains cables to ensure good EMC conditions. The LED wiring should be kept as short as possible to ensure good EMC. The max. secondary cable length is 2 m (4 m circuit), this applies for LED output as well as for temperature sensor. -
Page 27: Maximum Loading Of Circuit Breakers
The value is calculated through simulation programs based on the circuit breakers characteristic. Information about the maximum loading can be found in Tridonic data sheets. The following table shows the data for LCO 60/200-1050/100 o4a NF C EXC3 as an example. - Page 28 Manual LCO EXC3/ADV3 OTD | 03-2020 | 1.2 | en Installation notes 126.1 120.9 1000 The combination of both parameters can also be displayed graphically. This results in the tripping characteristic for a certain circuit breaker. Current [A] Duration [µs]...
- Page 29 Manual LCO EXC3/ADV3 OTD | 03-2020 | 1.2 | en Installation notes If several control gear are connected to one circuit breaker, the individual inrush currents add up. Implementation of the simulation The above-mentioned parameters, height and duration of the current pulse in both the circuit breaker and the control gear, are entered into the simulation program.
- Page 30 Manual LCO EXC3/ADV3 OTD | 03-2020 | 1.2 | en Installation notes Inrush current: The dotted lines represent different inrush currents. The index of a point signifies the number of control gear, that is, point 1 represents the result for 1 control gear, point 2 the result for 2 control gear, etc.
- Page 31 Considering different system impedance Switch-on point used: should always be at max. input voltage Adopted cable lengths and cable data (Tridonic: Cable length 40 cm; Resistivity: 0.0172 ohm * mm / m; inductance: 5 nH / cm; terminal resistance: 2 milliohm) The modeling of the control gear is performed from the input to the bus voltage electrolytic capacitor .
-
Page 32: Functions And Interfaces
Manual LCO EXC3/ADV3 OTD | 03-2020 | 1.2 | en Functions and interfaces IVG Plus Description In some cases mains voltage is not stabilized and has some voltage peaks which are lower or higher than the nominal voltage range. Between 192 V and 80 V input voltage, the LED Driver operates in undervoltage mode and dims the secondary side linearly down to 10 %. - Page 33 Manual LCO EXC3/ADV3 OTD | 03-2020 | 1.2 | en IVG Plus Commissioning Activating the IVG Plus function The IVG Plus function is activated by default. Deactivating the IVG Plus function Deactivating the IVG Plus function via masterCONFIGURATOR (valid only for EXC3) The eCLO function can be deactivated via the masterCONFIGURATOR.
-
Page 34: Eclo
Manual LCO EXC3/ADV3 OTD | 03-2020 | 1.2 | en eCLO eCLO Description The light output of an LED module reduces over the course of its lifetime. The eCLO function (enhanced Constant Light Output) compensates for this natural decline by constantly increasing the output current of the LED Driver throughout its lifetime. - Page 35 Manual LCO EXC3/ADV3 OTD | 03-2020 | 1.2 | en eCLO Parameter Default Parameter value Description value value Initial timer The initial timer value is always 0. value The function will be started from this step. Initial 100 % Specifies the intensity, with which the function is started.
-
Page 36: Inputdim
Manual LCO EXC3/ADV3 OTD | 03-2020 | 1.2 | en inputDIM inputDIM Description inputDIM enables dimming with the variation of mains voltage between 170 and 250 V AC. The max. / min. dimming level can be set via appropriate software. - Page 37 Manual LCO EXC3/ADV3 OTD | 03-2020 | 1.2 | en inputDIM Parameter Default Parameter value Description Min value Max value Minimum 30 % Interpolation point 1: Defines the minimum level of the LED. 10 % 85 % level Minimum 180 V...
-
Page 38: External Temperature Management (Only Exc3)
Manual LCO EXC3/ADV3 OTD | 03-2020 | 1.2 | en External temperature management (only EXC3) Description ETM protects the LED module against thermal overstress. An external temperature sensor (NTC) detects the LED module temperature and the LED Driver will limit the output current according to this temperature: If the temperature is between the limits T1 (normal condition) and T2 (overload), the LED output current will be decreased. - Page 39 Manual LCO EXC3/ADV3 OTD | 03-2020 | 1.2 | en Parameter Default Parameter value Description value Max value External Via this checkbox the function can be activated or deactivated tempera- t ure management Lower tempera- t ure 75 °C Tempera- t ure at which the power reduction starts 50 °C...
-
Page 40: Chronostep V2
Manual LCO EXC3/ADV3 OTD | 03-2020 | 1.2 | en chronoSTEP V2 chronoSTEP V2 Description In the outdoor lighting and street lighting sector, it often makes sense to dim the lighting level during the night hours in order to save energy. - Page 41 Manual LCO EXC3/ADV3 OTD | 03-2020 | 1.2 | en chronoSTEP V2 Commissioning Activating and adjusting the chronoSTEP V2 function Activating and adjusting the chronoSTEP V2 function via companionSUITE The chronoSTEP V2 function can be activated and adjusted via companionSUITE.
-
Page 42: U6Me2
Manual LCO EXC3/ADV3 OTD | 03-2020 | 1.2 | en U6Me2 U6Me2 Description U6Me2 is the communication type to activate and adapt the chronoSTEP function in the device using switch-on and switch-off commands. Further information can be found in the "chronoSTEP V2 Instruction manual - U6Me2 programming" (see https://www.tridonic.com/com/de/download/technical/Instruction_manual_U6Me2_programming_en.pdf... -
Page 43: Corridorfunction V2 (Only Exc3)
Manual LCO EXC3/ADV3 OTD | 03-2020 | 1.2 | en corridorFUNCTION V2 corridorFUNCTION V2 (only EXC3) Description The corridorFUNCTION V2 enables the illuminance to be linked to the presence or absence of people. A conventional relay motion sensor is connected. The luminous intensity is increased when a person enters the room. When the person leaves the room the motion sensor switches off after a certain delay and the luminous intensity is automatically reduced. - Page 44 Manual LCO EXC3/ADV3 OTD | 03-2020 | 1.2 | en corridorFUNCTION V2 Variable switch-off times The profiles and their values can be freely adjusted. The values can be adjusted via a connection to a DALI bus. Commissioning Activating and deactivating the corridorFUNCTION V2 Activating the corridorFUNCTION V2 via mains voltage Activating the corridorFUNCTION V2 is simple.
- Page 45 Manual LCO EXC3/ADV3 OTD | 03-2020 | 1.2 | en corridorFUNCTION V2 Deactivating the corridorFUNCTION V2 via mains voltage Connect mains voltage push button to the terminal marked DA/L Connect neutral conductor to the terminal marked DA/N Press the push button 5 times within 3 seconds Activating and adjusting the corridorFUNCTION V2 via the masterCONFIGURATOR The corridorFUNCTION V2 can be activated and adjusted via the masterCONFIGURATOR.
- Page 46 Manual LCO EXC3/ADV3 OTD | 03-2020 | 1.2 | en corridorFUNCTION V2 Installation Requirements: The LED Driver is correctly installed in the luminaire and cabled on the power supply side A motion sensor is installed in the lighting system The motion sensor is connected to the LED Driver...
- Page 47 Manual LCO EXC3/ADV3 OTD | 03-2020 | 1.2 | en corridorFUNCTION V2 Benefits: Control can be changed at any time to a digital control signal (DSI or DALI) without having to change the luminaire or provide an additional control line ½...
-
Page 48: Dsi (Only Exc3)
Manual LCO EXC3/ADV3 OTD | 03-2020 | 1.2 | en DSI (only EXC3) Description DSI (Digital Serial Interface) enables DSI LED Driver to be controlled. The DSI line can be wired separately via a two-core cable or together with the mains cable in a five-core cable. Communication is not impaired by the mains cable. In contrast to DALI, there is no individual addressing of the LED Drivers with DSI. -
Page 49: Switchdim (Only Exc3)
Manual LCO EXC3/ADV3 OTD | 03-2020 | 1.2 | en switchDIM switchDIM (only EXC3) Description With the switchDIM function it is possible to use the mains voltage as a control signal. The phase of a simple standard mains voltage push button is connected to the terminal marked DA/L and the neutral conductor is connected to the terminal marked DA/N. - Page 50 Manual LCO EXC3/ADV3 OTD | 03-2020 | 1.2 | en switchDIM Using the switchDIM function switchDIM is operated by the mains voltage push button. Procedure: Switch the device on/off by briefly actuating the push button -or- Dim the device by holding down the push button Synchronising devices If the devices in a system do not operate synchronously, the devices must be synchronized, i.e.
- Page 51 Manual LCO EXC3/ADV3 OTD | 03-2020 | 1.2 | en switchDIM Four-pole wiring Configuration: Phase (L), neutral (N), earth (PE), control line (L') Benefits: No need for a control line thanks to bridging terminal DA/N and the N-connection of the luminaire...
- Page 52 Manual LCO EXC3/ADV3 OTD | 03-2020 | 1.2 | en switchDIM ½ CAUTION! For five-pole wiring the neutral conductor must be connected to DA/N. This prevents 400 V being applied between adjacent terminals if a different phase is used for the control input.
-
Page 53: Power-Up Fading (Only Exc3)
Manual LCO EXC3/ADV3 OTD | 03-2020 | 1.2 | en Power-up fading Power-up Fading (only EXC3) Description The power-up fading function offers the opportunity to realize a soft start. The soft start will be applied when the mains supply is switched on and during operation with switchDIM. -
Page 54: Dali (Only Exc3)
The DALI standard is defined in IEC 62386. A test procedure standardized by the DALI Activity Group ensures compatibility between products from different manufacturers. Tridonic products have undergone this test and meet all the requirements. This is indicated by the logo of the DALI Activity Group on the device. - Page 55 ("enhanced DALI") offers extended DALI commands. They can be used to activate specific commands of the LED Driver. The masterCONFIGURATOR software works with eD commands. These commands are Tridonic specific. They are not part of the DALI standard and are not publicly available.
-
Page 56: Ready2Mains
Manual LCO EXC3/ADV3 OTD | 03-2020 | 1.2 | en ready2mains ready2mains Description ready2mains uses the mains cable to transmit information: easily, reliably and professionally. ready2mains can be used to configure both drivers with a separate communication interface as well as fixed output drivers. The configuration saves time and is very flexibel. -
Page 57: Dc Recognition
Manual LCO EXC3/ADV3 OTD | 03-2020 | 1.2 | en DC recognition DC recognition Description In emergency light systems with central battery supply the DC recognition function uses the input voltage to detect that emergency mode is in place. The LED Driver then automatically switches to DC mode and dims the light to the defined DC level. Without DC recognition different and more complex solutions need to be applied in order to detect emergency mode. -
Page 58: Dimming On Dc (Only Exc3)
Manual LCO EXC3/ADV3 OTD | 03-2020 | 1.2 | en Dimming on DC Dimming on DC (only EXC3) Description If Dimming on DC is activated the requirements of the DC recognition function are ignored. Even if DC is detected, the LED Driver... -
Page 59: Intelligent Temperature Guard
Manual LCO EXC3/ADV3 OTD | 03-2020 | 1.2 | en Intelligent Temperature Guard Intelligent Temperature Guard ½ WARNING! The t temperature is the maximum permitted temperatur in terms of safety. Operating the LED Driver above the permitted t temperature is not compliant with relevant standards! The Intelligent Temperature Guard function does not replace the proper thermal design of the luminaire and does not enable the lighting to operate for lengthy periods of time in impermissible ambient temperatures. - Page 60 Manual LCO EXC3/ADV3 OTD | 03-2020 | 1.2 | en Intelligent Temperature Guard Power Power reduction is dependent on temperature: reduction Power reduction continues if temperature still rises process and Power reduction stops if temperature does not rise anymore or if maximum power reduction is reached...
-
Page 61: Surge Burst Protection
In the case of protection against overvoltage, it is decisive between which connections the overvoltage occurs. Lightning strikes cause an overvoltage between the live power lines and the ground. LED Drivers from Tridonic offer a protection of 10 kV and meet protection classes I and II according to standard IEC 61000-4-5. -
Page 62: Reference List
Manual LCO EXC3/ADV3 OTD | 03-2020 | 1.2 | en Reference list Additional information Web page PRE3 Outdoor series: http://www.tridonic.com/com/en/products/premium-outdoor-series.asp Web page ADV3 Outdoor series: https://www.tridonic.com/com/en/products/compact-dimming-advanced-outdoor-nfc.asp Data sheets: Go to above web page link and click "Products" > "Downloads" > "Data sheet"... -
Page 63: Technical Data
Manual LCO EXC3/ADV3 OTD | 03-2020 | 1.2 | en Reference list Technical data Data sheets: http://www.tridonic.com/com/en/data-sheets.asp Company certificates: http://www.tridonic.com/com/en/company-certificates.asp Environmental declarations: http://www.tridonic.com/com/en/environmental-declarations.asp LED/lamp matrix: http://www.tridonic.com/com/en/lamp-matrix.asp Operating instructions: http://www.tridonic.com/com/en/operating-instructions.asp Other technical documents: http://www.tridonic.com/com/en/technical-docs.asp Tender text: http://www.tridonic.com/com/en/tender.asp Declarations of conformity: Available documents are found on each product page of our website in the "Certificates" tab for the specific product, www.tridonic.com/com/en/products.asp...
Need help?
Do you have a question about the LCO EXC3 and is the answer not in the manual?
Questions and answers