
Related Manuals for Bresser National Geographic 9062000


Summary of Contents for Bresser National Geographic 9062000
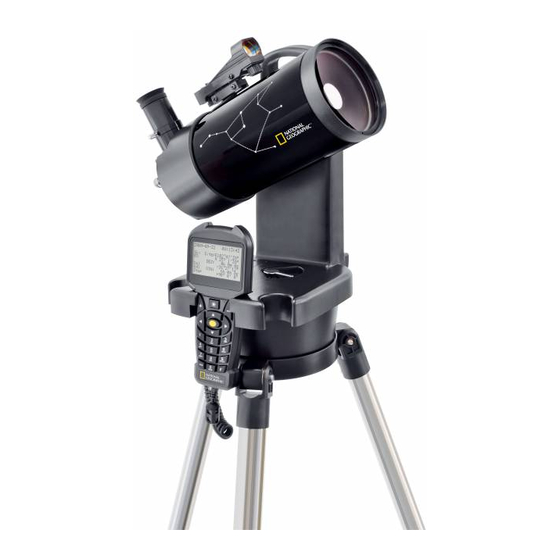
- Page 1 AUTOMATIK TELESKOP AUTOMATIC TELESCOPE Bedienungsanleitung Operating instructions Mode d’emploi Istruzioni per l’uso Instrucciones de uso Руководство по эксплуатации Art.No. 9062000 / 9062100...
- Page 2 (DE) WARNUNG! Schauen Sie mit diesem optischen Gerät niemals direkt oder in die Nähe der Sonne! Achten Sie besonders darauf, wenn es von Kindern benutzt wird! Es besteht ERBLINDUNGSGEFAHR! Verpackungsmaterial (Plastiktüten, Gummibänder, etc.) von Kindern fernhalten! (EN) CAUTION: Never attempt to observe the sun with this telescope. Make sure children do not attempt to observe the sun with the telescope.
- Page 3 (DE) Bedienungsanleitung ................6 (EN) Operating instructions ................10 (FR) Mode d’emploi ..................14 (IT) Istruzioni per l’uso ................. 18 (ES) Instrucciones de uso ................22 (RU) Руководство по эксплуатации ............. 26...
- Page 4 No. 1 Art.No. 9062100 No. 2 Art.No. 9062000 Art.No. 9062100 No. 3 No. 4 No. 5 Fig. 3 No. 6...
- Page 5 No. 7 No. 8 1% C Fig. 9 No. 9 1& J 1) Zubehör kann je nach Modell variieren. Gli accessori possono variare a seconda del modello. Accessories may vary depending on the model. Los accesorios pueden variar según el modelo. Les accessoires peuvent varier en fonction du modèle.
- Page 6 Umgang mit dem Gerät nie unbeaufsichtigt! Die Nutzung darf Über neue Entwicklungen für dieses Produkt informieren wir ggf. auf unserer nur, wie in der Anleitung beschrieben, erfolgen, andernfalls besteht Website unter www.bresser.de/download/automatic_telescopes GEFAHR eines STROMSCHLAGS! Teil I – Der Aufbau VERÄTZUNGSGEFAHR!
- Page 7 5. Montierung b) Benutzerdefinierter Ort (Custom Site) Platzieren Sie die Bohrungen an der Unterseite der Montierung auf die Geben Sie die Daten nach folgendem Schema ein: Schrauben die aus dem Stativ herausragen. (No. 6). Die Schrauben sind gefed- Name: Wählen Sie eine Bezeichnung (z. B. Ortsname). ert und rasten mit einem deutlichen “Klick”...
- Page 8 Status: on Status: Aus mit der Zentral-Taste (5). Das Teleskop schwenkt jetzt automatisch zum Custom Site Benutzerdefinierter Ort gewünschten Objekt. Name: Name Lon: Längengrad Beispiel: Beobachten Sie den Jupiter Lat: Breitengrad Zone: Zeitzone Country & City Land & Stadt Country: up and down Land: Pfeiltasten oben und unten City: left and right Stadt: Pfeiltasten links und rechts...
-
Page 9: Hinweise Zur Reinigung
Tasche oder Transportverpackung auf. Entfernen Sie Batterien aus dem Gerät, wenn es längere Zeit nicht benutzt wird! EG-Konformitätserklärung Eine „Konformitätserklärung“ in Übereinstimmung mit den anwendbaren Richtlinien und entsprechenden Normen ist von der Bresser GmbH erstellt wor- den. Diese kann auf Anfrage jederzeit eingesehen werden. - Page 10 Currently there are no additional accessories (e.g. serial cable etc) available. Information about new developments for this RISK OF CHEMICAL BURN product can be found on our website under www.bresser.de/download/auto- Keep batteries out of the reach of children! Make sure you insert the matic_telescopes batteries correctly.
- Page 11 6. Eyepiece Open the Altitude and Azimuthal locking knobs. Adjust the telescope so that the Remove one eyepiece from its eyepiece holder (6) and slide it into the eyepiece tube opening (2) is pointing directly north and is level. It is recommended that connection (3).
- Page 12 • Target Sync Further improves the alignment Example: Let’s observe Jupiter. of the telescope • RA BKlash Corr. Calibrate RA axis backlash • DEC Bklash Corr. Calibrate DEC axis backlash • Navigation • Solar System Object catalogue of the solar system •...
-
Page 13: Notes On Cleaning
The batteries should be removed from the unit if it has not been used for a long time. EC Declaration of Conformity Bresser GmbH has issued a 'Declaration of Conformity' in accordance with applicable guidelines and corresponding standards. This can be viewed any time upon request. - Page 14 ! L’utilisation de l’appareil doit se faire exclusivement comme actuellement. Des informations sur les nouveaux développements concernant décrit dans ce manuel, faute de quoi un RISQUE d’ELECTROCUTION ce produit peuvent être consultées sur notre site Web sous www.bresser.de/ peut exister ! download/automatic_telescopes RISQUE DE BLESSURE ! Chapitre I –...
- Page 15 5. Monture Lat: entrez les coordonnées en latitude de votre lieu. Placez les perçages de montage à la base de la monture sur les vis de montage Zone: entez le fuseau horaire de votre lieu (+ 1 heure pour la France). du trépied, puis serrez-les fermement (No.
- Page 16 Zone: Zone: Le premier objet du catalogue sera affiché et vous pourrez passer au(x) Country & City Pays & Ville suivant(s) en appuyant sur les touches de déplacement vers le haut ou vers Country: up and down Pays: haut et bas le bas.
-
Page 17: Déclaration De Conformité Ce
à ne pas être utilisé un certain temps. Déclaration de conformité CE Bresser GmbH a émis une « déclaration de conformité » conformément aux lignes directrices applicables et aux normes correspondantes. Celle-ci peut être consultée à tout moment sur demande. - Page 18 (alimentatore e/o batterie). Non consentire ai pio, cavo seriale ecc) disponibili. Informazioni sui nuovi sviluppi per questo bambini di utilizzare l‘apparecchio senza supervisione! L’utilizzo deve prodotto sono disponibili sul nostro sito web sotto www.bresser.de/download/ avvenire soltanto conformemente a quanto descritto nella guida, in automatic_telescopes caso contrario esiste il PERICOLO di SCOSSA ELETTRICA! Parte I –...
- Page 19 5. Sostegno Posizione iniziale / OTA (Optical Tube Assembly) Zero Collocare i fori del lato inferiore del sostegno sulle viti che sporgono dal trep- Come punto di inizio per l'allineamento, è necessario che il dispositivo di con- piede (n. 6). Le viti sono molleggiate e si innestano nei fori con un "clic" udibile. trollo del telescopio conosca la direzione verso cui punta il tubo (OTA).
- Page 20 Panoramica del menu principale: Esempio: osservazione di Giove • Allineamento • A. to una Stella Allineamento del telescopio su una stella • A. due Stella Allineamento del telescopio su due stelle • A. tre Stella Allineamento del telescopio su tre stelle •...
-
Page 21: Dichiarazione Di Conformità Ce
Togliere le batterie dall’apparec- chio nel caso non venga utilizzato per un periodo prolungato! Dichiarazione di conformità CE Bresser GmbH ha redatto una "dichiarazione di conformità" in linea con le disposizioni applicabili e le rispettive norme. Su richiesta, è visionabile in qualsiasi momento. - Page 22 ( por ejemplo, cable serial , etc ) disponibles . Información sobre trario, existe PELIGRO de DESCARGA ELÉCTRICA. nuevos desarrollos para este producto se puede encontrar en nuestra página web bajo www.bresser.de/automatic_telescopes ¡PELIGRO DE ABRASIÓN! No dejar las pilas al alcance de los niños. Al colocar las pilas, preste Parte I –...
- Page 23 6. Ocular Para liberar la altitud y azimut, use el botón de bloqueo de Azimut. Oriente la Coja uno de los oculares de su porta ocular (6) y coloquelo en el portaocular óptica del telescopio (2) en dirección norte y nivelelo. Se recomienda el uso de (3).
- Page 24 • Navegación Ejemplo: Vamos a observar Júpiter • Sistema solar Catálogo de objetos del sistema solar • Constelaciones Catálogo de constelaciones • Mejores objetos Catálogo famoso de estrellas • Messier Catal. Catálogo con objetos de cielo profundo • NGC Catalog. Amplio catálogo con recorridos variados •...
-
Page 25: Instrucciones De Limpieza
Declaración de conformidad de la Unión Europea (CE) Bresser GmbH ha emitido una "Declaración de conformidad" de acuerdo con las directrices y normas correspondientes. Dicha declaración se puede con- sultar en cualquier momento, previa petición. - Page 26 аксессуаров (серийного кабеля и т. п.) сейчас нет. Информацию об иначе есть серьезный риск получить УДАР ТОКОМ. усовершенствованиях продукта можно найти на нашем сайте www. bresser.de/automatic_telescopes ОПАСНОСТЬ ПОЛУЧЕНИЯ ОЖОГА! Исключите доступ детей к батарейкам! При установке/замене Часть I – Сборка телескопа...
- Page 27 5. Монтировка Дол: долгота вашего местоположения; Разместите монтировку на верхней части треноги так, чтобы отверстия в Шир: широта вашего местоположения; основании монтировки совпали с винтами на треноге. Затяните фиксиру- Пояс: часовой пояс вашего местоположения. ющие винты (рис. 6). Исходное положение оптической трубы 6.
- Page 28 Lon: Дол: процедуру выравнивания придется повторить. Lat: Шир: Zone: Пояс: После выравнивания телескопа вы можете воспользоваться функ- Страна и город цией автоматического наведения во время проведения наблюдений. Страна: вверх и вниз Нажмите клавишу ввода (6) на пульте управления и выберите пункт меню Город: влево...
-
Page 29: Сертификат Соответствия Ес
1 344 световых лет Сертификат соответствия ЕС Сертификат соответствия был составлен с учетом действующих правил и соответствующих норм компанией Bresser GmbH Его можно просмо- треть по запросу в любое время. УТИЛИЗАЦИЯ Хотя туманность Ориона (М42) находится на расстоянии 1 344 световых... - Page 32 © 2020 National Geographic Partners LLC. All rights reserved. NATIONAL GEOGRAPHIC KIDS and Yellow Border Design are trademarks of the National Geographic Society, used under license. Visit our website: www.nationalgeographic.com Bresser GmbH Gutenbergstr. 2 · DE-46414 Rhede www.bresser.de · info@bresser.de Errors and technical changes reserved. Manual_9062X000_Automatic-Telescope_de-en_NATGEO_v042020a...
Need help?
Do you have a question about the National Geographic 9062000 and is the answer not in the manual?
Questions and answers