KRUG+PRIESTER EBA Series Operating Instructions Manual
Guillotines
Hide thumbs
Also See for EBA Series:
- Operating instructions manual (48 pages) ,
- Operating instructions manual (48 pages)
Advertisement
Table of Contents
- 1 Table of Contents
- 2 Safety Precautions
- 3 Intended Use
- 4 Installation
- 5 Startup
- 6 Operation
- 7 Operating Elements
- 8 Blade and Cutting Stick Replacement
- 9 Maintenance and Cleaning
- 10 Annual Inspection / Safety Test
- 11 Possible Malfunctions
- 12 Accessories
- 13 Technical Data
- 14 EC-Declaration of Conformity
- Download this manual
Advertisement
Table of Contents

Subscribe to Our Youtube Channel
Related Manuals for KRUG+PRIESTER EBA Series


Summary of Contents for KRUG+PRIESTER EBA Series
- Page 1 Guillotines Operating Instructions EBA 5560 www.eba.de...
-
Page 2: Table Of Contents
Table of Contents Safety precautions Intended use Installation Startup Operation Operating elements Blade and cutting stick replacement Maintenance and cleaning Annual inspection / Safety test Possible malfunctions Accessories Technical data EC-declaration of conformity - 2 -... -
Page 3: Safety Precautions
Safety precautions Please read these operating instructions before putting the machine into operation and observe the safety precautions. The operating instructions must always be available. Children must not operate the machine! Do not reach beneath the blade! Never leave the blade unattended! Do not extract or transport the blade without protection! (See page 27 and 29). -
Page 4: Intended Use
Safety precautions / Intended use Do not use any spray cans with flammable content near to the cutting machine! Do not use any flammable cleaning agents. Intended use The machine is designed for cutting stacks of paper to a specified size. This machine is constructed for "one-man operation"... - Page 5 Safety precautions Disconnect from the mains before starting any service work or before removing the panels! Replacement of blade and cutting stick may be performed only when the main switch is switched off! - 5 -...
- Page 6 Safety precautions All components which could endanger the operator are covered by a guard (B)! Do not operate the machine without the following safety devices: • Safety beam guard (A) • Panels, tightly screwed (B). The cutting action, which is dangerous to the operator, is protected by a two-handed control system (B) and safety beam guard (A).
- Page 7 Safety precautions When not in use for a longer period switch off. (Main switch to "0"). Danger! Blade must always be covered by the pressing bar. Clamping Blade - 7 -...
-
Page 8: Installation
Installation The machine is mobile on castors. Align the machine as followes: • Align machine with water level and adjust accordingliy. 4 x screws size 19 (A). • Reference area machine table (B). - 8 -... -
Page 9: Startup
Installation / Startup The machine is delivered ready for operation. Side tables (A), left and right are available as an option. Assembly instructions are included. Startup Plug into socket. - 9 -... - Page 10 Startup The machine may only be operated, if the operating instructions and the safety instructions have been understood. Before each use, check the safety equipment for completeness and functionality. • All covers have to be mounted (A). • Safety beam guard must be mounted (B). •...
- Page 11 Startup Position the main switch to "I" (A). Blade locking facility (B) must be pulled out. Press (C). Machine will automatically go to the start position. The machine is now ready for use. Display (C) is pivotable. By loosing the allen head screw (D), (allen wrench is in the tool box) the display can be pivoted within the elongated hole.
-
Page 12: Operation
Operation Optical cutting line indicator: Optical cutting red line (A), indicates the position of the cut. Blade cuts on the front edge of the light beam. Mechanical cutting line indicator: The clamp (B) can be used as cutting line indicator for cutting. Pre-clamping can be performed using the foot pedal (C). - Page 13 Operation Clamp plate: A clamp plate (A) is fitted to the machine to prevent pressure marks on sensitive material. To dismantle: • Remove the clamp plate (A) by turning the screwdriver (found in tool box) in the space between the clamp and clamp plate. ...
- Page 14 Operation Setting clamping pressure If necessary, set clamping pressure with setting wheel (A). If a cutting process has been activated, the oil pressure can be seen on the oil pressure indicator (B). The clamp moves automatically when cutting is activated. The paper can be pressed in advance, with the foot pedal (A).
- Page 15 Operation Cutting activation Do not reach into the cutting area when the blade is in motion. A cut can only be activated when the specified size is approached. • Release the photo-electric beam guard (A). • Press both actuators of the safety two-handed control system (B) simultaneously and keep them pressed until the paper is completely cut.
-
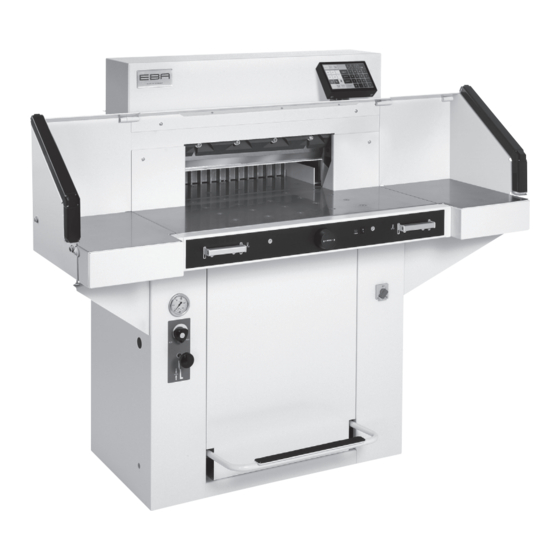
Page 16: Operating Elements
Operation / Operating elements Operating elements - Safety light beam - Safety two-handed control system clamping and cutting - Air table On-Off - Backgauge control - Foot pedal - Main switch - Hand-wheel for backgauge setting - Blade locking - Backgauge - Side lay left and right - Clamp pressure - Clamp pressure adjustment... - Page 17 Operation • In memory 3 + 4 (mm and inch) no measurements are saved. Until a first input of data the following will be shown in the . The corresponding fields: measurements entered remain stored. They cannot be deleted but overwritten. How to program Memory 3 and 4 Press the memory button to enter the memory platform (3 or 4).
- Page 18 Operation Cutting activation Warning! • Run backgauge to the front for turning the paper stack • Do not interrupt the upward movement of the blade by performing switching procedures • Wait until the display is green before activating a cut •...
- Page 19 Operation Eject function If EJECT is pressed instead of START after inserting the measurement , the backgauge will advance forwards so that paper can be removed. Finally the backgauge moves to the last setting. Multiple cut • Enter the start dimension on the display •...
- Page 20 Operation Programming This control system enables you to store 99 programs with 99 programmable steps. One step represents one measurement. After entering the program numbers you are able to change between several program steps with the button First figure on display = program number.
- Page 21 Operation Calculator function in programming • Press PROG EDIT • Enter program number • Enter the 1st program step e.g. start-up measurement 40 cm • Store the measurement with enter • Calculate the desired measurement e.g. 40 - 2 = ...
- Page 22 Operation Adapting a program when the printer’s imprint deviates • Press PROG RUN "Load program no." appears • Enter program number 01 ... 99, and with 2 x Enter proceed to Step 1 • Correct the cutting position of the backgauge with the hand-wheel •...
- Page 23 Operation Eject function program • If a short measurement e.g. 30 cm and then a long measurement e.g. 40 cm is cut at the start of a program then it is wise to insert an EJECT after the first cut so that the paper is pushed to the front.
-
Page 24: Blade And Cutting Stick Replacement
Blade and cutting stick replacement If the cutting quality decreases: • Check the cutting depth (see page 34). • Check the cutting stick (see page 28). • Replace or grind the blade (see page 24 - 34). The blade cannot be ground if the blade height is less than 8,2 cm / 3,23 inches. - Page 25 Blade and cutting stick replacement • Set mains switch (A) to position "I" . • Set clamping oil pressure (B) to min. 50 bar. • Press in blade locking key (C). • Activate cutting blade remains in lowest position. •...
- Page 26 Blade and cutting stick replacement Remove both outer screws. Mount blade changing tool (A). Tighten screws (B). - 26 -...
- Page 27 Blade and cutting stick replacement Remove remaining two screws (A). Simultaneously slightly loosen both screws (B) and remove blade with blade changing tool. Weight of blade approx. 5 kg. Place the blade into the blade carrier and screw it into place. - 27 -...
- Page 28 Blade and cutting stick replacement • Loosen screws (A) (SW4). • Remove cutting stick (B). • If needed the cutting stick can be turned or exchanged. • Slightly tighten screws (A). The cutting stick can be used eight times. • Turn screw (C) as far as possible to the right (Otherwise the first cut will be too deep).
- Page 29 Blade and cutting stick replacement Take the exchange blade carefully out of the blade box and screw it to the blade changing tool (D). • Check, if when using the upper threads (B), the blade (E) is protected. • The blade is not protected Use the lower thread (C) for fixing.
- Page 30 Blade and cutting stick replacement Screw in middle screws and tighten. Remove the blade changing tool. Slightly screw in outer screws. - 30 -...
- Page 31 Blade and cutting stick replacement • Press in blade locking key. • Set main switch to position "I". • Activate cutting blade remains in the lowest position. • Set main switch to position "0". Screw in slightly the left screw. - 31 -...
- Page 32 Blade and cutting stick replacement Loosen slightly screws (A) so that the blade slides onto the cutting stick. Push the blade and screw (B) as far as possible to the left or right and then centralize them. The blade must rest on the cutting stick.
- Page 33 Blade and cutting stick replacement Tighten the remaining 3 screws beginning from the left. Pull out blade locking key blade moves to the top. Tighten the screw which is visible at the right. - 33 -...
- Page 34 Blade and cutting stick replacement Danger! Blade must always be covered by the pressing bar. Clamping Blade Turn main switch to position "I". Paper cutting test. If the last sheet or several sheets are not completely cut, gradually turn the knob for blade depth adjustment (A) 1/6 turn to the left until the paper is cut along the entire length.
-
Page 35: Maintenance And Cleaning
Maintenance and cleaning Maintenance work may only be performed by trained staff. Danger! Disconnect the mains before starting any service work or before removing the cover. Grease and oil the machine according to the lubrication diagram after 1000 operating hours or once a year. If the machine is subject to excessive load then twice a year. - Page 36 Maintenance and cleaning Lubrication schedule Lubricate (1) to (8). Type of oil: SAE10 to SAE50 all types. Grease (9) to (16) (9+10) Blade guidance (11-12) Clamp guidance Type of grease: Roller bearing grease - all types. Oil hinges of the foot clamping device at the front area of the machine room.
-
Page 37: Annual Inspection / Safety Test
Maintenance and cleaning Annual inspection Next Maintenance To maintain the operational safety and to prevent premature wear, we recommend an annual inspection and maintenance of the machine by a qualified service technician. Krug & Priester GmbH & Co. KG 72336 Balingen - Germany Parts &... -
Page 38: Possible Malfunctions
Possible malfunctions Machine does not function! Is the machine plugged in? • Main switch to position "I"? (A) • Blade locking facility (B) must be pulled out. • Push in the fuses in the back of the machine F1, F2, F3. •... - Page 39 Possible malfunctions • Oil pressure set too low. Increase oil pressure at rotary control (A). • Hydraulic oil shortage. Check hydraulic oil level (B), if necessary, top up. "Information" Clamp bar is active, please release clamp • Operate the foot pedal (clamping) again.
- Page 40 Possible malfunctions Does not cut through the last sheet. Reset the cutting depth (A) ..or turn / replace the cutting stick (B). (See page 29 "Blade and cutting stick replacement"). A reduction in the cutting quality indicates that the blade must be sharpened or a blade change is necessary.
- Page 41 Possible malfunctions Trouble shooting-light beam Cut cannot be activated: • Remove all items obstructing the safety area (A) • (B) Green = o.k. / ready for operation light beam is interrupted or error Did none of the specified solutions help you with your problem? Contact: Service • www.krug-priester.com •...
-
Page 42: Accessories
Accessories Recommended accessories: HSS - Blade • No. 9000 138 Cutting stick (6 pieces) • No. 9000 238 Blade changing tool • No. 9000 525 Paper knock-up block • No. 9000 521 Side tables left and right • No. 9000 536 Included in delivery - 42 -... -
Page 43: Technical Data
Technical data Technical data: Power supply: 230 V / 50 Hz / 8,5A / 1~ 120 V / 60 Hz / 12A / 1~ Leakage current: < 3,5mA Power cord gauge: min. 1,5mm (230V) Power cord gauge: AWG 12 (20A) (120V) Cutting length: 550 mm Cutting height:... - Page 44 Technical data This machine is approved by independent safety laboratories and is in compliance with the EC-regulations 2006/42/EG and 2014/30/EU. Sound level information: Sound measurement to EN 13023 : 72,5 db (A) Subject to alteration without notice. - 44 -...
- Page 45 Technical data The company Krug + Priester has the following certifications: • Quality management system according to DIN EN ISO 9001:2015 • Environmental management system according to DIN EN ISO 14001:2015 • Energy management system according to DIN EN ISO 50001:2011 - 45 -...
-
Page 46: Ec-Declaration Of Conformity
EC-declaration of conformity EC-declaration of conformity - Herewith we declare that 5560 GS ID No. 11055101 UL ID No. 10055101 - complies with the following provisons applying to it 2006/42/EG: EC Machinery directive 2014/30/EG: EMV Electromagnetic compatibility directive 2011/65/EU, 2015/863/EU RoHS directive - Applied harmonised standards in particular EN 60204-1; EN 1010-1; EN 1010-3; EN 55014-1; EN 55014-2; EN 61000-3-2;... - Page 47 Remarks: - 47 -...
- Page 48 EBA • Made in Germany Document Shredders • • Trimmers and Guillotines • • Krug & Priester GmbH & Co. KG Simon-Schweitzer-Str. 34 D-72336 Balingen (Germany) www.krug-priester.com 01-2020 03.02.2020 zm 9700233 9700174...
Need help?
Do you have a question about the EBA Series and is the answer not in the manual?
Questions and answers
Is this an EBA D-72336 Balingen? If so, how big, in inches, will it cut?
The KRUG+PRIESTER EBA Series is associated with the location D-72336 Balingen, Germany. The cutting length is 550 mm, which is approximately 21.65 inches, and the cutting height is 95 mm, which is approximately 3.74 inches.
This answer is automatically generated