Table of Contents
Advertisement
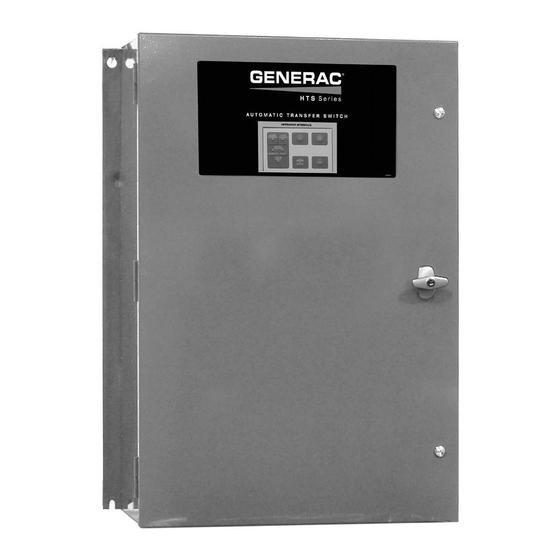
HTS Automatic Transfer Switch
*
NOT INTENDED FOR USE IN CRITICAL
LIFE SUPPORT APPLICATIONS.
*
ONLY QUALIFIED ELECTRICIANS OR
CONTRACTORS SHOULD ATTEMPT
INSTALLATION!
This manual should remain with the unit.
Owner's Manual
For
100 - 2600 Amp, 600 Volts
MODEL:________________________
SERIAL:________________________
DATE PURCHASED:______________
Advertisement
Table of Contents

Related Manuals for Generac Power Systems HTS


Summary of Contents for Generac Power Systems HTS
- Page 1 Owner’s Manual HTS Automatic Transfer Switch 100 - 2600 Amp, 600 Volts MODEL:________________________ SERIAL:________________________ DATE PURCHASED:______________ NOT INTENDED FOR USE IN CRITICAL LIFE SUPPORT APPLICATIONS. ONLY QUALIFIED ELECTRICIANS OR CONTRACTORS SHOULD ATTEMPT INSTALLATION! This manual should remain with the unit.
- Page 2 Automatic Transfer Switch Owner’s Manual...
-
Page 3: Table Of Contents
Table of Contents Table of Contents Section 1 Safety 3.9 Main Contacts at Standby (Emergency) ..9 3.10 Connecting Controller Communication 1.1 Introduction ............1 Wires ..............9 1.2 Safety Rules ...........1 3.11 Setting Dip Switches ........9 1.3 Safety Symbols and Meanings .....2 3.11.1 Dip Switch 1 ...........10 3.11.2 Dip Switch 2 ...........10 Section 2 General Information... - Page 4 Table of Contents 4.6.4 Sequence 4 - Signal Before Transfer ....18 4.6.5 Sequence 5 - ATS Transfer to Generator Position ............18 4.6.6 Sequence 6 - Utility Voltage Pickup ....18 4.6.7 Sequence 7 - Return to Utility Timer ....18 4.6.8 Sequence 8 - Signal Before Transfer ....
-
Page 5: Section 1 Safety
Safety Section 1 1.1 — Introduction Read the following information carefully before attempt- ing to install, operate or service this equipment. Also read the instructions and information on tags, decals, and labels that may be affixed to the transfer switch. Replace any decal or label that is no longer legible. -
Page 6: Safety Symbols And Meanings
Safety 1.3 — Safety Symbols and Meanings Automatic Transfer Switch Owner’s Manual... -
Page 7: Section 2 General Information
HTS via the communication link. If the communica- 2.1.2.4—TVSS Disconnect tion link were to break, the HTS will still function. It will monitor the Utility and Generator voltages and make the transfer determination itself, rather than being com- manded by the generator control panel. -
Page 8: Remote Alarm Contacts
2.2.1— G and H Panel Generators link. The 2-wire start output allows the ATS to start and stop The HTS acts as a Modbus slave on the communications the generator automatically. Without a RS-485 communi- network. For the “H” series of generator controllers, Port cation link and 2-wire start, the timing functions of the 1 is used for the connection. -
Page 9: Transfer Switch Data Label
General Information 2.4 — Transfer Switch Data Label A data label is permanently affixed to the transfer switch enclosure. Use this transfer switch only with the specific limits shown on the data label and on other decals and labels that may be affixed to the switch. This will prevent damage to equipment and property. - Page 10 General Information This page intentionally left blank. Automatic Transfer Switch Owner’s Manual...
-
Page 11: Section 3 Installation
Installation Section 3 3.1 — Introduction to Installation 3.4 — Connecting Power Source and Load Lines Though this equipment has been wired and tested at the factory, the installer should verify all wiring connections are proper. Installing the switch includes the following procedures: •... -
Page 12: Transfer Mechanisms (600-2600A)
Installation 3.4.2— Transfer Mechanisms (600-2600A) tionary. The normal (utility) and standby (emergency) contacts are moveable. The contacts are actuated by See Figure 3-2. The transfer mechanism may be either a means of a closing coil and mechanical linkage. The pole 2-pole, 3-pole, or 4-pole type. -
Page 13: Main Contacts At Normal (Utility)
Do not connect the shield at this end. 3.11 — Setting Dip Switches The dip switches, in the HTS, are read once, only at power up. If the communications to the Power Manager or the engine controller are working, it will overwrite the dip switch settings. -
Page 14: Dip Switch 1
Installation 3.11.1— Dip Switch 1 GenLink DCP Voltage Codes Modbus Address Dip1 – 8 7 Switch Number THREE PHASE DIP SWITCH SELECTED Code Dip1_3 2 1 0 = 480 Vac 0 0 0 1 = 600 Vac 0 0 1 2 = 415 Vac 0 1 0 3 = 240 Vac... -
Page 15: Programming
(not the average voltage) Pickup — all phases > +75% of nominal 3.12 — Programming The HTS transfer switch is controlled by the G/H control panel on the engine generator. The timer, voltage pickup, dropout and exercise settings are programmed into the Figure 3-7. - Page 16 Installation This page intentionally left blank. Automatic Transfer Switch Owner’s Manual...
-
Page 17: Section 4 Operation
Operation Section 4 4.1 — Functional Tests and Adjust- Note position of transfer mechanism main contacts by observing display windows in “A” and “B” in Fig- ments ure 4-1 as follows: Following transfer switch installation and interconnection, • Window (A) ON, Window “B” OFF - load terminals inspect the entire installation carefully. -
Page 18: Amp Models
Operation 4.2.2— 600 - 2600 Amp Models 4.2.2.1—Trip to Neutral Position See Figure 4-4. Remove manual handle from square shaft at the upper left corner of the switch. Insert a screwdriver into the “Trip” hole and push The main contact should trip to the neutral position and the word “OFF”... -
Page 19: Close To Normal Source Side
Operation 4.3 — Voltage Checks IMPORTANT: Any voltage measurements should be per- formed with a meter that meets UL3111 safety standards, and meets or exceeds overvoltage class CAT III. Before performing voltage checks, verify the following: Disconnect all loads from transfer switch until all Figure 4-5. -
Page 20: Electrical Operation
Operation transfer switch by whatever means provided (such cuit breaker(s), then proceed to Subsection 4.4 — as the main line circuit breaker), then return to Step Electrical Operation. 1 of Subsection 4.3 — Voltage Checks. 4.4 — Electrical Operation On the enclosure door, check that the utility avail- able LED is ON. -
Page 21: System Ready Led
Operation 4.5.1— System Ready LED using all the standard settings but with reduced time delays. Specifically the following timers are reduced to 1 The “System Ready LED” is lit if the Gxxx or Hxxx panel second: is in Auto, there are no transfer errors (excluding comm's •... -
Page 22: Sequence 2 - Line Interrupt Delay
Operation 4.6.7— Sequence 7 - Return to Utility Timer second utility loss timer and a 30 second utility return timer. • Return to Utility timer starts. The Utility source volt- • Voltage dropout triggers sequence 2. age must stay above the pickup level. If the Utility voltage falls below the pickup value, the Return to Utility timer is reset. -
Page 23: Signal Before Transfer
Set the timer to “0” when this option is not desired. The basic operation of the option is to delay (for the period of time set) the transfer of the HTS mechanism while a signal relay (SR) is energized. When the relay is energized, two sets of the dry contacts (wires 236 and 240, and 237 and 238) are closed. -
Page 24: Instrument Package (Utility Monitor)
The instrument package includes a terminal strip used to connect the current transformers and associated wiring. The HTS controller takes in the current signals and passes them on to the Hxxx or Gxxx panel for display on a PC through GenLink-DCP. -
Page 25: Section 5 Maintenance
Maintenance Section 5 5.1 — Operate Transfer Switch 5.4 — Main Current Carrying Contacts Operate the transfer switch at least once each month. At least once annually, have an Authorized Service Tech- This can be done by performing a NORMAL TEST of the nician check the main current carrying contacts in the system. - Page 26 Maintenance This page intentionally left blank. Automatic Transfer Switch Owner’s Manual...
-
Page 27: Section 6 Installation Drawings
Installation Drawings Section 6 6.1 — 100-400 Amp LV 6.1.1— No. 0H6400ID-B (Part 1 of 2) Automatic Transfer Switch Owner’s Manual... -
Page 28: 0H6400Id-B (Part 2 Of 2)
Installation Drawings 6.1.2— No. 0H6400ID-B (Part 2 of 2) Automatic Transfer Switch Owner’s Manual... -
Page 29: 100-400 Amp Lv
Installation Drawings 6.2 — 100-400 Amp LV 6.2.1— No. 0H6410ID-B (Part 1 of 2) Automatic Transfer Switch Owner’s Manual... -
Page 30: 0H6410Id-B (Part 2 Of 2)
Installation Drawings 6.2.2— No. 0H6410ID-B (Part 2 of 2) Automatic Transfer Switch Owner’s Manual... -
Page 31: 100-400 Amp Hv
Installation Drawings 6.3 — 100-400 Amp HV 6.3.1— No. 0H6420ID-B (Part 1 of 2) Automatic Transfer Switch Owner’s Manual... -
Page 32: 0H6420Id-B (Part 2 Of 2)
Installation Drawings 6.3.2— No. 0H6420ID-B (Part 2 of 2) Automatic Transfer Switch Owner’s Manual... -
Page 33: 600-1000 Amp
Installation Drawings 6.4 — 600-1000 Amp 6.4.1— No. 0H6440ID-C (Part 1 of 2) Automatic Transfer Switch Owner’s Manual... -
Page 34: 0H6440Id-C (Part 2 Of 2)
Installation Drawings 6.4.2— No. 0H6440ID-C (Part 2 of 2) Automatic Transfer Switch Owner’s Manual... -
Page 35: 1200-1600 Amp
Installation Drawings 6.5 — 1200-1600 Amp 6.5.1— No. 0H6450ID-C (Part 1 of 2) Automatic Transfer Switch Owner’s Manual... -
Page 36: 0H6450Id-C (Part 2 Of 2)
Installation Drawings 6.5.2— No. 0H6450ID-C (Part 2 of 2) Automatic Transfer Switch Owner’s Manual... -
Page 37: 2000-2600 Amp
Installation Drawings 6.6 — 2000-2600 Amp 6.6.1— No. 0H6460ID-C (Part 1 of 2) Automatic Transfer Switch Owner’s Manual... -
Page 38: 0H6460Id-C (Part 1 Of 2)
Installation Drawings 6.6.2— No. 0H6460ID-C (Part 1 of 2) Automatic Transfer Switch Owner’s Manual... - Page 40 Part No. 0H6470 Rev. B 04/23/15 Printed in USA Generac Power Systems, Inc. © Generac Power Systems, Inc. All rights reserved S45 W29290 Hwy. 59 Specifications are subject to change without notice. Waukesha, WI 53189 No reproduction allowed in any form without prior written 1-888-GENERAC (1-888-436-3722) consent from Generac Power Systems, Inc.
- Page 43 0F5153 EV HTS ENCLOSURE NEMA 1 0C7907E COVER LUG 4P 150/200AMP 0F5083 DECALHTS T/SWITCH NEMA 1 0C7907J COVER LUG 2P 300/400AMP 0G2749 DECALHTS T/SWITCH NEMA 1 P/L 0C7907F COVER LUG 3P 300/400AMP 0F4284 KEYPAD, COMM XFER SW IN-PHASE 0C7907G COVER LUG 4P 300/400AMP...
- Page 47 0F7110 ENCL NEMA 3R 24X36X10 099084 LUG SLDLSS 2/0-#6X21/64 AL/CU 0F7145 DECAL HTS TRANSFER SW NEMA 3R 0A9949 LUG SLDLSS 400-#4X1/4-20 CU7AL 0G2774 DECAL HTS(XR)TRANS SW NEMA 3R 0A7822 LUG SLDLSS 600/250-1/0X1/4-28 0F4284 KEYPAD, COMM XFER SW IN-PHASE 0C7907A COVER LUG 2P 100AMP...
- Page 51 0F6251 EV HTS ENCLOSURE NEMA 1 0E3717A ASSY-NEUT BLK 200-400A W/TAP 0F7117 EV HTS ENCLOSURE NEMA 3R 0F4034 ASSY TERMINAL BLOCK 300-400A 0F5083 DECAL,HTS T/SWITCH NEMA 1 0A9457 DECAL NEUTRAL 0G2749 DECAL,HTS T/SWITCH NEMA 1 P/L 091472 DUCT WIRING 1X1.5 (46"=3.833FT)
- Page 55 063925 LUG SLDLSS 500-4/0X17/32 AL/CU 0F5083 DECAL,HTS T/SWITCH NEMA 1 074349A SW CVR WN 600A 3P 0G2749 DECAL,HTS T/SWITCH NEMA 1 P/L 074349B SW CVR WN 600A 4P 0F7145 DECAL,HTS T/SWITCH NEMA 3R 074349C SW CVR WN 800/1000A 3P 0G2774...
- Page 59 074351A DECAL UL CT RL PANEL ENCL 0F5503 DECAL HTS SWIT CH I NFO 074604 WIRE HARNES S HTS 12-1600A (NOT SHO WN) 07452 5 DECAL, MANUAL OPE RATION 074672A LUG SL DLSS 750 -1/ 2X13/ 32 AL/CU 07216 4...
- Page 63 DECAL HTS SWITCH INFO (1)52 092979 AUX CONT INSULATOR (300A->) 074525 DECAL, MANUAL OPERATION (1)53 0H6460HD$ WIRE HARNESS HTS 20-2600A (NOT SHOWN) 074327 MNL HNDL 20-2600A WN(SUPPLIED W/SW) 0F4801 PLATE MOUNTING PCB ASSEMBLY HARNESS 0F5926 ASSY PCB COVER COMM XFER SW 0C6748 NUT HEX LOCK M4-0.7 SS NYL INS...
- Page 73 CGA, except to the extent permitted by that Act, and these terms are to be modified to the extent necessary to give effect to that intention. If you acquire goods from Generac Power Systems or any of its authorized resellers and distributors for the purposes of a business, then pursuant to section 43(2) of the CGA, it is agreed that the provisions of the CGA do not apply.
- Page 74 CGA, excepto con el alcance permitido por la ley y estos términos se deben modificar con el alcance necesario para hacer efectiva esta intención. Si adquiere bienes de Generac Power Systems o alguno de sus revendedores y distribuidores autorizados con propósitos comerciales, entonces, conforme a la sección 43(2) de la CGA, se acuerda que no se aplican las previsiones de la CGA.
- Page 75 Pendant la période de garantie mentionnée ci-bas, qui débute dès le démarrage réussi de l’appareil ou l’activation en ligne de l’appareil, Generac Power Systems, Inc. (Generac) garantit que son commutateur de transfert sera exempt de vices de matériaux et fabrication en ce qui concerne les éléments et la période indiqués ci-dessous.
Need help?
Do you have a question about the HTS and is the answer not in the manual?
Questions and answers