Honda FJ500 Owner's Manual
Hide thumbs
Also See for FJ500:
- Owner's manual (360 pages) ,
- Manual (148 pages) ,
- Owner's manual (81 pages)

Subscribe to Our Youtube Channel
Related Manuals for Honda FJ500


Summary of Contents for Honda FJ500
- Page 1 TILLER FJ500 OWNER'S MANUAL MANUEL DE L'UTILISATEUR BEDIENUNGSANLEITUNG MANUAL DE EXPLICACIONES MANUALE DELL'UTENTE...
-
Page 2: Safety Instructions
To ensure safe operation– For your safety and the safety of others, pay special attention to these precautions: • Honda tiller is designed to give safe and dependable service if operated according to instructions. Read and understand the Owner’s Manual before operating the tiller. - Page 3 • Gasoline is extremely flammable and is explosive under certain conditions. • Do not smoke or allow flames or sparks in the area where the tiller is refueled or where gasoline is stored. • Do not overfill the fuel tank, and make sure the fuel tank cap is closed securely after refueling.
- Page 4 To ensure safe operation– Operator responsibility • Read the owner’s manual carefully. Be familiar with the controls and their proper use of the tiller. • Use the tiller for the purpose it is intended that is, cultivating the soil. Any other use could be dangerous or damage the equipment, especially never use it to cultivate soil containing rocks, stones, wires and any other hard materials.
- Page 5 To ensure safe operation– Operator responsibility • Stop the engine in the following cases: – Whenever you leave the tiller unattended. – Before refueling • When stopping the engine, move the throttle lever to the LOW position, then turn the engine switch OFF. If the fuel valve is equipped on the tiller, be sure to turn the fuel valve OFF.
- Page 6 To ensure safe operation– Fire and burn hazard Gasoline is extremely flammable, and gasoline vapor can explode. Use extreme care when handling gasoline. Keep gasoline out of reach of children. • Add fuel before starting the engine. Never remove the cap of the fuel tank or add gasoline while the engine is running or when the engine is hot.
- Page 7 To ensure safe operation– Carbon monoxide poisoning hazard Exhaust contains poisonous carbon monoxide, a colorless and odorless gas. Breathing exhaust can cause loss of consciousness and may lead to death. • If you run the engine in an area that is confined or even partially enclosed, the air you breathe could contain a dangerous amount of exhaust gas.
-
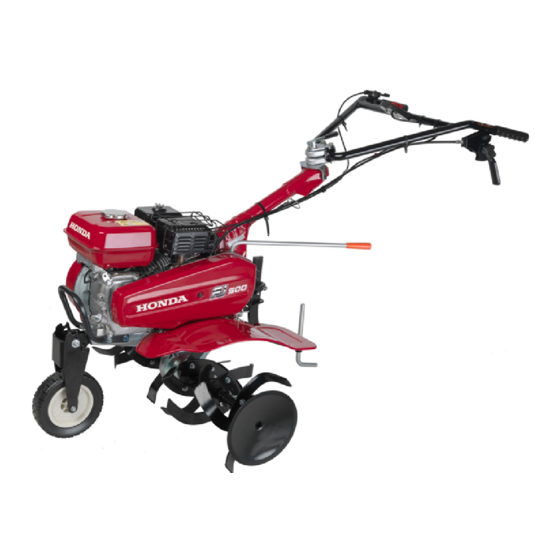
Page 8: Component Identification
3. COMPONENT IDENTIFICATION SE and SER types: HANDLEBAR HEIGHT ADJUSTER THROTTLE LEVER SHIFT LEVER ENGINE SWITCH MUFFLER CLUTCH LEVER FUEL TANK CAP HANDLEBAR FIXING LEVER SHIFT LEVER BELT COVER FRONT GUARD ENGINE OIL DRAIN BOLT ROTARY (SER and DER types) FRONT WHEEL ENGINE OIL FILLER CAP (DE and DER types) -
Page 9: Pre-Operation Check
• Check that the engine stops securely by operating the engine switch. (See pages 37 through 39 for stopping procedure.) • If you notice any other abnormal symptoms, consult with your authorized Honda dealer promptly. 5.Bolts and nuts Check for looseness in fastened parts. Securely tighten all loose parts. - Page 10 6.Engine oil CAUTION: Running the engine with insufficient oil can cause serious engine damage. 1.DE and DER types: Set the front wheel to the UP position (see page 34). 2.Park on level ground, stop the engine, put proper mounting under the front frame and put wood block under the drag bar as shown, to keep the tiller horizontal.
- Page 11 9.Fuel Check the fuel level, and refill the tank if the fuel level is low. Use unleaded gasoline with a Research Octane Number of 91 or higher (a Pump Octane Number of 86 or higher). Never use stale or contaminated gasoline or an oil/gasoline mixture. Avoid getting dirt or water in the fuel tank.
- Page 12 Gasolines containing alcohol If you decide to use a gasoline containing alcohol (gasohol), be sure its octane rating is at least as high as that recommended by Honda. There are two types of ‘‘gasohol’’: one containing ethanol, and the other containing methanol.
- Page 13 10.Clutch lever Before the operation check, make sure that there are no foreign objects (such as sand, soil, twigs, etc.) caught around the clutch lever, lock lever and/or lock lever arm. Check that the lock lever and the clutch lever operate smoothly by pushing the lock lever, and squeezing the clutch lever.
-
Page 14: Starting The Engine
5. STARTING THE ENGINE CAUTION: Be sure the clutch is disengaged and the shift lever is in the neutral position to prevent sudden uncontrolled movement when the engine starts. The clutch is engaged by pulling in the clutch lever and disengaged by releasing the lever. - Page 15 3.Turn the engine switch to the ON position. ENGINE SWITCH 4.Align the mark ‘‘ ’’ on the throttle lever with the mark ‘‘ ’’ (START position) as shown. START THROTTLE LEVER...
- Page 16 5.Pull the starter grip lightly until resistance is felt, then return the starter grip once. STARTER GRIP Hold the handlebar with your left hand and pull the starter grip briskly in the direction of the arrow as shown. CAUTION: Direction to pull Do not allow the starter grip to snap back against the engine.
-
Page 17: Tiller Operation
6. TILLER OPERATION 1.Handlebar height adjustment CAUTION: Before adjusting the handlebar, place the tiller on the firm level ground to prevent the handle from collapsing accidentally. SE and SER types: To adjust the handlebar height, loosen the handlebar height adjuster, select the appropriate hole and tighten it. - Page 18 3.Tilling depth adjustment Install the hitch attachment in the hitch box with a hitch pin. The tilling depth adjustment can be made as follows: Remove the lock pin and pin, loosen the lock nuts and bolts securing the drag bars A and B, and slide the drag bars up or down as necessary. After adjustment, tighten the bolts and lock nuts securely.
- Page 19 4.Clutch operation The clutch engages and disengages the power from the engine to the transmission. CAUTION: Reduce engine rpm before operating clutch operation. Engage: 1.Push and hold the lock lever. 2.Squeeze the clutch lever. 3.The clutch is engaged, release the lock lever. Disengage: Release the clutch lever.
- Page 20 5.Gear selection CAUTION: Return the throttle lever to the Low position and disengage the clutch before moving the shift lever. Avoid using excessive force on the shift lever. Select a gear position in accordance withe the contents of the Gear Selection Table.
- Page 21 7.Front wheel (DE and DER types) After getting to the tiller site, move the front wheel to the raised position before tilling. Always stop the engine before lowering or raising the wheel. To raise or lower the wheel, pull out the wheel assembly, move the wheel, then release the wheel assembly.
- Page 22 8.Handling tips • If the tiller tends to move forward rapidly, push down on the handlebars to allow the drag bar to penetrate the soil and slow the forward motion on the tiller. Continue to press down until the tiller tines have dug to a desired depth that allows easy tiller handling.
- Page 23 9.Normal operating angle Lower the handle slightly so the front of the machine is raised about 5~7°. HORIZONTAL LINE 5~7° ATTACHMENT LINE OF ENGINE To get the maximum advantage from the tiller, try to hold the machine at the angle shown while you are tilling the ground: CAUTION: •...
-
Page 24: Stopping The Engine
7. STOPPING THE ENGINE In an emergency: • Turn the engine switch to the OFF position. ENGINE SWITCH In normal use: 1.Release the clutch lever to the DISENGAGED position. DISENGAGED CLUTCH LEVER DISENGAGED 2.Move the throttle lever fully to the right. THROTTLE LEVER... - Page 25 3.Set the shift lever in the NEUTRAL position. SE and SER types: NEUTRAL SHIFT LEVER DE and DER types: NEUTRAL NEUTRAL SHIFT LEVER 4.Turn the engine switch to the OFF position. ENGINE SWITCH...
- Page 26 5.Turn the fuel valve to the OFF position. FUEL VALVE...
-
Page 27: Troubleshooting
5.Is the spark plug in good condition? Remove and inspect the spark plug. Clean, readjust gap and dry the spark plug. Replace it if necessary. 6.If the engine still does not start, take the tiller to an authorized Honda dealer. -
Page 28: Specifications
11. SPECIFICATIONS Model FJ500-SE FJ500-SER FJ500-DE FJ500-DER Description code FAAC Dimensions and weight Model FJ500-SE FJ500-SER FJ500-DE FJ500-DER Length 1,395 mm (54.9 in) 1,435 mm (56.5 in) Width 610 mm (24.0 in) 925 mm (36.4 in) 610 mm (24.0 in) 925 mm (36.4 in) - Page 29 Noise and vibration Type SE, SER DE, DER Sound pressure level at operator’s ears 81 dB (A) 81 dB (A) (EN ISO 11200: 1995) Uncertainty 2 dB (A) 2 dB (A) Measured sound power level 96 dB (A) 96 dB (A) (Reference to the motor hoe of 2000/14/EC, 2005/88/EC) Uncertainty 2 dB (A)
Need help?
Do you have a question about the FJ500 and is the answer not in the manual?
Questions and answers