Table of Contents
Advertisement
Advertisement
Table of Contents

Related Manuals for Dawlance DWT 255


Summary of Contents for Dawlance DWT 255
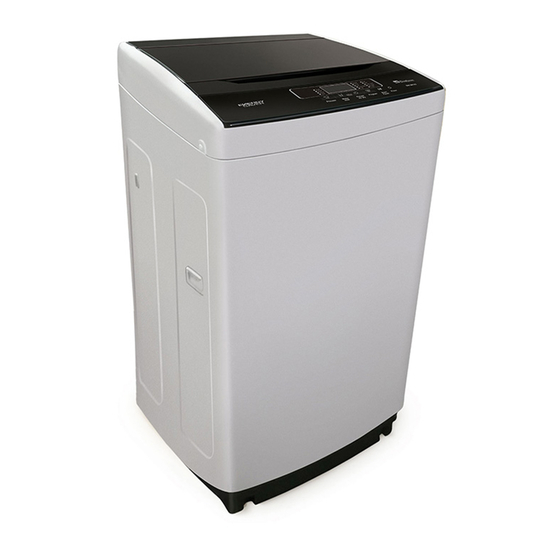
- Page 1 FULLY AUTOMATIC WASHING MACHINE User Manual DWT 255 DWT 255...
-
Page 2: Table Of Contents
Use of detergent..................9 Control panel instructions................. 10 Operation steps..................12 Maintenance.................... 13 Troubleshooting..................14 Other functions..................16 Model DWT 255 DWT 255 Rated voltage and frequency 220V~ 50Hz 220V~ 50Hz Water level/water volume (about) Product dimension (WxDxH) 530x560x950 (mm) -
Page 3: Before Using
Parts name Before using Top lid Top frame Feed valve Detergent box Lint lter Control panel Power cord Inner tub Pulsator Back cover Balancing apparatus Body Base Adjustable foot Foot wheel Fixing foot (3pcs) Accessories The end connecting to the appliance Connector for water inlet hose and tap... -
Page 4: Cautions
Before using Cautions Before using Please insert the plug into the power socket with voltage rating Always unplug the appliance and turn off the water when 220V A/C. the power is cut, the machine is moving or getting cleaned, or it is not in use. Do not insert or pull off the plug with wet hands. Do not bend, stretch, twist, strap, change, press or nip the electric cable. - Page 5 Before using Cautions Before using Do not put your hands while the machine is working. It is dangerous to alter the speci cations or It is dangerous even if the speed is very slow. attempt to modify this product in any way. Take special care of the children and forbid them to climb onto the washing machine.
-
Page 6: Installation And Adjustment
Installation and adjustment Before using Please install and adjust the machine according to the requirements of the manual. It is very important for your safety and correct operation. Unpacking Unpack the carton and take out the bottom panel. Open the top lid of washing machine and take out all the accessories. Remove all wrappers, including the polystyrene base. -
Page 7: How To Use Drainpipe
How to use drainpipe Before using Install drainpipe Set drainpipe clip into the drainpipe to above 2-3cm (from the drainpipe end without pothook). Now, install the drainpipe into the right drainpipe connector and x the drainpipe and drainpipe connector with the clip. After that, put the drainpipe clip on the cabinet. How to change the direction of the drainpipe 1. -
Page 8: Water Inlet Installation
Water inlet installation Before using Tap selection Unsuitable tap Suitable tap The front end should be longer than 10mm. The tap exit end face should be at and smooth, if not, le it to avoid leakage. Connect the inlet hose connector with the tap 1. - Page 9 Water inlet installation Before using Connect the inlet hose with the washing machine 1. Do not take off the water absorption cushion. Please check if the cushion is dropped or damaged before each use. If it is, contact the seller immediately. Inlet hose nut 2.
-
Page 10: Operation
Preparation before operation Operation Preparation before washing 1. Connect the inlet hose and open the tap. 2. This appliance must be earthed. Con rm the socket is earthed reliably and insert the power plug. The earth terminal should not link to the gas pipeline, tap pipeline etc. 3. -
Page 11: Load Laundry
Load laundry Operation The capacity of washing and spinning of the machine refers to the largest weight of the standard laundry under dry conditions. Washing quantity shall be lower than the rated capacity. Different thickness, size and type of the laundry will in uence the actual washing capacity. -
Page 12: Control Panel Instructions
Control panel instruction Mode and meaning of the indicator light on: indicate the selected mode At the beginning of start, the "normal ", press "PROGRAM" button, program is choose different programs. When choose the left five programs ("normal", "spin only", "heavy", "soft", "fast"), the light will be on, when press the right 5 programs ( "wash only", "rinse-spin", "water recycle", "air dry", "tub clean"), the light will flash. - Page 13 Operation Digital timer displays program code If select AIR DRY, the digital timer displays air dry time, unit is MIN. When washing, the digital timer shows the rest time of washing, unit is MIN. When trouble encountered, the digital time shows trouble code. End(min) End(min) To control the washing machine is in working state...
-
Page 14: Operation Steps
Operation steps Operation Power Button Power Button Press this button once to operate. Press it again to turn the power off. Start/Pause Button Start/Pause Button Use to pause and restart the operation. To change the washing procedure during an operation, press this button to stop, and again to restart after changing the procedure. - Page 15 Process Select Button Process Select Button Each time the button is pressed, the process changes. Delay Start Time Button Delay Start Time Button Adjusts delay start time. Max. 24 h Water Level Button Water Level Button The water level is automatically adjusted. However, you can select the water level manually by pressing this button.
-
Page 16: Maintenance
Maintenance Operation Maintenance methods External cleaning After the end of the programme Clean the exterior cabinet of the appliance with a The machine will stop automatically and the soft cloth. Do not use cleanser or volatile chemical buzzer will remind you to take out the laundry materials to clean the machine. -
Page 17: Troubleshooting
Troubleshooting Before contacting the technicians, please make the following checks: Possible reason Phenomena Plug is not inserted tightly. Control panel has no display No electricity in the socket. Power switch is not turned on. Power supply is cut off. Inlet hose connector (connecting with the tap) is not xed tightly. Inlet hose leaks Inlet hose and washing machine connector is loose. - Page 18 Settlement Settlement Insert the plug tightly. Make sure the socket is functioning, else change to another socket. Press power switch. Check power supply. Install the inlet hose again. Tighten the connector of the machine. Put down the drainpipe. Straighten or clean the drainpipe. Restart when water supply is resumed.
-
Page 19: Other Functions
Other functions 1. Give an alarm Display Explanation Settlement The top lid is opened Close the top lid and clear up the alarm. when preset is started. Open top lid, according to before After draining for 5 minutes, troubleshooting and settlement to it still does not reach to settle it, then close the top lid and the water level. - Page 21 THANK YOU FOR TRUSTING DAWLANCE DWT 255 This is your personal warranty from DAWLANCE (PRIVATE) LIMITED. It applies to you as the original purchaser provided it is purchased from an authorized dealer and it is not transferable. 1. THE WARRANTY IS VALID PROVIDED: i) The warranty card is properly lled and bears dealer’s seal at the time of purchase.
Need help?
Do you have a question about the DWT 255 and is the answer not in the manual?
Questions and answers
Water level adjustment
Why My dawlance automatic washing machine 255 es leaks water from their bottom