
Subscribe to Our Youtube Channel
Related Manuals for VADDIO AV Bridge 2x1


Summary of Contents for VADDIO AV Bridge 2x1
- Page 1 Complete Manual for the AV Bridge 2x1 Presentation Switcher Document 411-0042-30 Rev A March 2020...
-
Page 2: Table Of Contents
Contents Overview About this Guide Features Unpacking the AV Bridge 2x1 A Quick Look at the AV Bridge 2x1 Front Panel Connector Panel Installation Don’t Void Your Warranty! Cabling Notes Basic Connections Basic Connections for Conferencing Using Dante Devices with AV Bridge 2x1... - Page 3 Complete Manual for the AV Bridge 2x1 Presentation Switcher Routing Audio Setting Gain Between Input and Output (Crosspoint Gain) Configuring Streaming Settings Supported Input Resolutions and Frame Rates Configuring USB Streaming Set IP Streaming Video Settings RTSP Streaming Settings RTMP Streaming Settings...
- Page 4 Complete Manual for the AV Bridge 2x1 Presentation Switcher camera pan camera tilt camera zoom camera preset camera ccu get camera ccu set camera ccu scene camera focus camera comm host camera standby video program pip video mute video type...
-
Page 5: Overview
Glossary Compliance/conformity information For your convenience, information on installing this product is also available in the smaller, stand-alone Installation Guide for the AV Bridge 2x1 Presentation Switcher, which covers unpacking, physical features, switch settings, installation, and initial power-up. Features The perfect solution for rooms where you only need two cameras: 2x1 video switcher bridges two HDMI cameras or other video sources into a soft-client conferencing or IP streaming environment Simultaneous USB 3.0 and IP streaming (RTSP or RTMP), video and audio... -
Page 6: Unpacking The Av Bridge 2X1
Complete Manual for the AV Bridge 2x1 Presentation Switcher Unpacking the AV Bridge 2x1 Make sure you received all the items you expected. Here is the packing list for the AV Bridge 2x1. AV Bridge 2x1, North America: 999-8250-000 AV Bridge 2x1, Europe and UK: 999-8250-001... -
Page 7: A Quick Look At The Av Bridge 2X1
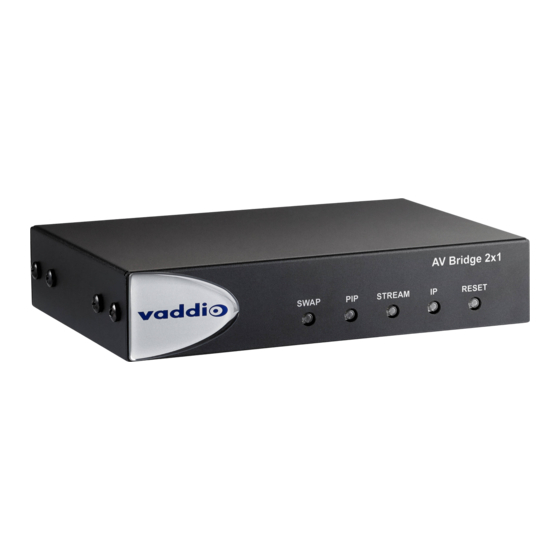
Complete Manual for the AV Bridge 2x1 Presentation Switcher A Quick Look at the AV Bridge 2x1 Physical features of the device – controls, indicators, and connectors. Front Panel Swap button: Changes the selected input. Exchanges the PIP and main image on the HDMI output, if the PIP is turned on. -
Page 8: Connector Panel
Complete Manual for the AV Bridge 2x1 Presentation Switcher Connector Panel Network/PoE+ – Power, control via web interface, Dante audio, and IP streaming. USB 3.0 – Uncompressed video output with PCM audio for conferencing applications. RS-232 – Connect to an optional third-party control system. -
Page 9: Installation
Caution When building cables for Vaddio products, do not use pass-through RJ-45 connectors. If they are crimped incorrectly, they can cause intermittent connections and degrade signal quality. Incorrectly crimped pass-through connectors can also damage the connectors on the product, which will void your warranty. -
Page 10: Basic Connections
This diagram shows a basic installation. Cameras or other HDMI sources may be used for both HDMI inputs. The AV Bridge 2x1 does not power the speaker(s). The HDMI output displays video from the selected source; the picture-in-picture (PIP) is from the video source not currently selected – a camera,... -
Page 11: Basic Connections For Conferencing
HDMI output shows near-end video. The HDMI output from the AV Bridge 2x1 goes to a "confidence display" showing near-end video only. The image on this display is used as the near-end PIP on the main display. If the PIP is enabled on the AV Bridge 2x1, this is part of the image that others in the conference will see, and the room's main display shows a PIP within the near-end PIP. -
Page 12: Rs-232 Serial Communication Settings And Port Pin-Outs
Depending on the equipment connected to the RS-232 port, you may need a null-modem (crossover) cable. Powering Up Power up the AV Bridge 2x1 and the connected equipment at the same time, or power up the connected equipment before you power up the AV Bridge 2x1. -
Page 13: Initial Device Set-Up And System Administration Tasks
See Interface. Locate and set up the product using the Vaddio Deployment Tool – This tool is available as a free download at https://info.legrandav.com/VaddioDeploymentTool. The tool scans the network for Vaddio devices, lists them by model and IP address, identifies all devices that are not set up, provides the controls to complete the initial device set-up, and provides links to each device's web interface. -
Page 14: About The Web Interface
Complete Manual for the AV Bridge 2x1 Presentation Switcher About the Web Interface The AV Bridge 2x1 presentation switcher provides a web interface to allow configuration via the IP network connection, using a browser. The web interface allows you to:... -
Page 15: Initial Device Set-Up From The Web Interface
Complete the initial device set-up. Getting the Device's IP Address To see the current IP address for the AV Bridge 2x1, press the IP button on the front panel. The IP address and other network information is displayed on the video outputs. - Page 16 Complete Manual for the AV Bridge 2x1 Presentation Switcher Expect a security warning from your browser the first time you access the device's web interface. Different browsers will respond with different messages and options. Your browser will probably present a...
-
Page 17: Setting Up The Web Interface
Complete Manual for the AV Bridge 2x1 Presentation Switcher Setting up the Web Interface If the device has never been in service, or if factory defaults have been restored, the web interface opens to the initial device set-up page. Set the admin password. If there are other tasks on the page (such as reading and accepting policies and agreements), complete them also. -
Page 18: Initial Device Set-Up Using The Vaddio Deployment Tool
2. Power up the AV Bridge 2x1 device if you have not done so already. 3. On the Find Devices page, click Scan. If the scan does not locate the AV Bridge 2x1 device, your computer may be on a different subnet from the device. Click Advanced and specify the appropriate portion of the network to scan. -
Page 19: Next Steps For New Deployments
Complete Manual for the AV Bridge 2x1 Presentation Switcher Next Steps for New Deployments After initial device set-up is complete, you will also need to complete system administration tasks to define how each device behaves as an element of your network. -
Page 20: Setting Passwords And Access
Complete Manual for the AV Bridge 2x1 Presentation Switcher Setting Passwords and Access – S ACH DEVICE ECURITY PAGE The Account Passwords and Web Server areas of the Security page provide basic security for the web interface: Admin password – Required for access to the admin pages of the web interface and for Telnet access to the device. -
Page 21: Configuring Other Security Settings
Complete Manual for the AV Bridge 2x1 Presentation Switcher Configuring Other Security Settings – S ACH DEVICE ECURITY PAGE Depending on your environment, you may want to make these changes: Enable HTTP access – When selected, administrators and operators can access the product’s web interface using the less-secure HTTP protocol. -
Page 22: For Non-Dhcp Environments: Configuring The Device With A Static Ip Address
Complete Manual for the AV Bridge 2x1 Presentation Switcher For Non-DHCP Environments: Configuring the Device with a Static IP Address Caution Consult your IT department before editing network settings. Errors in network configuration can make the device inaccessible from the network. Do not change DHCP/Static addressing, IP address, subnet mask, or gateway unless you are very familiar with the characteristics and configuration of the network where you install the device. -
Page 23: Optional For Dhcp Environments: Changing From A Dhcp Address To A Static Ip Address
Do not change the IP address, subnet mask, or gateway. You may wish to change the IP addresses of other connected equipment to static addresses as well. For all Vaddio products with web interfaces, this setting is on the Networking page. Adding Room Information ABELS PAGE Enter information about the location of the equipment and the local IT or A/V help line. -
Page 24: Setting System Time And Time Zone
Complete Manual for the AV Bridge 2x1 Presentation Switcher Setting System Time and Time Zone ETWORKING PAGE Using automatic NTP updating ensures that the timestamps in the device's diagnostic log are accurate. Specifying your time zone may make it easier to match logged events with other actions and external events. -
Page 25: Identifying Dante Devices
Note The Dante chip in the AV Bridge 2x1 has its own IP address and device name. These do not correspond to the AV Bridge 2x1's device name and IP address in the web interface. To physically locate Dante devices: 1. - Page 26 Complete Manual for the AV Bridge 2x1 Presentation Switcher To rename a device in the Dante Controller application: In the Device View window, select the device and go to its Device Config tab. The Rename Device option is near the top of the tab.
-
Page 27: Performance And Behavior Settings
This chapter covers performance and behavior settings for the AV Bridge 2x1. Note To locate or pair to Dante devices, use the Dante Controller application. Other performance and behavior settings are in the AV Bridge 2x1 web interface. What do you need to do? Go to this page... -
Page 28: Configuring Audio Settings
Complete Manual for the AV Bridge 2x1 Presentation Switcher Configuring Audio Settings UDIO PAGE MULTIPLE TABS The web interface provides separate controls for each of the audio inputs and outputs: Analog – Line/Mic 1 and 2 (connections to the Audio In connectors, typically the room's microphones);... -
Page 29: Muting And Setting Volume
Because Dante audio components connect to the network, unexpected behavior can occur. This can be disruptive if the affected component is a speaker. Vaddio recommends muting Dante speakers or turning down their volume to the minimum setting when they are not in use. -
Page 30: Microphone Settings And Adjustments
Complete Manual for the AV Bridge 2x1 Presentation Switcher Microphone Settings and Adjustments UDIO PAGE NALOG AND ATRIX TABS To accomplish this... Do this Help people to hear the person who is Enable Speech Lift and select the microphone closest to speaking. -
Page 31: Enabling Phantom Power To Microphones
Complete Manual for the AV Bridge 2x1 Presentation Switcher Enabling Phantom Power to Microphones UDIO PAGE NALOG TAB To supply 48 VDC phantom power to a microphone connected to a Line/Mic input, check the Phantom Power checkbox below the controls for the appropriate input. -
Page 32: Speaker Adjustments
Complete Manual for the AV Bridge 2x1 Presentation Switcher Speaker Adjustments UDIO PAGE NALOG TAB To accomplish this... Do this Compensate for differing speech Select Compressor to reduce the dynamic range from the volumes on the far end. connected speakers. -
Page 33: Synchronizing Audio With Video In The Ip Stream
Complete Manual for the AV Bridge 2x1 Presentation Switcher Synchronizing Audio with Video in the IP Stream UDIO PAGE TREAMING TAB If the video lags noticeably behind the audio in the IP stream, check the Delay box for the appropriate audio... -
Page 34: Routing Audio
To specify how the AV Bridge 2x1 uses a given audio input, locate its row. Locate the column representing the desired output and select the table cell where the desired row and column intersect. -
Page 35: Setting Gain Between Input And Output (Crosspoint Gain)
Complete Manual for the AV Bridge 2x1 Presentation Switcher Setting Gain Between Input and Output (Crosspoint Gain) To adjust crosspoint gain between any input and the output to which it is routed, right-click the table cell in the matrix to open a gain control. -
Page 36: Configuring Streaming Settings
Configuring USB Streaming TREAMING PAGE To change the USB device name: Edit the USB Device Name to change the way the AV Bridge 2x1 shows up in your soft client's device selection list. To allow soft client control of the audio: Check the Enabled box for HID Audio Controls to allow conferencing applications to control the audio. -
Page 37: Set Ip Streaming Video Settings
Complete Manual for the AV Bridge 2x1 Presentation Switcher Set IP Streaming Video Settings TREAMING PAGE If you are not sure how to configure streaming settings, start with the Easy mode defaults. This configures most settings automatically. To set up IP streaming in Easy quality mode: 1. - Page 38 Complete Manual for the AV Bridge 2x1 Presentation Switcher To set up IP streaming in Custom quality mode: 1. Select Custom quality mode. 2. Select the desired resolution. 3. Select the desired IP streaming frame rate. 4. Select Constant or Variable bit rate.
-
Page 39: Rtsp Streaming Settings
RTSP Streaming Settings TREAMING PAGE RTSP port: Vaddio strongly recommends using the default RTSP port number. Path: The portion of the streaming URL that appears after the IP address. You may wish to change this to help identify the stream source – for example, demo-studio-3. -
Page 40: Rtmp Streaming Settings
Complete Manual for the AV Bridge 2x1 Presentation Switcher RTMP Streaming Settings TREAMING PAGE To use RTMP streaming, you must have an account with a streaming service. Notes When RTMP streaming is selected and a content service provider is configured, the device streams to the service until you stop the stream. -
Page 41: Stopping The Ip Stream
Complete Manual for the AV Bridge 2x1 Presentation Switcher To select the enabled RTMP streaming service: Expand the list of available streaming services, and select the one to use. Enable IP streaming when you are ready to start sending content to the streaming service. -
Page 42: Working With Video Inputs
A red tally indicator identifies the tab for the current program source. The tabs for connected Vaddio cameras present the same controls present in the cameras' own web interfaces. -
Page 43: Setting Video Transition Type And Speed
Complete Manual for the AV Bridge 2x1 Presentation Switcher Setting Video Transition Type and Speed IDEO WITCHING PAGE OR IDEO UTPUT PAGE The video transition settings determine how the video output behaves when you switch from one video input to the other. -
Page 44: Setting Up Macros And Triggers
Complete Manual for the AV Bridge 2x1 Presentation Switcher To place the graphic on the canvas and work with it: 1. Select the expand/collapse arrow associated with the filename to open the file information. 2. Select the View icon associated with the filename. Initially the image is placed at the top left corner of the canvas (coordinates 0,0). -
Page 45: Configuring Standby Behavior
Complete Manual for the AV Bridge 2x1 Presentation Switcher Configuring Standby Behavior NTERFACE PAGE To place the cameras in standby mode along with the switcher, check the box marked "Standby Connected Cameras when AV Bridge 2x1Enters Standby." Leave this check box unchecked if the cameras should remain powered up. -
Page 46: Customizing Labels
Complete Manual for the AV Bridge 2x1 Presentation Switcher Customizing Labels Some of the labels in the web interface are customizable – because you may find, for example, that "Podium" is a more useful label than "Line/Mic 1." You can rename:... -
Page 47: System Maintenance
Complete Manual for the AV Bridge 2x1 Presentation Switcher System Maintenance System maintenance tasks for the AV Bridge 2x1 are on the System page. In the event that you need to contact Vaddio Technical Support, the Help page provides contact information. Exporting and Importing Configuration Data... - Page 48 Complete Manual for the AV Bridge 2x1 Presentation Switcher To export a configuration: To save a copy of the current configuration, select Export Data. The configuration exports as a .dat file and downloads to your default file download location. The filename is the device's hostname followed by the .dat file extension.
-
Page 49: Updating The Firmware
From time to time, we issue new firmware to introduce new features and other product improvements, and to fix issues that turn up. We recommend keeping all your Vaddio products up to date, to get the most out of them. -
Page 50: Rebooting
Complete Manual for the AV Bridge 2x1 Presentation Switcher Rebooting YSTEM PAGE IRMWARE TAB This can help if the device stops responding as you expect. In the System Utilities section, select Reboot, then confirm. You will need to log in again after the reboot. -
Page 51: Contacting Vaddio Technical Support
Viewing Diagnostic Logs IAGNOSTICS PAGE If you encounter a problem that you can’t solve, your Vaddio technical support representative may ask you to download and email the log file available from the Diagnostics screen. Note The log may include large numbers of internal events even when no errors have occurred. -
Page 52: Operating The Av Bridge 2X1
Operating the AV Bridge 2x1 The AV Bridge 2x1 provides a web-based user interface in addition to the front panel controls for basic functions. To access the web interface, you may need to log in with the user account credentials, depending on how the device is configured. -
Page 53: Muting And Video: Quick Steps You Can Take From Any Page
Complete Manual for the AV Bridge 2x1 Presentation Switcher Muting and Video: Quick Steps You Can Take from Any Page All non-administrative pages of the web interface provide controls to do these things: Mute all video – HDMI Out and the USB and IP streams send the selected video mute pattern, either black video or color bars. -
Page 54: Working With Cameras
Select the video source to display on the HDMI output and the IP and USB streams. If it is a camera, you do not need to log in to its web interface - you can control it directly from the AV Bridge 2x1 web interface. -
Page 55: Working With Audio
Complete Manual for the AV Bridge 2x1 Presentation Switcher Working with Audio UDIO PAGE USER OR GUEST ACCESS Up to four audio channels may be available on the operator's Audio page. Each provides a mute/unmute button, volume read-out, and volume slider control. -
Page 56: Going To Standby (Low Power) Mode
Complete Manual for the AV Bridge 2x1 Presentation Switcher Going to Standby (Low Power) Mode LL PAGES The standby control is available at the top of each page of the web interface. When the system is in standby, no audio or video is sent or received and most of the web interface controls are unavailable. -
Page 57: Serial Command Api
Complete Manual for the AV Bridge 2x1 Presentation Switcher Serial Command API The Vaddio serial command API allows an external device such as an AMX or Crestron presentation system to control the device. It is also used for device macros. The serial command API can be accessed via Telnet or direct RS-232 connection. -
Page 58: Audio Volume
Complete Manual for the AV Bridge 2x1 Presentation Switcher audio volume Gets or sets the volume of the specified audio channel. The valid range depends on the channel. Synopsis audio [ channel ] volume { get | up | down | set <level> }... -
Page 59: Audio Mute
Complete Manual for the AV Bridge 2x1 Presentation Switcher audio mute Gets or sets the mute status of the specified audio channel. Synopsis audio <channel> mute {get | on | off | toggle} Channels master The channel currently designated as master/AEC reference. -
Page 60: Audio Route
Complete Manual for the AV Bridge 2x1 Presentation Switcher audio route Gets or sets the input routed to the specified output. Synopsis audio <channel> route {get | set <inputs>} Outputs line_out_1 Line Out 1 and 2 (speakers or other outputs) -
Page 61: Audio Crosspoint-Gain
Complete Manual for the AV Bridge 2x1 Presentation Switcher audio crosspoint-gain Returns or sets the input routing gain, in dB, for a given output and input. Synopsis audio <output> crosspoint-gain <input> {get | set <level>} Outputs line_out_1 Line Out 1 and 2 (speakers or other outputs) -
Page 62: Streaming Settings Get
Complete Manual for the AV Bridge 2x1 Presentation Switcher streaming settings get Returns current IP and USB streaming settings. Synopsis streaming settings get Parameters IP Custom_Frame_Rate Frame rate selected in Custom mode. IP Custom_Resolution Resolution selected in Custom mode. IP Enabled May be true or false. -
Page 63: Streaming Ip Enable
Complete Manual for the AV Bridge 2x1 Presentation Switcher streaming ip enable Set or change the state of IP streaming. Synopsis streaming ip enable { get | on | off | toggle} Parameters Returns the current state of IP streaming Enables IP streaming. - Page 64 Complete Manual for the AV Bridge 2x1 Presentation Switcher camera pan Moves the specified camera horizontally Synopsis camera <1..2> pan { left [<speed>] | right [<speed>] | stop } Required <1..2> Specify the camera to control. Options Moves the camera left.
- Page 65 Complete Manual for the AV Bridge 2x1 Presentation Switcher camera zoom Moves the specified camera in toward the subject or out away from the subject. Synopsis camera <1..2> zoom { in [<speed>] | out [<speed>] | stop } Required <1..2> Specify the camera to control.
- Page 66 Complete Manual for the AV Bridge 2x1 Presentation Switcher camera preset Moves the camera to the specified preset, or stores the current camera position and optionally CCU information, either with or without specifying that Tri-Synchronous Motion is to be used when moving to this position.
- Page 67 Complete Manual for the AV Bridge 2x1 Presentation Switcher camera ccu get Returns or sets CCU (lighting) information for the specified camera. Options auto_white_balance Current state of the auto white balance setting (on or off). red_gain Red gain value as an integer (0 to 255).
- Page 68 Complete Manual for the AV Bridge 2x1 Presentation Switcher camera ccu set Sets the specified CCU (lighting) information. Synopsis camera <1..2> ccu set <param> <value> Required <1..2> Specify the camera to control. Options auto_white_balance {on | off} Auto white balance setting (on or off). Auto white balance overrides red gain and blue gain manual settings.
- Page 69 Complete Manual for the AV Bridge 2x1 Presentation Switcher camera ccu scene Stores the current CCU scene to the specified camera, or recalls the specified ccu scene for the specified camera. Valid only if the specified camera supports CCU scenes.
- Page 70 Complete Manual for the AV Bridge 2x1 Presentation Switcher camera focus Changes the camera focus. Synopsis camera <1..2> focus {{ near [<speed>] | far [<speed>]} | {mode [auto | manual | get]} | stop } Required <1..2> Specify the camera to control.
- Page 71 Complete Manual for the AV Bridge 2x1 Presentation Switcher camera comm host Directory operations – get the IP address of the device at the specified input, add or delete a device. Synopsis camera <input> comm host { get | set <host> | unset } Options <input>...
- Page 72 Complete Manual for the AV Bridge 2x1 Presentation Switcher video program pip Get or set the state of the PIP. When not in a call, the PIP source is the HDMI input that is not currently selected; the main image is from the selected input.
- Page 73 Complete Manual for the AV Bridge 2x1 Presentation Switcher video mute Gets or sets the video mute status of the specified channel. When video is muted, the device sends a mute pattern such as blue or black video with an on-screen message stating that video mute is on. This can be desirable when preparing the room or when privacy is needed.
- Page 74 Complete Manual for the AV Bridge 2x1 Presentation Switcher trigger Turn an existing trigger on or off. This command has no effect if the specified trigger has not been defined. Note If the web interface's macro/trigger test mode is in use, this command is disabled.
- Page 75 Complete Manual for the AV Bridge 2x1 Presentation Switcher network settings get Returns the device's current network settings, including MAC addres, IP address, netmask, and gateway. Synopsis network settings get Example network settings get Name: eth0:WAN MAC Address: 00:04:a3:85:0a:ee IP Address: 10.30.240.187...
- Page 76 Complete Manual for the AV Bridge 2x1 Presentation Switcher system factory-reset Gets or sets the factory reset status. When the factory reset status is on, the system resets to factory defaults on reboot. Note Factory reset does not affect settings managed in the Dante Controller application.
- Page 77 Complete Manual for the AV Bridge 2x1 Presentation Switcher history Returns the most recently issued commands from the current Telnet session. Since many of the programs read user input a line at a time, the command history is used to keep track of these lines and recall historic information.
- Page 78 Complete Manual for the AV Bridge 2x1 Presentation Switcher Specifications USB Stream Video and audio; up to 1080p/60 resolution (Full HD) IP Stream RTSP or RTMP video and audio; up to 1080p/30 resolution HDMI Inputs Two HDMI inputs, video HDMI Output Video and audio;...
- Page 79 Complete Manual for the AV Bridge 2x1 Presentation Switcher Troubleshooting and Care If the equipment does not power up as expected, use this table to determine whether to call Vaddio Technical Support. Note If the equipment behaves in a way that suggests even a remote possibility of a bad cable, please try a known good cable with the same pin-out.
- Page 80 Complete Manual for the AV Bridge 2x1 Presentation Switcher Control Issues What is it doing? Possible causes Check and correct Swap button does not do The front panel is locked. This is normal. anything. Change the selected input from the web interface or unlock the front panel (User Interface page).
- Page 81 Note This operation does NOT reset Dante-related information. Use the Dante Controller application to manage Dante devices and Dante-related settings on the AV Bridge 2x1. Restoring Factory Defaults from the Front Panel Press and release the Reset button, then immediately press and hold the IP button for 15 seconds.
- Page 82 Complete Manual for the AV Bridge 2x1 Presentation Switcher Operation, Storage, and Care For smears or smudges on the product, wipe with a clean, soft cloth. Do not use any abrasive chemicals. Keep this device away from food and liquids.
- Page 83 Complete Manual for the AV Bridge 2x1 Presentation Switcher Glossary Acoustic echo cancellation. Audio processing that subtracts the far-end (speaker) audio from the sound that your microphone picks up. bandwidth Data transfer rate (bits per second) for the stream. In some cases, using a high bandwidth can slow down other network traffic.
- Page 84 SSL certificate A file used with HTTPS proving that a web page really originates from its purported source. Vaddio devices use self- signed SSL certificates. Since these are not issued by a recognized certificate authority, your browser will pop up security warnings the first time you try to browse to the device's web interface.
- Page 85 Audio from your site (near-end audio) in a conference call. UVC drivers (Universal Video Class) Standard USB video drivers used by Vaddio cameras. They're the reason your computer doesn't have to stop and download a driver when you connect your new Vaddio USB camera to it.
- Page 86 This device must accept any interference including interference that may cause undesired operation of the device. Changes or modifications not expressly approved by Vaddio can affect emission compliance and could void the user’s authority to operate this equipment. ICES-003 Compliance This digital apparatus does not exceed the Class A limits for radio noise emissions from digital apparatus set out in the Radio Interference Regulations of the Canadian Department of Communications. ...
- Page 87 Complete Manual for the AV Bridge 2x1 Presentation Switcher European Compliance This product has been evaluated for Electromagnetic Compatibility under the EMC Directive for Emissions and Immunity and meets the requirements for a Class A digital device. In a domestic environment this product may cause radio interference in which case the user may be required to take adequate measures. ...
- Page 88 Complete Manual for the AV Bridge 2x1 Presentation Switcher Photo Credits This guide may include some or all of these photos. European Space Agency (ESA) astronaut Samantha Cristoforetti, a Flight Engineer with Expedition 42, photographs the Earth through a window in the Cupola on the International Space Station By NASA - https://blogs.nasa.gov/ISS_Science_Blog/2015/03/06/women-in-space-part-two-whats-...
- Page 89 RS-232 pin-out 8 camera home command 59 Index camera presets 50 cameras 38, 50 controlling 38, 50 capabilities 1, 74 accessories 2 CCU scenes 65 admin login 10 custom 65 default 10 recalling 65 admin password 13, 16 CCU settings 62-64 changing 16 chroma setting 63-64 AGC (automatic gain control) 26...
- Page 90 25, 51, 55 information, room 19 speakers 25, 51, 55 initial device set-up 9, 13-14 video 69 using Vaddio Deployment Tool 14 IP address 10-11, 18-19, 21 changing to static 19 network configuration 10, 18, 71 configuring 18 current 71...
- Page 91 Complete Manual for the AV Bridge Mini HD Audio/Video Encoder noise cancellation 26 rebooting 46, 71 NTP server 20 red gain 63-64 remote operation 48 resolution 33 operating environment 5, 78 IP streaming 33 operator 50-52 restoring a configuration 43-44 controls 50-52 restoring default settings 72, 77 RJ-45 connectors 5...
- Page 92 Complete Manual for the AV Bridge Mini HD Audio/Video Encoder USB 32, 48 streaming media player 48 Streaming page (web) 32 Vaddio Deployment Tool 10, 14 supported web browsers 10 check for the latest version 14 synchronizing audio with video 29...
- Page 93 ©2020 Legrand AV Inc. Vaddio is a registered trademark of Legrand AV Inc. Audinate®, the Audinate logo and Dante® are registered trademarks of Audinate Pty Ltd. All other brand names or marks are used for identification purposes and are trademarks of their respective owners. All patents are protected under existing designations.
Need help?
Do you have a question about the AV Bridge 2x1 and is the answer not in the manual?
Questions and answers