TESTO 400 Short Instructions
Universal iaq instrument
Hide thumbs
Also See for 400:
- Instruction manual (138 pages) ,
- Short instructions (22 pages) ,
- Instructions (2 pages)
Table of Contents
Advertisement
Quick Links
Advertisement
Table of Contents

Related Manuals for TESTO 400


Summary of Contents for TESTO 400
- Page 1 400 - Universal IAQ instrument Short instructions...
-
Page 2: Table Of Contents
Rear view ......................6 Probe connections ....................6 Commissioning ..................7 Mains unit/energy storage unit ................7 Switching the testo 400 on and off ..............7 Display – user interface ..................8 Using the product ................10 Overview of main menu ( )................ -
Page 3: About This Document
Pay particular attention to the safety instructions and warning advice in order to prevent injury and damage to the product. You will also find further information about your testo 400 universal IAQ instrument in the online instruction manual on the Testo website, www.testo,com, under the product-specific download. -
Page 4: Data Protection
4 Data protection 4 Data protection The testo 400 measuring instrument makes it possible to input and store personal data such as name, company, customer number, address, telephone number, e-mail address and website. Please be aware that your use of the functions offered here is entirely your own responsibility. -
Page 5: Product Description
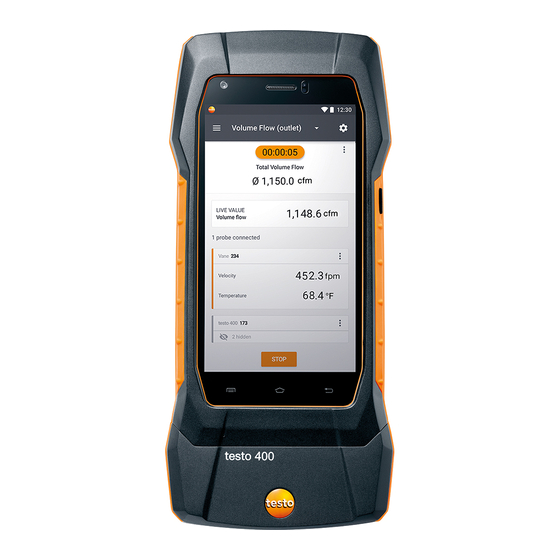
6 Product description 6 Product description Front view 1 On/Off and Standby button 2 User interface/Touchscreen (see Section 9.1) 3 Front camera 4 Connections for probes (see Section 7.3) -
Page 6: Rear View
6 Product description Rear view 1 Camera 2 Differential pressure measurement connections (+/- marking) 3 Magnets 4 Attachment point for carrying strap 5 USB port/mains connection CAUTION Make sure the pressure tube does not jump away from the connection socket. Risk of injury! - Ensure correct connection. -
Page 7: Commissioning
If the mains unit is connected, the measuring instrument is automatically powered via the mains unit. Only charge the energy storage unit at an ambient temperature of 0 to 45 °C. Switching the testo 400 on and off Current Action Function... -
Page 8: Display - User Interface
7 Commissioning Current Action Function status Instrument on Press and hold down the Choice: press [OK] to switch the button (> 1 sec) instrument off or press [Cancel] to cancel switch-off of the instrument. The tutorial can be executed again at any time in the main menu under Help and Information. - Page 9 7 Commissioning Edit reading display Further symbols on the user interface (without numbering) One level back Exit view Share report Search Favourite Delete Further information Display report Multiple selection...
-
Page 10: Using The Product
8 Using the product 8 Using the product Overview of main menu ( ) Menu Description Measuring List with various application-specific menus Customer Create, edit and delete customer and system information. Memory Call up, edit, send, export (different formats possible) and delete measurements that have been carried out. - Page 11 8 Using the product Menu Description Settings Instrument settings Regional settings WLAN & e-mail Measurement settings Company details Torch Display settings Restore factory settings Help and Information Aids Instrument information (serial number, app version, firmware version, update information) Tutorial Instruction manual Exclusion of liability Additional applications Additional applications...
-
Page 12: Overview Of Measurement Types ( )
Comfort – PMV/PPD (EN 7730 / ASHRAE 55) Discomfort – Draft rate Differential temperature (ΔT) Differential pressure (ΔP) You will also find further information about the individual measurement types in the online instruction manual on the Testo website, www.testo,com, under the product-specific download. -
Page 13: Overview - Editing The Reading Display
These changes are saved for the next measurement. Zero pressure sensor Once the testo 400 has been brought into the operating position for a differential pressure measurement, the sensor should be zeroed against ambient air. -
Page 14: Getting The Readings In 5 Steps
8 Using the product Getting the readings in 5 steps Switch instrument on: Press button > 1 sec. Connect probe via cable or Bluetooth ® Place probe in the application. Start measurement and read off measuring values. - Page 15 8 Using the product Save and send readings You will also find further information about your testo 400 universal IAQ instrument in the online instruction manual on the Testo website, www.testo,com, under the product-specific download.
-
Page 16: Software
9 Software 9 Software The testo 400 has a USB port, via which the measuring instrument can be connected to the PC. Knowledge of Windows ® operating systems is required to work with the software. Purpose The testo DataControl measurement data management and analysis software... -
Page 17: First Steps
9 Software First steps Installing the software/driver 9.3.1 Insert the program CD into the CD-ROM drive of the computer. Download the program (www.testo.com/download-center) and unpack the zip file using a suitable compression tool. TestoDataControlPCsetup.exe Launch the file. Follow the instructions of the installation wizard. -
Page 18: Using The Product
Operation of the software is based on the same functional principle as the instrument firmware for the testo 400. You will also find further information about testo DataControl in the online instruction manual on the Testo website, www.testo,com, under the product-specific download. -
Page 19: Technical Data
10 Technical data General Feature Value Probe connections - 2x type K thermocouple - 2x Testo Universal Connector (TUC) for connecting cable probes to the corresponding plug - 1x differential pressure - 1x absolute pressure (integrated) - 4x Bluetooth probe or testo Smart Probe ®... -
Page 20: Product-Specific Approvals
10.1 Product-specific approvals Please find the current approvals in the attached Approval and Certification document(s). 10.2 Contact and support If you have any questions or need further information, please contact your dealer or Testo Customer Service. For contact details, please visit www.testo.com/service-contact. - Page 21 Testo SE & Co. KGaA Testo-Strasse 1 D-79853 Lenzkirch Germany Phone: +49 7653 681-0 Fax: +49 7653 681-7699 E-mail: info@testo.de www.testo.com 0971 4011 en 02...
Need help?
Do you have a question about the 400 and is the answer not in the manual?
Questions and answers