Advertisement
Advertisement
Table of Contents

Subscribe to Our Youtube Channel
Related Manuals for Goldair PLATINUM GPCV330


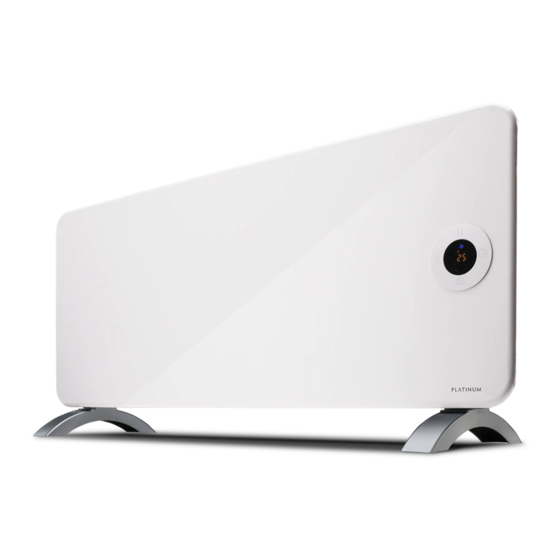
Summary of Contents for Goldair PLATINUM GPCV330
- Page 2 General Care and Safety Guide YOUR SAFETY IS IMPORTANT TO US. PLEASE ENSURE YOU TAKE NOTE OF THE INSTRUCTIONS AND WARNINGS OUTLINED IN THIS MANUAL. CAUTION: In order to avoid a hazard due to inadvertent resetting of the thermal cut-out, this appliance must not be supplied through an external switching device, such as a timer, or connected to a circuit that is regularly switched on and off by the utility.
- Page 3 General Care and Safety Guide • Never use the appliance to dry clothes. • Do not connect the appliance to mains supply until completely assembled and adjusted. • Ensure hands are dry before handling the plug or main unit. • Ensure heater is on a flat, stable, heat-resistant surface.
-
Page 4: Assembly And Installation
Components HEAT OUTLET CONTROL PANEL (BACK) MAIN POWER SWITCH AIR INLET SCREW PACK 8 x SCREWS including 2 x ONE WAY SCREWS TO ATTACH FEET WALL MOUNTING 6 x LONG SCREWS 4 x WALL PLUGS FEET x 2 Assembly and Installation Before using this appliance, it must either be wall mounted or have the feet fitted. - Page 5 The screw pack to attach the feet to your appliance will be taped to either one of the feet for your appliance, or taped to the plug. NOTE: Your Goldair Panel Heater should be installed with at least 100mm clearance from the floor and any other surrounding parts including other appliances, side walls and soft furnishings.
-
Page 6: Operating Your Heater
Operating Your Heater Always choose a safe location for the heater, keeping in mind the safety precautions outlined. Ensure all packaging has been removed from the unit before use. Please follow the below instructions. WARNING: In order to avoid overheating or fire, do not cover the heater. WARNING: Keep all objects at least 1 metre from the front and 150mm from the sides of the appliance. -
Page 7: Operation
Operating Your Heater HEATER CONTROL PANEL 1 – Display 2 – Temperature 3 – Heat Setting 4 – Timer 5 – Power Ensure the power switch is in the OFF position before plugging unit in. WARNING: Do not use this heater until it is fully assembled according to the free standing or wall mounting instructions within this manual. - Page 8 Download Goldair mobile APP • Open the APP Store or Google Play on your mobile phone. • Open “Search” and enter “Goldair" • Click “GET” and begin to download and install. Once downloaded to your phone open the APP Tap REGISTER near the bottom of the screen.
- Page 9 WiFi – Downloading and Setting up APP • Enter the verification code from your text message • Create a password. • Then tap confirm. If you haven’t received a verification code via text message. Tap the resend button and when the verification code is received follow above steps.
- Page 10 Pairing APP to Heater On your phone tap “ADD DEVICE” to connect to the heater. Press the Heat Setting button for 5 seconds until the green WiFi symbol starts flashing. Heat Setting Button WiFi Symbol Tap ‘Next Step” on the phone.
- Page 11 Pairing APP to Heater Choose/confirm which WiFi to connect to. Note: your phone may pick up other WiFi signals (e.g. neighbours) so you will need to choose. XXXXXX Enter your WiFi password The phone will then connect to the heater. Ensure you have a good strong signal from your WiFi router.
- Page 12 Tap “Confirm” to complete the addition. DEVICE SHARING CANCELLATION Open the “GOLDAIR APP” and tap the 3 dots in the top right of the screen. Tap “Add Sharing” and delete the phone numbers of shared members to cancel the device sharing.
-
Page 13: Temperature Setting
Open the “GOLDAIR" APP to select the heater (when using one mobile phone to control multiple heaters, you need to select the heater to be operated). -
Page 14: Heat Settings
Operating your Heater from the APP HEAT SETTINGS Press the HIGH/LOW button to switch between high and low heat settings. The set level will be shown on the bottom of the APP. It will also show on the heater display as ‘Mode’ CHILD LOCK Tap the padlock icon to display the closed padlock indicating that the child lock is active. - Page 15 Adding Additional Heaters From the “Devices” page of the APP press “Add Device” and follow the steps below to pair the new heater. Choose/confirm which WiFi to connect to. Note: your phone may pick up other WiFi signals (eg. neighbours) so you will need to choose. XXXXXX Enter your WiFi password...
- Page 16 Adding Additional Heaters The phone will then connect to the heater. Ensure you have a good strong signal from your WiFi router. Note: The WiFi indicator on the heater screen may disappear during this pairing process. Once complete the screen showing the device has been successfully added will appear.
-
Page 17: Safety Device
Model No: GPCV330 Supply: 220-240VAC 50/60Hz Wattage: 2000W SUPPORT AND TECHNICAL ADVICE Goldair – New Zealand Goldair – Australia Monday – Friday 8am-5pm Monday – Friday 8am-5pm Phone +64 (0)9 917 4000 Phone +61 (0)3 9365 5100 Phone 0800 232 633 Phone 1300 465 324 info@cdb.co.nz... -
Page 18: Three Year Warranty
In non-domestic use Goldair limits the voluntary warranty to three months. Goldair undertake to repair or replace this product at no charge if found to be defective due to a manufacturing fault during the warranty period.
Need help?
Do you have a question about the PLATINUM GPCV330 and is the answer not in the manual?
Questions and answers