Advertisement
Quick Links
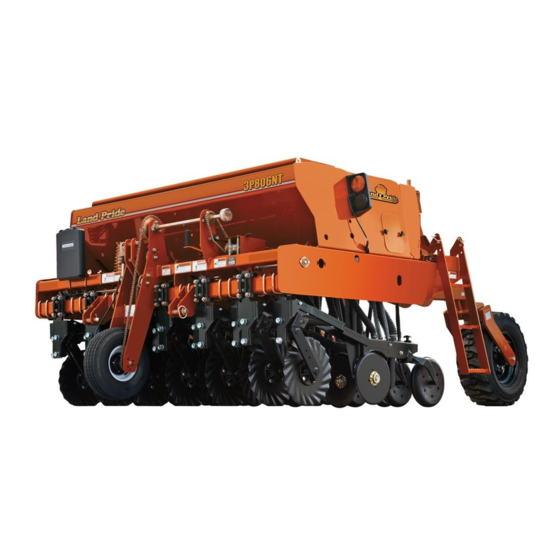
Compact Drill
3P806NT
Table of Contents
Read the Operator's Manual entirely. When you see this symbol,
the subsequent instructions and warnings are serious - follow
without exception. Your life and the lives of others depend on it!
Cover photo may show optional equipment not supplied
with standard unit.
For an Operator's Manual and Decal Kit in another
language, please see your Land Pride dealer.
32508
313-520M
Operator Manual
Printed 2019-01-23
Advertisement

Subscribe to Our Youtube Channel
Related Manuals for Land Pride 3P806NT


Summary of Contents for Land Pride 3P806NT
- Page 1 Your life and the lives of others depend on it! Cover photo may show optional equipment not supplied with standard unit. For an Operator’s Manual and Decal Kit in another language, please see your Land Pride dealer. Printed 2019-01-23...
- Page 2 Machine Identification Record your machine details in the log below. If you replace this manual, be sure to transfer this information to the new manual. If you or the dealer have added options not originally ordered with the machine, or removed options that were originally ordered, the weights and measurements are no longer accurate for your machine.
- Page 3 Land Pride assumes no responsibility for errors or omissions. Neither is any liability assumed for damages resulting from the use of the information contained herein. Land Pride reserves the right to revise and improve its products as it sees fit. This publication describes the state of this product at the time of its publication, and may not reflect the product in the future.
- Page 4 Parts you to available dealers for Manual for this equipment. Download the Land Pride products. Refer to appropriate App on your smart phone, open Parts Manual QR Locator on the App, point your phone on the QR code and this page for detailed take a picture.
- Page 5 Be Familiar with Safety Decals Read and understand “Safety Decals” on page 5, thoroughly. Read all instructions noted on the decals. Keep decals clean. Replace damaged, faded and illegible decals. 2019-01-23 3P806NT 313-520M...
- Page 6 Agricultural chemicals can be dangerous. Improper use can seriously injure persons, animals, plants, soil and property. Do not use liquid seed treatments with the 3P806NT. Read and follow chemical manufacturer’s instructions. Wear protective clothing. Handle all chemicals with care.
- Page 7 When inflating tires, use a clip-on chuck and extension hose long enough for you to stand to one side–not in front of or over tire assembly. Use a safety cage if available. When removing and installing wheels, use wheel-handling equipment adequate for weight involved. 2019-01-23 3P806NT 313-520M...
- Page 8 Do not stand between the moving tractor and drill during hitching. Keep hands, feet and clothing away from power-driven parts. Wear snug-fitting clothing to avoid entanglement with moving parts. Make sure all persons are clear of working area. 3P806NT 313-520M 2019-01-23...
- Page 9 Keep lights in operating condition. Keep all safety decals clean and legible. Replace all damaged or missing decals. Order new decals from your Land Pride dealer. Refer to this section for proper decal placement. When ordering new parts or components, also request corresponding safety decals.
- Page 10 Do NOT exceed 20 mph maximum transport speed. Loss of vehicle control and/or machine damage can result. 818-337C Rev. B On front face of upper front cross tube, left of gauge wheel; 1 total 32546 See “Transporting” on page 22. 3P806NT 313-520M 2019-01-23...
- Page 11 838-102C On left side frame at ladder; 2 total 32546 See “Loading Materials” on page 24. Warning: Hand Crush 838-611C 32760 On axle tube; 2 on axle tube 2, 3, 4, or 5 total 2019-01-23 3P806NT 313-520M...
- Page 12 Danger: Moving Chain (Option) 32763 818-518C CAUTION MOVING CHAIN HAZARD To prevent serious injury from moving chain: DO NOT operate with enclosure missing 818-518C REV. B Dual Seed: On outside of box end wall, under both covers; 2 total 3P806NT 313-520M 2019-01-23...
- Page 13 Safely support and secure implement before repairs are made. 818-719C WARNING: Cancer and Reproductive Harm - www.P65Warnings.ca.gov On front face of upper front cross tube, left of center; 1 total 32546 See “Important Safety Information” on page 1. 2019-01-23 3P806NT 313-520M...
- Page 14 On rim of each lift assist wheel; 2 total 32546 Caution: Transport Locks 32546 848-339C On top face of caster cross tube; 2 total NOTICE: Petroleum Products 858-679C On left-hand ends of seed boxes; 28214 1 per seed box 3P806NT 313-520M 2019-01-23...
- Page 15 Table of Contents Introduction Introduction Land Pride welcomes you to its growing family of new product owners. Your Semi-Mounted 8-Foot No-Till Drill has been designed with care and built by skilled workers using quality materials. Proper setup, maintenance, and safe operating practices will help you get years of satisfactory use from the machine.
- Page 16 32546 Serial Number Location Serial Number: __________________________ Your Land Pride dealer wants you to be satisfied with your new machine. If you do not understand any part of this manual or are not satisfied with the service received, please take the following actions.
- Page 17 5. Check that all safety decals and reflectors are correctly located and legible. Replace if damaged. See “Safety Decals” on page 5. 6. Inflate tires to pressure recommended and tighten wheel bolts as specified. See “Appendix A - Reference Information” on page 58. 2019-01-23 3P806NT 313-520M...
- Page 18 Table of Contents Preparation and Setup Hitching Tractor to Drill The 3P806NT is a 3-Point Category II hitch implement, employed in 2-point Semi-Mounted mode. Note: The top link of the tractor 3-point is not used for transport or field operation. Full 3-point mode is incompatible with lift-assist.
- Page 19 Hydraulic Hose Hookup Connect hydraulic system to tractor before lifting the drill. High Pressure Fluid Hazard: The hydraulic system of the 3P806NT drill has one Escaping fluid under pressure can have sufficient pressure to single-acting lift-assist cylinder. The cylinder raises the penetrate the skin.
- Page 20 This is the factory configuration. Note: The drive wheel axle height may need to be adjusted due to ground conditions. See page 32. 14. Check level of frame front-to-rear. If not level, adjust the rear height with the stroke control spacers. 3P806NT 313-520M 2019-01-23...
- Page 21 1.25 1.50 1.75 2.00 2.25 2.50 2.75 2.75 3.00 3.25 3.25 3.50 3.75 3.75 4.00 4.25 4.50 4.75 5.00 5.25 5.50 6.50 28359 Figure 6 32057 Figure 7 28359 Stroke Control Spacers Stroke Control Spacer Combinations 2019-01-23 3P806NT 313-520M...
- Page 22 To avoid serious injury or death: Falling hazard: Watch your step when climbing ladder or walking on walkboard. Watch your step when walking on drill ladder and walkboard. 838-102C Falling from drill could cause severe injury or death. 3P806NT 313-520M 2019-01-23...
- Page 23 Secure with pin. 8. Re-start tractor. Slowly move the lift circuit lever to Figure 9 32057 Retract, allowing the cylinder to settle on the lock Stroke Control Spacers (and relieving pressure from the hydraulic system). 2019-01-23 3P806NT 313-520M...
- Page 24 2. Lower the tractor 3-point lift arms to the stop, block or reference indicator established at step 14 on page 16. 3. Move lift-assist circuit lever to Float. 4. If about to begin planting, set tractor 3-point hitch to Float (and not Draft or Depth Control mode). 3P806NT 313-520M 2019-01-23...
- Page 25 3. Lift lock pins out of lock plate holes and turn 90 degrees to hold in the unlock position. Figure 10 32058 Caster Pivot Locked 2019-01-23 3P806NT 313-520M...
- Page 26 Do not transport with seed loaded in Native Grass box. Heavier mix components settle to the bottom, which can prevent drive system from operating, and results in irregular seed rate and population distribution. 3P806NT 313-520M 2019-01-23...
- Page 27 5. Raise drill (page 19). 6. Carefully tow drill from trailer. 7. Remove caster pivot swivel locks (if engaged, Land Pride recommends locking casters prior to loading for page 21). trailer transport, and leaving them locked for transport and 8. Unless arriving at planting ground, install lift-assist unloading.
- Page 28 5. To reduce wear, remove main shaft drive chains for 4. Load fertilizer evenly into fertilizer compartment. main seed boxes. 5. To reduce wear, remove drive chains for seed boxes not used. Loading Dual Seed Box See “Main Seed Box Loading.” 3P806NT 313-520M 2019-01-23...
- Page 29 Manual-Pak™ enclosure at front center of drill). Rate setting controls are different for each box, but inde- All chart rates, for all boxes, are approximate. Land Pride pendent for each box. Some boxes have more than one strongly recommends calibration of each box to the control.
- Page 30 2. Lower drill and plant. Acremeter counts shaft rotations, calculates acres or hectares, and adds to the running grand total. Figure 13 27378 Electronic Acremeter 3. During planting (drill lowered and moving forward), the display blanks (goes dormant), but area tally continues. 3P806NT 313-520M 2019-01-23...
- Page 31 4. Remove pins from lower 3-point links on drill (not 12. Pull forward, lower drill, set both hitch and lift-assist from the front of any hitch extension in use). circuit to Float, and begin seeding. 5. Disconnect lighting harness and any other electrical connections. 2019-01-23 3P806NT 313-520M...
- Page 32 7. Set lift-assist circuit to Float, to relieve all pressure. 19. Cover with a tarp if stored outside. 8. Remove pins from lower 3-point links at tractor (any hitch extension in use may be left on drill). 3P806NT 313-520M 2019-01-23...
- Page 33 Dual Box Seed rate is controlled by adjustments for: provide adjustments for optimal field results. • Right Drive Type gearbox lever The 3P806NT has double-disc 06 Series openers with • Seed Rate Handle at box (drill rear) depth-controlling press wheels mounted on floating •...
-
Page 34: Figure 1
Instead, increase coulter down pressure by adding weight to drill. See “Coulter Down Pressure” on page 31. Normal practice is to set coulter depth approximately 1 inch deeper than desired seed depth. Figure 16 18509 Coulter Depth Adjustment 3P806NT 313-520M 2019-01-23... -
Page 35: Refer To Figure
Drill w/Small Seed 170 lbs (77 kg) 259 lbs (118 kg) 3P806NT configurations typically are too light to reach Fert. & Small Seed 183 lbs (83 kg) 273 lbs (124 kg) the factory down-force of 400 lbs at all rows. The table at NG &... - Page 36 The kit includes two brackets. Each bracket accepts up to five 100 pound (45 kg) weight. The following table shows the additional force per row that the kit can provide. Weights Additional Force per Row Added Pounds Kilograms Figure 19 28364 Adding Weights 32337C 3P806NT 313-520M 2019-01-23...
-
Page 37: Figure 3
] supported for use with the 3P806NT drill; coulter is not part of opener assembly and is not shown) From front to back, a Land Pride 06 Series row unit can include the following capabilities (some optional): 1. Disc Blades: standard, 2 per row unit Double disc blades open a furrow, creating the seed bed. -
Page 38: Figure 6
3. To reduce the spacing between the discs (the normal case), move one spacer washer from the inside to the outside of the disc. Figure 22 26385 4. Re-assemble and check disc contact. Adjusting Disc Spacers 3P806NT 313-520M 2019-01-23... - Page 39 Refer to Figure 24 To adjust scrapers, loosen inch bolt and move scraper as needed. The standard scraper is shown. Optional spring-loaded carbide scrapers are available (see page 53). They require no adjustment. Figure 24 18647 Disc Scraper Adjustment 2019-01-23 3P806NT 313-520M...
- Page 40 - this task can be performed with discs mounted) ® To lock up Seed-Lok wheels: 1. Pull catch wire aside 2. Pull firming-wheel arm up and release wire to catch arm. Figure 26 27122 ® Seed-Lok Lock-Up 3P806NT 313-520M 2019-01-23...
-
Page 41: Opener Depth (Press Wheel Height)
To adjust, first raise drill slightly, then lift and slide T-handles on top of openers. • For shallower seeding, slide T-handles toward drill. Figure 27 15659 • For deeper seeding, slide T-handles away from drill. Press Wheel Adjustment 2019-01-23 3P806NT 313-520M... - Page 42 Check tire size and air pressure, page 58. Build up of seed treatment in feed Clean out seed treatment from feed cups. cup. Incorrect rate adjustment. Check gearbox, sprocket, seed-rate handle and seed door settings. Perform calibration if not already done. 3P806NT 313-520M 2019-01-23...
- Page 43 Coulters set too deep or spring force See page 30 for correct adjustment. too deep too high Incorrect press wheel adjustment. Set press wheels to a shallower depth. Coulters and openers Drill at a slight angle to rows. plugging in no-till conditions 2019-01-23 3P806NT 313-520M...
- Page 44 Check that acremeter is for your drill. Activate display. Lower left corner must be “656.2 revs/ac” or “1621.5 revs/ha”. Contact dealer if otherwise. Acremeter battery exhausted Replace acremeter (unit is sealed and bat- tery is not replaceable). See page 52. 3P806NT 313-520M 2019-01-23...
- Page 45 5. Inspect hydraulic hoses for cuts, cracks and aging. Check fittings for evidence of leaks. 6. Replace any worn, damaged or illegible safety decals. Order new decals from your Land Pride dealer. See “Safety Decals” on page 5. 2019-01-23 3P806NT 313-520M...
- Page 46 1. Loosen the jam nut 2. Turn the bolt clockwise until the spring is fully compressed. 3. Back the bolt out in. (6 mm). 4. Tighten the jam nut. Figure 29 32059 Rear Caster Adjustment Bolts (left side shown) 3P806NT 313-520M 2019-01-23...
- Page 47 Native Grass Box Open Water wash-out is not recommended for the Native Grass box, particularly if seed lubricants have been used. Water may cause build-up of solidified residue. Filler material used in native grass mixes can also present problems. 2019-01-23 3P806NT 313-520M...
- Page 48 Coulter Disc Replacement Replace 17 in. (43.2 cm) coulter blades when adjusting drill level becomes difficult. Two signs that blade replace- ment is indicated are: • Coulter height adjustments drill-wide are using the lowest axle hole (page 30). 3P806NT 313-520M 2019-01-23...
- Page 49 “T” top resting on top of bracket. If a seed firmer is also installed, it may be necessary to shorten the flap. Figure 36 31047 Seed Tube Flap 2019-01-23 3P806NT 313-520M...
- Page 50 Moving the eyebolt higher decreases height. 5. Tighten the jam nut. 6. Lower the drill and check the setting. The factory setting for eyebolt reveal is: in. (88.9 mm) Figure 37 32060 Lift-Assist Eyebolt 3P806NT 313-520M 2019-01-23...
- Page 51 8. Set circuit to Neutral and shut off tractor. 9. Tighten JIC fitting to 18-20 ft-lbs (24-27 N-m). 10. With cylinder bled and tightened, raise drill and re-install removed lock channel or spacers. 2019-01-23 3P806NT 313-520M...
- Page 52 Lift-Assist Arm Pivot One zerk each pivot; 4 total Type of Lubrication: Grease Quantity = Until grease emerges 32068 Caster Pivots One zerk each pivot; 2 total Type of Lubrication: Grease Quantity = Until grease emerges 32061 3P806NT 313-520M 2019-01-23...
- Page 53 Felt Barrier Seals 16381 1 seal at each shaft end, 2 total Type of Lubrication: Oil Quantity: Soak seal Note: If Small Seeds is also installed, access these seals from below or through the end wall gaps. 2019-01-23 3P806NT 313-520M...
- Page 54 See “Chain Routing” starting on page 61 for locations all chains by drill configuration. 12227 Type of Lubrication: Chain Lube Quantity = Coat thoroughly. Coulter Hub Bearings Seasonal One zerk per coulter; 15 total Type of Lubrication: Grease Quantity = Until resistance is felt 13879 3P806NT 313-520M 2019-01-23...
- Page 55 Spread a small skim coat of anaerobic sealant ® (Loctite 525 or equivalent) to gear case mating Use sparingly. Excess sealant may squeeze off the intended surfaces before bolting them back together. surface and lock bearings or gears. 2019-01-23 3P806NT 313-520M...
- Page 56 Options Acre/Hectare Meter A digital acremeter is standard on 3P806NT drills, programmed for the revs/area of the 3P806NT, and in the units of measure typical for the destination. Order one of the following if you prefer alternate units of measure.
- Page 57 Box. Box capacity is one bushel per foot of box width. Dual Seed may be factory or field installed. Consult your Land Pride dealer for ordering information. Note: Dual Seed is not compatible with Native Grass or Fertilizer Option (or kits).
- Page 58 8 bushel box with Series II meters, Series II agitator, and seed tubes. Consult your Land Pride dealer for ordering information. Note: Native Grass is not compatible with the Fertilizer Option (or kits). Native Grass is compatible with an existing, concurrent, or subsequent installation of the Small Seeds attachment.
- Page 59 Number RMVBL SMALL SEED BOX PARTITION 123-409D 17028 Seed Firmers The standard 3P806NT drill includes seed flaps. Only one type of optional seed firmer may be installed at the same time. Order one firmer kit per opener. ® Seed-Lok Seed Firmer...
- Page 60 The standard attachment includes a drive system, 1.9 bushel box (67 liter), meters and seed tubes. Consult your Land Pride dealer for ordering information. Note: The Small Seeds attachment is compatible with an existing, concurrently installed, or subsequent installation of Dual Seed, Fertilizer or Native Grass.
- Page 61 “Weight Bracket Installation” on page 83, and “Drill Weight Adjustment” on page 32. 28226 Second Ladder The second ladder can installed on the opposite end of the walkboard from the standard ladder. Description Part Number L ADDER ASSEMBLY 119-020A 68622 2019-01-23 3P806NT 313-520M...
- Page 62 414 kPa the tire. Tire warranty information is found online at 50 psi the manufacturer’s websites listed below. For assis- 5.70-8 8-Ply 345 kPa tance or information, contact your nearest Authorized Farm Tire Retailer. ManufacturerWebsite Firestonewww.firestoneag.com Gleasonwww.gleasonwheel.com Titanwww.titan-intl.com 3P806NT 313-520M 2019-01-23...
- Page 63 = nominal thread diameter in mm x thread pitch ⁄ 1180 2640 1950 4290 3160 d. ft-lb = foot pounds ⁄ 1330 2970 2190 4820 3560 25199m 25199 Torque tolerance + 0%, -15% of torquing values. Unless otherwise specified use torque values listed above. 2019-01-23 3P806NT 313-520M...
- Page 64 Table of Contents Appendix A - Reference Information Hydraulic Diagram 32056 3P806NT 313-520M 2019-01-23...
- Page 65 Ground Drive to Gearbox This assembly drives the Main Seed Box (via the gearbox), and if installed, all optional attachments. See “Gearbox to Main Seed Box Meters” on page 62 for gearbox output chain routing. 188P 28339 2019-01-23 3P806NT 313-520M...
- Page 66 Table of Contents Appendix A - Reference Information Gearbox to Main Seed Box Meters See “Ground Drive to Gearbox” on page 61 for gearbox input. Main box meters are the only meters coupled to the left gearbox output. 28412 3P806NT 313-520M 2019-01-23...
- Page 67 Table of Contents Appendix A - Reference Information Gearbox to Dual Seed Box Meters (Option) See “Ground Drive to Gearbox” on page 61 for gearbox input. 31626 2019-01-23 3P806NT 313-520M...
- Page 68 14T through 23T from stor- age tower (ships with 17T, shown on this page) Gearbox Output Sprocket: Standard drill: 19T w/ Rate Reduction kit: 12T N. G. Jackshaft Input Sprocket: Standard drill: 17T w/ Rate Reduction kit: 22T 29340 3P806NT 313-520M 2019-01-23...
- Page 69 Table of Contents Appendix A - Reference Information Main Seed Box Agitator (Option) No Fertilizer or Small Seeds installed. 28336 Agitator and Fertilizer Drive (Options) No Small Seeds installed. See page 67 for Fertilizer Box drive. 28335 2019-01-23 3P806NT 313-520M...
- Page 70 See below for Native Grass configuration. See page 69 for Small Seeds Box drive 28351 Agitator and Small Seeds Drive w/Native Grass (Options) No Fertilizer installed. See above if Native Grass not installed. See page 69 for Small Seeds Box drive 28337 3P806NT 313-520M 2019-01-23...
- Page 71 Table of Contents Appendix A - Reference Information Fertilizer Drive (Option) No Main Seed Box Agitator installed. See below for Fertilizer Box drive 28338 Fertilizer Box Drive (Option) See page 68 if Small Seeds also installed. 28345 2019-01-23 3P806NT 313-520M...
- Page 72 Small Seeds Drive (Option) See above if Fertilizer is also installed. See page 66 if Main Box Agitator is also installed, with or without Native Grass installed. See next diagram for Small Seeds Box drive details. 28356 3P806NT 313-520M 2019-01-23...
- Page 73 See page 66, page 68 or page 69 for Accessory Jackshaft to Small Seeds chain detail. Table 1: Accessory to Small Seeds chain: 122P If Small Seeds only Option 214P if Native Grass installed (see page 70 if Fertilizer installed) 28344 2019-01-23 3P806NT 313-520M...
- Page 74 Table of Contents Appendix A - Reference Information Small Seeds Box Drive with Fertilizer (Option) When Fertilizer is also installed, Small Seeds Jackshaft is driven from Fertilizer jackshaft. If Fertilizer is not also installed, see page 69. 13742 3P806NT 313-520M 2019-01-23...
- Page 75 27-39 37-53 Unload Truck The 3P806NT drill is delivered by flatbed truck. When coordinating the unload with the Great Plains driver, plan to position the partially assembled drill at a spot with: • at least 10 ft. (3 m) clearance behind the press wheels, •...
- Page 76 Orient the wheels with the valve stems to the outside (which is toward the inside if the caster frames are reversed, as in the figure). Secure with bolts and lock washers Figure 43 32117 Mount Wheel 3P806NT 313-520M 2019-01-23...
- Page 77 500-064D WASHER - SAFETY CHAIN SA 803-031C NUT HEX 1-8 PLT 804-027C WASHER LOCK SPRING 1 PLT At the threaded end of the pivot pin , add a flat washer , lock washer and nut . Tighten nut to Grade 2 torque. 2019-01-23 3P806NT 313-520M...
- Page 78 . Push up inside lock tube. Complete with and bolt Install Caster Zerks 15. Select one: Figure 46 32119 800-001C GREASE ZERK STRAIGHT 1/4-28 Caster Assembled Install zerk in shaft at end of pivot arm tube. 16. Repeat all steps for other caster. 3P806NT 313-520M 2019-01-23...
- Page 79 151-172H82 LIFT ASSIST BOLT ON MOUNT 20. Select ten each: 802-055C HHCS 5/8-11X2 GR5 804-022C WASHER LOCK SPRING 5/8 PLT 803-021C NUT HEX 5/8-11 PLT Attach lift assist bolt on mount to frame mount weldment using bolts, washers and nuts. 2019-01-23 3P806NT 313-520M...
- Page 80 26. Repeat step 22 through step 24 for the upper arms and upper holes. Install Arm Zerks 27. Select four: Figure 49 32116 800-001C GREASE ZERK STRAIGHT 1/4-28 Install one zerk in middle of top and bottom Parallel Arm Parts cross bar of each parallel arm. 3P806NT 313-520M 2019-01-23...
- Page 81 JIC (Joint Industry Conference, 37 flare) or NPT (National Pipe Thread, tapered thread) fittings. Avoid bleeding at: ORB (O-Ring Boss) Never bleed pressurized lines at: QD (Quick Disconnect) fittings. See “Bleeding Hydraulics” on page 47. Figure 51 32056 Lift-Assist Cylinder Bleed 2019-01-23 3P806NT 313-520M...
- Page 82 38. Perform a side to side level check, and make any adjustment required, per “Eyebolt Adjustment” on page 46. Figure 52 32058 Stroke Control Spacers 3P806NT 313-520M 2019-01-23...
- Page 83 . Place it onto the outlet end of the hose , up against the ribs. Slide the outlet end of the hose fully onto the small seeds tube inlet at the rear row unit opening . Move the clamp to halfway onto the hose neck. 2019-01-23 3P806NT 313-520M...
- Page 84 804-009C WASHER LOCK SPRING 5/16 PLT 803-008C NUT HEX 5/16-18 PLT Orient the reflector upright, and red/orange reflective side to rear. Secure mount to lift-assist pivot with bolts , lock washers and nuts Figure 54 32531 SMV Reflector 3P806NT 313-520M 2019-01-23...
- Page 85 If a Seed-Lok is present (not shown), secure the ® scraper assembly to the Seed-Lok , using a threaded ® hole present in the Seed-Lok . The hex nut is unused. 46. Re-mount the removed disc blade. 2019-01-23 3P806NT 313-520M...
- Page 86 In this case, a hitch extension kit (page 54) is available. Great Plains CPH, PFH or SSH accessory hitches are not compatible with the 3P806NT. Mount the extension on the drill before hitching to the tractor.
- Page 87 8. Repeat step 1 through step 6 for the right side of the drill. See “Drill Weight Adjustment” on page 32 for weight selection. 2019-01-23 3P806NT 313-520M...
-
Page 88: Warning
K7093, spring ........81 fertilizer ........44 down force, coulter ......31 main box ........43 down pressure, opener .......35 Land Pride .......... 12 meters ......... 24 dual seed ..........53 latches, fertilizer clean-out ....44 Native Grass ....... 43 LCD, acremeter ........27 small seeds ......... - Page 89 ......59 oversize tires ........82 seed flap ..........45 troubleshooting ......38 owners manual ........11 seed hose ...........79 weights ........23 seed loading ........24 weights effect ......32 seed lubricant ........55 parallel arm ........76 T-handle ........30 3P806NT 313-520M 2019-01-23...
- Page 90 807-175C, spring ....... 74 3-point ..........82 810-242C, spacers ...... 17 U.S. customary ........52 3-point operation.........82 811-065C, elbow ........ 77 3P806NT ........11 811-856C, coupler ......15 W clip ..........35 30 kph ...........3 815-200C, hub ........72 WARNING, defined ......1 313-520M, manual......11...
- Page 91 90 days for commercial or rental purposes. This Warranty is limited to the replacement of any defective part by Land Pride and the installation by the dealer of any such replacement part. Land Pride reserves the right to inspect any equipment or part which are claimed to have been defective in material or workmanship.
- Page 92 Table of Contents Corporate Office: P.O. Box 5060 Salina, Kansas 67402-5060 USA www.landpride.com...
Need help?
Do you have a question about the 3P806NT and is the answer not in the manual?
Questions and answers