Table of Contents
Advertisement
Available languages
Available languages
Quick Links
Advertisement
Table of Contents

Related Manuals for Look RSP


Summary of Contents for Look RSP
- Page 1 NUAL...
- Page 2 NOTICE D’INSTRUCTIONS 2 - 7 MOUNTING INSTRUCTIONS 8 - 13 ISTRUZIONI DI MONTAGGIO 14 - 19 MANUAL DE MONTAJE 20 - 25 MONTAGE HANDLEIDING 26 - 31 MONTAGEANLEITUNG 32 - 37...
-
Page 3: Presentation Du Produit
été coupé trop court, lors de tests de vélos ou lors de la revente. Comme la grande majorité des produits LOOK, il est identiques à ceux fournis aux grandes Il existe 2 types de RSP : équipes professionnelles, et est contrôlés durant tout son cycle de fabrication pour RSP Route : vous apporter entière satisfaction. - Page 4 MONTAgE DE LA SELLE SUR LA TIgE DE SELLE RSP ROUTE 1 - Positionner le COULISSEAU (4)sur la tête Fig 1 de TIGE DE SELLE (8). 2 - Poser le CHARIOT INFERIEUR (3)sur l’ensemble COULISSEAU+TIGE DE SELLE. 3 - Placer le CHARIOT SUPERIEUR (2) sur le CHARIOT INFERIEUR (3). Insérer la VIS (7) dans la RONDELLE VIS (6), puis dans la RONDELLE OBLONGUE (5), en vérifiant que les faces rayonnées...
- Page 5 MONTAgE DE LA SELLE SUR LA TIgE DE SELLE RSP R5 1 - Positionner les BRIDES CONIQUES (3 et Fig 2 5) sur les cônes de la TIGE DE SELLE (6). 2 - Choisir le recul nécessaire (+ ou – 5 mm) afin de positionner la selle dans le sens souhaité.
- Page 6 INSTALLATION DE LA TIgE (R5 ET ROUTE) DANS LE CADRE 1 - Positionner le TAMPON (1) dans 3 - Insérer la tige dans l’ensemble COLLIER + le COLLIER (4) puis les VIS M4 x 12 (3) et TAMPON + VIS puis dans le tube de selle de M5 x 12 (2). la façon présentée ci-dessous : 2 - Positionner la LAME RESSORT (5) dans Fig 4...
- Page 7 VIS jusqu’à être en butée sur le cadre. De part la morphologie des cadres 5 - Régler la hauteur de selle selon vos LOOK, une recoupe de la tige de selle préférences. pourrait être nécessaire pour atteindre les positions les plus basses.
-
Page 8: Entretien
été réparé, repeint hors Employer un chiffon doux. Rincer à l’eau et le d’un centre de réparation agréé LOOK. sécher avec un chiffon. Ne pas utiliser d’appareil de nettoyage à La garantie ne couvre pas les cas suivants : haute pression, ni de produits abrasifs. -
Page 9: Product Presentation
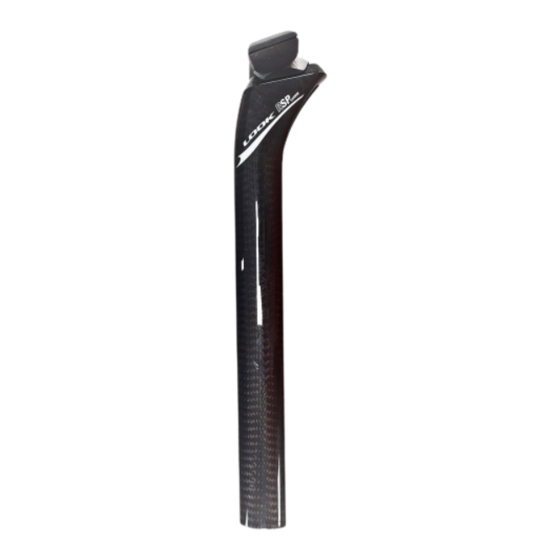
European and international safety Offering retraction of + or - 5 mm, while standards. being reversible All the RSP are compatible with all LOOK frames with an integrated saddle stem. Before use, please read these instructions fully and follow the advice they give, in order to get the most out of this high- WARNING: quality product. - Page 10 FITTINg ThE SADDLE TO ThE RSP ROAD STEM 1 - Position the SLIDE (4) on the head of the Fig 1 SADDLE STEM (8). 2 - Fit the LOWER CLAMP (3) on to the SLIDE + SADDLE STEM assembly. 3 - Place the UPPER CLAMP (2) on the LOWER CLAMP (3) .
- Page 11 FITTINg ThE SADDLE TO ThE RSP R5 STEM 1 - Position the TAPERED FLANGES (3 and 5) Fig 2 on the SADDLE STEM’S cones (6). 2 - Select the retraction needed (+ or – 5 mm) so as to put the saddle in the desired position. 3 - Bring the SADDLE RAILS in the TAPERED FLANGES’...
- Page 12 FITTINg ThE STEM (R5 AND ROAD) INTO ThE FRAME 1 - Position the BUFFER (1) in the CLAMP 3 - Insert the stem in the CLAMP + BUFFER + (4) and the SCREWS M4 x 12 (3) and M5 SCREW unit and in the saddle tube as x 12 (2). shown below: 2 - Position the SPRING BLADE (5) in the Fig 4...
- Page 13 4 - Slide the CLAMP + BUFFER + SCREW unit WARNING: till it is stopped by the frame. By the morphology of LOOK frames, 5 - Adjust the saddle’s height according to cutting the seatpost may be necessary your preferences.
-
Page 14: Maintenance
Use a soft cloth. Rinse with water and dry the user or has been repaired or repainted, with a cloth. other than by an approved LOOK repair Do not use a high-pressure cleaner or centre. abrasive products. -
Page 15: Presentazione Del Prodotto
attentamente tutte istruzioni Tutti i reggisella RSP sono compatibili con rispettare i consigli dati, al fine di tutti i telai LOOK dotati di reggisella inte- beneficiare pienamente dei vantaggi di grato. questo prodotto di alta qualità. ATTENZIONE: LOOK si riserva la possibilità di modificare questo telaio LOOK è stato progettato ed le specifiche del prodotto, e ciò... - Page 16 MONTAggIO DELLA SELLA SULL’ASTA RSP DA STRADA 1 - Collocare il PATTINO (4) sulla testa Fig 1 dell’ASTA SELLA (8). 2 - Posare il CARRELLO INFERIORE (3) sull’insieme PATTINO + ASTA SELLA. 3 - Collocare il CARRELLO SUPERIORE (2) sul CARRELLO INFERIORE (3). Inserire la VITE (7) nella RONDELLA VITE (6) poi...
- Page 17 MONTAggIO DELLA SELLA SULL’ASTA RSP R5 1 - Posizionare le FLANGE CONICHE (3 e 5) Fig 2 sui coni del REGGISELLA (6). 2 - Scegliere l’indietreggiamento necessario (+ o – 5 mm) per posizionare la sella nel senso desiderato. 3 - Inserire le GUIDE DI SELLA nelle scanalature delle FLANGE CONICHE.
- Page 18 MONTAggIO DELL’ASTA (R5 & DA STRADA) NEL TELAIO 1 - Posizionare il TAMPONE (1) nel COLLARE 3 - Inserire il reggisella nell’insieme costituito (4) poi le VITI M4 x 12 (3) e M5 x 12 (2). da COLLARE + TAMPONE + VITI poi nel reggisella secondo il modo 2 - Posizionare la LAMINA della MOLLA (5) riportato qui di seguito: nel REGGISELLA (6).
- Page 19 7 - Regolare orizzontalmente la sella per mezzo di una livella poi affinare le vostre preferenze. 8 - RSP DA STRADA: Serrare per mezzo di una chiave esagonale da 6 mm la vite M8 (7 Fig. 1) secondo la coppia di serraggio raccomandata da 22 N.m...
-
Page 20: Manutenzione
Tutti gli accessori LOOK sono garantiti un prima di utilizzarla. anno a partire dalla data d’acquisto contro Se i tubi del proprio telaio LOOK o della qualsiasi vizio o difetto di fabbricazione. propria forcella hanno subito qualsiasi tipo di danno, portare la bicicletta Per rendere valida la garanzia, registrati sul nostro sito: www.lookcycle.com... - Page 21 Antes de usar este producto, lea bien todas las instrucciones y sígalas para, Todas las RSP son compatibles con todos así, poder disfrutar plenamente de las los cuadros LOOK con tija de sillín inte- ventajas de este producto de alta calidad.
- Page 22 MONTAjE DEL SILLíN EN LA TIjA RSP CARRETERA 1 - Situar la CORREDERA (4) en la TIJA DEL Fig 1 SILLÍN (8). 2 - Colocar el CARRO INFERIOR (3) en el conjunto CORREDERA + TIJA DEL SILLÍN. 3 - Colocar el CARRO SUPERIOR (2) en el CARRO INFERIOR (3). Insertar en tornillo...
- Page 23 MONTAjE DEL SILLíN EN LA TIjA RSP R5 1 - Posicionar las BRIDAS CÓNICAS (3 y 5) Fig 2 sobre los conos de la TIJA DE SILLÍN (6). 2 - Seleccionar el retroceso necesario (+ o – 5 mm) con el fin de posicionar el sillín en el sentido deseado.
- Page 24 MONTAjE DE LA TIjA (CARRETERA & R5) EN EL CUADRO 1 - Posicionar el TAMPÓN (1) en la 3 - Insertar la tija en el conjunto ABRAZADERA ABRAZADERA (4) luego los TORNILLOS + TAMPÓN + TORNILLO y luego en el tubo M4 x 12 (3) y M5 x 12 (2). de sillín tal como presentado a continuación: 2 - Posicionar la LÁMINA RESORTE (5) en el...
- Page 25 ADVERTENCIA : TAMPÓN + TORNILLO hasta topar con el cuadro Según la morfología de los cuadros LOOK, un recorte de la tija de sillín 5 - Ajustar la altura de sillín según las podría ser necesario para obtener las preferencias.
-
Page 26: Mantenimiento
Si los tubos del cuadro LOOK o de la desde la fecha de compra. horquilla han sufrido cualquier tipo de daño, lleve la bicicleta al punto de compra Para que la garantía sea válida, regístrese... - Page 27 We danken u voor uw vertrouwen in onze nemen op een frame met een ingebouwde producten. zadelbuis met E-Post doorsnede. Door dit accessoire van LOOK te kiezen, kiest u van een product van hoge technologie, Deze biedt veel afstelmogelijkheden in met een Frans design.
- Page 28 MONTAgE VAN hET ZADEL OP DE RSP WEg PEN 1 - Plaats de SLEDE (4) op de kop van de Fig 1 ZADELPEN (8). 2 - Plaats de ONDERSTE WAGEN (3) op de SLEDE + ZADELPEN 3 - Plaats BOVENSTE WAGEN (2) op de ONDERSTE WAGEN (3). Steek de...
- Page 29 MONTAgE VAN hET ZADEL OP DE RSP R5 PEN 1 - Plaats de CONISCHE FLENZEN (3 en 5) op Fig 2 de conussen van de ZADELSTANG (6). 2 - Kies de gewenste achterwaartse beweging (+ of – 5 mm) om het zadel in de juiste richting te plaatsen. 3 - Plaats de ZADELRAILS in de groeven van de CONISCHE FLENZEN.
- Page 30 MONTAgE VAN DE PEN IN hET FRAME (WEg & R5) 1 - Plaats de BUFFER (1) in de BEUGEL (4) en 3 - Steek de stang in de BEUGEL + BUFFER vervolgens de SCHROEVEN M4 x 12 (3) en + SCHROEF en vervolgens in de zadelbuis M5 x 12 (2). zoals hieronder staat aangegeven: 2 - Plaats het VEERBLAD (5) in de ZADELBUIS Fig 4...
- Page 31 4 - Schuif de BEUGEL + BUFFER + SCHROEF LET OP : tot aan de aanslag op het frame. Door de morfologie van de LOOK frames 5 - Stel de hoogte van het zadel op de moet de zadelpen mogelijks worden gewenste hoogte af.
-
Page 32: Garantie
Alle LOOK accessoires hebben één jaar Kijk uw fiets altijd na voor gebruik. garantie vanaf de aankoopdatum, op alle Als de buizen van uw LOOK frame of uw productiefouten of gebreken. vork beschadigd zijn, breng de fiets dan naar uw LOOK dealer voor inspectie. - Page 33 PRODUKTPRÄSENTATION Die nicht integrierte RSP Sattelstütze er- Sie haben sich für ein LOOK Zubehör möglicht die erneute Umrüstung zu einer entschieden. traditionellen Sattelstütze bei Look Rahmen mit integrierter Sattelstütze im E-Post De- Wir möchten uns für Ihr Vertrauen in unsere sign. Produkte bedanken.
- Page 34 MONTAgE DES SATTELS AUF DIE RSP STRAßEN-STüTZE 1 - Das GLEITSTÜCK (4) auf das obere Ende Abb. 1 der SATTELSTÜTZE (8) setzen. 2 - Die UNTERE SATTELKLEMME (3) auf die Einheit GLEITSTÜCK + SATTELSTÜTZE setzen. 3 - Die OBERE SATTELKLEMME (2) auf der UNTEREN SATTELKLEMME (3) positionieren. Die Schraube (7) in die SCHRAUBEN-BEILAGE (6), dann durch die längliche Beilage (5) stecken;...
- Page 35 MONTAgE DES SATTELS AUF DIE RSP R5-STüTZE 1 - Die KONISCHEN FLANSCHE (3 und Abb. 2 5) auf die Kegel der SATTELSTÜTZE (6) positionieren. 2 - Die optimale Einstellung (+ oder – 5 mm) wählen, um den Sattel in die gewünschte Position zu bringen. 3 - Die SATTELFÜHRUNGEN in die Aussparungen der KONISCHEN FLANSCHE bringen.
- Page 36 MONTAgE DER STüTZE IN DEN RAhMEN (STRAßEN & R5) 1 - Den STÖPSEL (1) in die KLEMMUNG (4) 3 - Die Schrauben in die aus KLEMMUNG + bringen, dann die SCHRAUBEN M4 x 12 STÖPSEL + SCHRAUBEN bestehende (3) und M5 x 12 (2) einsetzten. Einheit einführen, danach entsprechend nachstehender Abbildung in die Sattelstütze 2 - Die FEDER-SCHNEIDE (5) in die stecken :...
- Page 37 4 - Die aus KLEMMUNG + STÖPSEL + ACHTUNG : SCHRAUBEN bestehenden Einheit bis zum Anschlag in den Rahmen stecken. Auf Grund der Bauweise von LOOK Rahmen kann das Kürzen des 5 - Die Sattelhöhe wie gewünscht einstellen. Sattelrohres notwendig sein, um die niedrigste Sitzhöhe zu erreichen.
- Page 38 Kaufdatum eine Gewährleistung für 5 Sollten die Rohre Ihres LOOK-Rahmens Jahre für Fertigungsfehler oder -mängel. oder Ihrer Gabel Schäden aufweisen, das Fahrrad zu Ihrem LOOK-Händler zur Für die Gültigkeit der Garantie registrieren Sie sich bitte auf unserer Website unter: Überprüfung bringen. Wenn Sie nachts www.lookcycle.com.
- Page 39 lookcycle.com...
Need help?
Do you have a question about the RSP and is the answer not in the manual?
Questions and answers