Advertisement
Table of Contents
- 1 Table of Contents
- 2 One General Introduction
- 3 Product Specifications
- 4 Product Structure
- 5 Product Function
- 6 Requirements for Installation and Notice
- 7 Preparation before Installation
- 8 Installation of Bypass-Valve
- 9 Installation of Drain Pipe and Overflow Pipe
- 10 Power Connection
- 11 Primary Inflow of the Softener
- 12 Daily Operation and Maintenance of the Softener
- 13 Troubleshooting of the Softener
- 14 List of Components on the Controller
- Download this manual
Advertisement
Table of Contents

Related Manuals for 3M SFT Series


Summary of Contents for 3M SFT Series
- Page 1 3M SFT Softener Installation and Operating Manual for model: SFT - 150/200 Please read this user manual carefully and keep this manual properly...
- Page 2 If you have any question, feel free to contact your local sales representative or the 3M Company. 1. The packaging materials could pose as a danger to children. Keep the packaging materials (such as plastic bag) out of reach of children;...
-
Page 3: Table Of Contents
Six Maintenance and trouble-shooting of the Softener 1 Daily operation and maintenance of the Softener ....19 2 Troubleshooting of the Softener ...........20 3 List of components on the controller ........21 Seven How to protect your rights and interests? 1 Quality and warranty .............25 3M SFT Softener... -
Page 4: One General Introduction
One General introduction 1.1 Product Specifications SFT-150 SFT-200 Flow Rate per Hour 1.5 ton 2 ton Incoming Water Temperature 4.4-37.8 C (40-100 172-862 kPa (25-125 psi) Incoming Water Pressure Voltage / Frequency 220V / 50Hz Water Inlet / Outlet Connection ¾”... -
Page 5: Product Function
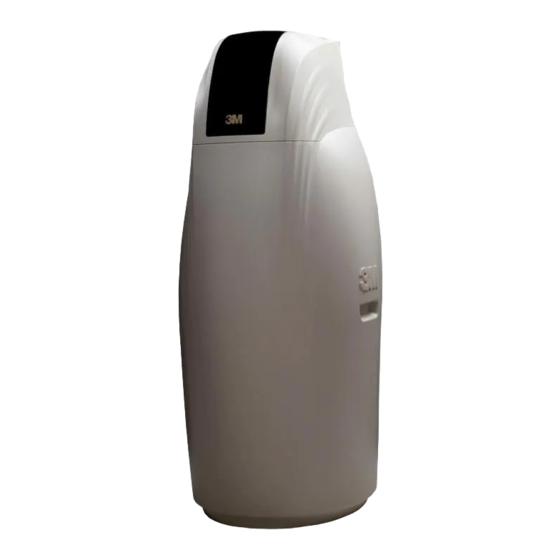
1.3 Product function The SFT series softener bears many characteristics, for instance high water yield, good water softening effect, stable operation, etc.The SFT series softener is equipped with intelligent operations such as automatic cleaning and automatic regeneration.This product bring to you and your family a cleaner and smoother water experience with its high water quality for your everyday life - the ideal choice for great bathing experience, daily washing and protection for hot water appliances. -
Page 6: Requirements For Installation And Notice
*Make sure that the softener is installed and maintained by 3M or 3M authorized dealer and installers. 3 Main steps for installation 3.1 Preparation before Installation... -
Page 7: Installation Of Bypass-Valve
3.1.3 SFT -150/200 500 x 700 Width * Depth (mm) Note: The above measurement is for recommendation only. The actual size for installation to be determined based on site conditions. 3.1.4 Take the product out of the packing box and remove all packing. - Page 8 3.3 Inlet / Outlet Pipe Connection 3.3.1 Confirm that the inlet water valve is turn off and confirm the water outlet location. 3.3.2 Connect the inlet pipe and outlet pipe to the by-pass valve according to the arrows marked on the bypass valve for water flow direction (Fig3.3.2).
-
Page 9: Installation Of Drain Pipe And Overflow Pipe
3.4 Installation of drainage pipe and overflow pipe 3.4.1 Connect flexible drainage hose (16mm inner diameter) to the drainage control valve. Use hose clamps to secure hose to prevent hose from coming loose. 3.4.2 Connect the other end of flexible drainage hose to drainage outlet such as floor drain, drainage pool. -
Page 10: Power Connection
3.5 Power Connection Insert the supplied 220-volt power adapter into the power outlet. 4.1 Controller Panel Overview 1 Display: Display of operating parameters, time parameters and operating status. 2) SET CLOCK: Switch to setting state, setting of time parameters, brine quantity parameters. Saving of settings and exit setting process. - Page 11 Note: Contact local 3M seller if you are unsure of the local water hardness. Step 2: Days Override Day override sets the number of days between regenerations and sets the maximum number of days between regenerations. Default setting is 14 days. Set Day Override using •...
- Page 12 4.3 Setting of operational parameters 4.3.1 When the system is operating, one of two displays will be shown. Pressing NEXT will alternate between the displays. One of the displays is always the current time of day. The second display is one of the following: days remaining or gallons remaining.
- Page 13 4.3.2 Set Time of Day The user can also set the time of day. Time should only need to be set after extended power outages or when daylight saving time begins or ends. If an extended power outage occurs, the time of day will flash on and off which indicates the time of day should be reset.
- Page 14 4.4.2 To initiate a manual regeneration at the present delayed regeneration time, press and release “REGEN”. The words “REGEN TODAY” will flash on the display to indicate that the system will regenerate at the preset delayed regeneration time. Note: If you pressed the "REGEN" button in error, pressing the button again will cancel the request. 4.5 Introductory to Regeneration Process The regeneration process includes backwash, salt wash, rinse, second rinse, and water filling.
- Page 15 Change Bleach Washing to Rinse 4.5.5 After completing the rinsing process, the system starts the water filling process and displaying the time remaining to complete this process Change water injection to Water Filling 4.5.6 After completing the water filling process, the regeneration process is completed. The system will return to normal operational mode and display panel will shows current time.
- Page 16 4.6.1 Days, since last regeneration: This display shows the days since the last regeneration occurred. Press the NEXT to go to next parameter. Press REGEN to exit Diagnostics. 4.6.2 Gallons, since last regeneration: This display shows the number of gallons that have been treated since the last re generation.
- Page 17 4.6.4 Gallons, 63 day usage history: This display shows day 1 (for yesterday) and flashes the number of gallons treated yesterday. Pressing the button will show day 2 (which would be the day before yesterday) and flashes the number of gallons treated on that day. Continue to press button to show the maximum number of gallons treated for the last 63 days.
- Page 18 4.6.7 Gallons, total used since last reset: The total number of gallons used since last reset will be displayed. This display will equal zero if a water meter is not installed. Press the NEXT button to go to next parameter. Press REGEN to return to previous step. 4.6.8 Days, total number since last reset: The total number of days the control valve has been in service since last reset will be displayed.
-
Page 19: Primary Inflow Of The Softener
5. Water Flow Test of the Softener 5.1 Primary inflow of the Softener 5.1.1 Refer to Section 3 of the manual on the installation of the softener. Refer to Section 4 of the manual to complete the setup of control valve and regeneration settings. 5.1.2 Activate regeneration manually by referring to Section 4.4 - “Manual Regeneration”. - Page 20 Soft water Untreated water Untreated water Untreated water Fig 5.2.2 Fig 5.2.1 5.2.3 Diagnostic operation (Fig. 5.2.3): Untreated water enters the inlet of bypass valve and diagnostic operation can be perform when process such as manual regeneration is activated. Untreated water exit the system via the outlet of bypass valve into the outlet pipe.
- Page 21 5.3 Salt Wash and Water Filling Test 5.3.1 Activate regeneration manually by referring to Section 4.4 - “Manual Regeneration”. 5.3.2 During the regeneration process, press REGEN in every step to escalate to the “Fill” position (Section 4.5.5) to check on the system’s water filling function. Now observe if the water level start to rise slowly in the brine tank.
-
Page 22: Daily Operation And Maintenance Of The Softener
6. Maintenance and Trouble-shooting 6.1 Daily operation and maintenance of the Softener 6.1.1 The installer will configure the water softener. User do not need to perform any operation on the water softener unless there is a loss of power supply or insufficient salt supply. 6.1.2 Replenishment of Salt Supply During each regeneration, a specific amount of salt is consumed, thus requiring its periodic replenishment (the frequency and salt dosage level is dependent on the regeneration... -
Page 23: Troubleshooting Of The Softener
6.1.3 Conduct regular checks on the time of the day setting to ensure that regeneration is performed at the set timing. Refer to Section 4.3.2. 6.1.4 To prevent service problems, the brine tank should be emptied and flushed out with a garden hose when dirt and other insolubles accumulate. - Page 24 Solutions Faults Analysis a. Check salt setting 1.Water is salty a. Salt setting is too high b. Replace b. Cyclone (distributor) tube too short c. Increase the water pressure with a booster c. The inlet pressure is too low and unable o pump to flush the drainage pipe and check flush out the drainage pipe or it need to replace the brine valve tank...
-
Page 25: List Of Components On The Controller
6.3 List of components on the controller 6.3.1 The front shroud and drive Description Number Illustration number PC Board Drive Gear DriveGear Cover Drive Bracket&Spring Clip Motor Front Cover Assembly * No. 2 to 6 are complete drive components. - Page 26 6.3.2 Drive Cap Assembly, Downflow Piston, Regenerant Piston and Spacer Stack Assembly Drawing No Description Quantity Space Stack Assembly Drive Cap Assembly Drive Back Plate Piston Downflow Assembly Regenerant Piston O-ring 228 O-ring 337 O-ring 215 (Distributor Tube) Not Shown Body Assembly...
- Page 27 6.3.3 Injector Cap, Injector Screen, Injector, Plug and O-Ring Drawing No Description Quantity Injector Cap O-ring 135 Injector screen Injector ASY Z Plug Injector ASY B Brown Injector ASY C Violet Injector ASY E White Injector ASY H Green Not Shown O-ring 011 O-ring 013 Not Shown...
- Page 28 6.3.4 Refil Flow Control Assembly Drawning No. Description Quantity Elbow Locking Clip Polytube insert 3/8” Nut 3/8 " Elbow Cap 3/8” O-ring (019) BLFC Retainer Assembly ** BLFC Not Shown Elbow 1/2” with nut and insert Option * Assembly includes V3182 BLFC. ** includes drawing #7...
- Page 29 6.3.5 Drain Line 3/4” Drawing No. Description Quantity Elbow Locking Clip DLFC Retainer Assembly DLFC Retainer Valve Drain Elbow 3/4 Male O-ring 019...
- Page 30 6.3.6 Water Meter and Meter Plug Drawing No. Description Quantity Nut 1” QC Meter Assembly (Includes drawing #3 & #4) Turbine O-ring 215...
- Page 31 Description: Fitting 1” Brass Sweat Assembly Drawing No. Description Quantity Nut 1” Quick Connect Split Ring O-Ring 215 Fitting 1” Brass Sweat Assembly Description: Fitting 3/4” Brass Sweat Assembly Drawing No. Description Quantity Nut 1” Quick Connect Split Ring O-Ring 215 Fitting 3/4”...
- Page 32 Description: Fitting 1” Plastic Male NPT Assembly Drawing No. Description Quantity Nut 1” Quick Connect Split Ring O-Ring 215 Fitting 1" Plastic Male NPT Description: Fitting 1 1/4” Plastic Male NPT Assembly Drawing No. Description Quantity Nut 1” Quick Connect Split Ring O-Ring 215 Fitting 1 1/4”...
- Page 33 Bypass Valve Drawing No. Description Quantity Nut 1” Quick Connect Split Ring O-Ring 215 Bypass 1” Rotor Bypass Cap Bypass Handlenect Bypass Rotor Seal Retainer O-ring 135 O-ring 112 O-ring 214 V3191-01 Vertical Adapter Assembly Order No. Description Quantity V 3151 Nut 1”...
- Page 34 4. Sending such notification to: 3M PURIFICATION INC. shall not under any circumstances be liable to the recipient of 3M PURIFICATION INC. Incorporated, 400 Research Parkway, Meriden CT these instructions for any direct, indirect, special, incidental, or consequential loss or 06450 U.S.A.
Need help?
Do you have a question about the SFT Series and is the answer not in the manual?
Questions and answers