
Related Manuals for RCA RT2906


Summary of Contents for RCA RT2906
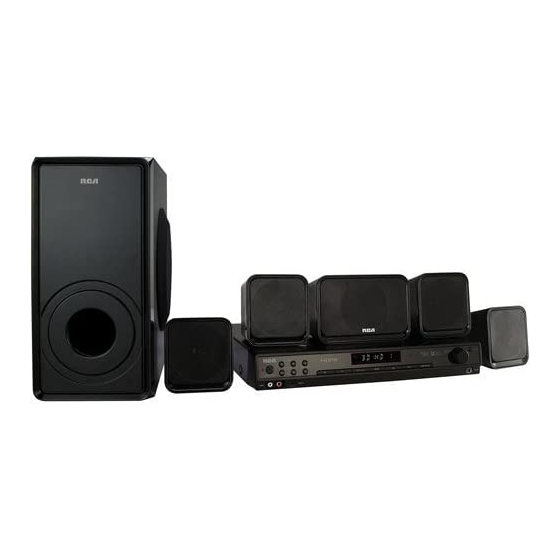
- Page 1 User Manual RT2906 It's important to read this instruction prior to using your new product for the first time.
-
Page 2: Fcc Information
FCC Information THE LIGHTNING FLASH AND ARROWHEAD WITHIN THE TRIANGLE IS A WARNING SIGN ALERTING YOU OF “DANGEROUS VOLTAGE” INSIDE THE PRODUCT. CAUTION: TO REDUCE THE RISK OF ELECTRIC THE EXCLAMATION POINT WITHIN THE SHOCK, DO NOT REMOVE COVER (OR BACK). TRIANGLE IS A WARNING SIGN ALERTING NO USER SERVICEABLE PARTS INSIDE. -
Page 3: Service Information
FCC Information For Your Safety Technical Specification The AC power plug is polarized (one blade is wider Product: Dolby Digital Audio / Video Receiver than the other) and only fits into AC power outlets Brand: one way. If the plug won’t go into the outlet completely, turn the plug over and try to insert it Electrical Consumption the other way. -
Page 4: Important Safety Instructions
Important Safety Instructions Please read and save for future reference. Unplug this apparatus during lightning storms • Some of the following information may not apply or when unused for long periods of time. to your particular product; however, as with R e fe r a l l s e r v i c i n g to q u a l i f i e d s e r v i ce •... -
Page 5: Connections And Setup
Connections and Setup Setup and Maintenance of the Unit Provides spaces for sufficient ventilation as indicated: one center speaker and one subwoofer Left and right Left and right connections are completed. front speakers rear speakers it from a cold place to a warm place: there is risk of condensation. - Page 6 Connections and Setup Connecting to HDMI Components Note: This product will play audio from HDMI-connected products TV with HDMI Input while also passing on the video signal to a HDMI-connected TV. Satellite Receiver or Cable Box Blu-ray Disc Player Connecting to Audio Components ANALOG AUDIO IN Analog Audio Analog Audio...
-
Page 7: Connecting The Antennas
Connections and Setup Digital Connection The digital audio jacks can accept Dolby Digital (Surround Sound) or PCM (Stereo) signals when compatible components are connected. This unit provides one optical and one coaxial digital input jacks for the connection of your components that have digital audio outputs. - Page 8 Connections and Setup AM Loop Antenna and FM Indoor Antenna 1. Uncoil the antenna wire and locate the base end of the AM antenna. 2. Press down on the antennas tab to open the terminal. 3. Insert the antenna wires into the terminal and release the tabs to secure the wires in place. 4.
-
Page 9: Positioning Speakers
Connections and Setup Positioning Speakers Front Speaker Placement For best results, follow the speaker placement below. Alignment Align the center speaker evenly with (A) or slightly behind (B) (the left and right speakers), but not ahead of them. Courtesy Dolby Laboratories 1. -
Page 10: Better Surround Placement
Connections and Setup Better Surround Placement Location If possible, place surround speakers to either side of the listening area, not behind it. Height If space permits, install surround speakers 2-3 feet above viewers. This helps to minimize localization effects. Aiming Aim surround speakers straight across the room, not down at viewers, to help create a more open, spacious surround sound field. -
Page 11: Unit Controls
- 6 - Unit Controls Main Unit (TUNING buttons) Tunes in to desired stations in AM/FM mode. 2. ON/STANDBY Turns on / off the unit. When the unit is turned on, the unit will go to the mode it was in before powered off. -
Page 12: Remote Controls
Remote Controls Turns on/off the unit. 2. SLEEP Selects sleep time. 3. NIGHT Selects among night mode options (DRC ON/DRC OFF/DRC SOFT) which compresses the volume difference between normal voices and sounds such as explosions. (Available only during Dolby digital signal playback) The setting is also available in SETUP MENU. - Page 13 Remote Controls 10. MEM + / MEM - Selects programmed stations in AM/FM mode. 11. TUNER + Tap to increase the radio frequency in AM/FM mode. Press and hold to search next available station in ascending frequencies. 12. EQ buttons Selects among preset equalizer mode (POP, FLAT, JAZZ, CLASSIC, ROCK, BASS and TREBLE).
-
Page 14: Operating Your Unit
Operating Your Unit Example: Connecting a Blu-ray Player Selecting Source When one of the SOURCE buttons on the front 1. Connect the HDMI output of Blu-ray player to panel or on the remote control is pressed, the HDMI IN 1 jack on the rear panel of the unit. corresponding input will be activated. - Page 15 Operating Your Unit 3. Repeat step 2 to tune to another radio station. 4. To prematurely stop the searching function, press TUNER+ or TUNER- button on the remote Tips: control. 5. Adjust the volume by pressing VOL +/ VOL -. manually, press MONO/ST on remote control to switch from Stereo to Mono mode.
-
Page 16: Advanced Sound Control
- 11 - Advanced Sound Control Sound Enhancement Systems Manufactured under license from This receiver is equipped with several built-in Dolby Laboratories. sound enhancement systems. Dolby, Pro Logic, and the double-D symbol are trademarks of Dolby Dolby Digital Laboratories. The Dolby Digital mode lets you enjoy full digital surround from software processed in the Dolby Stereo Digital format. -
Page 17: Fine Setting Of The Components
Advanced Sound Control Fine Setting of the Components Analog Inputs You can select the surround mode by pressing The Home Theater has four analog audio inputs: TV, VCR, GAME and LINE-IN. SURROUND follow by key to select among different options. (HALL, CHURCH, CLUB, STADIUM, Note: STUDIO, STEREO, DOLBY PL EMULATION, DOLBY PL To play Dolby Prologic II Movie sound when... -
Page 18: Speaker Configurations
Advanced Sound Control Speaker Configurations Notes: You can also change the setup of the speakers. Use CNTR stands for “Center Speaker” a subwoofer to enjoy optimum sound. selection while SURR stands for “Surround For optimum surround experience measure the Speaker” selection. distance between the speaker and your favorite By default, the Center and Surround Speakers listening position. -
Page 19: Troubleshooting Tips
Troubleshooting Tips AM / FM Operation STEREO indicator is off in FM mode Adjust the antenna. Press MONO / ST button to insure you are not outputting in mono. The signal is Mono. Severe hum or noise. The signal is too weak. Connect an external antenna. There is interference to FM reception. -
Page 20: Care And Maintenance
Care and Maintenance Disconnect the audio system from the power source before performing any maintenance. Cleaning the exterior Disconnect the system from AC power before cleaning the exterior of the system with a soft dust cloth, or with a slightly damp leather chamois. Never use strong solvents. Important Battery Information month. -
Page 21: Technical Specifications
Technical Specifications Amplifier Section: RMS Output Power: Dolby Digital Mode with 10% Total Harmonic Distortion Front, Rear and Center Channel: 100 Watts per channel (1kHz, 8Ω) Subwoofer Channel: 100 Watts (100Hz, 8Ω) Total RMS Output Power, Dolby Digital mode: 600 W Muting Attenuation: 65dB Frequency Response: 200Hz/3dB, 1KHz ref. -
Page 22: Limited Warranty
Limited Warranty AVC MULTIMEDIA (“AVC”) makes the following limited warranty. This limited warranty extend to the original consumer purchaser and is limited to non-commercial use of the product. One Year Parts & Labor Warranty AVC products purchased in the United States or Canada are warranted to be free from defects in materials or workmanship for a period of one year from the date of their original retail purchase. - Page 23 Limited Warranty All warranties implied by state law, including the implied warranties of merchantability and fitness for a particular purpose, are expressly limited to the duration of the limited warranties set forth above. With the exception of any warranties implied by state law as hereby limited, the foregoing warranty is exclusive and in lieu of all other warranties, guarantees, agreements and similar obligations of manufacturer or seller with respect to the repair or replacement of any parts.
- Page 24 www.RCAav.com Printed in China 811-AV6291W111...
Need help?
Do you have a question about the RT2906 and is the answer not in the manual?
Questions and answers