
Subscribe to Our Youtube Channel
Related Manuals for Infinity Beta SW Series


Summary of Contents for Infinity Beta SW Series
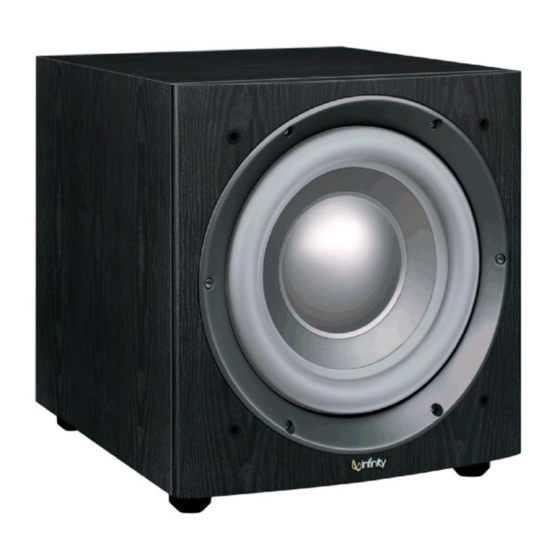
- Page 1 Beta SW Series ™ CSW-10 Subwoofer SERVICE MANUAL Infinity Systems, Inc. 250 Crossways Park Dr. Woodbury, New York 11797 Rev1 9/2004...
-
Page 2: Table Of Contents
(356mm x 337mm x 391mm) Weight: 52 lb (23.6 kg) Infinity continually strives to update and improve existing products, as well as create new ones. The specifications and construction details in this and related Infinity publications are therefore subject to change without notice. -
Page 3: Detailed Specifications
CSW-10 CSW-10 450W Powered Sub/ Plate Amp LINE VOLTAGE Yes/No Hi/Lo Line Nom. Unit Notes Normal Operation US 120VAC/60Hz 108-132 Vrms EU 230VAC/50-60Hz 207-264 Vrms Normal operation, MOMS required QA Test Parameter Specification Unit Limits Conditions Notes Amp Section Bridge type amplifier, None of the speaker terminals must be connected to system GND at any time. -
Page 4: Amplifier Access
CSW-10 QA Test Parameter Specification Unit Limits Conditions Notes Signal Sensing (ATO) functional Auto - on selection switch in Auto Auto-Turn-On (yes/no) ATO Input test frequency functional " ATO Level LFE Input functional " ATO Level Speaker in functional " Amp connected and AC on, then functional input signal applied... -
Page 5: Controls And Connections
CSW-10 ONTROLS AND ONNECTIONS Rear Panel ∞ § • ™ ª ¡ ¢ £ ‚ ⁄ ¶ ¡ Line-Level Inputs Bass Optimization Controls (see page 5) • Bass Optimization System Selector ™ Power Indicator ª Center-Frequency Adjustment £ Subwoofer Level (Volume) Control ‚... - Page 6 CSW-10 ONNECTIONS If you have a Dolby* Digital or DTS ® receiver/processor If your receiver/processor has subwoofer with a low-frequency-effects (LFE) output: outputs for the left and right channels: SUBWOOFER OR LFE OUTPUT • Set Normal/LFE Switch to LFE. • Set Normal/LFE Switch to Normal. NOTE: Some receivers have a single subwoofer output (do not confuse NOTE: In this case, you do not need to use a Y connector.
-
Page 7: Operation
CSW-10 PERATION Crossover Adjustments Power On Plug your subwoofer’s AC cord into a wall outlet. Do not use the NOTE: This control will have no effect if the Normal/LFE Selector Switch § is set to “LFE.” If you have a Dolby Digital or DTS outlets on the back of the receiver. -
Page 8: Exploded View/Parts List
10. Woofer, 10” Sub DCR=3.4 ohms ±10% 1 351508-001 5. Logo CSW-10 351617-001 11. Grille Assembly, Frnt CSW-10 (Black) 352332-003 6. Foot Assembly, Rubber, 338037-002 (Beech/Cherry) 352332-004 Blk w/Threaded Insert Infinity Systems, 250 Crossways Park Drive, Woodbury, New York 11797 6/04... -
Page 9: Test Set Up And Procedure
CSW-10 CSW-10 Test Set Up and Procedure SYSTEM AURAL SWEEP TEST Equipment needed: • Function/signal generator/sweep generator • Integrated Amplifier • Multimeter • RCA cables General Unit Function (UUT = Unit Under Test) Switches/knobs on the amplifier faceplate: Crossover Frequency Adjust full CW (150Hz) Phase switch –... -
Page 10: Bulletin Inf2004-02
4) Locate D90 & D91 trace locations close to the main power capacitors (refer to the image) 5) Solder two RLS4148 SMD Diodes in their designated areas, D90 and D91, Infinity part # 054-414803-100. IMPORTANT: POLARITY - Diodes should be soldered with their cathode facing into the amplifier assembly, anodes facing the PCB edge of the amplifier. - Page 11 CSW-10 TESTING 7) Set the amplifier controls as follows: a. Gain control to full CCW (MIN) b. Crossover control to full CW (150) c. Phase switch to 0 d. LFE/Normal switch to Normal e. RABOS Switch to OFF f. AC Power switch to OFF 8) Connect the amplifier to an 8 ohm resistive load (250W minimum) 9) Connect a Sine wave signal: 50Hz, 0.250VRMS signal to the amplifier Left or Right input.
-
Page 12: Block Diagram
CSW-10... -
Page 13: Pcb Drawings
CSW-10... - Page 14 CSW-10...
- Page 15 CSW-10...
- Page 16 CSW-10...
- Page 17 CSW-10...
- Page 18 CSW-10...
- Page 19 CSW-10...
- Page 20 CSW-10...
-
Page 21: Electrical Parts List (120/230V)
CSW-10 CSW-10 120/230v Electrical parts list Part number Description Reference Designator MAIN PCB Resistors 021-100401-020 MOF Resistor 1K 1W J FK TYPE R173 021-560305-020 MOF Resistor 560R 5WS J 8x25 KINK 022-005105-020 Resistor PN:SQM 0R05 5W J 25x13 022-470307-020 Winding resistor KNP 470R 7W J (KNP-700S) 024-000098-120 SMD Resistor... - Page 22 CSW-10 Part number Description Reference Designator MAIN PCB 054-050601-100 SMD ZENER DIODE PN:BZX84C5V6 5.6V SOT-23 TAPIN 054-414803-100 SMD DIODE PN:LL4148 (Wishay) D4-5,13,14,21,22,31,33,38, 054-540100-100 SMD Transistor (PNP) PN:MMBT5401 LT1 SOT-23 054-555100-100 SMD Transistor (NPN) PN:MMBT5551 LT1 (ON) 051-000600-100 Transistor NPN PN:MPSW06RLRA TO-92 (ON) 051-005600-100 Transistor PNP PN:MPSW56RLRA TO-92 (ON)
- Page 23 CSW-10 Part number Description Reference Designator DRIVER PCB 034-330615-301 Electrolytic Cap. 330uF/16V M (R)0812 P:3.5 031-100144-106F SMD Cap. 0u01/50V K 0805 X7R C108,118,131,140 031-100343-100F SMD Cap. 100pF/50V J 0805 NPO C81,84 031-100344-100F SMD Cap. 0u1/50V K 0805 X7R C75-78,82,85 031-180344-100F SMD Cap.
- Page 24 CSW-10 Part number Description Reference Designator PREAMP/RABOS PCB 024-000097-120 SMD Resistor 0R 1/4W J 1206 R302,303,297 024-100498-121 SMD Resistor 1K 1/4W J 1206 R238,264,298 024-100598-121 SMD Resistor 10K 1/4W J 1206 R202,206,207,212,222, 024-150498-121 SMD Resistor 1K5 1/4W J 1206 R251 024-150598-121 SMD Resistor 15K 1/4W J 1206...
- Page 25 CSW-10 Part number Description Reference Designator PREAMP/RABOS PCB 054-414803-100 SMD DIODE PN:LL4148 (Wishay) D201,204,207,209,212,216, 050-505200-001 PN:LT-2402-21 LED1 Miscellaneous 072-010058-000 RCA JACK 2P PN:0502000W1G (Red,White) J201 072-040007-000 7P Terminal hous SWA101 JS-1001-07 P3,4 072-040008-110 8P Terminal housing JS-1001-08 073-010021-000 Screw fixing house PN:PCB-2(M3) 4PIN T1,2,3 074-030002-000...
-
Page 26: Semiconductor Pinouts
CSW-10... -
Page 27: Schematics (120/230V)
CSW-10 New DESIGN... - Page 28 CSW-10 New DESIGN...
- Page 29 CSW-10 New DESIGN...
- Page 30 CSW-10 New DESIGN...
-
Page 31: Packing
353100-001 Outer Carton CSW-10 120v (Beech) 352517-002 6. Warranty Card, 3/5 Year, Infinity 352004-001 Outer Carton CSW-10 120v (Cherry) 352517-003 7. Spike Foot Set 338076-001 8. RABOS Kit 335852-003 Infinity Systems, 250 Crossways Park Drive, Woodbury, New York 11797 6/04...
Need help?
Do you have a question about the Beta SW Series and is the answer not in the manual?
Questions and answers