Table of Contents
Advertisement
Advertisement
Table of Contents

Related Manuals for HIKVISION DS-PEA4H-10


Summary of Contents for HIKVISION DS-PEA4H-10
- Page 1 Panic Alarm Master Station • User Manual Panic Alarm Master Station User Manual...
- Page 2 SURVEILLANCE LAWS VARY BY JURISDICTION. PLEASE CHECK ALL RELEVANT LAWS IN YOUR JURISDICTION BEFORE USING THIS PRODUCT IN ORDER TO ENSURE THAT YOUR USE CONFORMS THE APPLICABLE LAW. HIKVISION SHALL NOT BE LIABLE IN THE EVENT THAT THIS PRODUCT IS USED WITH ILLEGITIMATE PURPOSES.
- Page 3 Panic Alarm Master Station • User Manual Regulatory Information FCC Information Please take attention that changes or modification not expressly approved by the party responsible for compliance could void the user’s authority to operate the equipment. compliance: This equipment has been tested and found to comply with the limits for a Class B digital device, pursuant to part 15 of the FCC Rules.
- Page 4 Panic Alarm Master Station • User Manual www.recyclethis.info...
- Page 5 Panic Alarm Master Station • User Manual Applicable Models This manual is applicable to DS-PEA4H-10. The power supply must conform to LPS. Use only power supplies listed in the user manual: Model Manufacturer KPL-040F-VI Channel Well Technology Symbol Conventions The symbols that may be found in this document are defined as follows.
- Page 6 Panic Alarm Master Station • User Manual Safety Instructions Proper configuration of all passwords and other security settings is the responsibility of the installer and/or end-user. In the use of the product, you must be in strict compliance with the electrical safety regulations of the nation and region.
-
Page 7: Table Of Contents
Panic Alarm Master Station • User Manual TABLE OF CONTENTS Chapter 1 Overview ........................1 Introduction ..........................1 Main Feature ..........................1 Appearance ..........................1 Front Panel ........................1 Rear Panel ........................2 Side Panel ........................4 Chapter 2 Activation ........................6 Activating Locally ........................ - Page 8 Panic Alarm Master Station • User Manual Call Forwarding ......................44 Call Waiting ........................44 Record Query ......................... 44 Alarm Record Query ...................... 44 Call Record Query ......................45 Local Playback ........................47 Chapter 5 Master Station Configuration via Client Software ............49 Adding Master Station to Client Software ................
-
Page 9: Chapter 1 Overview
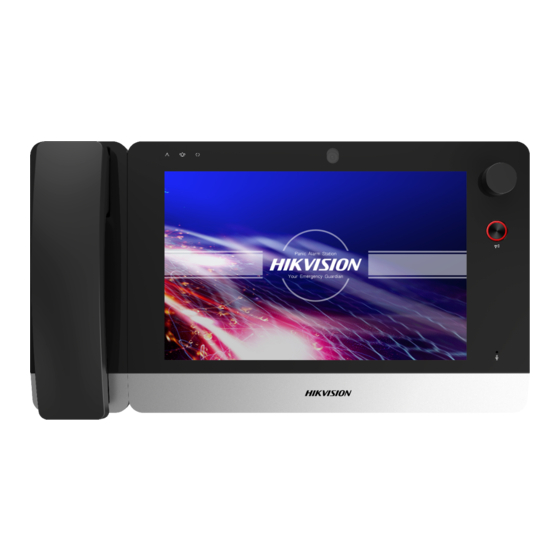
Chapter 1 Overview Introduction The DS-PEA4H-10 panic alarm master station (hereinafter called “master station”), used to manage security control devices, supports functions such as live view, intercom, device call, broadcast, etc. It is equipped with 10.1-inch HD touch screen that displays flat-design interface. The master station applies to security areas such as school, square, scenic spot, hospital, shopping mall, station, park, nursing home, etc. -
Page 10: Rear Panel
Panic Alarm Master Station • User Manual Front Panel Front Panel Component Description Component Description Exception indicator Flashing yellow when exception occurs. Information indicator Flashing green when receiving alarm information. Power indicator Solid blue when the master station is powered on. Camera Rotatable 2 MP high definition camera. - Page 11 Panic Alarm Master Station • User Manual Rear Panel...
-
Page 12: Side Panel
Panic Alarm Master Station • User Manual Rear Panel Component Description Component Description Camera angle adjustment wheel Adjust the angle of 2MP HD camera. Built-in speaker Audio output. Power interface Connect to 12 VDC power supply. Network interface Connect to wired network. VGA interface Connect to display. - Page 13 Panic Alarm Master Station • User Manual Side Panel Component Description Component Description Handset interface Connect to handset. Volume adjustment key Adjust speaker volume. Mute key Turn off the master station sound output. USB 3.0 interface Insert USB flash drive. USB 2.0 interface Insert USB flash drive.
-
Page 14: Chapter 2 Activation
Panic Alarm Master Station • User Manual Chapter 2 Activation You should activate the master station first before you can use the master station. Local activation, activation via SADP software, and activation via client software are supported, you can choose any one of the methods to activate the master station. -
Page 15: Activating Via Client Software
Panic Alarm Master Station • User Manual SADP software is used for detecting the online device, activating the device, resetting the activation password and editing network parameters of the device. Get the SADP software from the technical support, and install the SADP according to the prompts. Follow the steps to activate the master station. - Page 16 Panic Alarm Master Station • User Manual Click OK to activate the master station. Optional: Edit the network parameters of the master station. Select the master station from online device list and click Modify Netinfor to pop up the Network Parameter Modification page.
-
Page 17: Chapter 3 Local Configuration
Panic Alarm Master Station • User Manual Chapter 3 Local Configuration You are able to configure the master station locally, including network parameters and SIP server parameters configuration, device management, daily configuration (sound, time and display parameters), call and alarm video configuration, system maintenance, alarm input/output and other related parameters configuration. -
Page 18: Setting Sip Server And Master Station Id
Panic Alarm Master Station • User Manual Notes: The default IP address of the master station is 192.0.0.64. Tap the editable text on the page (e.g. 192.0.0.64) and modify the network parameters by the pop-up soft keypad. You can slide to select multiple characters on the text, or you can tap on the text content to change the text editing position. - Page 19 Panic Alarm Master Station • User Manual SIP Server Configuration Page (SIP Protocol) − When the protocol is set as Private Protocol, you need to set the server address type, IP address, port number, device ID, device location and register period. SIP Server Configuration Page (Private Protocol) Server Address Type: Tap on the Server Address Type line, and select IP Address or Domain Name Address.
-
Page 20: Device Management
Panic Alarm Master Station • User Manual Password: The user name which the device registers to the SIP server. Device ID.: The ID number of the device, the available number should be between 0 and 999999. Note: Device ID is the unique identification of the device, facilitating the communication between the master station and the alarm device. - Page 21 Panic Alarm Master Station • User Manual Group Page Creating a new group Purpose: You are able to create a custom group for alarm devices management, up to 8 new groups can be set up. Steps: On the Group page, tap Add Group to enter the group name in the pop-up dialog box, and tap OK. Note: By default, the master station has 2 groups: All Devices, Favorites.
- Page 22 Panic Alarm Master Station • User Manual 3) Select and check alarm devices in the list, you are able to select the devices in batch. You can tap on the upper right corner and enter the information (ID number, name, IP address and location) of the alarm devices to search the alarm devices.
- Page 23 Panic Alarm Master Station • User Manual Collecting Alarm Devices Purpose: You are able to add focus alarm devices to favorites group, it is convenient to view the alarm device and communicate with the alarm device in the favorites group. Steps: On the Group page, tap All Devices to enter the page.
- Page 24 Panic Alarm Master Station • User Manual You can only set the call forwarding for the alarm device on main master station. If you do not configure the master station call priority of the alarm device, the default setting is call waiting.
- Page 25 Panic Alarm Master Station • User Manual Steps: On the Group page, click All Devices to enter the page. Select and click an alarm device to enter the alarm device configuration page. Tap Call Settings, and click Call Keep Audio to select an audio file in the pop-up window. You are able to select the audio file from local file list or SD card file list as the call waiting audio.
-
Page 26: Configuring Master Station
Panic Alarm Master Station • User Manual Sudden Decrease of Sound Intensity: Slide the slider to enable Sudden Decrease of Sound Intensity, by default, it is disenabled. You need to set sudden decrease sensitivity, the available sensitivity value is between 1 and 100. Optional: Tap Copy to to copy the hubbub alarm parameters to other alarm devices. -
Page 27: Configuring Network Camera
Panic Alarm Master Station • User Manual When there are two master stations have an intercom with each other, if one of the master station clicks the call waiting button, the other side master station will enter the call waiting state, and play the configured call waiting audio file until the end of the call waiting state. -
Page 28: General Parameters Settings
Panic Alarm Master Station • User Manual Tap Add Devices or to pop up the Add Devices window. Select IP Address or URL to add network cameras. − Adding a network camera by IP Address. Select IP Address, enter the name, IP address, port number, user name and password of the network camera, and click OK to add the network camera. -
Page 29: Setting Sounds Parameters Of Master Station
Panic Alarm Master Station • User Manual Setting Sounds Parameters of Master Station Purpose: In this section, you are able to set the call ringtone, ring duration, audio input/output and its corresponding volume and keypad sound. Steps: On the home page of master station, click System Config to enter the page. to enter the General page. -
Page 30: Setting Time Of Master Station
Panic Alarm Master Station • User Manual Line Out Volume: Set the volume of Line Out audio output. Notes: By default, the volume of all audio inputs and audio outputs is level 6, the level ranges from 0 to 10. ... - Page 31 Panic Alarm Master Station • User Manual In this section, you are able to enable the NTP and configure the NTP parameters. After enabling NTP, the device synchronizes the time periodically from the NTP server based on the interval automatically. By default, the NTP function is close.
-
Page 32: Configuring Display Parameters Of Master Station
Panic Alarm Master Station • User Manual DST Settings Page Slide the slider to enable DST, and select the start time, the end time and the DTS bias of the DST. Start Time: Tap in the Start Time line to pop up the Time Settings window, and configure the start time of DST. -
Page 33: Call Settings
Panic Alarm Master Station • User Manual Display Configuration Page Enabling HDMI & VGA Purpose: The master station can connect to external display of local video via HDMI or VGA interface, external display needs to be enabled manually. Enter the display configuration page, slide the slider in the HDMI & VGA line to enable the external display function. -
Page 34: Configuring Call Of Master Station
Panic Alarm Master Station • User Manual Configuring Call of Master Station Purpose: In this section, you are able to configure the announcement quick switch, auto answering, assistant management. Steps: On the home page of master station, click System Config to enter the page. to enter the Call page. - Page 35 Panic Alarm Master Station • User Manual Configuring Auto Answering Purpose: You are able to enable auto answering function for the master station. If auto answering is enabled, after receiving the alarm device or the master station call, the master station will automatically answer the call when the configured auto answering duration arrives.
-
Page 36: Setting Alarm Video
Panic Alarm Master Station • User Manual Setting Alarm Video Purpose: In this section, you are able to enable alarm video record, including the panic alarm record, consultation record, hubbub alarm record, and master station calling record. Steps: On the home page of master station, click System Config to enter the page. to enter the Call page. - Page 37 Panic Alarm Master Station • User Manual to enter the System Maintenance page. Tap Basic Settings to enter the basic settings page. Basic Settings Page Viewing Device Information Enter the basic settings page, click in the Device Information line, you can view the device type and version in the pop-up window.
-
Page 38: Managing Usb Flash Driver
Panic Alarm Master Station • User Manual In this section, you can restore the all device parameters except network parameters to defaults. On the Basic Settings page, click in the Restore Defaults line to pop up the Reboot Device window. You can click OK to reboot the master station, or click Cancel to cancel the operation. -
Page 39: Managing Microsd Card
Panic Alarm Master Station • User Manual After exporting the configuration file successfully, click OK to close the window. Notes: The configuration file name format: *****.bin. The length of the file name is up to 32 characters (contain 4 byte suffixes). ... -
Page 40: Project Configuration
Panic Alarm Master Station • User Manual to enter the System Maintenance page. Tap SD Card Management to enter the SD card management page. SD Card Management Page Format SD Card: You can format the SD card. Tap in the Format SD Card line to pop up a window, you can select OK to format the SD card or select Cancel to cancel the operation. -
Page 41: Configuring Io Input/Output
Panic Alarm Master Station • User Manual Editing Project Password Tap Save to save the new password. configuring IO Input/Output Purpose: In this section, you are able to configure the IO input parameters, and the linkage IO outputs of the panic alarm, consultation, hubbub alarm and master station call. - Page 42 Panic Alarm Master Station • User Manual IO Input Settings Page Zone No.: The zone number of the zone needs to be configured. Zone Name: By default, it is Alarm In. The zone name ranges in length from 1 to 32 characters. Zone Type: You are able to select the zone as Instant Zone, Fire Zone, 24H Silent Zone or Disabled Zone.
- Page 43 Panic Alarm Master Station • User Manual IO Input Settings Page to select the linked alarm outputs for the panic alarm / consultation/hubbub alarm/master station call. Notes: By default, the liked alarm output is None. The linked alarm output supports multiple choice. ...
-
Page 44: Chapter 4 Local Operation
Panic Alarm Master Station • User Manual Chapter 4 Local Operation Video Call In this section, you can listen, announce the alarm device, and start live view of the alarm device. And you can also start audio or video call with other master stations. Video Call with Alarm Device Steps: On the home page of master station, click Audio/video to enter the page. -
Page 45: Video Call With Master Station
Panic Alarm Master Station • User Manual Listening: You can click to enable the listening and get the alarm device video and audio. By default, it is turned on. Listening will be automatically turned off when enabling the intercom. Intercom: Tap to enter the intercom state, you start video intercom with the alarm device. -
Page 46: Quick Dialing
Panic Alarm Master Station • User Manual Video Call with Master Station On the video call page, you are able to tap to adjust the microphone volume of the other end of the master station, or tap to adjust the speaker volume of the other end of the master station. The available volume is between 0 and 10, 0 represents mute mode, 10 is the maximum volume. -
Page 47: Broadcasting
Panic Alarm Master Station • User Manual Quick Dialing to listen the alarm device, or tap to start video intercom with the alarm device. You can also tap to broadcast the alarm device in the group. Broadcasting The master station supports group broadcasting and temporary broadcasting for the alarm devices, and the announcement quick switch broadcasting. - Page 48 Panic Alarm Master Station • User Manual Broadcasting Page (Announcement Broadcast) On the announcement broadcast page, you can tap on the button right to adjust the announcement volume, or tap to stop broadcasting. - Select Audio Broadcast Tap Audio Broadcast, you can select an audio file for broadcasting in the pop-up Audio File window, and tap OK to enter the page, the master station will play the audio file for all alarm devices in the group.
-
Page 49: Temporary Broadcasting
Panic Alarm Master Station • User Manual In the process of group broadcasting, it can receive calls of up to 4 alarm devices or master stations. The broadcast will stop after answering the call. The local audio file comes with the device. The SD card audio file requires to be uploaded, and you need to insert the SD card into the microSD card interface for using the SD card audio file. -
Page 50: Receiving Panic Help Or Consultation
Panic Alarm Master Station • User Manual On the announcement quick switch broadcast page, you can tap on the button right to adjust the announcement volume, or tap to stop broadcasting. Notes: The announcement quick switch broadcast cannot use the audio file. ... - Page 51 Panic Alarm Master Station • User Manual Call Page When receiving a panic help from alarm devices, the function buttons displayed on the page include: Strobe light , siren , electrical lock . When answering the call from master station, the page does not display this function buttons.
-
Page 52: Hanging Up Call
Panic Alarm Master Station • User Manual Hanging up Call On the Receiving Call page, tap to end the call and exit the call page. Call Forwarding If the master station is busy, you can transfer the alarm call from the current master station to another master station. -
Page 53: Call Record Query
Panic Alarm Master Station • User Manual Alarm Record Page You can tap to enter the alarm record list of corresponding alarm events to view the alarm record. Alarm Record List (Panic Alarm) Note: You can tap on the upper right corner and enter the information (device ID number, location, alarm type) to search the alarm record. - Page 54 Panic Alarm Master Station • User Manual In this section, you can search for the call records, including master station ringing and dialing record, consultation record. Each records can support the storage of up to 512 alarm records. Steps: On the home page of master station, tap Message to enter the page. to enter the call record page.
-
Page 55: Local Playback
Panic Alarm Master Station • User Manual Optional: In the call record list, you can tap to start a call with the corresponding device, or tap play back the video record stored on the SD card. Note: The master station dialing records cannot be played back. Local Playback You can play back the alarm video records or call video records on the master station. - Page 56 Panic Alarm Master Station • User Manual Local Video Playback The video file will play the stored video and audio. During playback, the master station can receive call, and exit the current video playback after answering the call. The master station can receive up to 4 calls at the same time. You can tap to exit the video playback, tap the pause button to pause the playback, and slide the progress bar to select the playback time.
-
Page 57: Chapter 5 Master Station Configuration Via Client Software
Before adding the master station, please ensure that the device and the PC is in the same subnet. Adding Master Station by Online Search Steps: Enter the device management page, click Device tab and select Hikvision Device as the device type to display the Online Device area. Select an online device from the Online Device area. -
Page 58: Remote Configuration Via Client Software
Panic Alarm Master Station • User Manual Nickname: Edit a name for the device as you want. Address: Enter the device’s IP address or domain name. Port: Enter the device port number. The default value is 8000. User Name: The default user name is admin. Password: the device password. - Page 59 Panic Alarm Master Station • User Manual Time Configuration Editing Time Zone Purpose: You are able to synchronize the time to the selected time zone. Steps: Select a time zone from the drop-down box. Click Synchronization, and click save. Enable NTP Purpose: You are able to enable NTP to enable automatic synchronization, which periodically synchronizes time from the NTP server based on the synchronization interval.
-
Page 60: Editing General Settings
Panic Alarm Master Station • User Manual Enable DST Purpose: You are able to enable DST (Daylight Saving Time). Steps: Check Enable DST. Select the start time, end time and the DST bias. Click Save. Editing General Settings Purpose: You are able to edit the device name, device number, and configure the video files. Steps: On the remote configuration page, click System - General Parameters to enter the page. -
Page 61: Editing The User
Panic Alarm Master Station • User Manual Password Management Configuration Access Lock: Check Access Lock to enable the access lock, you can set the user lock parameters, including Max. Password Attempts and the lock duration. Max. Password Attempts: The maximum times that the user attempts to enter the password. By default, it is 7, the available value is 3 to 10. -
Page 62: System Maintenance
Panic Alarm Master Station • User Manual System Maintenance Purpose: In this section, you are able to reboot the device remotely, restore default settings, restore all parameters, import/export configuration file and upgrade the device remotely. On the remote configuration page, click System – System Maintenance to enter the System Maintenance page. System Maintenance Page System Management Reboot: Click Reboot to restart the device. -
Page 63: Editing Network Parameters
Panic Alarm Master Station • User Manual Do not power off the device during the upgrade. Editing Network Parameters Purpose: In this section, you are able to edit the general network parameters. Steps: On the remote configuration page, click Network – General to enter the page. Edit the IP address, subnet mask, gateway, port number. -
Page 64: Configuring Intercom Protocol
Panic Alarm Master Station • User Manual SIP Parameters Configuration (SIP Protocol) Login Status: Indicate the register status of the device, if the device has registered to the SIP server, displays Registered, otherwise, displays Unregistered. Select the server address type as IP Address or Domain Name from the drop-down box. According to the selected address type, enter the IP address or domain name of the SIP server. -
Page 65: Setting Video & Audio Parameters
Panic Alarm Master Station • User Manual Intercom Protocol Configuration Select the Protocol as Private Protocol or SIP Protocol from the drop-down box. Click Save. Note: The device will reboot automatically after switching the protocol successfully. Setting Video & Audio Parameters Purpose: In this section, you are able to configure the image quality, resolution and other parameters of the camera. -
Page 66: Setting Vedio Display Parameters
Panic Alarm Master Station • User Manual Resolution: When the stream type is video & audio, the resolution can be set as 1080P, HD720P or 4CIF. When the stream type is video, the resolution can be set as 4CIF, CIF, VGA or QVGA. Audio Encoding Type: When the stream type is video &... - Page 67 Panic Alarm Master Station • User Manual Select a camera from the drop-down box to configure the display parameters of the camera, including display position, display format and optional display content, you are able to add custom display information. − Editing the display position Drag the blue box on the live view page to change the position of the display information, click Save, and then the position of the display information will be updated.
-
Page 68: Setting Intercom Audio Encoding Type
Panic Alarm Master Station • User Manual Setting Intercom Audio Encoding Type Purpose: In this section, you are able to set the intercom audio encoding type as G711_U/G726/AAC/OPUS. Steps: On the remote configuration page, click Image – Intercom Audio to enter the page. Select the Audio Encoding Type as G711_U, G726, AAC or OPUS from the drop-down box. -
Page 69: Configuring Camera Parameters
Panic Alarm Master Station • User Manual Notes: Supported Audio file format: .mp3 and .wav. The file name can’t contain spaces at the beginning and end. The length of the file name should be not more than 31, and the file name should not contain symbols: ?\/*”<>|. - Page 70 Panic Alarm Master Station • User Manual Note: The video standard come into force after rebooting.
- Page 71 Panic Alarm Master Station • User Manual Appendix A Installation Notice In order to reduce the impact of echo of the device, we recommend the distance between the two master stations should be no less than 10 m. 010000001090129...
- Page 72 UD13081B...
Need help?
Do you have a question about the DS-PEA4H-10 and is the answer not in the manual?
Questions and answers