Table of Contents
Advertisement
Available languages
Available languages
Quick Links
Bedienungsanleitung
Flügelradanemometer
Operating manual
Van Air Flow Meter
Anémomètre à hélice
Bedieningshandleiding
Vleugelradanemometer
Istruzione d'uso
Anemometro ad Elica
Manual de instrucciones
Medidor de CO
en combinación con Molinete
Wöhler FA 410
Wöhler FA 430
Mode d'emploi
en Ambiente
2
EN
NL
ES
Advertisement
Chapters
Table of Contents

Subscribe to Our Youtube Channel
Related Manuals for Wohler FA 410


Summary of Contents for Wohler FA 410
- Page 1 Bedienungsanleitung Flügelradanemometer Operating manual Van Air Flow Meter Mode d'emploi Anémomètre à hélice Bedieningshandleiding Vleugelradanemometer Istruzione d'uso Anemometro ad Elica Manual de instrucciones Medidor de CO en Ambiente en combinación con Molinete Wöhler FA 410 Wöhler FA 430...
-
Page 2: Table Of Contents
Inhalt Inhalt Allgemeines ........... 4 Informationen zur Bedienungsanleitung ..4 Hinweise in der Bedienungsanleitung ... 4 Bestimmungsgemäße Verwendung ....4 Lieferumfang in der Grundausstattung ..5 Transport ............5 Entsorgung ............ 5 Anschrift ............5 Gerätespezifikationen ......6 Technische Daten ......... 6 Aufbau und Funktion ...... - Page 3 Inhalt 5.8.2 Punktueller Mittelwert ........20 Einstellungen ........21 P1.0: Auswahl der Maßeinheit ..... 22 P2.0: Eingabe der Fläche des Luftauslasses ............... 22 P3.0: RH offset (nur Wöhler FA 430) ... 23 P4.0: Eingabe des Absolutdrucks (nur Wöhler FA 430) ........23 Kalibrieren (nur Wöhler FA 430)..
-
Page 4: Allgemeines
Allgemeines Allgemeines Informationen zur Be- Diese Bedienungsanleitung ermöglicht Ihnen die sichere Bedienung des Wöhler FA 410 und Wöh- dienungsanleitung ler FA 430 Flügelradanemometer. Bewahren Sie diese Bedienungsanleitung dauerhaft auf. Das Flügelradanemometer darf grundsätzlich nur von fachkundigem Personal für den bestim- mungsgemäßen Gebrauch eingesetzt werden. -
Page 5: Lieferumfang In Der Grundausstattung
Allgemeines Lieferumfang in der Gerät Lieferumfang Grundausstattung Wöhler FA 410 Flügelradanemometer oder 4 x AAA Batterien Wöhler FA 430 Kunststoffkoffer Transport ACHTUNG! Durch unsachgemäßen Transport kann das Gerät beschädigt werden! Um Transportschäden zu vermeiden, muss das Gerät stets in dem dafür vorgesehenen Koffer transportiert werden. -
Page 6: Gerätespezifikationen
Diese Bedienungsanleitung bezieht sich auf die Flügelradanemometer Wöhler FA 410 und Wöhler FA 430. Das bedeutet, dass sie Beschreibungen enthalten kann, die nicht auf das Wöhler FA 410 zutreffen. In diesem Fall wird darauf hingewiesen. Die beiden Geräte unterscheiden sich wie folgt: Wöhler FA 410... - Page 7 Technische Daten Auflösung Beschreibung Wöhler FA 410 Wöhler FA 430 Strömungs- 0,1 m/s geschwindigkeit 0,1 (0 – 9999,9) oder 1 (10.000 – 99.999) Luftvolumenstrom Temperatur 0,1°C/F Relative Feuchte (RH) 0,1 % Taupunkt 0,1°C/F Feuchtkugeltempera- 0,1°C/F 1 ppm Genauigkeit Beschreibung Wöhler FA 410 Wöhler FA 430...
- Page 8 Technische Daten Sonstiges Beschreibung Wöhler FA 410 Wöhler FA 430 Aufwärmzeit 30 Sekunden Arbeitsbedingungen 0 - 50°C, < 80% rH (zur Vermeidung von Kondensat) Lagerbedingungen -10 - 50°C, < 90% rH Stromversorgung 4 Mikro Batterien AAA Batterielebensdauer > 40 Stunden >...
-
Page 9: Aufbau Und Funktion
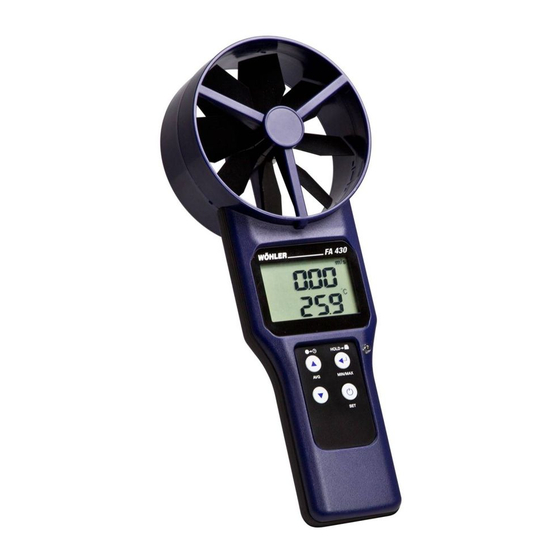
Aufbau und Funktion Aufbau und Funktion Geräteteile Abb. 1: Geräteteile Vorderseite Griff Tastenfeld IR Schnittstelle Display Flügelrad Rückseite Batteriefach... -
Page 10: Tastenfeld
Aufbau und Funktion Tastenfeld Abb. 2: Tastenfeld Das Gerät wird über vier Tasten gesteuert. Diese haben folgende Funktionen EIN/AUS-Taste · Kurz drücken: Ein-/Ausschalten · Gedrückt halten: Setupmodus aufrufen und beenden HOLD/MIN/MAX-Taste · Kurz drücken: Einfrieren des aktuellen Wertes, nach dem Einfrieren gedrückt halten, um den Ausdruck zu starten ·... -
Page 11: Display
Aufbau und Funktion Aufwärts-Taste · Umschalten der Anzeigewerte im oberen Displaybereich (nur Wöhler FA 430) · Gedrückt halten: Aufrufen des Mittelwert- Modus (AVG) · Im Mittelwert-Modus (AVG): Anzeige des Mittelwertes und Rückkehr in den normalen Messmodus · Im Setup Modus: Auswahl eines Parameters und Erhöhen eines Wertes Abwärts-Taste ·... -
Page 12: Bedienung
Zum Einschalten drücken Sie kurz die Ein/Austaste. Im Display erscheint etwa 1 Sekunde der Display- segment-Test. Das Wöhler FA 410 wechselt unmittelbar danach in den normalen Messmodus. Das Wöhler FA 430 wechselt nach einer 30 Se- kunden dauernden Aufwärmphase in den norma- len Messmodus. -
Page 13: Auswahl Des Messkanals
Ein-/Austaste und die AVG-Taste gleichzeitig 2 Sekunden lang. Im Display erscheint kurz „n“, bevor das Gerät in den normalen Messmodus wechselt (Wöh- ler FA 410) oder die Aufwärmphase startet (Wöh- Abb. 5: Deaktivieren der Automatischen ler FA 430). Abschaltfunktion Das Gerät wird sich nun nicht mehr automatisch ausschalten. -
Page 14: Messen Des Volumenstroms
Messen mit Messtrichter Wichtiger Hinweise: Verwenden Sie bei Messungen an Drallauslässen oder an Axial-Ventilen, den „Wöhler FA 410/430 Messtrichter mit Drall-Gleichrichter“ (Artikel 4164) oder rüsten Sie Ihren Messtrichter mit einem Drall-Gleichrichter (Artikel 23501) nach, siehe Zu- behör. Vor der Messung an Push-Pull-Geräten prüfen Sie, ob dies über ein Axial-Ventil verfügt. -
Page 15: Messen Ohne Messrichter
Bedienung Trichtersymbol. HINWEIS! Das Gerät berücksichtigt automatisch den ange- bauten Trichter bei der Berechnung des Volu- menstroms. ACHTUNG! Achten Sie darauf, dass das Flügelradanemome- ter während der Messung fest in der Halterung des Trichters sitzt. Nur dann erscheint das Trich- Abb. -
Page 16: Bestimmung Der Luftqualität (Nur Wöhler Fa 430)
Bedienung Bestimmung der Luftqualität (nur Wöhler FA 430) Eine ausreichende Luftqualität in Innenräumen ist entscheidend für die Behaglichkeit der Nutzer/Bewohner. Daher ist die Bestimmung der Luftqualität Grundlage vieler neu- er Richtlinien, z.B. VDI 6022-3 und DIN EN 15251. Das Wöhler FA 430 bietet Ihnen parallel zur Bestimmung der Menge der aus- oder einstromenden Luft die Beurteilung der Qualität dieser Luft: Die beiden gemäß... -
Page 17: Ausdruck Der Daten Auf Dem Thermodrucker
Bedienung Ausdruck der Daten auf Über eine Infrarot-Schnittstelle können die Werte auf einen Thermodrucker übertragen und ausge- dem Thermodrucker druckt werden. Drücken Sie im normalen Messmodus die HOLD/MIN/MAX-Taste kurz, um den Wert an- zuhalten. Drücken Sie im Haltemodus die HOLD/MIN/MAX-Taste 2 Sekunden lang, um die Daten-Übertragung auf den Thermodru- cker zu starten. -
Page 18: Anzeige Der Kleinsten Und Der Größten Gemessenen Werte
Bedienung Anzeige der kleinsten und der größten gemessenen Werte Halten Sie im normalen Messmodus die HOLD-/MIN/MAX-Taste 3 Sekunden lang ge- drückt. Es werden die kleinsten gemessenen Wert ange- zeigt. Im Display erscheint MIN. Halten Sie nochmals die HOLD-/MIN/MAX- Taste 3 Sekunden lang gedrückt. -
Page 19: Anzeige Des Mittelwertes
Bedienung Anzeige des Mittelwertes Das Flügelradanemometer berechnet den zeitlichen und punktuellen Mittelwert aller Messgrößen. 5.8.1 Zeitlicher Mittelwert Halten Sie im normalen Messmodus 2 Sekun- den lang die Aufwärtstaste gedrückt, um in den Modus für die punktuelle Mittelwertmes- sung zu gelangen. ... -
Page 20: Punktueller Mittelwert
Bedienung Halten Sie die HOLD/MIN/MAX-Taste ge- drückt, um einen Ausdruck zu starten, um damit die Messung zu dokumentieren. Im Display erscheint „Print“. ACHTUNG! Nach der Rückkehr in den normalen Messmodus sind die ermittelten Mittelwerte nicht mehr sichtbar oder abrufbar. Es empfiehlt sich daher, die Werte über einen Ausdruck zu sichern. -
Page 21: Einstellungen
Einstellungen Halten Sie die HOLD/MIN/MAX-Taste ge- drückt, um einen Ausdruck zu starten, um damit die Messung zu dokumentieren. Im Display erscheint „Print“. ACHTUNG! Nach der Rückkehr in den normalen Messmodus sind die ermittelten Mittelwerte nicht mehr sichtbar oder abrufbar. Es empfiehlt sich daher, die Werte über einen Ausdruck zu sichern. -
Page 22: P1.0: Auswahl Der Maßeinheit
Einstellungen P1.0: Auswahl der Maßeinheit Drücken Sie im P1.0-Modus die HOLD/MIN/MAX-Taste, um in den Maßeinhei- tenmodus zu gelangen. Wechseln Sie mit den Aufwärts-und Abwärts- tasten zwischen den metrischen Einheiten (m/s, °C, m /h, cm ) und den imperialen Ein- heiten (fpm;... -
Page 23: P3.0: Rh Offset (Nur Wöhler Fa 430)
Einstellungen Wenn die Eingabe vollständig ist, drücken Sie die HOLD/MIN/MAX-Taste, um die Eingabe zu speichern und in den P2.0-Modus zurückzu- kehren. P3.0: RH offset (nur Wöhler FA 430) Wird ein Offset-Wert eingegeben, so addiert das Messgerät den Offset-Wert grundsätz- lich auf den Messwert. -
Page 24: Kalibrieren (Nur Wöhler Fa 430)
Kalibrieren (nur Wöhler FA 430) Kalibrieren (nur Wöhler FA 430) Kalibrierung der relati- Diese Kalibrierung kann nicht vom Benutzer vor- genommen werden. Schicken Sie das Gerät zur ven Feuchte Feuchtekalibrierung ins Werk oder zu einer zuge- lassenen Servicestelle. -Kalibrierung Das Messgerät wird im Werk auf eine CO Konzentration von 400 ppm kalibriert. -
Page 25: Batteriewechsel
Batteriewechsel Schalten Sie das Gerät aus. Halten Sie 2 Sekunden lang gleichzeitig die Ein-/Aus-Taste, die HOLD/MIN/MAX-Taste und die Abwärtstaste gedrückt, um in den -Kalibriermodus zu gelangen. Im Display erscheint CAL und das Gerät zählt 30 Sekunden lang herunter. Anschließend beginnt die Kalibrierung. -
Page 26: Störungen
Störungen Störungen Störung Mögliche Ursache Behebung Gerät schaltet sich nicht Ein-/Aus-Taste zu kurz Ein-/Austaste etwas länger ein. gedrückt drücken Batterien nicht korrekt ein- Überprüfen Sie die korrekte gelegt Polung Batteriespannung nicht Batterien wechseln ausreichend Fehlercodes 10.1 Lufttemperatur Fehlercode Fehler Maßnahme Temperatur liegt unterhalb Gerät 30 Minuten lang bei Raumtemperatur des Messbereichs. -
Page 27: Taupunkt Und Feuchtkugeltemperatur
Fehlercodes 10.3 Taupunkt und Feuchtkugeltemperatur Fehlercode Fehler Maßnahme Verursacht durch Tempera- Siehe Punkt 10.1 und 10.2. tur oder Feuchtefehler 10.4 Strömungsgeschwindigkeit Fehlercode Fehler Maßnahme Strömungsgeschwindigkeit Messen Sie innerhalb des Messbereichs. liegt oberhalb des Messbe- Erscheint dennoch E03, Gerät zur Repara- reichs. -
Page 28: Garantie Und Service
Garantie und Service Garantie und Service 11.1 Garantie Jedes Wöhler FA 410 und FA 430 wird im Werk in allen Funktionen geprüft und verlässt unser Werk erst nach einer ausführlichen Qualitätskontrolle. Bei sachgemäßem Gebrauch beträgt die Garan- tiezeit auf das Wöhler FA 410 und FA 430 12 Mo- nate ab Verkaufsdatum, ausgenommen sind Bat- terien. -
Page 29: Konformitätserklärung
Konformitätserklärung Konformitätserklärung Das Produkt: Produktname: Flügelradanemometer Modellnummer: Wöhler FA 410 und Wöhler FA 430 Entspricht den wesentlichen Schutzanforderungen, die in den Richtlinien des Rates zur Angleichung der Rechtsvorschriften der Mitglieds- staaten über die elektromagnetische Verträglichkeit (2014/30/EU) festgelegt sind. -
Page 30: Zubehör
Zubehör Zubehör Drucker Wöhler TD 100 Thermodrucker Best. Nr.4160 Messtrichter Wöhler FA 4xx Messtrichterset mit einem eckigen und einem Best.-Nr. 4148 runden Messtrichter zum Aufstecken auf das Flügelradanemome- Eckiger Messtrichter 346 x 346 mm Runder Messtrichter Ø 210 mm Drall-Gleichrichter Wöhler FA 4xx Messtrichter mit Drall-Gleichrichter Best.-Nr. -
Page 31: Kurzanleitung
Kurzanleitung Kurzanleitung... - Page 32 Contents General Information ......34 Operation Manual Information ..... 34 Notes ............34 Intended Use ..........34 Scope of supply for standard configuration . 34 Transport ............. 34 Information on disposal ....... 35 Adress ............35 Fan anemometer specifications ..36 Technical Data ........
- Page 33 Contents 5.8.1 Average value determined over time ... 50 5.8.2 Multi-point average ........51 Settings ..........53 P1.0: Select unit ........... 53 P2.0: Entering the area of the air outlet in cm or inch ............54 P3.0: RH offset (Wöhler FA 430 only) ..54 P4.0: Entering the absolute pressure (Wöhler FA 430 only).
-
Page 34: General Information
Wöhler FA 410 / 430. Please keep this formation manual for your information. The Wöhler FA 410 / FA 430 should be used by trained professionals for its intended use only. Liability is void for any damages caused by not following this manual. -
Page 35: Information On Disposal
General Information original case designed for the purpose. Information on disposal Electronic equipment does not belong into domes- tic waste, but must be disposed in accordance with the applicable statutory provisions. You may hand in any defective batteries taken out of the unit to our company as well as to recycling places of public disposal systems or to selling points of new batteries or storage batteries. -
Page 36: Fan Anemometer Specifications
Fan anemometer specifications Fan anemometer specifications This operating manual has been written for the Wöhler FA 410 and Wöhler FA 430 fan anemometers. That means it may contain descriptions that do not apply to the Wöhler FA 410. This is indicated in such instances. The differences between both fan ane- mometers are listed in the table below: Wöhler FA 410... - Page 37 Technical Data Resolution Description Wöhler FA 410 Wöhler FA 430 Flow velocity 0.1 m/s 0.1 (0 – 9999.9) or 1 (10,000 – 99,999) Volume flow Temperature 0.1 °C/F Relative humidity (RH) 0.1% Dew point 0.1 °C/F Wet-bulb temperature 0.1 °C/F...
- Page 38 Technical Data Miscellaneous Description Wöhler FA 410 Wöhler FA 430 warm-up time 30 seconds 0 – 50 °C (32 – 122 °F), < 80% RH Operating conditions (to avoid condensa- tion) -10 – 50 °C (14 – 122 °F), < 90% RH...
-
Page 39: Design And Function
Design and function Design and function Fan anemometer components Fig. 1: Fan anemometer components Front view Handle Keypad IR interface Display 10 Fan Rear view Battery compartment... -
Page 40: Keypad
Design and function Keypad Fig. 2: Keypad The fan anemometer is operated using four keys. The keys have the following func- tions ON/OFF key · Press briefly: Power on/off · Press and hold: Access and exit Setup mode HOLD/MIN/MAX key ·... -
Page 41: Display
Design and function Up key · Toggle between readings displayed in the top part of the display (Wöhler FA 430 only) · Press and hold: Access the Average value mode (AVG) · In the Average value mode (AVG): Display average value and return to normal Measuring mode ·... -
Page 42: Operating The Fan Anemometer
On/Off key. All possible symbols and units are displayed for about 1 second. The Wöhler FA 410 switches immediately to the normal Measuring mode. The Wöhler FA 430 switches to the normal Meas- uring mode after a warm-up time of approx. 30 seconds. -
Page 43: Selecting The Measurement Channel
2 seconds. "n" is shown on the display before the fan ane- mometer switches to the normal Measuring mode (Wöhler FA 410) or the warm-up phase begins Fig. 21: Deactivate the Auto-Off function (Wöhler FA 430). The Auto-Off function is deactivated, the fan ane- mometer will now not power off automatically. - Page 44 Down key. The air temperature, volume flow, wet-bulb tem- perature and dew point readings are displayed in succession. Wöhler FA 410 To toggle between displayed readings in the lower part of the display, briefly press the Down key.
-
Page 45: Measuring Volume Flow
The funnel symbol is shown in the display. NOTE! The readings now automatically take the installed Fig. 6: Wöhler FA 410/430 with round funnel into consideration for the calculation of the funnel attached volume flow. CAUTION! - Page 46 Operating the fan anemometer measurement funnel mode, please refer to the Chapter 6.2. NOTE! For the measurement of the volume flow at air passages without funnel we recommend the measurement mode “Average value determined over time”.(chapter 5.8.1) When starting the measurement mode , direct the fan anemometer slowly and steady over the entire area of the air passage.
-
Page 47: Determinating The Air Quality (Only Wöhler Fa 430)
Operating the fan anemometer Determinating the air A good air quality is decisive for the comfort of persons. Therefore many new guidelines , e.g. quality VDI 6022-3 and DIN EN 15251, are based on the (only Wöhler FA 430) determination of the air quality. The Wöhler FA 430 does not only determine the amount of circulating air but it also determines the quality of this air. -
Page 48: Printing Out Data On The Thermal Printer
Operating the fan anemometer Printing out data on the You can print out readings by transmitting them to a thermal printer via the infrared interface. thermal printer In the normal Measuring mode, briefly press the HOLD/MIN/MAX key to freeze the current reading. -
Page 49: Displaying The Lowest And Highest Measured Values
Operating the fan anemometer Displaying the lowest and highest measured values When in the normal Measuring mode, press and hold the HOLD/MIN/MAX key for 3 sec- onds. The lowest measured values are displayed. MIN is shown in the display. ... -
Page 50: Displaying The Average Value
Operating the fan anemometer Displaying the average value The fan anemometer calculates the time-averaged and multi-point average of all measured quantities. 5.8.1 Average value deter- In the normal Measuring mode, press and hold the Up key for 2 seconds to access the mined over time Multi-point average mode. -
Page 51: Multi-Point Average
Operating the fan anemometer To obtain a printout, press and hold the HOLD/MIN/MAX key. "Print" is shown in the display. CAUTION! After returning to the normal measuring mode, the average values will no longer be shown. There- fore we recommend to print them out for docu- mentation. - Page 52 Operating the fan anemometer To obtain a printout, press and hold the HOLD/MIN/MAX key. "Print" is shown in the display. CAUTION! After returning to the normal measuring mode, the average values will no longer be shown. There- fore we recommend to print them out for docu- mentation.
-
Page 53: Settings
Settings Settings In the Setup mode, the user is able to configure settings to achieve measurement re- sults of the utmost accuracy. The following settings are possible: P1.0: Select unit P2.0: Entering the area of the air outlet P3.0: RH offset P4.0: Enter the air pressure (Wöhler FA 430 only). -
Page 54: P2.0: Entering The Area Of The Air Outlet In Cm
Settings P2.0: Entering the area of the air outlet in cm or inch In the P2.0 mode, press the HOLD/MIN/MAX key to access the Area entry mode. A five-digit figure is displayed. The first digit flas- hes. Set the first digit using the Up key. Fig. -
Page 55: P4.0: Entering The Absolute Pressure (Wöhler Fa 430 Only)
Settings P4.0: Entering the absolute pressure (Wöhler FA 430 only). When measuring at high altitudes, take the pressure into consideration to obtain a pre- cise CO reading. Before beginning to take measurements at high altitudes, enter the absolute pressure of your location . ... -
Page 56: Calibration (Wöhler Fa 430 Only)
Calibration (Wöhler FA 430 only) Calibration (Wöhler FA 430 only) Calibrating the relative The user is not authorized to calibrate the relative humidity. If it becomes necessary to calibrate the humidity relative humidity, return the fan anemometer to the factory or send it to an approved service cen- ter. - Page 57 Calibration (Wöhler FA 430 only) Carry out manual calibration on a sunny day out- side in the fresh air, for example on the outside windowsill, when the CO concentration is approx. 400 ppm. NOTE! A rainy day is not suitable due to the high air hu- midity, and because it can affect the CO concen- tration in the air.
-
Page 58: Replacing Batteries
Replacing batteries The battery symbol is shown in the display when Replacing batteries the battery voltage is low. In the event the battery symbol is displayed, replace the batteries as follows: Open the battery compartment on the rear of the fan anemometer by simultaneously press- ing down on the small tab above the lid and sliding off the lid at the same time. -
Page 59: Faults
Faults Faults Fault Possible cause Remedy It is not possible to power On/Off key pressed too Press the On/Off key slight- on the fan anemometer fleetingly ly longer Batteries not inserted cor- Check correct polarity rectly Battery voltage insufficient Replace batteries Error codes 10.1 Air temperature... -
Page 60: Dew Point And Wet-Bulb Temperature
Error codes 10.3 Dew point and wet-bulb temperature Error code Error Remedial action Caused by temperature or Please refer to paragraphs 10.1 and 10.2. humidity error 10.4 Flow velocity Error code Error Remedial action Flow velocity is above range Take measurements within range If E03 is still displayed, return the fan anemometer for repair. -
Page 61: Warranty And Service
If used properly, the warranty period for the Wöh- ler Fa 410 / 430 will be 12 month from the date of sale. Not covered by the warranty are the batter- ies and the costs for transport and package. -
Page 62: Accessories
Accessories Accessories Printer Wöhler TD 100 Thermoprinter Art. n° 4160 Measurement funnel Wöhler FA 4xx Measurement funnel kit with a rectangular and a Art. n° 4148 circular measurement funnel that can be plugged on the fan an- emometer Rectangular funnel 346 x 346 mm Circular funnel Ø... -
Page 63: Short Guide
Short guide Short guide...
Need help?
Do you have a question about the FA 410 and is the answer not in the manual?
Questions and answers