Advertisement
Installing Smart-1 150 Hard Disk
Drives
705275
Protected
2013
Smart-1 150
Item
1
2
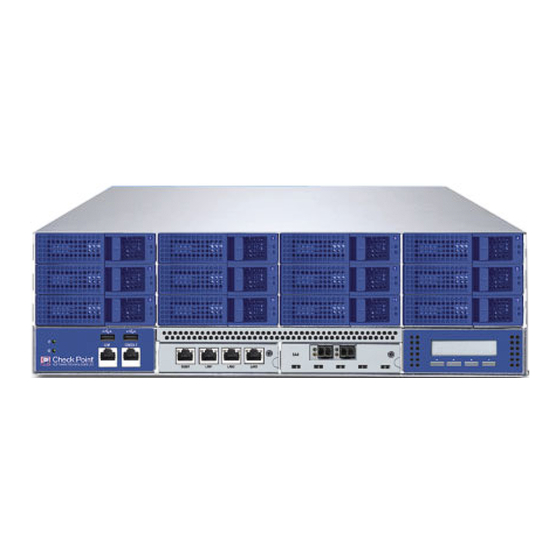
Smart-1 150 uses a dedicated LSI Logic RAID controller to perform RAID 10 mirroring and
striping across all of the hard disk drives. The appliance supports RAID configurations with 4, 8,
or 12 hard disk drives.
Adding Hard Drive Storage
Smart-1 150 can contain up to 12 hard drives. This section explains how to add more hard
drive storage to appliances that were purchased with less than 12 hard drives.
Overview
1. Turn off the appliance.
2. Install the additional four or eight hard disk drives.
3. Turn on the appliance.
4. Run the commands to add more RAID arrays to the appliance.
For a list of our Third Party Copyright notices, please refer to: http://www.checkpoint.com/3rd_party_copyright.html.
Description
Hard disk drive #1
Hard disk drive #12
Classification [Protected]
© 2013 Check Point Software Technologies Ltd. All rights reserved.
For a list of our trademarks, please refer to: http://www.checkpoint.com/copyright.html.
P/N:705275 | 1
Advertisement
Table of Contents

Related Manuals for Check Point Smart-1 150


Summary of Contents for Check Point Smart-1 150
- Page 1 12 hard disk drives. Adding Hard Drive Storage Smart-1 150 can contain up to 12 hard drives. This section explains how to add more hard drive storage to appliances that were purchased with less than 12 hard drives. Overview 1.
- Page 2 The initial setup is 4 hard drives configured in one RAID 10 array. A Smart-1 150 appliance that uses 8 hard disk drives uses two RAID 10 arrays. A Smart-1 150 appliance that uses 12 hard disk drives uses three RAID 10 arrays.
-
Page 3: Replacing Hard Disk Drives
150 from left to right, top to bottom. The upper left hard drive is #1, upper right hard drive is #4. On Smart-1 150 the lower right hard drive is #12. Warning - When replacing more than one hard drive, DO NOT REMOVE both of the hard drives in these pairs. -
Page 4: Removing A Hard Disk Drive
Removing a Hard Disk Drive To remove a hard disk drive: 1. On the hard disk drive, push left on the ejector handle to unlock the hard disk drive. 2. Pull on the ejector handle and the hard disk drive bezel to remove the hard disk drive. 3.
Need help?
Do you have a question about the Smart-1 150 and is the answer not in the manual?
Questions and answers