Table of Contents
Advertisement
Quick Links
Advertisement
Table of Contents

Subscribe to Our Youtube Channel
Related Manuals for Lennox EDA


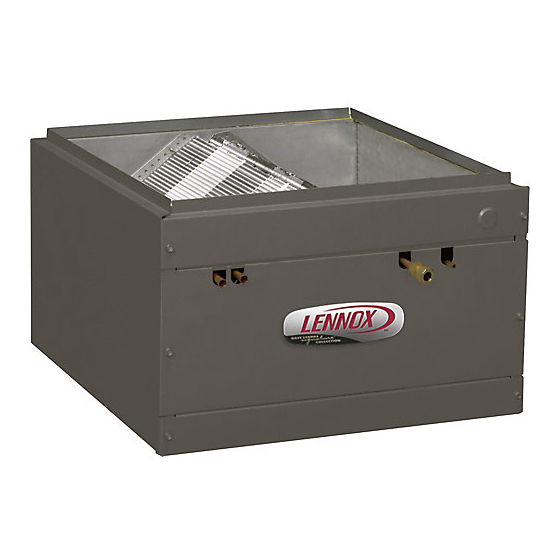
Summary of Contents for Lennox EDA
- Page 1 NOTE - EDA is not applicable to variable-capacity outdoor units! Humiditrol Enhance Dehumidification Accessory 506064-02 4/2019 (EDA) Units Supersedes 506064-01 2019 Lennox Industries Inc. © Installation, Setup and User Guide Dallas, Texas, USA...
-
Page 2: Table Of Contents
2. Installation ................11 1.1. Shipping and Packing List 2.1. Information ......................11 Table 1. Packing List Quantity Description 2.1.1. Refrigeration ......................11 Humiditrol Enhanced Dehumidification Accessory (EDA), EDA-024B (94M41), ® 2.1.2. Releasing Air Charge ...................11 EDA-036C (94M42) or EDA-060D (94M43) 2.1.3. Refrigerant Line Connections ................11 Bag assembly (includes check/flow restrictor for use on Humiditrol coil, and Humid- 2.2. Electrical Wiring ....................11 itrol EDA notification label). Outdoor fan relay and wiring harness (used in select applications. Refer to system 2.3. Humiditrol Installation and Checkout Flow Chart ..........17 wiring diagrams pages 18 to 21 for applicable applications). -
Page 3: Additional Parts Required
NOTE: These instructions are intended as a general guide and do not supersede local codes in any way. Consult authorities having jurisdiction before NOTE: Due to Lennox’ ongoing commitment to quality, features and options are installation. subject to change without notice and without incurring liability. Improper •... -
Page 4: Operation Notes
ComfortSense 7500 or refrigerant through the Humiditrol coil, or cause the refrigerant to bypass the that Non-communicating Non-communicating Communicating Indoor iComfort M30 and Outdoor Units” on coil, depending on the mode of operation. page 12. “Figure 12. CS7500 1.3.4. Operation Notes or M30 with Non- • Dehumidification will not occur when the outdoor temperature is at or above 95ºF Communicating Indoor Lennox or indoor temperature is at or below 65ºF. ComfortSense 7500 or Communicating and Communicating Non-communicating iComfort M30 wired as 24VAC Outdoor Units • When operating in cooling (or heat pump heating) mode, all temperatures and Conventional Wired for Non- pressures will be as in a normal system. Communicating” on page 13. • When the thermostat is in Humiditrol mode, and after a cooling demand has been satisfied but a dehumidification demand persists, and the room temperature is “Figure 13. CS7500... -
Page 5: Decision Tree
XC13N, XC14, XC16 “Installing The Humiditrol ® Enhanced -024 94M44 XC21 -030 Dehumidification Accessory (EDA) In A 14HPX, 16HPX, EL15XP1, ML14XP1, SPB, TPAH4, XP14, XP16, XP21 94M44 -036 Harmony III™ Zoning System Using The -042 EL16XP1, ML16XP1, SL18XP1 98M22 Humiditrol Zoning Accessory”... -
Page 6: Unit Dimensions
1.6. Unit Dimensions 11/16 (17) EDA Model Dimensions - Inches (mm) EDA-024B EDA-036C EDA-060D Dimension 17-1/2 (445) 21 (533) 24-1/2 (622) OUTLET 12-1/4 (311) 12-1/4 (311) 14 (356) 16-1/8 (422) 19-5/8 (498) 23-1/8 (587) OPENING 16-1/8 (422) 19 5/8 (498) -
Page 7: Installation Configuration
1.7. Installation Configuration 1.7.1. Horizontal and Up-flow TYPICAL UP-FLOW POSITION (Furnace Shown) EDA-024B: 12-1/2” EDA-036C: 12-1/2” (TRANSITION HUMIDITROL EDA-060D: 14” See Note 2) UNIT TRANSITION 12” (min.) (See Note 1) Varies by indoor INDOOR coil model; see LENNOX COIL Product Specifications. -
Page 8: Down-Flow
1.7.2. Down-flow This accessory is designed for indoor installations in either up-flow or horizontal air discharge applications, however, the unit will function in the down-flow configuration, provided the instructions contained herein are followed. Furnace Configuration Air Handler Configuration FIELD CONSTRUCTED SUPPORT STAND FIELD CONSTRUCTED SUPPORT STAND INDOOR COIL UNIT INSULATED TRANSITION INSULATED TRANSITION HUMIDITROL HUMIDITROL UNIT UNIT Figure 4. Typical Down-flow Configurations for both Air Handler and Gas Furnace... - Page 9 NOTE − Coil weight must not rest on transition. UNIT Using the field-constructed brackets, assemble EDA, transition, and indoor coil, fastening the EDA−036C: 12−1/2" (318 mm) brackets to the coil and Humiditrol units with EDA−060D: 14" (356 mm) field−supplied screws.
-
Page 10: Component Functions
- bypasses the active mode - allows HUMIDITROL refrigerant flow through HUMIDITROL inactive mode - vent path to suction line; EDA active mode - directs refrigerant flow back to liquid line. Figure 9. Check/Flow Restrictor Operation Figure 10. Humiditrol Unit Parts Arrangement... -
Page 11: Installation
All Humiditrol coils are shipped with a combination check/flow restrictor. The restrictor is provided in the bag assembly and must be installed. Refer to the appropriate high and/or low side installation instructions for information on the appropriate line sets. Refer to Lennox Refrigerant Piping guide (Corp. 9351-L9) for proper size, type, and application of field-fabricated lines. 2.1.2. Releasing Air Charge NOTE: Humiditrol units are shipped from the factory with dry air as a holding charge. - Page 12 Use Wire nuts DS—Y1 JUMPER - MUST BE REMOVED OUTDOOR FOR HUMIDITROL OPERATION SENSOR (X2658) HEAT PUMP APPLICATIONS ONLY - REMOVE R—O JUMPER. VIOLET ORANGE EDA VALVE ACTUATOR EDA RELAY EARLIER MODEL VALVE OUTDOOR UNIT ACTUATOR DEFROST BOARD (HP) INDOOR Humiditrol...
- Page 13 DEHUMIDIFICATION. DS—Y1 JUMPER - MUST BE REMOVED FOR HUMIDITROL OPERATION HEAT PUMP APPLICATIONS ONLY - REMOVE R—O JUMPER. (2-STAGE ONLY) FOR HUMIDITROL OPERATION (EDA), INDOOR UNIT CONNECT FIELD PROVIDED WIRE FROM DS ON A92 TO DS ON A175. 24 VOLT SEE TRACE CUT DETAIL.
- Page 14 NUMBER OF WIRES REQUIRED—Indoor unit to: Air Sensors (Optional) Operation sequence for dehumidification CS7500 and iComfort System Type Humiditrol EDA Outdoor unit Outdoor Discharge REMOVE 24 VOLTS FROM DH AND/OR DS 1-stage AC THERMOSTAT CYCLES OUTDOOR UNITS TO 2-stage AC...
- Page 15 NUMBER OF WIRES REQUIRED—Indoor unit to: Air Sensors (Optional) Operation sequence for dehumidification iComfort E30 System Type Humiditrol EDA Outdoor unit Outdoor Discharge REMOVE 24 VOLTS FROM DH AND/OR DS 1-stage AC THERMOSTAT CYCLES OUTDOOR UNITS TO 2-stage AC INDOOR AND OUTDOOR FAN SPEEDS...
- Page 16 NUMBER OF WIRES REQUIRED—Indoor unit to: Air Sensors (Optional) System Type Humiditrol EDA Outdoor unit Discharge Outdoor iComfort S30 1-stage AC 2-stage AC 1-stage HP 2-stage HP Operation sequence for dehumidification REMOVE 24 VOLTS FROM DH AND/OR THERMOSTAT CYCLES OUTDOOR...
-
Page 17: Humiditrol Installation And Checkout Flow Chart
2.3. Humiditrol Installation and Checkout Flow Chart NOTE - Lennox communicating systems support iHarmony zoning sytem only. Cannot use Harmony III in total communicating system. Following the procedures reference in this section when installing the Humiditrol Installation Process Check Dehumidification Operation and associated components. Table 5. Required Parts for Specific Applications ENSURE ALL POWER IS OFF... -
Page 18: Leak Testing, Evacuating, Charging
NOTE 1 - (Any upflow or horizontal application) The physical distance between the evaporator coil 7/8 X 7/8 X OUTDOOR UNIT and the EDA unit can be extended so long as all of the evaporator coil air flow also flows through 3/8 TEE STOP the EDA coil and the 12 foot line length limitations are met. -
Page 19: Using Humiditrol Comfort Adjust
2. PUSH ACTUATOR SHAFT DOWN TOWARD THE Refer to the ComfortSense 7500, iComfort E30, M30 or S30 Thermostat Installation CENTER-OF-TRAVEL POSITION and Setup Guide for non-communicating installation, wiring, and setup. NOTE: Lennox communicating outdoor units have an outdoor sensor installed. If these units are connected to a Lennox communicating thermostat, an optional outdoor sensor is not needed. IMPORTANT Either a CS7500 or iComfort family thermostat along with a properly connected outdoor temperature sensor are required for the Humiditrol unit to function prop- erly. -
Page 20: Dehumidification Requirements
Overcooling ranges from 2ºF below the cooling setpoint (MIN setting) down to 2ºF START above the heating setpoint (MAX setting). Halfway between the two settings is the HUMIDITROL MID setting. indoor temperature there a heating greater than 2ºF Table 6. Humiditrol Comfort Adjust Parameters demand above heating set point RUN EQUIPMENT Humiditrol Comfort Adjust parameters Indoor temperature is greater than: IN NORMAL HEATING MODE Maximum overcooling 2% above heating setpoint there a cooling... -
Page 21: Icomfort E30 And S30 Thermostats
NOTE 1. With EDA Coil Active, expect a 10 to 25ºF air temperature rise across EDA coils. NOTE 2. With EDA Coil Active, expect a 10 to 40ºF liquid line temperature change across EDA coils. NOTE 3. Charge compensator and 1/4” line not required on all systems. See Product Specifications. -
Page 22: Cooling Mode (Dehumidification Off)
1200 0.06 NOTE 1. In Cooling Mode, no air temperature change across EDA coils. NOTE 2. In Cooling Mode, no liquid line temperature change across EDA coils. 1400 0.08 NOTE 3. Charge compensator and 1/4” line not required on all systems. See Product Specifications. -
Page 23: Thermostat Demand Signal
hermostat emand IGnal Table 9. Demand Signals - Humiditrol Operating Sequence System Demand System Response Blower CFM Thermostat Demand Relative Humidity Com pr (Cool) % System Type Step Status Comments Cooling Demand - No Dehumidification Demand Single-stage outdoor unit (na) Acceptable 24 VAC High Compressor and indoor blower follow thermostat Two-stage outdoor unit Y1... -
Page 24: Checklist
Confirm 1/4” port oriented downward to lowest point Check/Flow Restrictor 3/8” Line Confirm restrictor installed/oriented properly. System Charge Refrigerant With unit running in cooling mode, check and confirm system is properly charged (see outdoor unit installation instructions). Outdoor Unit Fan Relay If non-communicating outdoor unit with variable speed outdoor fan. Confirm relay is installed properly. Outdoor Unit EDA Label Confirm label is installed in prominent location and will be easily visible dur i ng servicing. NOTE: System will NOT operate in dehumidification mode with outdoor temperature at or above 95ºF. Dehumidification Operational Status Record supply air temperature and confirm that temperature is higher than in cooling mode. Mode Dehumidification Operational Status On units with variable speed outdoor fan, check that fan operates at approxi m ately 250 RPM (lowest speed). Mode...
Need help?
Do you have a question about the EDA and is the answer not in the manual?
Questions and answers