Table of Contents
Advertisement
Advertisement
Table of Contents

Related Manuals for Daub DR


Summary of Contents for Daub DR
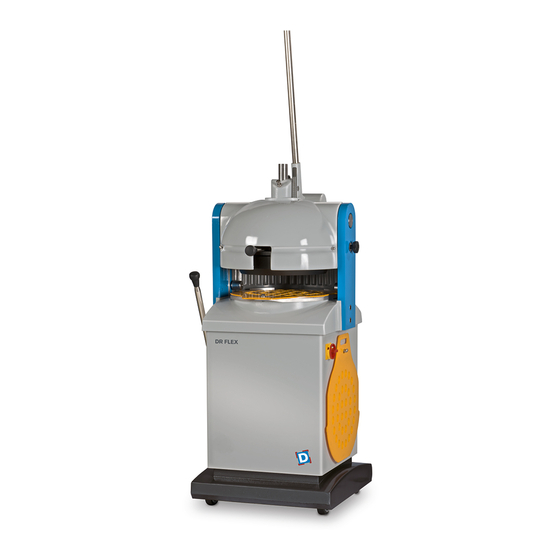
- Page 1 Date: 01-01-2016 DR (FLEX) Version: 06 USERS MANUAL ENGLISH...
-
Page 2: General
Page 2 GENERAL We thank you for choosing a DAUB product. We trust you are satisfied with your purchase. For correct use and prolong lifespan it is important to read our manual and to comply with the suggestions, recommendations and / or regulations when unpacking, installing, using and maintaining the machine. -
Page 3: Table Of Contents
Inadmissible use of the machine ....................11 WORKING OF THE MACHINE ....................... 12 Taking use of the machine ......................12 Working with the machine ......................13 EXCHANGING DIVIDING DISCS (ONLY MODEL DR-FLEX) ..............15 JUDGMENT OF THE RESULT ......................... 17 10 MAINTENANCE ............................. 18 10.1 Cleaning ............................ -
Page 4: Product Information
Date: 01-01-2016 DR (FLEX) Version: 06 USERS MANUAL Page 4 PRODUCT INFORMATION After sales service: Your supplier Machine naming: Machine number: See machine plate Date of manufacturing: See machine plate Power: See machine plate Voltage: See machine plate Current: See machine plate... -
Page 5: Definitions
Date: 01-01-2016 DR (FLEX) Version: 06 USERS MANUAL Page 5 DEFINITIONS Warnings The following signs warns the operator for a possible danger. Figure 2-1 Figure 2-2 Figure 2.1 is a sticker which is used on the machine indicating the position where caution must be taken to avoid stucking into the machine. -
Page 6: Decription Of Parts Of The Machine
Date: 01-01-2016 DR (FLEX) Version: 06 USERS MANUAL Page 6 Decription of parts of the machine Pressing handle Volume bar Front cover Rear cover Knife release Locking pin voor mes Rounding handle Bolt for v-belt tension Power switch Roundingplate Figure 2-3... -
Page 7: Safety
Date: 01-01-2016 DR (FLEX) Version: 06 USERS MANUAL Page 7 SAFETY Safety regulations Remove plug from the power supply when cleaning and/or maintaining the machine. Only qualified or well instructed employees can do repairs of mechanical or electrical nature. Never put your hands in its working area when using the machine (see figure 3-1). -
Page 8: Transport And Unpacking
Date: 01-01-2016 DR (FLEX) Version: 06 USERS MANUAL Page 8 TRANSPORT AND UNPACKING Transport The machine must be transported in its original packing. In the means of transport the packing must be secured against shoving. The machine should be moved with the right lift equipment. -
Page 9: Installation
Date: 01-01-2016 DR (FLEX) Version: 06 USERS MANUAL Page 9 INSTALLATION Placing and maintenance Only qualified employees are allowed to install the machine. The machine can only be used for its purpose: to divide and round dough. Guarantee can not be claimed if changes have been made to the machine without the manufacturers permission and/or if not-original spare parts are used. -
Page 10: Carrying Off Materials
Date: 01-01-2016 DR (FLEX) Version: 06 USERS MANUAL Page 10 Carrying off materials When carrying off a complete machine, parts or only the packing, you should comply with the legal regulations. Specifications concerning the material of the parts can be asked for at the manufacturers. -
Page 11: Product Description
Date: 01-01-2016 DR (FLEX) Version: 06 USERS MANUAL Page 11 PRODUCT DESCRIPTION Purpose of the machine The machine (dependent on the type) is meant to divide and round dough pieces of 2, 3 or 4 kg (4.4, 6.6 or 8.8 lbs), which have already been pre-proofed lightly. Put the undivided dough piece on the plate and flatten it by hand. -
Page 12: Working Of The Machine
Date: 01-01-2016 DR (FLEX) Version: 06 USERS MANUAL Page 12 WORKING OF THE MACHINE Taking use of the machine Check if the machine is placed correctly as described in chapter 6 “Installation”. Check if it is necessary to clean the machine because of possible transport dirt. -
Page 13: Working With The Machine
Date: 01-01-2016 DR (FLEX) Version: 06 USERS MANUAL Page 13 Working with the machine Qualified persons older than 16 years may only operate the divider rounder. • Turn the power on • Adjust volume control bar (Indications shown in table 1) to the position to the weight of dough •... - Page 14 Date: 01-01-2016 DR (FLEX) Version: 06 USERS MANUAL Page 14 • Press the dough by rotating the press handle. The pressing ring will come down and the dough will be pressed. In order to obtain dough pieces with equal weights, it is necessary to press as long...
-
Page 15: Exchanging Dividing Discs (Only Model Dr-Flex)
Date: 01-01-2016 DR (FLEX) Version: 06 USERS MANUAL Page 15 EXCHANGING DIVIDING DISCS (ONLY MODEL DR-FLEX) Always turn the main switch to “0” (=off) before. • Remove front cover and rear cover • Pull locking pin • Turn de dividing disc up by pulling up the knife release lever (see position 1) •... - Page 16 Date: 01-01-2016 DR (FLEX) Version: 06 USERS MANUAL Page 16 • Rotate the two grips to the outside of the disc • Lock the grips by pushing it into the disc • Rotate disc counter clockwise Weight of disc is approx. 13 kg (29 lbs) •...
-
Page 17: Judgment Of The Result
Date: 01-01-2016 DR (FLEX) Version: 06 USERS MANUAL Page 17 JUDGMENT OF THE RESULT The following information will help you to obtain the best possible result. When operating the machine, always observe the following adjustment options: volume, pressing time and rounding time. -
Page 18: Maintenance
Date: 01-01-2016 DR (FLEX) Version: 06 USERS MANUAL Page 18 10 MAINTENANCE In below section there are reference to specific position numbers, which can be found in the technical manual. If you do not have a technical manual, please ask your dealer. -
Page 19: Cleaning Of The Dividing Head And Knife Crown
Date: 01-01-2016 DR (FLEX) Version: 06 USERS MANUAL Page 19 10.2 Cleaning of the dividing head and knife crown • Remove covers (see position 1) • Turn the weight control bar to its maximum (see figure position 2) • Remove locking pin (see position 3) Be aware the pressing handle will rotate backwards if the dividing disc will tilt towards. -
Page 20: Cleaning Of The Area Below The Rounding Table
Date: 01-01-2016 DR (FLEX) Version: 06 USERS MANUAL Page 20 • Take position at the back of the machine • Keep knife release with left hand and pressing handle with the right hand • Move knife release to the left (see position 1) to end position •... -
Page 21: Adjusting Of The Knife Crown
Date: 01-01-2016 DR (FLEX) Version: 06 USERS MANUAL Page 21 10.4 Adjusting of the knife crown Only qualified employees can adjust the knife crown. Other persons have to keep some distance. First of all remove the covers and the pressing ring. -
Page 22: Fault Finding
Date: 01-01-2016 DR (FLEX) Version: 06 USERS MANUAL Page 22 11 FAULT FINDING The knife crown and the dividing head remain disconnected. Check if pressing handle is returned up completely Check the spring on the knife release (figure D1-20) The rounding table does not stop its eccentric movement.
Need help?
Do you have a question about the DR and is the answer not in the manual?
Questions and answers
How do I get it to start
To start the Daub DR machine, follow these steps:
1. Check Safety Instructions: Read the safety instructions in Chapter 3 to avoid injuries and machine damage.
2. Inspect Rounding Plates: Ensure the supplied rounding plates fit properly and align with the centering pin.
3. Verify Electrical Connection:
- Connect the power cable.
- Ensure the machine is connected to a circuit with a Class 1, Type C residual current device.
- Check the machine’s rotation:
- Turn on the main switch.
- Rotate the rounding lever; the worktable should rotate counterclockwise.
- If rotation is incorrect, an electrician must swap two phases in the connection plug.
4. Turn on the Machine: Switch on the machine to begin operation.
These steps ensure safe and proper startup.
This answer is automatically generated