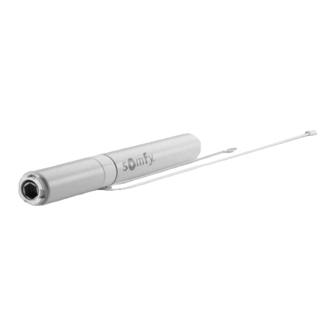
SOMFY Tilt Only 50 WF RTS Installation & Programming Manual
Interior applications
Hide thumbs
Also See for Tilt Only 50 WF RTS:
- Instructions manual (28 pages) ,
- Instructions manual (46 pages)
Table of Contents
Advertisement
Advertisement
Table of Contents

Related Manuals for SOMFY Tilt Only 50 WF RTS


Summary of Contents for SOMFY Tilt Only 50 WF RTS
- Page 1 Installation/programming guide Interior applications...
-
Page 3: Table Of Contents
Contents Overview RTS options Compatibility, Motor-Power supply-sensors Power connections: Applications with RTS integrated motors Basic Programming and setting of RTS motors 1 Connect the RTS transmitter to the motor 2 Check the motor rotation direction 3 Change motor rotation direction if needed 4 Place the blind in the desired UP position 5 Set the DOWN position 6 Set the UP position... - Page 4 Add or remove transmitters Factory reset Program individual channels to group channel Sonesse 40 WT, Setting of end limits Curtain track Recommendations Motor cable output options Attach motor to rail Wiring guide DCT & RTS Curtain track motors RTS, Programming instruction Connect the RTS transmitter to the motor Check the motor rotation direction Change if needed motor rotation direction...
- Page 5 Set the tilt speed / scroll wheel step Modify motor rotation direction Modify scroll wheel rotation direction Li-Ion motors Activate/Deactivate RTS Temporary sleeping mode How to replace battery Sonesse 30 DCT Wiring Setting type of blind Setting of rolling speed Setting of tilt speed Reset motor in Factory mode 24 V Wired controls for Roll up application...
- Page 6 Sunis WireFree II io sensor Description Program the sensor on a motor with a 1-way transmitter Programming Moco DCE To change to Lift application Setting of end limits TaHoma Composition Connect the box Create your account Configure your connected home Add devices Connexoon Window RTS Product components...
-
Page 8: Overview Rts Options
Overview RTS options 24 Volt 230 Volt WireFree range RTS motorer RTS Receiver RTS motor RTS Receiver RTS motor io motor Glydea ULTRA RTS + track Irismo WireFree 45 RTS Movelite 35 RTS Motor Sonesse Motor Motor Motor Tilt & lift 25 WF RTS Motor LW 25 30 RTS Sonesse 40... -
Page 9: Compatibility, Motor-Power Supply-Sensors
*= Roll up 24 WF RTS Li-ion, Roll up 28 WF RTS Li-Ion, Sonesse 28 WF RTS Li-Ion, Roll Up 28 WF RTS , Sonessen ULTRA 30 WF RTS Li-Ion, Tilt&Lift 25 WF RTS, Tilt Only 50 WF RTS C = Compatible... - Page 10 Compatibility chart Compatibility chart, Motor / Remote-sensors io Remote control compatibility chart Smoove Smoove 1 io Smoove A/M io Situo 1&5 io Chronis 1&5 io Nina io Nina Timer io origin io Sonesse 40 io io sensor and system compatibility chart Sunis WF io Tahoma Connexoon...
-
Page 11: Power Connections: Applications With Rts Integrated Motors
Jr 30 Roll Up 30782 WF RTS Roll Up 28 WF RTS Tilt & Lift 25 WF RTS Tilt Only 50 WF RTS Wirefree motors, built in battery Jr Roll Up 30 WF RTS Li-Ion Roll Up 24 WF RTS Li-Ion... - Page 12 Power connection 230 V AC motors: Sonesse 40 RTS/io, 2 wires, Sonesse (ULTRA) 50 RTS 3 x 1,5 mm 3 x 0,75 mm 1. Neutral 2. Phase 3. Ground 230V/50 Hz Sonesse 40 RTS Blue Black 230V/50 Hz Sonesse 50 RTS Blue Black Yellow/green...
-
Page 13: Basic
IWC RTS & io motors - programming and Basic setting Basic Initial setup - Connect the motor that should be programmed to power - For Li-Ion motors, put the motor in program mode To set Li-Ion motors in programming mode. Briefly press the motor The motor jogs 3 times and head programming button... -
Page 14: Place The Blind In The Desired Up Position
IWC RTS & io motors - programming and Basic setting Basic 4 Place the blind in the desired UP position 5 Set the UP position Short Blind goes down Stop at desired Adjust if needed simultaneous down position press 6 Set the DOWN position Short simultaneous The motor moves upwards and press... -
Page 15: Adjustments
IWC RTS & io motors - programming and Basic setting Basic 1 Adjusting the DOWN limit 5 sec. Place the blind in the down position Press simultaneously ...motor jogs until... 2 sec. Choose a new down position Confirm new down position, press “My” ... -
Page 16: Set Blind Mode: Roller Or Venetian
IWC RTS & io motors - programming and Basic setting Basic Set blind mode: Roller or Venetian Default setting Tubular motors = Roller Tilt & Lift 25 WF RTS = Venetian Place the blind half way down 2 Change the setting 2 sec. -
Page 17: Setting My Position For Non Tilt Products
IWC RTS & io Motors - programming and Basic setting Basic Setting My position for products/motors in Non Tilt mode Adjusting My position 5 sec. Repeat procedure to a new desired position Place the blind in desired position Confirm the My position, press “My” until motor jogs OK My can never be set the same as up or down position... -
Page 18: Wired Rts Receivers, 24 Vdc
24 VDC RTS Receivers Basic Wiring DC RTS Receiver 230/24 V power supply Integrated DC RTS Receiver 230/24 V power supply Power 1 x 2,5 DC RTS (power 4 x 2,5 DC RTS, Power 2,7 DC) -
Page 19: Setting From The Rts Receiver
24 V RTS Receivers - Programming and basic settings Basic Setting from the RTS receiver 1 Set the RTS receiver in programming mode If the blind doesn’t react, - reverse the 24V power supply cables 3 sec. 3 sec. - try from start again Press the prog button until... -
Page 20: Setting From The Rts Remote Control
24 V RTS Receivers - Programming and basic settings Basic Setting from the RTS remote control 1 Connect the RTS remote control to the RTS receiver When programming If the blind doesn’t react, a multi channel control, - reverse the 24V power choose channel first supply cables - try from start again... -
Page 21: Set Type Of Blind: Roll Up Or Tilt And Lift
24 V RTS Receivers - Programming and basic settings Basic Set type of blind: Roll up or Tilt and Lift For Roll up type of blind, roller, pleated or roman blind Do below setting (Default = Tilt & Lift) 1 Put the receiver in programming mode 5 sec. -
Page 22: Change The Motor Rotation Direction
24 V RTS Receivers - Programming and basic settings Basic Change the motor rotation direction Place the blind half way open 1 Put the receiver in programming mode 5 sec. Press simultaneously ...motor jogs until... 2 Check the rotation direction ok ... -
Page 23: Sett The Time For Open And Close Movement
24 V RTS Receivers - Programming and basic settings Basic Set the time for open and close movement This setting is needed to - set and use a MY position - connect and use a sun sensor - set a run time for conservatory roof blinds 1 Put the receiver in programming mode 5 sec. - Page 24 24 V RTS Receivers - Programming and basic settings Basic 5 Set the down time Time measurement continues (max 10 sec) Press and hold Blind moves When blind stops, downwards release the button If the blind’s still not in it’s down position, repeat step 5 7 Set the up movement time If the blind reaches If the blind doesn’t reach-...
- Page 25 24 V RTS Receivers - Programming and basic settings Basic If the blind’s still not in it’s UP position, repeat step 9 11 Close time setting of open and close movements A MY-position has now automatically been set Tilt&Lift mode: Press until...
-
Page 26: Modify The My Position, In Tilt & Lift Mode
24 V RTS Receivers -Programming and basic settings Basic Modify the MY position, in Tilt & lift mode With the up and down movement times set, MY position is pre-set to: - bottom bar in down end limit - slats tilted to 45 degrees 1 To set a new MY-position, when in Tilt &... -
Page 27: Modify The My Position, In Roll Up Mode
24 V RTS Receivers -Programming and basic settings Basic Modify the MY position, in Roll up mode With the up and down movement times set, MY position is pre-set to: - 3/4 down 1 To set a new MY-position, when in Roll up mode Move the blind to the new desired MY-position 2 Confirm the new desired MY-position... -
Page 28: Activating The Motor Run Timer
24 V RTS Receivers -Programming and basic settings Basic Activating the motor Run timer Limit the controls power output to the programmed operation time Only recommended on end products with no mechanical stop 2 sec. 2 sec. Press simultaneously ...motor jogs Press simultaneously ...motor jogs until... -
Page 29: Add A Transmitter
Add or remove transmitters Basic Add a transmitter 1 Start from a transmitter that’s assigned to the blind When using a >2 sec. multi channel control, choose channel first ...motor jogs Press the prog button on the back of the control until... 2 Add the new transmitter ...motor jogs Press the prog button on... -
Page 30: Add Or Remove Transmitters
Add or remove transmitters Basic Replace lost transmitter 1 Press and hold programming button on motor or receiver Press and hold programming button Motor jogs two times 2 Record the new transmitter Press simultaneoulsy ...motor jogs ...motor jogs Press the prog button until... -
Page 31: Factory Reset
Factory reset Basic 1 Press and hold programming button on motor or receiver 3 sec. 3 sec. Press and hold programming button Motor jogs 3 times After 7 sec. After 12 sec. First after 2 sec. The RTS motor/receiver is now reset. Start programming from beginning 1 Cut the power twice 5 sec. -
Page 32: Program Individual Channels To Group Channel
Program individual channels to group channel Basic Telis 4 with blinds programmed to channel 1 up to 4 To program group channel Select Channel 1 Press Prog on ...motor jogs Select all Channels Press Prog on ...motor jogs backside until... backside until... -
Page 33: Sonesse 40 Wt, Setting Of End Limits
Sonesse 40 WT Basic Setting of end limits Note! The position of the motor, to the right or left, and the way the fabric is rolled on the tube, impacts how to set the limits Adjust the stop limit Adjustment screw 1 alters the stop limit in direction 1 Adjustment screw 2 alters the stop limit in direction 2 By turning the screw towards + the number of motor turns increases By turning the screw towards –... -
Page 34: Curtain Track
Curtain track Basic Recommendations Please note there is a maximum distance between brackets and a minimum mounting distance from the wall, see drawing below. >15 mm >35 mm 500 mm 500 mm 500 mm 110 mm >15 mm >35 mm 110 mm 500 mm 500 mm... -
Page 35: Curtain Track Motors Rts, Programming Instruction
Curtain track Basic Programming instruction 1 Connect the RTS transmitter to the motor Only connect one motor to power whilst programming It’s recommended to perform programming with curtain installed. At the first command, open or close, the curtain will make a complete run, open &... -
Page 36: Setting My Position
Curtain track Basic Setting My position 2 sec. Place the curtain in the desired position To confirm My position, ...motor jogs press MY until... Re-adjustment of end -limits 1 Place the curtain in the end limit you wish to adjust OPEN CLOSE 2 Put the receiver in programming mode... -
Page 37: Set Touch Motion Or Manual Over Ride Mode
Curtain track Basic Set Touch motion or manual over ride mode 1 Put the receiver in programming mode 5 sec. Press simultaneously ...motor jogs until... 2 Switch between manual over-ride to touch motion High sensitivity Low sensitivity 2 sec. No touch motion 5 sec. -
Page 38: Set Track Speed, Default Speed = 20 Cm/S
Curtain track Basic Set track speed Possible speeds: 12.5 / 15 / 17 / 20 cm/s Glydea Ultra 35/60, Ultra quite setting Set toggle switch to Hi-speed for standard setting, 15 cm/s and adjustable. Set the toggle switch to “Silent” for Ultra silent mode, 7,5 cm/s. -
Page 39: Add Transmitter
Curtain track Basic Add transmitter see RTS page (RTS motor) Reset motor to factory mode, erase all settings Glydea Movelite For Glydea Press and hold programming or ‘S’ button..until motor has jogged three times ULTRA RTS, remove motor bottom cover Wiring control unit to Glydea DCT Connection of DCT tool Open... -
Page 40: Curtain Track Dct Motors, Wiring Control Unit To Glydea Dct
Curtain track Basic Programming instruction for DCT motors it’s recommended to use Setting tool ref 9014599 Programming Start up, press up At the first command, open or close, (open) or the curtain will make a complete run, open - close, down (close) to record the hard end limits. -
Page 41: Set Touch Motion Or Manual Over Ride Mode
Curtain track Basic Set Touch motion or manual over ride mode Put the receiver in programming mode Press ‘UP’, ‘STOP’ ...motor jogs Press until..motor jogs and ‘DOWN’ until... High sensitivity Low sensitivity No touch motion Press again to move to To confirm setting, ...motor jogs next function. -
Page 42: Curtain Track Wt Motors, Wiring Instruction
Curtain track Basic Wiring instruction for Glydea ULTRA WT, Movelite WT Motor can be used without programming. Open When first connected to power the motor will run a full cycle to set the end limits Close For setting Use setting tool ref 9014599 Programming instruction Please note, one of the two power wires, black or brown, needs to be connected to permanent power during programming... -
Page 43: Back Release Setting
Curtain track Basic Back release setting Move the curtain to the OPEN end limit Press and hold ...motor jogs Press ‘DOWN’ to..desired ‘STOP’ and ‘DOWN’ release point until... To confirm back- ...motor jogs release point, press ‘STOP’ until... For setting of - Track speed (Glydea Ultra 35/60 ULTRA only), Follow procedure described for RTS control, page 38 Reset motor to factory mode, erase all settings Press and hold ‘UP’,... -
Page 44: Advanced
Additional function Advanced Sunsensor fuctions, setting of receiver when connected to outside sun sunsensor 1 Deactivate and activate privacy function Default setting: Exterior sun sensors are automatically deactivated when a manual down signal is given = Privacy function 2 sec. Press simultaneously ...motor jogs Press until... -
Page 45: Program Sun Disappearing Position
Additional function Advanced Sunsensor fuctions, setting when connected to outside sunsensor Program sun disappearing position -This function is available only if a MY position is recorder. If no sun disappearing position is programmed the blind will not go up when sun disappears In tilting mode: The shade will move to the lower 2 sec. -
Page 46: Set The Tilt Speed / Scroll Wheel Step
Additional functions Advanced Set the tilt speed / scroll wheel step 1 Enter setting 2 sec. Press simultaneously ...motor jogs twice ...with Sonesse 30 RTS blinds moves until... automatically up and down 2 Set speed/scroll wheel step Press UP or DOWN repeatedly to To confirm setting, ...motor jogs decrease or increase speed... -
Page 47: Modify Motor Rotation Direction
Additional functions Advanced Set the tilt speed / scroll wheel step To decrease speed Make sure motor is set in Tilt mode Press DOWN and STOP simultaneously until motor jogs To increase speed Make sure motor is set in Tilt mode Press UP and STOP simultaneously until motor jogs Modify motor rotation direction... - Page 48 Additional functions Advanced Modify scroll wheel rotation direction Make sure motor is set in Tilt mode Move the blind away from it’s end limit Verify that the tilt rotation direction 2 sec. 2 sec. is correct Press ...motor jogs Press ...motor jogs simultaneously simultaneously...
-
Page 49: Li-Ion Motors
Li-Ion motors Advanced Deactivate/Activate RTS when control point is temporarily recorded to motor This function is used to deactivate the radio transmission to save the battery life (during shipment, storage) 1 Deactivate the RTS Radio Technology Press simultaneously ...motor jogs once and until... -
Page 50: Temporary Sleeping Mode
Li-Ion motors Advanced 2 Activate the RTS Briefly press the Prog button on Motor jogs once and the motor head or plug in the green LED charger. blinks 5 times Temporary sleeping mode Attention The driven product must be programmed. The drive will not respond to any control points commands for 15 minutes. -
Page 51: How To Replace Battery
Li-Ion motors Advanced Li-Ion motors, How to replace battery Precaution Replacement of the battery by an identical model only, must be carried out by a professional of the motorization and the automation of the habitat. Attention • Do not use tools that could damage the drive when replacing the battery •... -
Page 52: Sonesse 30 Dct
Sonesse 30 DCT Advanced Wiring We recommend to use DCT setting tool Ref 9014599 for setting Connect power 1 UP (White/Blue) 2 STOP (Blue) 3 DOWN (White/Orange) 4 GND (Orange) Connect DCT setting tool Programming for, - Checking and changing rotation - Setting of end limits - Setting and changing of my position Follow the procedure for Sonesse 30 RTS page 13-17 &... -
Page 53: Setting Of Tilt Speed
Sonesse 30 DCT Advanced Setting of tilt speed Press until..motor jogs three times Blind moves automatically up and down Press UP Press DOWN To confirm new ...motor jogs to increase speed to decrease speed speed, press until... Reset motor in Factory mode Press until... -
Page 54: Wired Controls For Roll Up Application
24 V Wired controls for Roll up application Advanced Setting of My positions - My position from UPPER end limit Place blind in UP end limit Press simultaniousy Stop at desired My position until blind moves down Adjust if needed with UP or DOWN button To confirm My ...motor jogs... -
Page 55: Wired Control For Tilt & Lift Applications
24V Wired control for Tilt & Lift applications Advanced Adjust tilt speed Place the blind Press ...moves continuously approximately 75% closed simultaneously until... up and down 5 sec. Press repeatedly to increase To confirm new tilt ...motor jogs or decrease speed speed, press until... -
Page 56: Sunis Rts, Adding And Setting
Sunis RTS, Adding and setting Advanced Sun sensor LED-indication Prog button PROG Mode-button Solar cells Sensitivity MODE adjustment button Front Back side The battery must be charged before any setting starts. Place Sunis RTS sensor exterior, in full daylight for at least 30 minutes Place Sunis RTS sensor The battery in Sunis... -
Page 57: Connect Sun Sensor
Sunis RTS Advanced Add a sensor for exterior installation Enter programming mode Press prog button on ...motor jogs programmed transmitter with sun function (Telis Soliris) until... Connect sun sensor PROG MODE Press prog button Motor jogs shortly. -
Page 58: Check Sun Mode On Or Off
Check Sun mode ON or OFF Advanced Always look at the blinds movements ✸ ✸ Short press of the If left LED is lit, If right LED is lit, select button go to 1 got to 2 The motor jogs if it has entered Release when “Sun mode ON”. -
Page 59: Check And Installation
Check and installation Advanced 1 Set the sensitivity adjustment button to + (right) PROG MODE Use a suitable screwdriver 2 Set the Demo mode (if led blinks green PROG PROG ✸ the maximum sun 5 sec. MODE MODE is measured) Press the ...the blind “jogs”... -
Page 60: Switch The Demo Mode Off
Check and installation (continuing) Advanced Remove Sunis Sensor RTS from the mounting plate Switch the Demo mode ✸ PROG PROG 5 sec. MODE MODE Press the MODE ...motor jogs button until... Set sensitivity values on Sunis Sensor RTS, suitable for used blind types and conditions Restart on page 51 if additional motors should be programmed to Sunis Sensor RTS or Mount Sunis Sensor RTS on the mounting plate... -
Page 61: Explanations Of Led Signals
Explanations of LED signals Advanced PROG MODE Press short the MODE-button Operational mode DEMO-mode The LED lights green for 5 sec. The LED blinks green for 30 sec. The light level exceeds the set value. The light level exceeds the set value. ✸... -
Page 62: Thermosunis Indoor Wirefree Rts, Adding And Setting
Thermosunis Indoor Wirefree RTS, Adding and setting Advanced Front Side view LED, Sun sensor ON/OFF-Switch LED - temperature sensor Sun, sensitivity adjustment Temperature sensetivity adjustment Programming button MODE-button 3-position switch UP end limit down end limit Cover position of sensor favorite position “my”... -
Page 63: Thermosunis Indoor Wirefree Rts
Thermosunis Indoor Wirefree RTS Advanced Add interior sun sensor Press the prog button on the back ...motor jogs of the control until... Connect sun sensor Short press of prog button until..motor jogs... -
Page 64: Mounting Of Thermosunis Indoor Wire Free Rts
Mounting of Thermosunis Indoor Wire free RTS Advanced Sun sensor Thermosunis is for indoor Place the sun sensor facing out use only! For fixing on window frame For fixing on the window pane mount the suction cup downward mount the suction cup on the on the Thermosunis back of Thermosunis Usage options for Thermosunis Indoor Wirefree RTS... -
Page 65: Get Started With Thermosunis Indoor Wire Free Rts
Get started with Thermosunis Indoor Wire free RTS Advanced Note If the temperature is below the set value the sun function is deactivated If the temperature is higher than the set value the sun function is activated If the sensor is covered by the blind the sensor will be deactivated, (privacy feature) In order for pos. -
Page 66: Activate The Sensor
Setting and programming Advanced O O O O O O Activate the sensor O O O O O O O O O The sensor is set The sun sensor function is active. The sun and temperature sensor on Off The sensors Sun LED lights for is active. -
Page 67: Erase The Sensor From The Motor
Erase the sensor from the motor Advanced 1 Put the motor/receiver in programming mode Press and hold Motor jogs for 2 sec 2 Erase the sensor The sensor is now erased from the motor Press and hold Motor jogs for 2 sec... -
Page 68: Setting Of The Sensitivity (Threshold Values)
Setting of the sensitivity (threshold values) Advanced PROG PROG MODE MODE PROG PROG PROG MODE MODE MODE PROG MODE Short press of the The LEDs for sun Turn the sensistivity adjustment The LEDS for sun mode button and temperature button for sun or temperature fully and temperature lights in red to the right... -
Page 69: Demo Mode
DEMO mode Advanced DEMO mode can be used to demontrate the function and for adjusting the threshold values. The response time is shorter than in user mode The sensor will revert to user mode if not operated for 3 min If the sensitivity button is turned fully to the left the sensor simulates sun, in demo and user mode. -
Page 70: Sunis Wirefree Ii Io Sensor
Sunis WireFree II io sensor Advanced Description Wall bracket Green LED (prog ) Orange LED (Threshold 5 → 8) Orange LED (Batteries) Green LED (Threshold 1 → 4) PROG-button Threshold... -
Page 71: Program The Sensor On A Motor With A 1-Way Transmitter
Sunis WireFree II io sensor Advanced Program the sensor on a motor with a 1-way transmitter Back of a Situo Back of a Smoove Press on the PROG button of a ...short movement Smoove A/M io or of a OK Situo 5 VAR A/M io until... - Page 72 Sunis WireFree II io sensor Advanced Switch from “standard” modus to “My” operating mode A new sensor is always delivered in “Standard” mode >5s To switch the mode press ...the LEDs are blinking. 5s on the “+” button until… The “My” mode is activated Switch from the “My”...
-
Page 73: Programming Moco Dce
Programming Moco DCE Advanced Programming Moco DCE For products equipped with LWE motors Diod EXT Prog button Tilt & Lift Applications and Lift application (This instruction shows setting via Centralis IB. Setting can be done with RTS control if RTS card is installed and the channels are programmed) Moco DCE is default set for Tilt &... -
Page 74: Setting Of End Limits
Programming Moco DCE Advanced Setting of end limits Connect motor 1 to terminal block 1 (Follow colour codes, cables to terminal) Motor 24VDC Encodermotor 1 Encodermotor 2 Encodermotor 3 Encodermotor 4 LW 25 E83 LW 25 E83 LW 25 E83 LW 25 E83 (without Encoder) LV 25 B44, B64... -
Page 75: Tahoma
To improve the radio range, we recommend that the TaHoma® box be placed in an unconfined place in the middle of the house (avoid metallic surfaces and enclosures). Create your account somfy-connect.com Confirm the account Go to via the email received Then select TaHoma®... -
Page 76: Configure Your Connected Home
Step 2: Customise your home Add devices TaHoma® is compatible with a wide range of devices from Somfy and its partners. These devices use different technologies, and are therefore grouped by family. The Somfy device families appear in the tabs by default. -
Page 77: Connexoon Window Rts
Connexoon Window RTS Product components Button with which the Connexoon and your Somfy devices can be Connect the Ethernet Plug the USB charger coupled without an Internet cable between the supplied into the USB port of connection Connexoon box and... -
Page 78: Select One Of The 6 Channels
Connexoon Window RTS Select one of the 6 channels <5s ...orange; Press SELECT until ...red; Press SELECT until Press SELECT until LED Channel LED blinks... Channel LED blinks... blinks..green; Press SELECT until ...2x orange ; Press SELECT until ...2x red; Press SELECT until Channel LED blinks... -
Page 79: To Register The Connexoon
Wait until the LED stays green. (There is internet connetion) Go to www.somfy-connect.com to register the Connexoon (via PC, Tablet or Smartphone). Enter the PIN code of the Connexoon. Then enter the requested data. Confirm the activation e-mail that is sent to the e-mail address (this should happen within 24 hours –... - Page 80 Notes...
- Page 81 Notes...
- Page 82 Notes...
- Page 83 Notes...
- Page 84 Somfy Ltd Unit 7, Lancaster Way Airport West, Yeadon Leeds West Yorkshire LS19 7ZA 0113 391 3030 sales.uk@somfy.com www.somfy.co.uk...
Need help?
Do you have a question about the Tilt Only 50 WF RTS and is the answer not in the manual?
Questions and answers