Table of Contents
Advertisement
Quick Links
Advertisement
Table of Contents

Related Manuals for SOMFY TAHOMA


Summary of Contents for SOMFY TAHOMA
- Page 1 PROGRAMMING GUIDE SOMFY TAHOMA® ZIGBEE & RTS SMARTPHONE & TABLET INTERFACE...
-
Page 2: Table Of Contents
PROGRAMMING GUIDE SOMFY TAHOMA® ZIGBEE & RTS V E R S I O N 1 . 0 M A Y 2 0 2 2 P r e p a r e d b y P R O J E C T S E R V I C E S... - Page 3 TABLE OF CONTENTS APPENDIX ------------------------------------------------------------- 40 AVAILABLE COMMANDS & ACTIONS SHARE TAHOMA FORGOT PASSWORD WI-FI STATUS CHANGE WI-FI NETWORK UNABLE TO READ QR CODE G. EDIT A PRODUCT H. DELETE A ZIGBEE PRODUCT DELETE AN RTS PRODUCT 3 of 48...
-
Page 4: Introduction
The Somfy Organization’s strength has been demonstrated with 50 years of experience in motorization. As leaders in the shading industry with innovation and modernization solutions for homes and commercial buildings, Somfy offers the widest range of strong, quiet motors and controls for all types of applications and technologies. -
Page 5: Overview
S Y S T E M C O N F I G U R A T I O N All motors must be fully operational and programmed with limits prior to TaHoma programming. The TaHoma system supports up to 50 Zigbee devices and 40 channels of RTS. -
Page 6: Installation
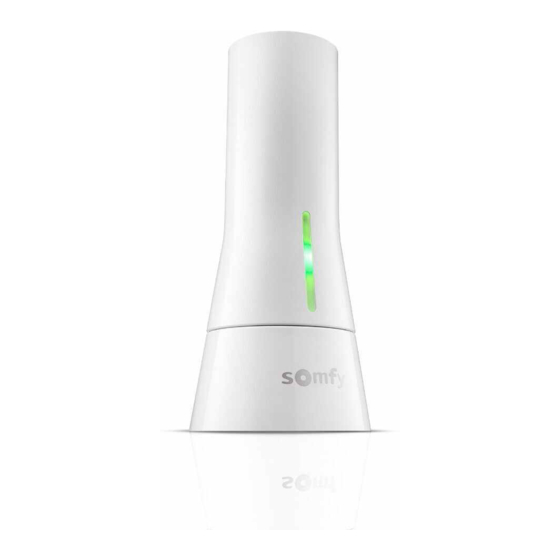
C O N N E C T I O N S & I N D I C A T O R S Zigbee Coordinator (ZC) TaHoma® RTS/Zigbee Smartphone and Tablet Interface PLUG-IN POWER SUPPLY REQUIRED #1811731 (With base stand included with TaHoma Interface) (Included with TaHoma Interface) Connect to line-voltage to power TaHoma Interface REAR Power Supply... - Page 7 Ensure the motor has proper power. PRESS & HOLD the LED button while installing in an outlet to pair to Use the Set & Go® Connect or TaHoma App to scan the QR code of the TaHoma system. Zigbee module to add the drapery motor into the TaHoma system.
-
Page 8: Power
P O W E R TaHoma Interface Ethernet Adaptor Yellow light indicates data transfer Green light indicates Ethernet connection Tahoma® Zigbee/RTS Smartphone & Tablet Interface USB Power Supply Ethernet Cable Ethernet Router or Network Switch Ensure the Ethernet Adaptor is... -
Page 9: Placement
• Be sure that plug-in Zigbee devices are using powered outlets WHOLE HOUSE CONTROL Place the TaHoma using the following criteria when installing one or more Interfaces: • Single Zone control (Room Control) • Whole House Control (up to 10 TaHoma Interfaces) •... -
Page 10: Tahoma Zigbee Network
• Situo Remote (1 & 4 channel) Information is transmitted from TaHoma to the Zigbee routers (green and yellow lines) and then down to the Zigbee end device. If a Zigbee router is unplugged or damaged and cannot route information, the Zigbee protocol will automatically generate a new route to get the information to its destination. -
Page 11: Set Up
“OK” The PIN code is a 12-digit number on the TaHoma Interface and the packaging. IMPORTANT: When scanning the QR code of a TaHoma Interface, only scan the QR code on the base of the TaHoma Interface. 11 of 48... - Page 12 Conditions,” SELECT “Confirm” 10. SELECT “CLOSE THE WINDOW” • An email from (info@somfy.com) will be sent summarizing your TaHoma offer with a link to your account • Click on the link within 24 hours to finalize TaHoma activation and customize your interface •...
-
Page 13: Connect Via Wi-Fi
NOTE: An internet connection is required. TaHoma does not support local control to operate Zigbee or RTS products without an internet connection. Follow the steps below to connect TaHoma using a 2.4 GHz Wi-Fi connection. An Ethernet connection provides more reliability and stability when compared to a Wi-Fi connection. - Page 14 9. PRESS & HOLD the Configuration Button on the back of the TaHoma for 3 seconds until the LED indicator turns BLUE, SELECT “Next” 10. SELECT “Scan” 11. REMOVE the base of the TaHoma, SCAN the QR code with your mobile device's camera 12.
- Page 15 Change Wi-Fi Network in Appendix CHECK TAHOMA CONNECTION STATUS CHECK WI-FI STRENGTH The TaHoma icon in the top right corner of the TaHoma From the TaHoma app Home Page, SELECT Menu Page will indicate connection status: the Menu icon in the bottom right corner, SELECT “My Setup”...
-
Page 16: Connect Via Ethernet
NOTE: An internet connection is required. TaHoma does not support local control to operate Zigbee or RTS products without an internet connection. Follow the steps below to connect TaHoma using the TaHoma® Ethernet Adaptor. An Ethernet connection provides more reliability and stability when compared to a Wi-Fi connection. - Page 17 Guide. CHECK TAHOMA CONNECTION STATUS CHECK CONNECTION TYPE The TaHoma icon in the top right corner of the TaHoma From the TaHoma app Home Page, SELECT Menu Page will indicate connection status: the Menu icon in the bottom right corner, SELECT “My Setup”...
-
Page 18: Settings
M O V E M E N T S My Products is used to add, delete, or edit Zigbee/RTS and other devices. 1. From the TaHoma app Home Page, SELECT the Menu icon in the bottom right corner 2. SELECT “My Products”... -
Page 19: Activity History
Activity History is used to view all commands sent from Android or IOS devices and any schedules that have launched. 1. From the TaHoma app Home Page, SELECT the Menu icon in the bottom right corner 2. SELECT “Activity History”... -
Page 20: Third-Party Integration
3. FOLLOW the prompts and refer to integration guides at https://www.somfypro.com/tahoma-documentation An Integration Report is generated in the TaHoma App which will include the TaHoma Interface PIN and IP address. Third-Party Integration must first be enabled in the TaHoma App. -
Page 21: Commissioning
A D D A Z I G B E E S M A R T P L U G To add a Smart Plug, follow the steps below. 1. From the TaHoma app Home Page, SELECT the Menu icon in the bottom right corner, SELECT “My Products”... - Page 22 This process may take up to 3 minutes 8. ENTER a name the device in text field, then SELECT “Next” The device is now added to the TaHoma To favorite the Smart Plug, SELECT the Star icon. To edit the Smart Plug,...
- Page 23 A D D A Z I G B E E D R A P E R Y M O T O R To add a Zigbee drapery motor, follow the steps below. NOTE: All motors must be fully operational and programmed with limits prior to TaHoma programming. 1. From the TaHoma app Home Page, SELECT the Menu icon in the bottom right corner, SELECT “My...
- Page 24 This process may take up to 3 minutes 8. ENTER a name in text field, then SELECT “Next” The motor will jog once to confirm it has been added to the TaHoma To favorite the motor, SELECT the Star icon. To edit the motor,...
- Page 25 A D D A Z I G B E E T U B U L A R M O T O R To add an AC or DC tubular motor, follow the steps below. All motors must be fully operational and programmed with limits prior to TaHoma programming. NOTE: First add all AC powered devices, then add DC tubular motors.
- Page 26 This process may take up to 3 minutes 8. ENTER a name in text field, then SELECT “Next” The motor will jog once to confirm it has been added to the TaHoma To favorite the motor, SELECT the Star icon. To edit the motor,...
- Page 27 A D D A Z I G B E E R E M O T E To add a Zigbee remote, follow the steps below. 1. From the TaHoma app Home Page, SELECT the Menu icon in the bottom right corner, SELECT “My Products”...
- Page 28 7. SELECT “Next” and WAIT for the device to pair This process may take up to 3 minutes 8. ENTER a name in text field, then SELECT “Next” The device is now added to the TaHoma To pair a Zigbee device to the remote, refer to Pair...
-
Page 29: Pair A Zigbee Remote
To pair a Zigbee remote or Zigbee groups, follow the steps below. NOTE: Only one device or one Zigbee group is permitted per channel. 1. From the TaHoma app Home Page, SELECT the Menu icon in the bottom right corner, SELECT “My Products”... - Page 30 7. SELECT a device or a Zigbee group to be controlled on the selected channel 8. SELECT “OK” 9. PRESS & RELEASE the PROGRAMMING BUTTON on the back of the remote control 10. SELECT “OK” The device or group has been paired to the selected channel Repeat the steps above to pair a device or Zigbee group to a channel...
-
Page 31: Create A Zigbee Group
C R E A T E A Z I G B E E G R O U P To create a Zigbee group, follow the steps below. 1. From the TaHoma app Home Page, SELECT the Menu icon in the bottom right corner, SELECT “My Products”... - Page 32 5. ENTER a name for the group in the text field 6. SELECT “Next” 7. SELECT the devices to group: NOTE: Only devices from the same category can be grouped. Allowed groups: • AC motors only • DC motors only •...
-
Page 33: Add An Rts Product
A D D A N R T S P R O D U C T To add an RTS motor, follow the steps below. NOTE: All motors must be fully operational and programmed with limits prior to TaHoma programming. 1. From the TaHoma app Home Page, SELECT the Menu icon in the bottom right corner, SELECT “My... - Page 34 An RTS motor has been added. IMPORTANT: When adding an RTS motor to a multi-gateway system, SCAN the TaHoma QR code that is in the closest range of that RTS motor being added. To favorite the RTS motor, SELECT the Star icon.
-
Page 35: Add A Scene
A D D A S C E N E A TaHoma system can support a maximum of 40 scenes with schedules. 1. SELECT the Scene icon from the bottom menu 2. SELECT the + icon in the top right corner 3. -
Page 36: Add A Schedule To A Scene
A D D A S C H E D U L E T O A S C E N E A TaHoma system can support a maximum of 40 scenes with schedules. NOTE: Scheduled scenes continue to operate at the scheduled time even after internet connection is lost. -
Page 37: Create A Room
C R E A T E A R O O M Create rooms to organize Zigbee and RTS devices. A maximum of 50 rooms can be created. 1. SELECT the Home icon from the bottom menu 2. SELECT the Gear icon in the top right corner 3. -
Page 38: Add Additional Gateways
When the “Congratulations, your gateway has been added…” note appears, SELECT “Finish” IMPORTANT: When adding an RTS motor to a multi-gateway system, SCAN the TaHoma QR code that is in the closest range of that RTS motor being added. 38 of 48... - Page 39 Add Additional Gateway via Ethernet 1. PLUG the ethernet cable into the adaptor 2. SELECT “Next” 3. WAIT for the TaHoma LED to turn GREEN 4. After the “Congratulations, your gateway has been added…” note appears, SELECT “Finish” 5. SELECT the Pencil icons to name the gateway,...
-
Page 40: Appendix
Open/Up Moves blind to the fully open position Stop Stops blind when moving Moves blind to the programmed “my” position if blind is at rest TAHOMA SMART PLUG COMMANDS Identify Turns LED from GREEN without turning output ON or OFF... -
Page 41: Share Tahoma
[ A P P E N D I X B ] S H A R E T A H O M A To share the TaHoma account with another user, the same login credentials used to create the account must be used to login with another device. -
Page 42: Change Wi-Fi Network
7. SELECT “Join” To switch from a Wi-Fi connection to a NOTE: Allow TaHoma to connect to devices wired connection using an Ethernet cable, on your local network; LED indicator will plug the Ethernet Adaptor into the... -
Page 43: Unable To Read Qr Code
3. Please wait until your device is paired, which may take up to 3 minutes 4. Once the device is discovered, ENTER a Name for the device in the text field 5. SELECT “Next” The device has been added to the TaHoma. 43 of 48... -
Page 44: Edit A Product
[ A P P E N D I X G ] E D I T A P R O D U C T To edit a Zigbee or RTS product, follow the steps below. 1. From the TaHoma app Home Page, SELECT the Menu icon in the bottom right corner 2. -
Page 45: Delete A Zigbee Product
[ A P P E N D I X H ] D E L E T E A Z I G B E E P R O D U C T Follow the steps below to delete a Zigbee product. 1. From the TaHoma app Home Page, SELECT the Menu icon in the bottom right corner 2. -
Page 46: Delete An Rts Product
[ A P P E N D I X I ] D E L E T E A N R T S P R O D U C T Follow the steps below to delete an RTS Product. 1. From the TaHoma app Home Page, SELECT the Menu icon in the bottom right corner 2. - Page 47 11. SELECT “No, I have no more devices” NOTE: This will remove the TaHoma channel. SELECT “Yes, I still have devices” NOTE: This will keep the TaHoma channel in case there are other RTS motors paired on the channel. The RTS Product has been deleted.
- Page 48 ABOUT SOMFY SOMFY® has been improving everyday life for more than 270 million people by designing and manufacturing intelligent motorization solutions for interior window coverings and exterior solar protections. Somfy innovates to automate and connect shades, blinds, draperies, awnings, rolling shutters, exterior screens &...
Need help?
Do you have a question about the TAHOMA and is the answer not in the manual?
Questions and answers