Table of Contents
Advertisement
Advertisement
Table of Contents

Summary of Contents for ATECH CRATER-06 A/550
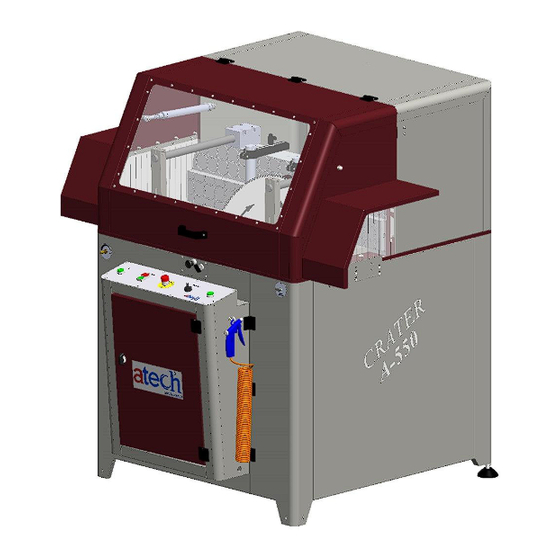
- Page 1 CRATER – 06 A/550 HEAVY DUTY 22” (550 mm) AUTOMATIC UPCUT MITER SAW USER’S MANUAL...
-
Page 2: Table Of Contents
CONTENTS 1. GENERAL INFORMATION 1.1. Introduction 1.2. Information About The Distributor 2. MACHINE’S DESCRIPTION AND PURPOSE OF USE 2.1. Machine’s Description 2.2. Technical Features 2.3. Cutting Diagram 2.4. Dimensions 2.5. Electric And Pneumatic Control Panel 2.6. Parts List and Technical Drawings 3. -
Page 3: General Information
Fax: 301-560-6627 info@ATechMachinery.com *In case of any technical problem please contact your nearest ATECH dealer or ATECH head office through the above mentioned phone, fax or e-mail address. *Technical labels with the model description of the machine are fixed onto the front side of each machine. -
Page 4: Cutting Diagram
2.3. Cutting Diagram 2.4. Dimensions 2.5. Electric And Pneumatic Control Panel The electric and pneumatic control panel allows you to make adjustments to the air pressure. The panel cover must be definitely closed and locked during operation. Service and maintenance work to remedy any malfunctions; DISCONNECT POWER AND PNEUMATIC POWER SUPPLIES. -
Page 5: Parts List And Technical Drawings
2.6. Parts List and Technical Drawings Image Definition Part Code Ø550 Saw Blade CRA550-02-0001 4 kW (5.5 HP) Motor CRA550-04-0002 Motor Connection Block CRA550-02-0003 Belt Pulley CRA550-02-0004 Protection Part Motor Tension CRA550-02-0005 Sheet Metal Motor Tension Bolt CRA550-02-0006 Print Washer Motor Tension Block CRA550-02-0007 Belt... - Page 6 Motor Pulley CRA550-02-0010 Motor Pulley Washer CRA550-02-0011 Coupling CRA550-02-0012 Washer (30-32mm) CRA550-02-0013 Saw Blade Flange CRA550-02-0014 Saw Blade Washer CRA550-02-0015 Saw Blade Shaft Nut CRA550-02-0016 Saw Blade Shaft Tube CRA550-02-0017 6206 ZZ Bearing CRA550-02-00018 Bearing Cover CRA550-02-0019 Piston-Hydro- pneumatic cylinder CRA550-02-0020 Connection Part Hydro-Pneumatic...
-
Page 7: Safety
Pneumatic Cylinder CRA550-03-0022 Saw Blade Guard CRA550-01-0023 Table Fence CRA550-02-0024 Vertical Pneumatic CRA550-03-0025 ClampCylinder Horizontal Pneumatic CRA550-03-0026 ClampCylinder Standard Angles Locking CRA550-02-0027 Manual Conveyor CRA550-01-0028 Chip Collector Manifold CRA550-01-0029 3. SAFETY 3.1. Safety Information The symbols shown hereunder are necessary to be read with special attention. Not reading or observing of them may cause damage to the equipment or personal injury. -
Page 8: Accident Prevention
The above symbol DANGER WARNING, warns you against specific dangers and you have definitely to read them. Negligence may cause damage to the equipment and bodily injury. Read the user’s manual carefully before using the machine or carrying out maintenance works. 3.2. -
Page 9: Transport Of The Machine
If main connection cable is damaged during operation, do not Use protective earmuffs. touch it and disconnect the main plug from main socket. When machine is working, do not Use protective gloves when make your hand close to saw blade. changing the saw. -
Page 10: Air Pressure Setting
Plug the machine's electrical power socket into the previously prepared 3-phase socket socket to follow the saw-turn direction and follow the following procedures: 1. Press the motor start button to rotate the saw. 2. Observe the direction of rotation of the saw. 3. -
Page 11: Operation
7. OPERATION CRATER upcut saws are for cutting of non-ferrous metals like aluminum, vinyl (PVC) and wood. The operator adjusts the rising speed of the saw blade type and size of the material. The inner and outer sharp edges of the circular saw blade allow you to obtain a smooth surface at high quality. - Page 12 7.1.12. Cut the saw by manually adjusting the cutting speed adjustment valve according to the type and size of the material to be sawed and cut the cutting process until the saw cuts down again. 7.1.13. Using the clamp button, remove the print on the clamps and remove the cut off piece. Pressure Adjustment Knob Fixed Miter...
- Page 13 Saw Blade Flange Washer Saw Blade 30x8x7 Washer M10x20 Inbus Screw Coupling Ø550 (22”) mm Saw Blade Figure 1 : Open The Control Panel And The Side Cover Plate. Figure 2 Figure 3 Figure 4 Figure 5 Figure 6...
-
Page 14: Maintenance
9. SAFETY INSTALLATION OF THE BELT Follow the instructions below to safely replace the motor belt. 9.1.1. Remove the saw blade by following the respective instructions for the saw blade. 9.1.2. Remove the saw blade guard assembly. 9.1.3. Remove the M6 screw by turning with a 5 mm allen key. 9.1.4. -
Page 15: Adding Oil
Disconnect the electrical power connection and air pressure connections before doing all this. 10.2. Method Of Hydro-Pneuamtic Cylinder Air Discharge And Adding Oil 10.2.1. Method Of Hydro-Pneumatic Cylinder Air Discharge 1. Remove 4 imbus head bolts that connect the hydro-pneumatic cylinder. 2. -
Page 16: Troubleshooting Guide
10.3. Work Day End Care 10.3.1. Disconnect the electrical and pneumatic power connections. 10.3.2. Clean all surfaces of the machine from the sawdust, chips and foreign materials. If cleaning of the protective housing is necessary, remove the front cover and wear gloves to protect your hands from the cutting edges of the saw. Use glasses to protect yourself from harmful substances.


Need help?
Do you have a question about the CRATER-06 A/550 and is the answer not in the manual?
Questions and answers