Table of Contents
Advertisement
Quick Links
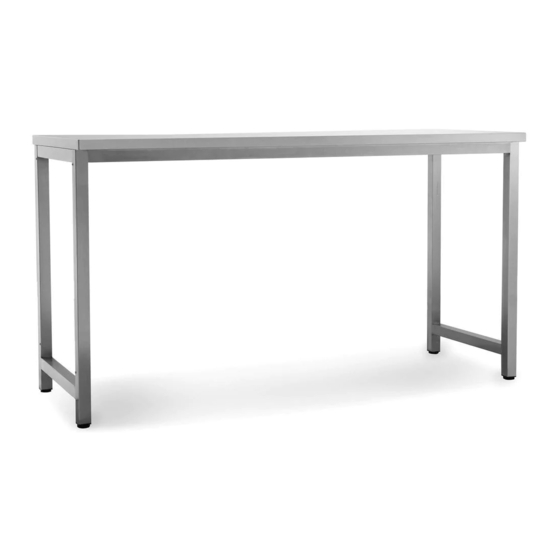
Outdoor Kitchen SS 64" Prep Table
STOP
Warning: Excessive weight
hazard!
Use two or more people to move, assemble, or
install cabinets to avoid back injury. Do not
leave children unattended near cabinets. High
risk of tipping if cabinets are installed
incorrectly: securely attach cabinets to the
wall to avoid serious injury. For assistance, call
1.877.306.8930; for U.K 0800.031.4069: e-mail at
info@newageproducts.com.
ATTENTION
Need help or spare parts? For fastest service,
contact NewAge Products at 1-877-306-8930;
or support@newageproducts.com.
Do not return to the retailer.
: Is your cabinet damaged?
65008-INSTL-01-Rev.01
Advertisement
Table of Contents

Subscribe to Our Youtube Channel
Related Manuals for Newage Outdoor Kitchen SS 64" Prep Table


Summary of Contents for Newage Outdoor Kitchen SS 64" Prep Table
- Page 1 For assistance, call 1.877.306.8930; for U.K 0800.031.4069: e-mail at info@newageproducts.com. ATTENTION : Is your cabinet damaged? STOP Need help or spare parts? For fastest service, contact NewAge Products at 1-877-306-8930; or support@newageproducts.com. Do not return to the retailer. 65008-INSTL-01-Rev.01...
-
Page 2: Weight Capacity
Weight Capacity lbs. 64" - PREP TABLE Max 200 lbs. -
Page 3: Parts Supplied
Unpacking • Begin by placing the package on a protected fl at surface. • Remove all cardboard, foam packaging material and clear plastic bags. • Dispose / recycle all packaging materials. • Verify all the contents in the box and gather the required tools. See “Parts” and “Tools Needed” in the list below. Parts Supplied Prep Table... -
Page 4: Limited Warranty
Customer must pay for shipping costs associated with any replacement product or parts. This limited warranty is limited to product replacement only. In no event will NewAge be liable for special, indirect, or consequential damages. This limited warranty is available to the initial purchaser only and is not transferable. Proof of purchase and additional information regarding the defect may be required at NewAge’s discretion. -
Page 5: Tools Needed
When this product is installed, operated and maintained according to the instructions attached to or furnished with the product, NewAge Products Inc. will replace the defective product or parts if the part fails as a result of defective materials or workmanship for the Lifetime of the product. - Page 6 Table Assembly Parts Needed. Insert Leg Frame into cross rails. Using M6 bolts to fasten the leg frame to cross rails. 8 x Hex Bolt (M6 x 13) 4 X Pan Head Bolts (M4 x 40mm) Use 4 x M4x 40mm Pan Head Bolts to assemble Worktop to Leg Frame Stand and level Table...
- Page 7 Table to Cabinet Ganging Parts Needed. 4 x Hex Bolt (M4 x 40) Align Holes in Table Leg Frame with with 4 Holes in side of Cabinet. Fasten 4 x 4mm x 40 mm Hex Bolts as shown. Note: Table has rivet nuts in legs to thread into. Insert bolt from cabinet side.
- Page 8 Table to Table Ganging On a Flat Protected Surface fl ip over two Parts Needed. tables and align them right to left sides as shown. 4 x Ganging Brackets 4 X Pan Head Bolts (M4 x 13mm) Washers (M4) Using 4 Ganging Brackets and 2 x M4 Pan Head bolts per each bracket.
- Page 9 Care and Maintenance of your Stainless Steel Cabinets Perform Regular Maintenance Wash regularly with clean fresh water, mild detergent and a micro fi ber cloth. After washing rinse in clean water and wipe the surface dry with your cloth remembering to go with the grain on brushed stainless steel.
- Page 10 For assistance, call 1.877.306.8930; for U.K 0800.031.4069: e-mail at info@newageproducts.com. ATTENTION : Is your cabinet damaged? STOP Need help or spare parts? For fastest service, contact NewAge Products at 1-877-306-8930; or support@newageproducts.com. Do not return to the retailer. 65008-INSTL-01-Rev.01...
- Page 11 Weight Capacity lbs. 64" - PREP TABLE Max 200 lbs.
- Page 12 Unpacking • Begin by placing the package on a protected fl at surface. • Remove all cardboard, foam packaging material and clear plastic bags. • Dispose / recycle all packaging materials. • Verify all the contents in the box and gather the required tools. See “Parts” and “Tools Needed” in the list below. Parts Supplied Prep Table...
-
Page 13: Garantie Limitée
Sous réserve des limitations et des exclusions énoncées ci-dessous ou dans la documentation d’un autre produit, NewAge garantit à l’acheteur initial que (1) les surfaces du produit seront exemptes de défaut pendant trois ans après la date d’achat, (2) les glissières de tiroir seront exemptes de défaut pendant deux ans après la date d’achat, et (3) l’intégrité... - Page 14 When this product is installed, operated and maintained according to the instructions attached to or furnished with the product, NewAge Products Inc. will replace the defective product or parts if the part fails as a result of defective materials or workmanship for the Lifetime of the product.
- Page 15 Table Assembly Parts Needed. Insert Leg Frame into cross rails. Using M6 bolts to fasten the leg frame to cross rails. 8 x Hex Bolt (M6 x 13) 4 X Pan Head Bolts (M4 x 40mm) Use 4 x M4x 40mm Pan Head Bolts to assemble Worktop to Leg Frame Stand and level Table...
- Page 16 Table to Cabinet Ganging Parts Needed. 4 x Hex Bolt (M4 x 40) Align Holes in Table Leg Frame with with 4 Holes in side of Cabinet. Fasten 4 x 4mm x 40 mm Hex Bolts as shown. Note: Table has rivet nuts in legs to thread into. Insert bolt from cabinet side.
- Page 17 Table to Table Ganging On a Flat Protected Surface fl ip over two Parts Needed. tables and align them right to left sides as shown. 4 x Ganging Brackets 4 X Pan Head Bolts (M4 x 13mm) Washers (M4) Using 4 Ganging Brackets and 2 x M4 Pan Head bolts per each bracket.
- Page 18 Entretien des armoires en acier inoxydable Faites régulièrement l’entretien – Lavez régulièrement les armoires avec de l’eau claire, un détergent doux et un chiff on microfi bre. Rincez ensuite à l’eau claire et essuyez la surface avec le chiff on, en suivant le grain de l’acier inoxy- dable brossé.
Need help?
Do you have a question about the Outdoor Kitchen SS 64" Prep Table and is the answer not in the manual?
Questions and answers