Table of Contents
Advertisement
Quick Links
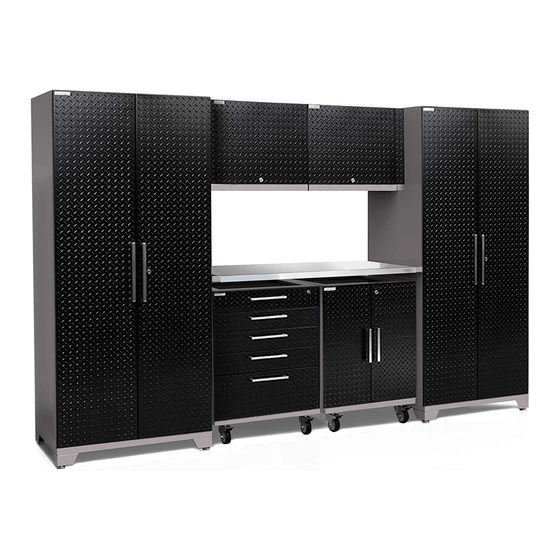
Performance Plus 2.0
STOP
Warning: Excessive weight
hazard!
Use two or more people to move, assemble, or
install cabinets and locker to avoid back injury.
Do not leave children unattended near cabinets.
High risk of tipping if cabinets are installed
incorrectly: securely attach cabinets to the
wall to avoid serious injury. For assistance, call
1.877.306.8930; for U.K 0800.031.4069: e-mail at
info@newageproducts.com.
ATTENTION
Need help or spare parts? For fastest service,
contact NewAge Products at 1-877-306-8930;
or support@newageproducts.com.
Do not return to the retailer.
Series
: Is your cabinet damaged?
R4
Advertisement
Table of Contents

Related Manuals for Newage Performance Plus 2.0 Series


Summary of Contents for Newage Performance Plus 2.0 Series
- Page 1 For assistance, call 1.877.306.8930; for U.K 0800.031.4069: e-mail at info@newageproducts.com. ATTENTION : Is your cabinet damaged? STOP Need help or spare parts? For fastest service, contact NewAge Products at 1-877-306-8930; or support@newageproducts.com. Do not return to the retailer.
-
Page 2: Product Overview
INDEX Product Overview: Unpacking - 3 Tools Needed - 3 Included Quantities - 4 Installing Worktop: Individual Parts - 4 Normal installation on cabinets - 21 Weight Capacity - 5 Using Support Brackets - 22 Worktop Options - 5 Installing Side Support Tray - 23 Installing Worktop Support Leg - 24/25 Installation Options - 6 Corner Worktop - 26... -
Page 3: Tools Needed
Unpacking • Begin by placing the package on a covered flat surface. • Remove all cardboard, foam packaging material and clear plastic bags. • Dispose / recycle all packaging materials. • Verify all the contents in the box and gather the required tools. See “Tools Needed”, and “Included Quantities”... -
Page 4: Individual Parts
Cabi net Casters Easy Corner Handle Bracket Shelves and Clothes Hooks Dividers Wall Wall Hanging Support Bracket Bracket 16 X Wall Hardware NewAge EVA Foam RubberTray Utility Hole Joining Leveling Tray Spacer Bracket Pack Logo Drawer Liner Grommet Foot Liners... -
Page 5: Weight Capacity
Weight Capacity lbs. lbs. lbs. Wall Cabinets Max 200 lbs. lbs./Shelf lbs. lbs. 250 lbs per foot. lbs. lbs. 1000 lbs. per set of 4 lbs. lbs. lbs. lbs. lbs. 150 lbs. per Caster Base Cabinet Tool Cabinet Locker 300lbs. / Shelf Max 1000 lbs. - Page 6 Installation options for Cabinets Option 1. - see page7. Important information: Please read Sets with casters andadjustable leveling legs. before beginning installation. Note: Casters cannot be installed on Locker cabinets. Layouts shown are only examples.All • cabinets are modular and can be configured in a variety of different layouts.
- Page 7 Option 1 Caster Set Installation Overview Plan layout before installing Attach feet to locker cabinets. Attach cabinets. casters to base cabinets. See full installation on pages 27 & • It is recommended to begin installation with Locker cabinet. • Install cabinets one at a time. •...
- Page 8 Option 2 Wall Mount Installation Overview Plan layout before installing Begin by attaching Locker cabinet to cabinets. wall. See page 12-16 for full instructions on hanging cabinets. • Determine height cabinets will be installed off the ground. • It is recommended to begin installation with Locker cabinet.
- Page 9 Option 3 Slatwall Installation Overview Begin by attaching Locker cabinet Plan layout before installing cabinets. to Slatwall using Slatwall bracket. page 17 for slatwall hanging instructions. • Determine height cabinets will be installed off the ground. • Slatwall bracket sold seperately •...
- Page 10 Option 4 Floor Installation Overview Plan layout before installing cabinets. Attach feet to cabinets. See full feet installation on page • It is recommended to begin installation with Locker cabinet. • Cabinets must be fully secured to wall using (4) wall screws per cabinet.
- Page 11 Option 5 Corner Set Installation Overview Attach feet to cabinets. See full feet Hang wall cabinets starting with corner installation on page wall cabinet. See full instructions on pages 12-16. Install corner worktop. See page26. Install corner worktop support and base cabinets.
- Page 12 Hanging Cabinets on Studded Wall Use stud finder to locate the studs Parts Needed. and mark the wall with a pencil. Lag Screw Wall Bracket (1/4”x 2.5”) Planning the general position of cabinets. Step A. Determine the height off the ground you would like the base and locker cabinets to be and make a horizontal mark at this position.
- Page 13 Hanging Cabinets on Studded Wall (cont.) Planning the general position of cabinets. (cont.) Step C. Measuring up from the line marked in Step A, make a horizontal mark at the following heights where they intersect the wall stud marks to determine where the top of the cabinet will be (and where the hanging bracket will be installed).
- Page 14 Hanging Cabinets on Studded Wall (cont.) Hanging cabinets on wall. Align the top of the wall hanging brackets with the lines marked for the position of the top of the cabinets(Step C) and attach the brackets securely into the studs using the supplied lag bolts.
- Page 15 Hanging Cabinets on Studded Wall (cont.) Lift cabinet into place over the brackets and flush with the wall, and lower into place. WALL WALL Warning Fasten cabinets to wall. See page 18. Do not load cabinets when • hanging from Easy Wall Hanging Cabinets.
- Page 16 Installing Wall Spacer Kit Attach spacer cabinet to side of locker Parts Needed. using 1/4” hex bolts andwashers 2 X Screws 8 X Hex Bolt (1/4”x 5/8”) 8 X Washer Wall Spacer (1/4”) Insert tab of spacer cabinet into slot Install screw to secure front face.
-
Page 17: Hanging Cabinets On Slatwall
Note: Slatwall Brackets for use with standard 3” slatwall Sold Separately. Check with your slatwall supplier to determine the rated capacity of your slatwall. DO NOT OVERLOAD. NewAge Slatwall Brackets are only compatible with standard 3” on center Slatwall. Insert bolts through slatwall bracket. - Page 18 Fastening Cabinets on StuddedWall Use stud finder to locate the studs Gather parts. and mark the wall with a pencil. Wall Washer Wall Screw (1/4”) (1/4”x 2.5”) Locker,tool and base cabinet: 4 Lag Screws and 4Wall washers CornerWallCabinet: 6 Lag Screws and 6Wall washers Level cabinet Place cabinet tight...
-
Page 19: Fastening Cabinets Together
Fastening Cabinets Together Note: All drawers must be removed prior to fastening cabinets together. See Page 29 drawer removal instructions. Parts Needed. 4 X Hex Bolt (¼”x ⁵/₈”) 8 X Washer 4 X Lock nut (¼”) (¼”) Align bolts, tighten lightly. Level cabinets and tighten all bolts. -
Page 20: Fastening Cabinets With Casters
Fastening Cabinets with Casters Parts Needed. Open cabinets, remove any shelves, drawers or loose items. 8 x Foot 2 x Cabinet Attachment Joining Plate Screw Align holes with joining plate andattach Flip cabinets and push sides using foot attachmentscrews. together, locate holes on edges. Attach casters and fasten cabinets together. - Page 21 Mounting the Worktop Place Worktop on cabinets. Locate the Parts Needed. punch holes on the tops of the cabinets. 4 x WoodScrew #8 x 5/8 Drill into the worktop using the #8 x 5/8” woodscrews. Optional: For locker support bracket. See Page 22.
- Page 22 Installing Worktop Note: Support Bracket included with Lockers A support bracket is to be used if the worktop is Side Support Bracket added to the set without a secondary supporting base/tool cabinet. Open locker doors and locate holes on side Parts Needed.
- Page 23 Installing Worktop Side Support Tray Open locker doors and locate upper Parts Needed. holes on side panels. 4 X Lock Nut 4 X Hex Bolt 2 XTray (1/4”) (1/4”x 5/8”) 6 x WoodScrews 8 X Washer (1/4”) #8 x 5/8 Align bracket holes with front or back Repeat Steps 1-2 for 2nd side tray.
-
Page 24: Installing Worktop Support Leg
Installing Worktop Support Leg Parts Needed. Insert threaded feet and adjustable leg posts at desired height and secure using M8 x 60mm bolts, nuts, and washers provided. 2x Leg Post Worktop Tray Leg Assembly Side Support (Sold Separately) Washer Hex Bolt LockNut Woodscrew (M8) - Page 25 Attach the Worktop Leg Support to the Worktop using the #8 - 5/8” Philips Head Screws. Installation option A: Installation option B: Installation option C: Attach one Worktop Support Attach one Worktop Support Attach the Worktop Tray,flush Leg flush to the end of one of with the end of the worktop.
- Page 26 Installing Corner Worktop Install Side Support Brackets on the Parts Needed. two base cabinets that will be adjacent to corner worktop. See Step 2 in side support brackets on page 4 x Washer 6 x # 8 x 5/8” Wall Screw (1/4”) screw (1/4”x 2.5”)
-
Page 27: Installing Feet
Installing Feet Open cabinet, remove any shelves, Parts Needed. drawers or loose items. 16 x Foot Attachment Screws M10 x 65mm Levelling Foot 4 x Cabinet Leg Align leg with edge of cabinet. Screw in Flip cabinet upside down, locate 4 x Foot attachment screws &... -
Page 28: Installing Casters
Installing Casters Note: Install casters with step brake on front side of cabinet. Warning: Always lock casters when not in use. Open cabinet, remove any shelves, Parts Needed. drawers or loose items. 4 x Casters 16 X Hex Bolt (1/4”x 5/8”) 16 X Washer 16 X Lock Nut (1/4”) - Page 29 Installing the Drawers Inserting Drawers. Slide In Align Rails Removing Drawers. Right Side Left Side Slide Out...
-
Page 30: Installing Handles
Installing Handles Align Handle to holes on doors Parts Needed. or drawers. Handle Handle Bolt Base Cabinet: 2 Handles and (4) - M4 x 30mm Handle Bolts Locker: 2 Handles and (4) - M6 x 35mm Handle Bolts Tool Cabinet: 5 Handles and (10) - M4 x 30mm Handle Bolts Screw in bolts. -
Page 31: Stacking Cabinets
Stacking Cabinets Note: Do not exceed weight capacity of feet. page 5. Position a second base cabinet on Parts needed. top of an existing base cabinet. 4 X Hex Bolt (1/4”x 5/8”) 8 X Washer 4 X Lock Nut (1/4”) (1/4”) Locate punch holes on adjoining Attach cabinets using the supplied... -
Page 32: Closet Rod
Inserting Locker Utility Rod and Hangars Parts needed. Open cabinet doors and insert shelf clips into slots in corners. Rotate to engage. 1 x Closet Rod 4 X Shelf Clips and 2 x Clothes Hooks Ensure rear flange slides down behind Place clothes hook against locker wall above supports. -
Page 33: Shelves
Inserting Cabinet Shelves Open cabinet doors and insert shelf Parts Needed clip on slight angle and rotate to level position. 4 X Adjustable Steel 16 X Shelf Clips Shelves Insert shelf on a angle and rotate to Lower shelf onto shelf clips. level position. - Page 34 Adjusting Base Cabinet Pullout Shelf Remove Pull-out shelf following Locate hole (A) in drawer slide. Using instructions for removing drawers finger depress and hold spring page loaded button. Swing drawer slide out from back of Pull drawer slide out and away from cabinet.
-
Page 35: Utility Access
Repeat steps 2 - 7 for 2nd slide Reinstall Pull-out shelf following mount. steps from page Utility Access Insert rubber grommet into cut-out hole in bottom panel. Using box knife cut along perforation in rubber grommet to create hole. Utility hole allows easy access to electrical outlet. -
Page 36: Magnetic Racing Stripe
Magnetic Racing Stripe Note: Racing stripe not available for Diamond Plate doors. The Racing Stripe can be installed on Remove the 2 plastic plugs holding in the either door of locker. To remove stripe racing stripe at the top of door. follow steps 1-3. -
Page 37: Adjusting The Door Hinges
Adjusting The Door Hinges Using a Philips screwdriver, the doors can be adjusted: Left, right, forwards and backwards, or up or down. To adjust the doors in or out from cabinet, turn the screw (A) clockwise or counterclockwise. To adjust the doors left or right, turn the screw (B) clockwise or counterclockwise. - Page 38 When this product is installed, operated and maintained according to the instructions attached to or furnished with the product, NewAge Products Inc. will replace the defective product or parts if the part fails as a result of defective materials or workmanship for the Lifetime of the product.
Need help?
Do you have a question about the Performance Plus 2.0 Series and is the answer not in the manual?
Questions and answers