Table of Contents
Advertisement
Available languages
Available languages
AudioKit
FR
Notice d'utilisation et d'installation
ES
Instrucciones de uso e instalación
gr
εγχειρίδιο της εγκατάστασης και της χρησιμοποίησης
Interphone audio
Intercomunicador audio
Audio-Türsprechanlage
EN
Installation and user manual
DE
Installation und Bedienungsanleitung
3208D
Audio door phone
Citofono audio
Audio-Intercom
θυροτηλέφωνου
IT
Manuale d'installazione e uso
NL
Installatie en Gebruiksaanwijzing
2 fils
50m max
1 mélodie
Platine de rue
à encastrer
V.092016 - IndA
Advertisement
Chapters
Table of Contents

Related Manuals for SCS Sentinel AudioKit 3208D


Summary of Contents for SCS Sentinel AudioKit 3208D
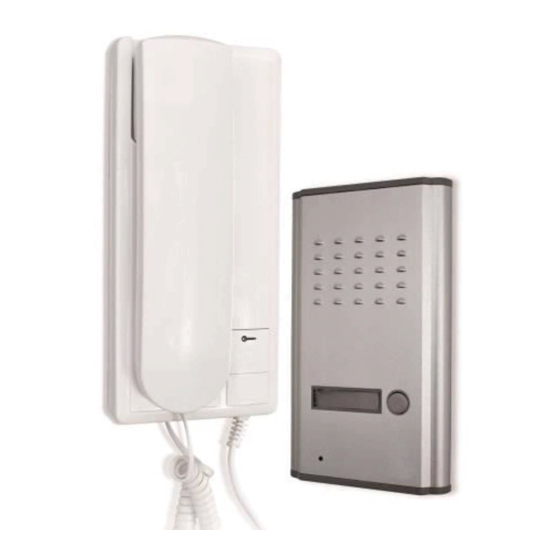
- Page 1 AudioKit 3208D Interphone audio Audio door phone Citofono audio Intercomunicador audio Audio-Türsprechanlage Audio-Intercom θυροτηλέφωνου 2 fils 50m max 1 mélodie Platine de rue à encastrer Notice d’utilisation et d’installation Installation and user manual Manuale d’installazione e uso Instrucciones de uso e instalación Installation und Bedienungsanleitung Installatie en Gebruiksaanwijzing εγχειρίδιο...
-
Page 2: Table Of Contents
SommAIre B2- Présentation du produit A- Précautions d’utilisation ..............................2 B- Descriptif ....................................2 B1 - Contenu du kit / Dimensions ..........................2 B2 - Présentation du produit ............................. 3 Combiné C- Câblage / Installation ................................3 Haut parleur C1 - Schéma de câblage ............................3 C2 - Installation et raccordement .......................... -
Page 3: D- Caractéristiques Techniques
e- ASSISTAnCe TéléPhonIque C2- Installation et raccordement • Fixer la platine de rue à 1,5 mètres de hauteur sur un mur plat. En cas de besoin, vous pouvez prendre contact avec notre assistance technique au numéro ci-dessous • Oter la vis du bas de la platine de rue, soulever légèrement le boîtier d’encastrement puis faire coulisser la facade. • Connecter les fils à... - Page 4 TABle of ConTenTS B2- Components A- Safety instructions ................................6 B- Description ....................................6 B1 - Contents / Dimensions ............................6 Handset B2 - Components ................................ 7 C- wiring / Installing .................................. 7 Loudspeaker C1 - Wiring diagram ..............................7 C2 - Installing ................................
- Page 5 C2- Attaching and connecting the elements e- WArrAnTY • Attach the outdoor station at a height of 1.5 metres mounted on a flat wall • Remove the bottom and top from the panel, slightly lift the flush-mounted unit then slide off the front panel. Do not forget to register the warranty within the month following the date of purchase on our • Connect the outdoor station wire (as shown in the diagram below) and insert the outdoor station onto its support.
-
Page 6: A- Precauzioni Per L'uso
InDICe B2- Presentazione del prodotto A- Precauzioni per l’uso ................................10 B- Specifiche....................................10 B1 - Contenuto del kit ................................10 Modulo B2 - Presentazione del prodotto ............................11 ricevitore Altoparlante C- Cablaggio / Installazione ..............................11 C1 - Schema di cablaggio ..............................11 C2 - Impianto .................................. -
Page 7: D- Caratteristiche Tecniche
e- ASSISTAnzA TelefonICA C2- fissaggio e collegamento degli elementi I tecnici del servizio post-vendita sono disponibili al numero : • Fissare la piastra esterna 1,5 metri di altezza su una parete piana. • Togliere la vite della parte inferiore e superiore della piastra, sollevare leggermente la scatola da incasso e far scorrere il frontalino. -
Page 8: A- Precauciones Para El Uso
ÍnDICe B2- Presentación del producto A- Precauciones para el uso ..............................14 B- Descripción ................................... 14 B1 - Contenido / Dimensiones ..........................14 B2 - Presentación del producto ..........................15 Teléfono C- Cableado / Instalación................................. 15 Altoparlante C1 - Esquema de cableado ............................. 15 C2 - Instalación ................................. -
Page 9: D- Características Técnicas
e- gArAnTÍA C2- fijación y conexión de los elementos • Fijar la placa de calle a 1,5 metros de altura en un muro plano. • Retirar el tornillo inferior y superior de la placa, levantar ligeramente la caja de empotrar y seguidamente hacer Es importante registrar sur garantía durante el mes posterior a su compra en : deslizar el panel. - Page 10 ÜBerSIChT B2- Produktpräsentation A- Vorsichtsmassnahmen beim betrieb ..........................18 B- Beschreibung ..................................18 B1 - Inhalt/abmessungen ............................18 B2 - Produktpräsentation ............................19 Kombiniert C- Anschluss/installation ................................ 19 Lautsprecher C1 - Schaltplan ................................19 C2 - Installation ................................. 20 D- Technische eigenschaften ..............................20 Leucht-Namensschild E- Garantie ....................................
- Page 11 e- gArAnTIe C2- Befestigung und anschluss der komponenten • Die Auβensprechstelle auf 1,5 Meter Höhe an einer glatten Wand befestigen. Bitte vergessen Sie nicht, Ihr Produkt spätestens einen Monat nach dem Erwerb auf der Website • Die untere Schraube der Türsprechanlage mit Hilfe des mitgelieferten Schlüssels ausdrehen, das Gehäuse leicht www.scs-laboutique.com/accountProduct/declaration. zu registrieren, um Anspruch auf die Garantie erheben zu können. Bewahren Sie den Strichcode anheben und die Vorderseite gleiten lassen. sowie den Kaufbeleg sorgfältig auf, da diese Elemente nötig sind, um die Garantie beanspruchen • Das Gehäuse direkt am Einbauort positionieren.
-
Page 12: A- Voorzorgsmaatregelen Bij Gebruik
SAmenVATTIng C- BeDrADIng / InSTAllATIe A- Voorzorgsmaatregelen bij gebruik ..........................22 C1- Bedradingsschema B- Beschrijving ..................................22 B1 - Inhoud / afmetingen ............................22 Handset B2 - Productpresentatie ............................22 Aansluitkabels C- Bedrading / installatie ................................. 23 Straatunit niet voorzien C1 - Bedradingsschema ............................ -
Page 13: D- Technische Specificaties
περίληψη D- TeChnISChe SPeCIfICATIeS Straatunit A- περιγραφικός .......................... 25 A1 - περιγραφή / διαστάσεις ......................25 Installatie ingebouwd A2 - Περιγραφή των στοιχείων ....................25 Gevel aluminium B- καλωδίωση / εγκατάσταση ....................26 B1 - πρότυπο καλωδίωσης ......................26 Besturing van een staking of elektrisch slot 12V /15W max B2 - τοποθετηση... - Page 14 ΕγγύΗΣΗ B- καλωδίωςη / εγκαταςταςη B1- πρότυπο καλωδίωσης Αυτό το προϊόν διαθέτει εγγύηση 2 ετών, για τα εξαρτήματα και τα εργατικά, από την ημερομηνία αγοράς. είναι απαραίτητο να διατηρείστε την απόδειξη αγοράς καθ’όλη την διάρκεια αυτής της θυροτηλεφωνο περιόδου ισχύος της εγγύησης. ςυνδέοντας...
- Page 15 Toutes les infos sur : www.scs-laboutique.com Route de St Symphorien 85130 Les Landes Génusson...
Need help?
Do you have a question about the AudioKit 3208D and is the answer not in the manual?
Questions and answers