Table of Contents
Advertisement
Available languages
Available languages
Quick Links
Advertisement
Table of Contents

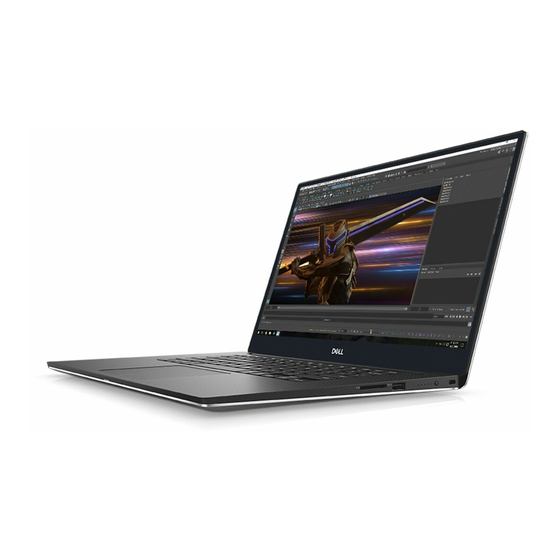
Related Manuals for Dell EMC Precision 5540


Summary of Contents for Dell EMC Precision 5540
- Page 1 Precision 5540 Service Manual Regulatory Model: P56F Regulatory Type: P56F003...
- Page 2 والتحذيرات والتنبيهات الملاحظات بك الخاص المنتج من استفادة أقصى تحقيق على تساعدك هامة معلومات إلى " ملاحظة " كلمة تشير ملاحظة و ت ُ علمك المشكلة تجنب بكيفية للبيانات فقد أو بالأجهزة تلف حدوث احتمال إلى " تنبيه " كلمة تشير...
-
Page 3: Table Of Contents
Contents بك الخاص الكمبيوتر على العمل ........................5 الأمان إرشادات ..................................... 5 الكمبيوتر داخل العمل قبل ................................5 السلامة احتياطات ..................................6 الإلكتروستاتيكي التفريغ من الحماية الإلكتروستاتيكي التفريغ ......................6 الإلكتروستاتيكي بالتفريغ الخاصة الموقع في الخدمة عدة ........................7 الحساسة المكونات نقل ................................7 بك... - Page 4 وإصلاحها الأخطاء استشكاف ........................47 التمهيد قبل للنظام المحسن التقييم تشخيصات (ePSA).........................47 تشخيصات تشغيل ePSA ( التمهيد قبل لما المحسن النظام تقييم ).......................47 المساعدة على الحصول ......................... 48 بشركة الاتصال Dell..................................48 Contents...
-
Page 5: بك الخاص الكمبيوتر على العمل
بك الخاص الكمبيوتر على العمل الأمان إرشادات المستند هذا في متضمن إجراء كل فإن ،ذلك غير إلى الإشارة يتم لم ما الشخصية سلامتك وضمان محتمل تلف أي من بك الخاص الكمبيوتر جهاز لحماية التالية السلامة بإرشادات استعن التالية الظروف وجود يفترض... -
Page 6: السلامة احتياطات
بطاقات أي بإزالة قم ExpressCards أوSmart Cards المناسبة الفتحات من السلامة احتياطات بالتفكيك متعلقة تعليمات أية تنفيذ قبل اتخاذها يجب التي الأساسية الخطوات تفاصيل السلامة باحتياطات الخاص الفصل يتناول التجميع أو التفكيك على وتنطوي الإصلاح الفك أو بالتركيب متعلقة إجراءات... -
Page 7: الإلكتروستاتيكي التفريغ
الإلكتروستاتيكي بالتفريغ الخاصة الموقع في الخدمة عدة المعصم وحزام الإستاتيكية للكهرباء مضادة حصيرة رئيسية مكونات ثلاثة الموقع في الخدمة عدة كل تتضمن استخدا م ً ا الأكثر الخدمة عدة هي المراقبة غير الموقع في الخدمة عدة تعد ربط وسلك الإلكتروستاتيكي بالتفريغ... -
Page 8: بك الخاص الكمبيوتر جهاز داخل العمل بعد
بك الخاص الكمبيوتر جهاز داخل العمل بعد الكمبيوتر تشغيل قبل وكبلات ،وبطاقات ،خارجية أجهزة أي توصيل من تأكد ،بديل إجراء أي إكمال بعد من هذا الخاص الكمبيوتر لجهاز المصممة البطارية سوى تستخدم لا ،الكمبيوتر جهاز تلف لتجنب تنبيه Dell. كمبيوتر لأجهزة... -
Page 9: والمكونات التكنولوجيا
والمكونات التكنولوجيا النظام في المتوفرة والمكونات التكنولوجيا الفصل هذا يتناول :الموضوعات • بالتيار الإمداد وحدة مواصفات • التيار مهايئ • الفيديو مواصفات • الصوت مواصفات • الشاشة مواصفات • المفاتيح لوحة مواصفات • البطارية التخزين وحدة مواصفات • بالتيار الإمداد وحدة... -
Page 10: الفيديو مواصفات
الفيديو مواصفات الفيديو جدول التحكم وحدة النوع وحدة على الاعتماد الرسومات ذاكرة نوع السعة الخارجية الشاشة دعم المركزية المعالجة Integrated Intel UHD Intel HD GFX المدمجة المشتركة النظام ذاكرة HDMI 2.0 ذاكرةGDDR5 طراز منفصلة Intel Xeon E-2276M GDDR5 4 جيجابايت HDMI 2.0 NVIDIA Quadro T1000... -
Page 11: المفاتيح لوحة مواصفات
الميزات المواصفات بت بت بمقدار الإطارات سرعة في تحكم اللون عمق نوع من الألوان مجموعة DCI-P3 بنسبة ثانية مللي الاستجابة وقت الواجهة نوع : eDP1.4b + PSR2 (4lane) التوهج ضد الاستقطاب نوع يخص فيما 80/80/80/80 الواسعة العرض زاوية العرض وضع U/D/L/R (الحد... -
Page 12: البطارية
الميزات المواصفات • مم 19.05 مقاس مفتاح فتحة مم مقاس مفتاح فتحة • 18.05 السريع التشغيل مفتاح عبر سهل تعطيل تمكين <Fn+F10> المتغيرة السطوع لمستويات الخلفية الإضاءة ذات المفاتيح لوحة التصميم QWERTY البطارية بوصة سعة الأقراص محركات مع الساعة في وات... - Page 13 التخزين وحدة مواصفات جدول التخزين وحدة مواصفات نوع من ثابتة أقراص محرك SATA الدقيقة في لفة 7200 سرعة وبمعدل جيجابايت سعة مم بطول بوصة مقاس نوع من ثابتة أقراص محرك SATA تقنية يدعم الدقيقة في لفة 7200 سرعة وبمعدل جيجابايت سعة...
-
Page 14: التركيب وإعادة الفك
التركيب وإعادة الفك التركيب وإعادة الفك القاعدة غطاء Installing the Base Cover 1. Place the base cover on the computer and snap it in place. 2. Tighten the M2x3 T5 (10), M2x8 (2) screws to secure the base cover to the computer. NOTE: Ensure you use a Torx #5 screwdriver for the base screws and a Philips screwdriver for the two M2x8 system badge screws. -
Page 15: البطارية
البطارية أيون ليثيوم لبطارية الوقائية التدابير تنبيه • أيون الليثيوم بطاريات مع التعامل عند الحذر ِ توخ • شحنة بتصريف بخروج للسماح النظام عن المتردد التيار مهايئ فصل طريق عن ذلك إجراء يمكن النظام من إزالتها قبل الإمكان قدر البطارية شحنة... -
Page 16: (Ssd) Pcie
• بدعم الاتصال يرجى ،السابقة الالتزامات حدود في البطارية إزالة تعذر حالة في Dell الفني البطارية تركيب البطارية حيز بمحاذاة البطارية ضع اللولبية المسامير ربط أحكم M2x4 (7) بالكمبيوتر البطارية تثبت التي النظام بلوحة البطارية كابل بتوصيل قم القاعدة غطاء بتركيب... - Page 17 لبطاقة الحرارية الوسادة اسحب بطاقة إلى للوصول SSD .المكشوفة صلبة مكونات من مصنوعة بذاكرة المزود الأقراص محرك تركيب (SSD) نوع من نوع من صلبة مكونات من مصنوعة بذاكرة المزود أقراص محرك في الحرارية الوسادة بلصق قم M.2. لبطاقة بالنسبة فقط الحرارية...
-
Page 18: الثابتة الأقراص
الثابتة الأقراص محرك اختياري بوصة مقاس الثابتة الأقراص محرك إزالة لديك الكمبيوتر داخل العمل قبل في الواردة الإجراءات اتبع : بإزالة قم القاعدة غطاء البطارية اختياري التكوين من جز ء ً ا الثابتة الأقراص محرك سيكون ،الخلايا ثلاثية بطارية مع شحنه... -
Page 19: الصوت مكبر
اختياري الثابتة الأقراص محرك مروحة تركيب الثابتة الأقراص محرك في الثابتة الأقراص محرك أغطية وضع أعد الثابتة الأقراص محرك بمجموعة الثابتة الأقراص محرك موزع بتوصيل قم اليد راحة مسند مجموعة على الثابتة الأقراص محرك مجموعة ضع النظام بلوحة الثابتة الأقراص محرك... -
Page 20: (Wlan)
الصوت مكبرات تركيب اليد راحة مسند مجموعة على الصوت مكبرات ضع ،المحاذاة دعامات باستخدام اللولبية المسامير وضع أعد M2x2 (4) اليد راحة مسند بمجموعة الصوت مكبرات تثبت التي اليد راحة مسند مجموعة على الموجودة التوجيه أدلة عبر الصوت مكبر كابلات بتوجيه... -
Page 21: وحدة
النطاق محلية اللاسلكية الشبكة بطاقة تركيب (WLAN) شبكة بطاقة على الموجود الحز بمحاذاة قم شبكة بطاقة بموصل الموجود اللسان مع النظام لوحة على WLAN WLAN اليد راحة مسند بمجموعة اللاسلكية الشبكة بطاقة تثبت التي الدعامة بمحاذاة قم ببطاقة الهوائي كابلات صل... - Page 22 النظام وحدة في بها الخاص الموصل من الذاكرة وحدة بإزالة قم ،ثم تنبثق حتى الذاكرة وحدة عن بعي د ًا التثبيت مشابك ارفع الذاكرة وحدات تركيب بها الخاص المقبس في الذاكرة وحدة أدخل تكه وتصدر مكانها في تستقر حتى الذاكرة وحدة...
- Page 23 اليمنى النظام مروحة لإزالة التالية الخطوات باتخاذ قم اللولبية المسامير بإزالة قم M2x4 (2) النظام بلوحة اليسرى الفيديو بطاقة مروحة يثبت الذي المعدني الرف وارفع موصل يثبت الذي المعدني الرف ارفع DisplayPort النوع عبر C [2]. التركيب وإعادة الفك...
- Page 24 النظام لوحة عن الشاشة كابل افصل الاحتجاز مشابك من الشاشة كابل توجيه بإلغاء قم النظام لوحة عن النظام مروحة كابل افصل اللولبية المسامير بإزالة قم M2x4 (2) النظام لوحة في النظام مروحة تثبت التي المحمول الكمبيوتر عن بعي د ًا المروحة...
-
Page 25: النظام مروحة
المراوح تركيب النظام مروحة لتركيب التالية الخطوات اتخذ اليد راحة مسند مجموعة في الموجودة اللولبية المسامير فتحات مع اليسرى المروحة في الموجودة اللولبية المسامير فتحات بمحاذاة قم النظام بلوحة اليسرى المروحة كابل بتوصيل قم اليسرى المروحة في الموجودة التوجيه أدلة خلال... -
Page 26: منفذ
القاعدة غطاء البطارية المسامير بإزالة قم M2x3 (5) النظام بلوحة الحراري المشتت تثبت التي الحراري للمشتت العلوي الجزء في المطبوعة الصور أرقام ترتيب راجع ، 5 ، 4 ، 3 ، 2 بالترتيب اللولبية المسامير إزالة من تأكد ملاحظة النظام لوحة... -
Page 27: النظام لوحة
مهايئ منفذ تركيب DC-in مهايئ منفذ ضع DC-in اليد راحة مسند مجموعة في الموجودة الفتحة داخل اليد راحة مسند مجموعة في الموجودة التوجيه أدلة عبر التيار مهايئ منفذ كابل بتوجيه قم اللولبي المسمار وضع أعد M2x3 اليد راحة مسند بمجموعة الطاقة... - Page 28 العرض شاشة كابل وافصل البلاستيك الذراع ارفع اللمس شاشة كابل لتحرير اللاصق الشريط انزع الهيكل من النظام لوحة لإزالة التالية الخطوات بإجراء قم اللولبية المسامير بإزالة قم M2x4 (4) بالكمبيوتر النظام لوحة تثبت التي الكمبيوتر جهاز من النظام لوحة ارفع التركيب...
-
Page 29: الصوت لوحة
النظام لوحة تركيب الكمبيوتر في النظام لوحة بمحاذاة قم اللولبية المسامير وضع أعد M2x4 (4) اليد راحة مسند بمجموعة النظام لوحة تثبت التي النظام بلوحة اللمس شاشة وكابل اللمس لوحة وكابل التحكم لوحة مفاتيح لوحة وكابل الصوت مكبر وكابل ،التيار مهايئ... - Page 30 البطارية بطاقةWLAN الثابتة الأقراص محرك المراوح الحراري المشتت وحدة الذاكرة وحدات وحدة النظام لوحة الصوت لوحة لإزالة التالية الخطوات بإجراء قم النظام لوحة اقلب المسامير بإزالة قم M2x3 (2) النظام بلوحة الصوت لوحة تثبت التي لأعلى الصوت لوحة ارفع الصوت...
-
Page 31: المصغرة الخلوية البطارية
الكمبيوتر داخل العمل بعد في الواردة الإجراءات اتبع المصغرة الخلوية البطارية المصغرة الخلوية البطارية إزالة الكمبيوتر داخل العمل قبل في الواردة الإجراءات اتبع الأساسي والإخراج الإدخال نظام إعدادات تعيين إعادة إلى المصغرة الخلوية البطارية إزالة تؤدي تنبيه نظام إعدادات تلاحظ بأن... -
Page 32: التشغيل زر
النظام لوحة اقلب : بتركيب قم النظام لوحة الذاكرة الحراري المشتت مجموعة المراوح الثابتة الأقراص محرك بطاقةWLAN البطارية القاعدة غطاء الكمبيوتر داخل العمل بعد في الواردة الإجراءات اتبع التشغيل زر Removing power button 1. Follow the procedures in Before Working Inside Your Computer. -
Page 33: الإصبع بصمة قارئ مع الطاقة زر
Installing power button 1. Align the power button into the slot on the system chassis. 2. Replace the M1.6x3 (2) screws that secure the power button to the system board. 3. Install the: Battery Base cover 4. Follow the procedures in After Working Inside Your Computer. - Page 34 e) Lift the power button board away from the system chassis [5]. الإصبع بصمة قارئ مع الطاقة زر تركيب النظام بهيكل الموجودة الفتحة داخل الطاقة زر ضع الطاقة لزر خياران هناك ملاحظة • ضوئي مؤشر مع الطاقة زر يعمل • اختياري...
-
Page 35: الشاشة مجموعة
: بإزالة قم القاعدة غطاء البطارية التالية الخطوات بتنفيذ قم النظام بلوحة الشاشة كابل يثبت الذي مايلار شريط حرر النظام بلوحة الموجود الموصل عن الشاشة كابل وافصل القفل ارفع النظام بلوحة الشاشة كابل يثبت الذي مايلار شريط حرر اللولبية المسامير بإزالة... -
Page 36: Antenna Cover
الشاشة مجموعة تركيب الحافة عن بعي د ًا الصوت مكبرات اتجاه مع المنضدة حافة على اليد راحة مسند ضع الشاشة مفصلات في الموجودة المسامير فتحات مع اليد راحة مسند مجموعة في الموجودة المسامير فتحات بمحاذاة قم اللولبية المسامير بإزالة قم M2.5 x 5 (6) اليد... - Page 37 برفق ٍ مست و سطح على النظام ضع الهوائي كابل لتحرير درجة بزاوية المفصلات بتدوير قم الشاشة وحدة خارج ورفعها الهوائي غطاء بسحب قم الهوائي وحدة لإزالة الهوائي وحدة تثبت التي النحاسية الأشرطة بإزالة قم اللولبية المسامير بإزالة قم M2x4 (4) ،...
-
Page 38: المفاتيح ولوحة المفاتيح لوحة حلية
الهوائي غطاء تركيب الشاشة مجموعة في الهوائي غطاء وضع أعد العادي الوضع إلى الشاشة مفصلات أدر : بتركيب قم الشاشة مجموعة بطاقةWLAN البطارية القاعدة غطاء الكمبيوتر داخل العمل بعد في الواردة الإجراءات اتبع المفاتيح ولوحة المفاتيح لوحة حلية المفاتيح لوحة... - Page 39 اللولبية المسامير بإزالة قم ثم ] 1 [ المفاتيح لوحة كابل توجيه بإلغاء قم M1.6 x 1.5 (31) بالكمبيوتر المفاتيح لوحة تثبت التي النظام بلوحة الموجود الموصل من الكابل افصل النظام بلوحة المفاتيح لوحة يثبت الذي اللولبي المسمار بإزالة قم النظام...
-
Page 40: مسند
المفاتيح لوحة تركيب المفاتيح لوحة على مايلار شريط بلصق قم اليد راحة مسند مجموعة في الموجودة اللولبية المسامير فتحات مع المفاتيح لوحة في الموجودة اللولبية المسامير فتحات بمحاذاة قم اللولبية المسامير بإزالة قم M1.6 x 1.5 (31) اليد راحة مسند بمجموعة... - Page 41 memory modules system board display assembly power connector port keyboard 3. After performing the above steps, we are left with the palm rest assembly. التركيب وإعادة الفك...
- Page 42 Figure 1. Power button with light indicator Figure 2. Fingerprint reader function without light indicator Installing the Palm rest Assembly 1. Align the palm rest assembly on the display assembly. 2. Tighten the screws to secure the display hinges to the palm rest assembly. 3.
- Page 43 4. Install the: keyboard system board power connector port display assembly fans heatsink assembly speakers WLAN card hard drive(optional) memory modules battery base cover 5. Follow the procedures in After Working Inside Your Computer التركيب وإعادة الفك...
-
Page 44: والمكونات التكنولوجيا
والمكونات التكنولوجيا النظام في المتوفرة والمكونات التكنولوجيا الفصل هذا يتناول :الموضوعات • USB النوعC • ميزاتUSB USB النوعC ً موص لا موصل ي ُعد النوع من معايير دعم نفسه للموصل يمكن الصغر بالغ جدي د ًا ماد ي ًا مثل... - Page 45 منفذUSB 3.0/USB 3.1 الأول الجيل من (SuperSpeed USB) أثبتت ،سنوات لعدة USB 2.0 تزداد الواقع وفي المبيعة؛ الأجهزة من مليارات حوالي في توفيرها تم حيث الكمبيوتر أجهزة عالم في المعايير مع المتطابقة الفعلية الواجهة أنها بقوة تلبي وأخير ً ا الفائق...
- Page 46 منتجات بعض يلي فيما SuperSpeed USB 3.0/USB 3.1 المتاحة الأول الجيل من منافذ عبر والمستخدمة المكتبي الكمبيوتر لأجهزة الخارجية الثابتة الأقراص محركات الأول الجيل من • USB 3.0/USB 3.1 • منافذ عبر المستخدمة المحمولة الثابتة الأقراص محركات USB 3.0/USB 3.1 الأول...
- Page 47 وإصلاحها الأخطاء استشكاف التمهيد قبل للنظام المحسن التقييم تشخيصات (ePSA) تشخيصات تقوم ePSA ( تضمين يتم لجهازك كامل بفحص النظام بتشخيصات أي ض ً ا المعروفة ePSA الأساسي والإخراج الإدخال بنظام (BIOS) نظام بواسطة داخل ي ًا تشغيلها ويتم الأساسي والإخراج...
- Page 48 المساعدة على الحصول :الموضوعات • بشركة الاتصال Dell بشركة الاتصال Dell منتج كتيب أو الفاتورة أو الشحن إيصال أو بك الخاصة الشراء فاتورة على الاتصال معلومات على العثور فيمكنك ،بالإنترنت نشط اتصال لديك يكن لم إذا ملاحظة Dell. توفرDell بشركة...
Need help?
Do you have a question about the Precision 5540 and is the answer not in the manual?
Questions and answers