
Subscribe to Our Youtube Channel
Related Manuals for Dell EMC Latitude 5510


Summary of Contents for Dell EMC Latitude 5510
- Page 1 Latitude 5510 Setup and specifications guide Regulatory Model: P80F Regulatory Type: P80F002...
- Page 2 Notes, cautions, and warnings NOTE: A NOTE indicates important information that helps you make better use of your product. CAUTION: A CAUTION indicates either potential damage to hardware or loss of data and tells you how to avoid the problem. WARNING: A WARNING indicates a potential for property damage, personal injury, or death.
-
Page 3: Table Of Contents
Contents 1 Set up your computer........................5 2 Create a USB recovery drive for Windows..................7 3 Chassis overview..........................8 Display view.................................... 8 Left view....................................9 Right view....................................9 Palmrest view..................................10 Bottom view..................................11 Keyboard shortcuts................................11 4 Technical specifications......................13 Processors.....................................13 Chipset....................................13 Operating system................................. - Page 4 System information............................... 26 Video....................................27 Security................................... 28 Secure boot..................................29 Intel Software Guard Extensions..........................29 Performance...................................30 Power management..............................30 POST behavior................................31 Manageability................................. 32 Virtualization support..............................32 Wireless...................................33 Maintenance screen..............................33 System logs..................................33 Updating the BIOS in Windows ............................33 Updating BIOS on systems with BitLocker enabled....................34 Updating your system BIOS using a USB flash drive....................
-
Page 5: Set Up Your Computer
Set up your computer Steps 1. Connect the power adapter and press the power button. NOTE: To conserve battery power, the battery might enter power saving mode. 2. Finish Windows system setup. Follow the on-screen instructions to complete the setup. When setting up, Dell recommends that you: •... - Page 6 Dell apps Details NOTE: Renew or upgrade your warranty by clicking the warranty expiry date in SupportAssist. Dell Update Updates your computer with critical fixes and important device drivers as they become available. Dell Digital Delivery Download software applications including software that is purchased but not preinstalled on your computer.
-
Page 7: Create A Usb Recovery Drive For Windows
Create a USB recovery drive for Windows Create a recovery drive to troubleshoot and fix problems that may occur with Windows. An empty USB flash drive with a minimum capacity of 16 GB is required to create the recovery drive. Prerequisites NOTE: This process may take up to an hour to complete. -
Page 8: Chassis Overview
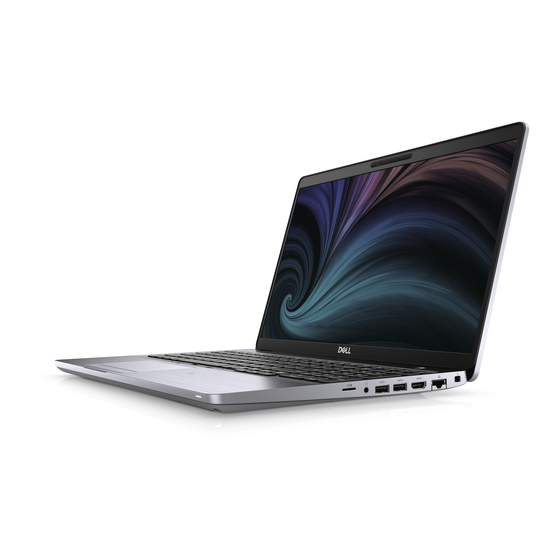
Chassis overview Topics: • Display view • Left view • Right view • Palmrest view • Bottom view • Keyboard shortcuts Display view 1. Array microphone 2. Camera shutter 3. Infrared (IR) emitter (optional) 4. Camera 5. Camera status light 6. -
Page 9: Left View
Left view 1. DC-in port 2. USB 3.2 Gen2 (USB Type-C) port with DisplayPort/Power Delivery/Thunderbolt (optional) 3. USB 3.2 Gen1 Type-A port 4. Air vent 5. Smart card reader (optional) Right view 1. Micro SD card slot 2. Micro SIM card slot 3. -
Page 10: Palmrest View
Palmrest view 1. Power button with optional fingerprint reader 2. Keyboard 3. NFC/Contactless smartcard reader (optional) 4. Touchpad 5. TrackPoint Chassis overview... -
Page 11: Bottom View
Bottom view 1. Air vent 2. Service tag location 3. Speakers Keyboard shortcuts NOTE: Keyboard characters may differ depending on the keyboard language configuration. Keys that are used for shortcuts remain the same across all language configurations. Table 2. List of keyboard shortcuts Keys Primary behavior Secondary behavior (Fn + Key) - Page 12 Keys Primary behavior Secondary behavior (Fn + Key) Fn + F6 F6 behavior Decrease brightness Fn + F7 F7 behavior Increase brightness Fn + F8 F8 behavior Switch to external display Fn + F10 F10 behavior Print screen Fn + F11 F11 behavior Home Fn + 12...
-
Page 13: Technical Specifications
Technical specifications Processors Table 3. Processors Description Values Processors 10th Generation 10th Generation 10th Generation 10th Generation 10th Generation Intel Intel Core i3-10110U Intel Core i5-10210U Intel Core i5-10310U Intel Core i7-10610U Core i7-10810U Wattage 15 W 15 W 15 W 15 W 15 W Core count... -
Page 14: Memory
Memory Table 5. Memory specifications Description Values Slots Two SoDIMM Type DDR4 Speed 3200 Mhz operates at 2667 MHz for Intel 10th Generation Maximum memory 32 GB Minimum memory 4 GB Configurations supported • 4 GB DDR4 at 2667 MHz (1 x 4 GB) •... -
Page 15: Audio
Description Values Power adapter port • 7.4 mm barrel-type • One PowerDelivery 3.0 port over USB Type-C Security One security-cable slot (wedge-shaped) Card slot microSD card slot SIM card uSIM card slot Table 8. Internal ports and connectors Description Values Internal: One M.2 Key-M (2280 or 2230) for solid-state drive •... -
Page 16: Camera
Table 11. Integrated graphics specifications Integrated graphics Controller External display support Memory size Processor Intel UHD Graphics • One HDMI 1.4b port Shared system memory 10th Generation Intel Core i3/i5/i7 • One USB 3.1 Gen2 Type-C port with DisplayPort Alt Mode/Thunderbolt 3 Camera Table 12. -
Page 17: Media-Card Reader
Description Values • Wi-Fi 5 (WiFi 802.11ac) • Wi-Fi 6 (WiFi 802.11 ax) Encryption • 64-bit and 128-bit WEP • 64-bit and 128-bit WEP • 64-bit and 128-bit WEP • 128-bit AES-CCMP • 128-bit AES-CCMP • 128-bit AES-CCMP • TKIP •... -
Page 18: Power Adapter
Description Values Dimensions: Horizontal 101.70 mm (4.00 in.) Vertical 55.20 mm (2.17 in.) Power adapter Table 18. Power adapter specifications Description Values Type 65 W 90 W 65 W Type-C 90 W Type-C Diameter (connector) 22 x 66 x 106 mm 22 x 66 x 130 mm 48.26 x 129.54 x 215.9 43.18 x 177.8 x 215.9 mm... -
Page 19: Dimensions And Weight
Dimensions and weight The following table lists the height, width, depth, and weight of your Latitude 5510. Table 20. Dimensions and weight Description Values Height: Technical specifications... -
Page 20: Display
Description Values Front height 20.98 mm (0.83 in.) Rear height 22.42 mm (0.88 in.) Width 359.10 mm (14.14 in.) Depth 236.25 mm (9.30 in.) Weight (maximum) 1.82 kg (4.01 lb) NOTE: The weight of your computer depends on the configuration ordered and manufacturing variability. Display Table 21. -
Page 21: Fingerprint Reader
Fingerprint reader Table 22. Fingerprint reader in power button Description Values Sensor technology Trans-capacitive sensing Sensor resolution 363 dpi Sensor area 5.25 mm x 6.9 mm Sensor pixel size 76 x 100 Table 23. Fingerprint reader on palmrest Description Values Sensor technology Capacitive Sensor resolution... -
Page 22: Computer Environment
Specifications Dell Supply Chain Defense Computer environment Airborne contaminant level: G1 as defined by ISA-S71.04-1985 Table 26. Computer environment Description Operating Storage Temperature range 0°C to 35°C (32°F to 95°F) -40°C to 65°C (-40°F to 149°F) Relative humidity (maximum) 10% to 80% (non-condensing) 0% to 95% (non-condensing) Vibration (maximum) 0.26 GRMS... -
Page 23: Software
Software This chapter details the supported operating systems along with instructions on how to install the drivers. Topics: • Downloading Windows drivers Downloading Windows drivers Steps 1. Turn on the notebook. 2. Go to Dell.com/support. 3. Click Product Support, enter the Service Tag of your notebook, and then click Submit. NOTE: If you do not have the Service Tag, use the auto detect feature or manually browse for your notebook model. -
Page 24: System Setup
System setup CAUTION: Unless you are an expert computer user, do not change the settings in the BIOS Setup program. Certain changes can make your computer work incorrectly. NOTE: Before you change BIOS Setup program, it is recommended that you write down the BIOS Setup program screen information for future reference. -
Page 25: Boot Sequence
Keys Navigation Moves to the previous page until you view the main screen. Pressing Esc in the main screen displays a message that prompts you to save any unsaved changes and restarts the system. Boot Sequence Boot sequence enables you to bypass the System Setup–defined boot device order and boot directly to a specific device (for example: optical drive or hard drive). -
Page 26: System Information
Option Description Date/Time Allows you to set the date and time settings. Changes to the system date and time take effect immediately. System information Table 28. System Configuration Option Description Integrated NIC Allows you to configure the on-board LAN controller. •... -
Page 27: Video
Option Description • Disabled • • Bright-enabled by default Keyboard Backlight Timeout on The Keyboard Backlight Timeout dims out with AC option. The main keyboard illumination feature is not affected. Keyboard Illumination will continue to support the various illumination levels. This field has an effect when the backlight is enabled. -
Page 28: Security
Security Table 29. Security Option Description Admin Password Allows you to set, change, and delete the admin password. System Password Allows you to set, change, and delete the system password. Internal HDD-2 Password This option lets you set, change, or delete the password on the system's internal hard disk drive (HDD). -
Page 29: Secure Boot
Option Description Admin Setup Lockout Allows you to prevent users from entering Setup when Admin password is set. This option is not set by default. Master Password Lockout Allows you to disable master password support Hard Disk passwords need to be cleared before the settings can be changed. -
Page 30: Performance
Option Description Enclave Memory Size This option sets SGX Enclave Reserve Memory Size Click one of the following options: • 32 MB • 64 MB • 128 MB—Default Performance Table 32. Performance Option Description Multi Core Support This field specifies whether the process has one or all cores enabled. -
Page 31: Post Behavior
Option Description • Every Day • Weekdays • Select Days Default setting: Disabled USB Wake Allows you to enable USB devices to wake the system from Standby. Support NOTE: This feature is only functional when the AC power adapter is connected. If the AC power adapter is removed during Standby, the system setup removes power from all the USB ports to conserve battery power. -
Page 32: Manageability
Option Description Fn Lock Options Allows you to let hot key combinations Fn + Esc toggle the primary behavior of F1–F12, between their standard and secondary functions. If you disable this option, you cannot toggle dynamically the primary behavior of these keys. -
Page 33: Wireless
Wireless Option Description Wireless Device Allows you to enable or disable the internal wireless devices. Enable • WLAN • Bluetooth All the options are enabled by default. Maintenance screen Option Description Service Tag Displays the Service Tag of your computer. Asset Tag Allows you to create a system asset tag if an asset tag is not already set. -
Page 34: Updating Bios On Systems With Bitlocker Enabled
Steps 1. Restart the computer. 2. Go to Dell.com/support. • Enter the Service Tag or Express Service Code and click Submit. • Click Detect Product and follow the instructions on screen. 3. If you are unable to detect or find the Service Tag, click Choose from all products. 4. -
Page 35: System And Setup Password
Figure 1. DOS BIOS Update Screen System and setup password Table 33. System and setup password Password type Description System password Password that you must enter to log on to your system. Setup password Password that you must enter to access and make changes to the BIOS settings of your computer. -
Page 36: Deleting Or Changing An Existing System Setup Password
• Only the following special characters are allowed: space, (”), (+), (,), (-), (.), (/), (;), ([), (\), (]), (`). 3. Type the system password that you entered earlier in the Confirm new password field and click OK. 4. Press Esc and a message prompts you to save the changes. 5. -
Page 37: Getting Help
Getting help Topics: • Contacting Dell Contacting Dell Prerequisites NOTE: If you do not have an active Internet connection, you can find contact information on your purchase invoice, packing slip, bill, or Dell product catalog. About this task Dell provides several online and telephone-based support and service options. Availability varies by country and product, and some services may not be available in your area.
Need help?
Do you have a question about the Latitude 5510 and is the answer not in the manual?
Questions and answers