Westinghouse REHR6 Series User Manual
Hide thumbs
Also See for REHR6 Series:
- Operation manual/installation instructions (12 pages) ,
- Operation manual (13 pages) ,
- User manual (12 pages)

Subscribe to Our Youtube Channel
Related Manuals for Westinghouse REHR6 Series


Summary of Contents for Westinghouse REHR6 Series
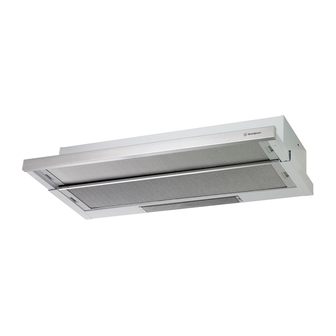
- Page 1 USER MANUAL RANGEHOOD REHR6*, WRH605I*, WRH608I*, WRR614*A, WRH908I* WRR604*B, WRR904*B, WRR614*B, WRR914*B...
- Page 2 Products must be used, installed and operated in accordance with this manual. You may not be able to claim on the Westinghouse manufacturer’s warranty in the event that your product fault is due to failure to adhere this manual.
-
Page 3: Safety Instructions
SAFETY INSTRUCTIONS Please read the user manual carefully and store in a CAUTION handy place for later reference. Pass the user manual on to possible new owners of the appliance. • Accessible parts may become hot when used with cooking appliance. Read the following carefully to avoid damage or injury. - Page 4 INSTALLATION Standard ducting installation Ducting installation When installing with ducting pipe the Duct spigot must It is recommended that the unit be positioned at a be fitted to the ducting hole on top of the body of the minimum of 600mm for an electric cooktop and 650mm rangehood.
- Page 5 INSTALLATION Fixing duct spigot Ducting accessories - REHR6* WR H605I* WR H608I* WRR614*A WRH908I* WRR604*B WRR904*B Snap in duct spigot to the rangehood. WRR614*B WRR914*B For best performance Ø 125mm ducting is recommended roof cowl AR125RC AR125F Fixing the rangehood Use 4 x M6x40 screws and washers supplied to fasten the cooker the wood support from upper side.
- Page 6 INSTALLATION Installation using the supplied drawer fascia – Setting of circulation air doors REHR6* WRH605I* WRH608I* WRH908I* WRR 604*B WRR904*B Standard ducted installation calls for a door extension of Exhaust 130mm whether the client opts to use the supplied draw fascia or a custom fascia of the same dimensions as that supplied.
- Page 7 OPERATION IMPORTANT! Remove filters for cleaning The Edison Screw lamps may have come loose 1. Slide filter tray forward 1cm. during transportation. 2. Push in clip on either side to release fi lter. Fig 1. Ensure that lamps are tightened firmly into the 3.
- Page 8 NOTES...
- Page 9 NOTES...
- Page 10 NOTES...
- Page 11 (c) ‘ASC’ means Electrolux’s authorised serviced centres; the Appliance; (d) ‘Westinghouse’ is the brand controlled by Electrolux Home Products In addition, Electrolux is not liable under this warranty if: Pty Ltd of 163 O’Riordan Street, Mascot NSW 2020, ABN 51 004...
- Page 12 0800 225 088 email: customercare@electrolux.co.nz web: westinghouse.co.nz P/No. E613030 and WESTINGHOUSE are trademarks of Westinghouse Electric Corporation. Used under license by Electrolux Home Products Pty Ltd. All Rights Reserved. © 2019 Electrolux Home Products Pty Ltd. ABN 51 004 762 341 WMAN_GenRangehood_Sep19...
Need help?
Do you have a question about the REHR6 Series and is the answer not in the manual?
Questions and answers