Table of Contents
Advertisement
Advertisement
Table of Contents

Related Manuals for Telstra TSH-D


Summary of Contents for Telstra TSH-D
- Page 1 Getting to know your Telstra TSH-D Desktop Phone...
-
Page 2: Getting To Know Your Phone
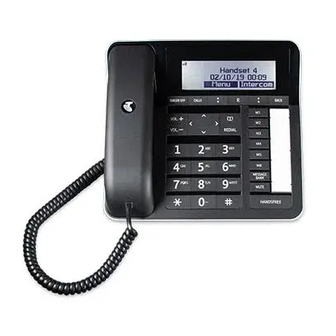
Getting to know your phone Overview of your phone Softkey right... - Page 3 Phone display Unregistered Menu Register Display icons Signal icon Displays when in hands-free mode Mute is activated Ringer is switched off Indicates a missed call Alarm is set...
-
Page 4: What's Inside
What’s inside Getting to know your phone Overview of your phone Phone display Display icons Safety precautions Getting started Location Phone range Signal strength Compatible modems Contents of the package Setting up Connecting the power adapter Power up the phone Select a language Registering the phone On the modem... - Page 5 Phonebook Store a name and number View the details or dial an entry Edit a name and number Delete an entry Delete all entries Predial an entry Check the memory status (Local contacts only) Caller ID and caller list New calls alert Dial a number in the Call List Copy a Call List number to the phonebook View the details of an entry...
- Page 6 Advanced settings DECT settings Change PIN Clock Master ECO plus Base version Restore to default settings Internal names Line settings Line name Line ID Phone line settings Multi call mode Intrusion call Line selection Default settings Help No dial tone No display No caller display Cannot register a phone to the modem...
-
Page 7: Safety Precautions
Your new phone is intended for use within Australia for connection to a Telstra Smart Modem. Please read the safety precautions and user guide carefully before installing the phone. The user guide is a part of the product package and must be passed on to a new owner. -
Page 8: Getting Started
When out of range of the modem, the icon will show. Compatible modems The TSH-D is compatible with Telstra Smart modems Gen 1 and Gen 2. It supports the DECT GAP standard and may work on other modems but not all... -
Page 9: Contents Of The Package
Contents of the package TSH-D Desktop Phone Power adaptor Headset cord Quick Start Guide with Handset Cord Setting up IMPORTANT Use only the power adaptor supplied with the product. Connecting the power adaptor 1. Plug the power adaptor into the socket marked on the rear of the phone and plug the other end into the mains power wall socket. -
Page 10: Select A Language
Select a language When the phone is rst set up it will list the different languages, use scroll to the required language and press Select. Registering the phone On the modem Pair step 2 below. On the phone 2. If the phone is not registered to a modem, press Register. The screen displays Registering and once successful Registered will be displayed. -
Page 11: Navigating The Menus
1. Press Menu, scroll to Clock & Alarm and press Select. 2. Date/Time is highlighted. Press Select. Enter Date is selected. Enter the date, e.g. when set to DD/MM, 27/08/19 for 27 August 2019 and press Ok. to Date Format and scroll or to To change the date format, scroll select either DD/MM or MM/DD. -
Page 12: Menu Map
Menu map Contacts Clock & Alarm Registration Local Contacts Date/Time Phone Name Alarm Auto Hang-up Edit Call Features Auto Answer View Voicemail Phone Setback Delete Call Forward Phone Version Delete All Call Waiting Advance Settings Predial Call Return DECT Settings Memory Status Voice Assistant Change PIN... -
Page 13: Making And Receiving Calls
Making and receiving calls Note Your phone will automatically time the duration of all external calls, the call timer will display on the screen. When the call ends, the total duration of your talk time is shown for 1 second. Switch the phone on/off 1. - Page 14 If more than one phone is registered to the modem, an internal call can be made between phones and a second call can also be made. You can register multiple TSH-D phones or compatible cordless phones. Each product will be allocate a speci c HANDSET #.
- Page 15 Receiving an internal call When an internal call is received, the phone name or number that is calling is displayed. 1. Press Silence to stop the phone ringing. 2. Press Reject to reject the call. Pick up the phone or press HANDSFREE to answer the call. Making a second call When on an internal or external call you can make a second internal or external call without ending the rst call.
- Page 16 3. If the line selection is set to manual, press HANDSFREE and scroll to highlight Auto or Line Name and press Select, if Line Name is selected scroll to the desired line and press Select. 4. When the second call answers you can have a conversation. 5.
-
Page 17: Store A Name And Number
Phonebook The phone gives you access to 2 phonebooks: Local contacts - The contacts are saved locally on the phone. Base contacts - The contacts are saved on the modem. All the phones registered to the modem can access these shared contacts. The local phonebook can store up to 100 contacts. -
Page 18: View The Details Or Dial An Entry
Press twice Press three times To enter a space, press WRITING TIPS To change the text from Abc to ABC, abc or 123, press . Press or to move between characters/digits. Press Clear to delete a character, or press and hold Clear to delete all characters. View the details or dial an entry 1. -
Page 19: Delete All Entries
5. Display shows Delete?. 6. Press Yes No to cancel. Press BACK button to return to standby. Delete all entries 1. Press Menu, Contacts is displayed, press Select. to select the desired phonebook and press Select. 2. Scroll 3. Press Option, scroll to Delete All and press Select. -
Page 20: New Calls Alert
Caller ID and caller list Provided the identity of the caller is not withheld, the number of the caller will be displayed together with the date and time of the call (if provided by the network). A subscription to this service may be required. Note If the caller’s number is stored in your phonebook along with a name, when you receive a call the name will also be displayed. -
Page 21: View The Details Of An Entry
View the details of an entry CALLS button to highlight the Call List ( Missed Calls, Press , scroll Outgoing Calls, Accepted Calls, All Calls ) you want. 2. Press Select, the most recent number or name if stored in the phonebook is displayed. -
Page 22: Clock And Alarm
Predial an entry in the Call List Press CALLS button , scroll to highlight the Call List ( Missed Calls, Outgoing Calls, Accepted Calls, All Calls ) you want. 2. Press Select, the most recent number (or name if stored in the phonebook) is displayed. -
Page 23: Call Features
3. Activation is highlighted, scroll or to Off, Once or Daily. to highlight Enter Time. 4. Scroll 5. Enter the time (HH:MM). If the current time format setting is 12 hour, scroll or to select AM or PM. to highlight Ringtone ... -
Page 24: Phone Settings
to the number, press Clear to delete a digit, or press and hold Clear to 5. Scroll delete all digits. Edit the number if necessary and press Save. 6. Press BACK button to return to standby. Phone settings Sound Ringer volume The ring volume can be set to different volume levels. - Page 25 Display Display contrast You can set the display contrast on the phone screen. 1. Press Menu, scroll to Phone Settings and press Select. 2. Scroll to Display and press Select. 3. Contrast is highlighted. Press Select. 4. Scroll to the contrast you require and press Select. 5.
- Page 26 Note A beep will be heard if the registration is successful. The phone is automatically assigned an available phone number. If registration is not successful the rst time, please repeat the process again in case the registration period ran out of time. If you still cannot register a phone to the modem please check how many phones are already registered.
-
Page 27: Upgrade Phone Software
Phone version 1. Press Menu, scroll to Phone Settings and press Select. to Phone Version and press Select. 2. Scroll 3. The software version will be displayed. BACK button 4. Press to return to standby. Upgrade phone software You can upgrade the phone to the latest software, this can be checked manually or the phone checks for new software every time it is switched on or at 12:00am everyday and sends a noti cation. - Page 28 When entering a PIN, the digits are shown as **** 1. Press Menu, scroll to Advance Settings and press Select. 2. DECT Settings is highlighted. Press Select. 3. Change PIN is highlighted. Press Select. 4. Enter the old PIN and press Ok. 5.
-
Page 29: Line Settings
Restore to default settings 1. Press Menu, scroll to Advance Settings and press Select. 2. DECT Settings is highlighted. Press Select. 3. Scroll to Base Setback and press Select. is displayed, Press Yes No to cancel. BACK button 5. Press to return to standby. -
Page 30: Phone Line Settings
to Line ID and press Select. 5. Scroll 6. The line ID is displayed. 7. Press BACK button to return to standby. Phone line settings 1. Press Menu, scroll to Advance Settings and press Select. 2. Scroll to Line Settings and press Select. 3. -
Page 31: Line Selection
Line selection When making calls you can pre set the line selection to auto, manual or individual line selection. 1. Press Menu, scroll to Advance Settings and press Select. to Line Selection and press Select. 2. Scroll 3. Scroll to select Manual, Auto or the desired named line and press Select. -
Page 32: Phone Does Not Ring
Warranty conditions Your Telstra Smart Phone - Desktop (TSH-D) phone comes with a manufacturer’s warranty of 24 months from the date of purchase. Our goods come with guarantees that cannot be excluded under the Australian Consumer Law. - Page 33 13 22 00...
Need help?
Do you have a question about the TSH-D and is the answer not in the manual?
Questions and answers