Table of Contents
Advertisement
Available languages
Available languages
Advertisement
Chapters
Table of Contents

Related Manuals for Novoferm NovoPort IV


Summary of Contents for Novoferm NovoPort IV
- Page 1 ® NovoPort WN 903012-21-6-50 09-2018...
- Page 2 Copyright und Haftungsausschluss ® © 2018 TORMATIC Die vollständige oder auszugsweise Vervielfältigung, Weitergabe oder Verwertung dieses Dokumentes, sei es in elektronischer oder mechanischer Form, einschließlich Fotokopie und Aufzeichnung, bedarf unabhängig vom damit verfolgten Zweck der vorherigen schriftlichen Genehmigung durch TORMATIC. Copyright and disclaimer ®...
-
Page 3: Table Of Contents
Inhalt Inhalt Zu diesem Handbuch ................... 5 Inhalt und Zielgruppe................5 1.1.1 Darstellungen in Abbildungen ..........5 Piktogramme und Signalwörter ............5 1.2.1 Gefahrensymbole ..............6 1.2.2 Hinweis- und Infosymbol ............6 Sicherheit ...................... 7 Bestimmungsgemäßer Gebrauch ............7 Vorhersehbare Fehlanwendung ............8 Personalqualifikation ................ - Page 4 Inhalt 4.10 Sondereinstellungen................25 4.10.1 Menü "Sondereinstellungen" öffnen ........25 4.10.2 Menü 5 + Menü 6: Kraftbegrenzung für Auf- und Zufahrt ... 25 4.10.3 Menü 7: Lichtzeiten einstellen ..........25 4.10.4 Menü 8: Toranpassungen ........... 26 4.10.5 Menü 9: Einstellungen weitere Betriebsarten...... 26 4.10.6 Menü...
-
Page 5: Zu Diesem Handbuch
Zu diesem Handbuch Zu diesem Handbuch Inhalt und Zielgruppe Dieses Handbuch beschreibt den Garagentorantrieb der Modulreihe NovoPort® IV (im Folgenden als "Produkt" bezeichnet). Dieses Handbuch richtet sich sowohl an technisches Personal, welches mit Montage- und Wartungsarbeiten beauftragt wird, als auch an die Endverbraucher des Produkts. Im vorliegenden Handbuch wird nur die Steuerung per Handsender beschrieben. -
Page 6: Gefahrensymbole
Zu diesem Handbuch 1.2.1 Gefahrensymbole Gefahr! Dieses Zeichen weist Sie auf eine unmittelbare Gefahr für das Leben und die Gesundheit von Personen hin, bis hin zu lebensgefährlichen Verletzungen oder Tod. Gefahr! Gefahr durch elektrischen Strom! Dieses Zeichen weist Sie auf Gefahren durch elektrischen Strom hin. Warnung! Gefahr durch Quetschen! Dieses Zeichen weist Sie auf gefährliche Situationen mit... -
Page 7: Sicherheit
Beauftragten ausgeschlossen. Bestimmungsgemäßer Gebrauch • Das Produkt ist ausschließlich zum Öffnen und Schließen gewichts- oder federausgeglichener Garagentore konzipiert. Ein Einsatz an Toren ohne Gewichts- oder Federausgleichsmechanismus ist nicht zulässig. • Das Produkt ist ausschließlich mit Produkten von Novoferm kompatibel. NovoPort® IV... -
Page 8: Vorhersehbare Fehlanwendung
Sicherheit • Veränderungen am Produkt dürfen nur mit ausdrücklicher Genehmigung durch den Hersteller vorgenommen werden. • Das Produkt ist ausschließlich für den Hausgebrauch geeignet. Vorhersehbare Fehlanwendung Eine andere Verwendung als die im Kapitel 2.1 beschriebene gilt als vernünftigerweise vorhersehbare Fehlanwendung, dazu gehören z. B.: •... -
Page 9: Gefahren, Die Vom Produkt Ausgehen Können
Sicherheit Gefahren, die vom Produkt ausgehen können Das Produkt wurde einer Risikobeurteilung unterzogen. Die darauf aufbauende Konstruktion und Ausführung des Produktes entspricht dem heutigen Stand der Technik. Das Produkt ist bei bestimmungsgemäßer Verwendung betriebssicher. Dennoch bleibt ein Restrisiko bestehen. Gefahr durch elektrische Spannung! Tödlicher Stromschlag durch Berühren von spannungsführenden Teilen. -
Page 10: Produktbeschreibung
IP20, nur für trockene Schutzklasse: Leistungsaufnahme: Räume Standby: 0,5 W Lautstärke: < 70 dBA Max. Betrieb: 200 W Hersteller: Novoferm tormatic GmbH Eisenhüttenweg 6 Zyklen / Stunde: 44145 Dortmund Max. Zyklen / Tag: Deutschland Max. Zyklen Gesamt: 25000 www.tormatic.de NovoPort® IV... -
Page 11: Typenschild
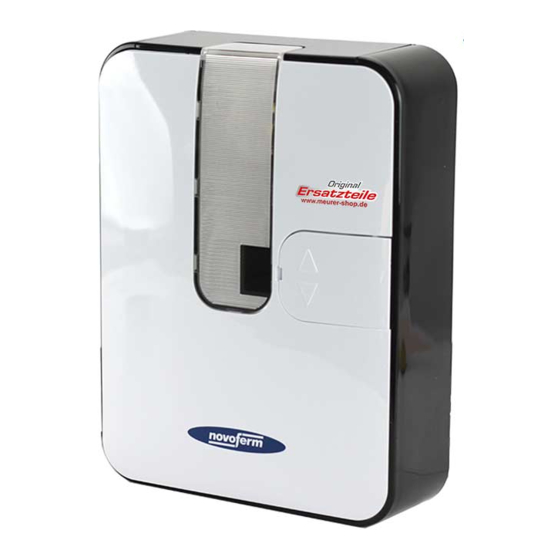
Produktbeschreibung Typenschild Das Typenschild befindet sich unter der Abdeckung des Steuergerätes, siehe Abb. 4-4, Seite 14. Die angegebenen Anschlusswerte sind zu beachten. Bedienelemente Abb. 3-2 Bedienelemente A. Ziffernanzeige (A1 Digitalpunkt) B. Taste AUF / Start C. Taste ZU D. Programmiertaste (PROG-Taste) 1. -
Page 12: Installation Und Montage
Installation und Montage Installation und Montage Sicherheitshinweise für die Installation und Montage • Die Installation darf nur durch qualifiziertes technisches Personal erfolgen. • Machen Sie sich vor Beginn der Produktinstallation mit allen Installationsanweisungen vertraut. Antriebe und Zubehör AWG 22 Y-OB 2 x 1,0 AWG 22 AWG 22... -
Page 13: Vorbereitung Der Montage
Installation und Montage HINWEIS Überprüfen Sie, ob die gelieferten Schrauben und Halterungen für die Montage vor Ort unter Berücksichtigung der baulichen Voraussetzungen geeignet sind. Vorbereitung der Montage Gefahr durch Stoßen oder Umfallen! Personen können durch das Tor gestoßen oder umgestoßen werden. •... - Page 14 Installation und Montage Schritt Installation Schieben Sie den Zahnriemenprofilanschlag unter den Zahnriemen. Positionieren Sie den Zahnriemenprofilanschlag so, dass dieser ca. 5 cm Abstand zum Antriebskopf in der Endposition AUF einhält. Hintere Zahnriemenbefestigung montieren Führen Sie den Zahnriemen durch den Eckverbindungswinkel durch und halten Sie ihn gespannt.
-
Page 15: Motorkopf Entriegeln
Installation und Montage Schritt Installation Wandschelle Halten Sie das Spiralkabel senkrecht hoch. Die max. Dehnung des horizontal geführten Kabels darf nicht mehr als das 3-fache der ursprünglichen Länge betragen. Klemmen Sie die Wandschelle am Knickpunkt auf. Halten Sie die Schelle an die Wand an und setzen Sie die Markierung. -
Page 16: Garagentorantrieb Verkabeln - Netzanschluss Und Steuerung
Installation und Montage Garagentorantrieb verkabeln - Netzanschluss und Steuerung Gefahr durch elektrische Spannung! Tödlicher Stromschlag durch Berühren von spannungsführenden Teilen. • Trennen Sie vor dem Öffnen der Abdeckung das Steuergerät von der Stromversorgung, indem Sie den Netzstecker ziehen. • Keine spannungsführenden Leitungen anklemmen. Nur potenzialfreie Taster und Relaisausgänge anschließen. -
Page 17: Übersicht Anschlussplan
Installation und Montage 4.6.1 Übersicht Anschlussplan 180R LS 4 LS 4 LS 2 LS 2 24V- 230V~ NovoPort® IV... -
Page 18: Impulsgeber Und Externe Sicherheitseinrichtungen
Installation und Montage Klemme Beschreibung Übersicht der Anschlussbelegung am Steuergerät Stecksockel für Funkempfänger Anschluss für Antenne. Bei Verwendung einer externen Antenne muss die Abschirmung auf die links daneben liegende Klemme (F) gelegt werden. Anschluss für externen Impulsgeber (Zubehör, z. B. Schlüsseltaster oder Codetaster) Anschluss für Schlupftürkontakt (Zubehör) oder Notstopp Über diesen Eingang wird der Antrieb gestoppt bzw. -
Page 19: Antennenverlegung
Installation und Montage Antennenverlegung Abb. 4-5 Antenne verlegen Lösen Sie die Schraube hinter der Bedienklappe und nehmen Sie die Abdeckung ab, siehe Abb. 4-4, Seite 14. Lösen Sie die beiden Schrauben der oberen Abdeckung und schieben Sie diese heraus. Nehmen Sie die Antenne aus der Transportsicherung und führen Sie sie durch die Durchführung senkrecht nach oben. -
Page 20: Antriebskopf Programmieren
Installation und Montage Gefahr durch elektrische Spannung! Tödlicher Stromschlag durch Berühren von spannungsführenden Teilen. • Trennen Sie vor dem Öffnen der Abdeckung das Steuergerät von der Stromversorgung, indem Sie den Netzstecker ziehen. Schritt Installation Schlupftürschalter Lösen Sie die Schrauben der Abdeckung und nehmen Sie die Abdeckung ab. Brechen Sie mit einer Zange die Blindlasche seitlich am Gehäuse des Antriebskopfes aus. -
Page 21: Menü 1: Startfunktion Für Den Handsender Programmieren
Installation und Montage Stellen Sie sicher, dass die Antenne korrekt positioniert ist (Abb. 4-5, Seite 17). Stellen Sie sicher, dass Sie alle Handsender, die Sie für dieses Garagentor einlernen möchten, zur Hand haben. Öffnen Sie die Bedienklappe am Steuergerät. Verbinden Sie das Netzkabel des Steuergerätes mit einer Netzsteckdose. Die Punktanzeige (A1) leuchtet auf. -
Page 22: Löschen Aller Am Antrieb Programmierten Handsender
Installation und Montage 4.9.4 Löschen aller am Antrieb programmierten Handsender Abb. 4-9 Löschen aller am Antrieb programmierten Handsender Ziehen Sie den Netzstecker des Steuergerätes. Halten Sie die PROG-Taste (D) gedrückt. Verbinden Sie den Netzstecker mit der Steckdose, während Sie die PROG- Taste (D) weiter gedrückt halten. -
Page 23: Kraftlernfahrt
Installation und Montage Abb. 4-11 Einstellung der Endpositionen Wenn sich das Garagentor in der gewünschten Endposition ZU befindet, drücken Sie die Programmiertaste (PROG-Taste) (D). Der Wert "0" wird angezeigt. Fahren Sie fort mit der Kraftlernfahrt. 4.9.6 Kraftlernfahrt Stoß- und Quetschgefahr am Tor! Bei der Kraftlernfahrt wird der normale mechanische Widerstand beim Öffnen und Schließen des Tors in den Antrieb eingelernt. -
Page 24: Prüfung Der Kraftbegrenzung
Installation und Montage HINWEISE • Sollte der Wert "0" nicht erlöschen, wiederholen Sie den Vorgang. • Nach 3 fehlgeschlagenen Versuchen erscheint der Wert "3" und fordert Sie auf, die Einstellung der Endpositionen zu wiederholen, siehe auch “Menü 3 + Menü 4: Einstellung der Endpositionen” auf Seite 20. -
Page 25: Sondereinstellungen
Installation und Montage 4.10 Sondereinstellungen 4.10.1 Menü "Sondereinstellungen" öffnen Um in die Menüs für Sondereinstellungen zu gelangen, halten Sie die Programmiertaste (PROG-Taste) (D) für ca. 3 Sekunden gedrückt. Der Wert "3" wird angezeigt. Drücken Sie erneut die Programmiertaste (PROG-Taste) (D). Der Wert "4"... -
Page 26: Menü 8: Toranpassungen
Installation und Montage Wert Lichtzeit Vorwarnzeit 60 s 120 s 240 s Anmerkungen: - TAM (Tor-Auf-Meldung): 24 Volt bei nicht geschlossenem Tor. - Bei eingestellter Vorwarnzeit schalten Licht und 24 V vor Anlauf des Antriebes ein. Drücken Sie die Programmiertaste (PROG-Taste) (D). Der Wert "8" wird angezeigt. -
Page 27: Menü H: Einstellungen Stopp-A
Installation und Montage Passen Sie die Einstellung ggf. mithilfe der AUF- (B) und ZU- (C) Tasten an. Wert Beschreibung Anmerkungen Normalbetrieb Werkseinstellung Normalbetrieb mit Einstellung zum Durchlüften der Garage. In dieser Betriebsart bleibt das Lüftungsstellung* Garagentor ca. 10 cm weit geöffnet. Drücken Sie zum Anfahren der Lüftungsstellung die zweite Taste am Handsender oder benutzen Sie einen Taster DuoControl/Signal 111 (Zubehör)*, der in Menü... -
Page 28: Einbruchhemmung Rückgängig Machen
Installation und Montage 4.11.2 Einbruchhemmung rückgängig machen Um die Einbruchhemmung rückgängig zu machen, gehen Sie wie folgt vor: Führen Sie die Zugglocke mit der offenen Einkerbung auf das Zugseil. Schieben Sie die Glocke entlang des Zugseils nach unten, bis das Ende des Zugseils in der Zugglocke einrastet. -
Page 29: Betrieb
Betrieb Betrieb Sicherheitshinweise für den Betrieb Beachten Sie für den Betrieb folgende Sicherheitshinweise: • Benutzung nur durch unterwiesene Personen. • Alle Benutzer müssen mit den anwendbaren Sicherheitsvorschriften vertraut sein. • Halten Sie die für den Einsatzbereich geltenden örtlichen Unfallverhütungsvorschriften und allgemeinen Sicherheitsbestimmungen ein. •... -
Page 30: Garagentor Öffnen Und Schließen (Weitere Betriebsarten)
Betrieb HINWEIS Bei der Installation des Systems wurden Verriegelungselemente des Garagentorantriebs demontiert. Diese sind wieder zu montieren, wenn das Garagentor über einen längeren Zeitraum hinweg von Hand bedient werden muss. Nur so kann das Garagentor im geschlossenen Zustand verriegelt werden. Beim Einstellen des Garagentors oder bei einem Ausfall der Versorgungsspannung kann das Garagentor von Hand geöffnet und geschlossen werden. -
Page 31: Fehlersuche
Fehlersuche Fehlersuche Gefahr durch elektrischen Strom! • Bei Arbeiten am Antrieb ist unbedingt vorher der Netzstecker zu ziehen! Störung Mögliche Ursachen Abhilfe Tor schließt / öffnet nicht vollständig. Tormechanik hat sich verändert. Tor überprüfen lassen. Schließ-/Öffnungskraft zu Krafteinstellung schwach eingestellt. Endposition durchführen lassen nicht richtig eingestellt. -
Page 32: Diagnoseanzeige
Diagnoseanzeige Diagnoseanzeige Wert Zustand Diagnose / Abhilfe Antrieb startet und Antrieb erhält einen Startimpuls am Eingang START oder Wert "0" erlischt. durch einen Sender. Normalbetrieb. Garagentor hat Endposition AUF erreicht. Garagentor hat Endposition ZU erreicht. Endposition wurde nicht erreicht. Wert "0" wird beim Antrieb im Modus Kraftlernfahrt. -
Page 33: Werkseinstellungen Wiederherstellen
Diagnoseanzeige Wert Zustand Diagnose / Abhilfe Garagentor öffnet oder Fehler beim Selbsttest. Trennen Sie die schließt nicht. Spannungsversorgung. Motorstillstand. Motor dreht nicht. Beauftragen Sie einen Fachbetrieb mit der Reparatur des Motors. Urlaubssperre aktiviert. Schiebeschalter SafeControl/Signal 112 in Position EIN. Garagentor öffnet sich Zurücksetzen. -
Page 34: Inspektions- Und Prüfprotokoll
Inspektions- und Prüfprotokoll Inspektions- und Prüfprotokoll Tab. 8-1 Eigner/Betreiber: Standort: Antriebsdaten Antriebstyp: Fabrikationsdatum: Hersteller: Betriebsart: Tordaten Typ: Konstruktionsjahr: Seriennummer: Gewicht Torblatt: Abmessungen: Installation, Erstinbetriebnahme Firma, Installationsbetrieb: Name, Installationsbetrieb: Datum der Erstinbetriebnahme: Unterschrift: Sonstiges: Änderungen NovoPort® IV... -
Page 35: Garagentorantrieb Testen
Inspektions- und Prüfprotokoll Garagentorantrieb testen HINWEIS Eine Inspektion ersetzt nicht die erforderlichen Wartungstätigkeiten! Nach jeder Inspektion sind festgestellte Mängel umgehend zu beseitigen. • Antriebsbetriebene Garagentore sind in regelmäßigen Abständen durch qualifiziertes und einschlägig geschultes und erfahrenes Personal zu inspizieren und zu warten. •... -
Page 36: Prüflisten
Prüflisten Prüflisten Prüfliste der Toranlage Ausstattung bei Inbetriebnahme mit einem Häkchen dokumentieren. Komponente vorhan- Prüfpunkt Anmerkungen den? Garagentor Manuelles Öffnen und Schließen Leichtgängigkeit Befestigungen / Steckverbindungen Zustand / Sitz Bolzen / Gelenke Zustand / Schmierung Laufrollen / Halterungen Laufrollen Zustand / Schmierung Dichtungen / Schleifkontakte Zustand / Sitz Torrahmen / Torführung... -
Page 37: Prüfungs- Und Wartungsnachweis Der Toranlage
Prüflisten Komponente vorhan- Prüfpunkt Anmerkungen den? Schlupftür Funktion / Zustand 5.2.1 Schlupftürkontakt Funktion / Zustand 5.2.2 Torschließer Funktion / Zustand Ampelsteuerung Funktion / Zustand Lichtschranken Funktion / Zustand Schließkantensicherung Funktion / Zustand Dokumentation Betreiber / Eigner Typschild / CE-Kennzeichen vollständig / lesbar Konformitätserklärung Toranlage vollständig / lesbar Installation, Betrieb und Wartung... -
Page 38: Wartung / Überprüfung
Wartung / Überprüfung 10 Wartung / Überprüfung HINWEIS Zu Ihrer Sicherheit muss die Toranlage vor der ersten Inbetriebnahme und nach Bedarf – jedoch mindestens einmal monatlich – geprüft werden. Wir empfehlen, einen Fachbetrieb hinzuzuziehen. Überwachung der Kraftbegrenzung Die Antriebssteuerung verfügt über ein 2-Prozessor-Sicherheitssystem zur Überwachung der Kraftbegrenzung. -
Page 39: Demontage / Entsorgung
Bitte beachten Sie, dass sich der Geltungsbereich ausschließlich auf die private Nutzung der Anlage erstreckt. Unter privater Nutzung verstehen wir max. 10 Zyklen (AUF/ZU) pro Tag. Der vollständige Text der Garantiebestimmung ist unter der folgenden https://www.novoferm.de/garantiebestimmungen Internetadresse verfügbar: NovoPort® IV... -
Page 40: Konformitäts- Und Einbauerklärung
Sonstige angewandte EN 300220-1:2017-05, EN 300220-2:2017-05 technische Normen und EN 301489-1:2017, EN 12453:2017 Spezifikationen: EN 60335-2-95:2015-01 / A1:2015-06 Hersteller und Name des Novoferm tormatic GmbH Bevollmächtigten der Eisenhüttenweg 6 technischen Unterlagen: 44145 Dortmund Dortmund, den 05.06.2018 Ort, Datum Dirk Gößling, Geschäftsführer 14.2 Konformitätserklärung nach Richtlinie 2014/53/EU... - Page 41 Contents Contents About this manual ..................43 Contents and intended audience............43 1.1.1 Illustrations ................43 Pictograms and signal words ............. 43 1.2.1 Hazard symbols ..............44 1.2.2 Notice and information symbol..........44 Safety ......................45 Intended use..................45 Foreseeable misuse ................46 Personnel qualification ...............
- Page 42 Contents 4.9.7 Checking the force limits ............. 62 4.10 Special settings .................. 62 4.10.1 Opening the special settings menu ........62 4.10.2 Menu 5 + Menu 6: Force limits for opening and closing ..63 4.10.3 Menu 7: Adjusting the light phases ........63 4.10.4 Menu 8: Door adjustments ..........
-
Page 43: About This Manual
About this manual About this manual Contents and intended audience This manual gives information about the NovoPort® IV series garage door operator (hereinafter referred to as ‘the product’). The manual is intended for technicians that install and maintain the product, and for consumers that use the product on a daily base. -
Page 44: Hazard Symbols
About this manual 1.2.1 Hazard symbols Danger! This sign indicates an immediate risk of death or injury. Danger! Hazardous electrical current! This sign indicates hazardous electrical current. Warning! Crush hazard! This sign indicates hazardous situations with limb crush hazard. Warning! Crush hazard! Text passages marked with this symbol inform you of dangerous situations entailing a risk of crushing for the entire body. -
Page 45: Safety
It may not be used for garage doors without spring-balancing or weight- balancing mechanisms. • The product is compatible with Novoferm products only. • Never make any modifications or changes to the product that have not been expressly approved by the manufacturer. -
Page 46: Foreseeable Misuse
Safety Foreseeable misuse Any use other than described in chapter 2.1 is regarded as reasonably foreseeable misuse. This includes but is not limited to: • using the product as an operator for sliding door constructions • using the product for garage doors without spring-balancing or weight-balancing mechanisms Any damage or injury as a result of reasonably foreseeable misuse or of not following the instructions in this manual will render the manufacturer’s liability null... -
Page 47: Potential Hazards Associated With The Product
Safety Potential hazards associated with the product The product has undergone a risk assessment. The product's design and construction, which are based on this risk assessment, correspond to the current state-of-the-art. The product is safe to operate when used as intended. Nevertheless, residual risks remain. -
Page 48: Product Description
IP20, for dry rooms only Power input: Protection class: Standby: 0.5 W Sound level: < 70 dBA Max. operation: 200 W Manufacturer: Novoferm tormatic GmbH Eisenhüttenweg 6 Cycles / hour: 44145 Dortmund Max. cycles / day: Germany Max. cycles total: 25000 www.tormatic.de NovoPort® IV... -
Page 49: Rating Plate
Product description Rating plate The rating plate is located under the cover of the control unit, see fig. 4-4, page 52. Observe the power supply specifications. Control elements Fig. 3-2 Control elements A. Numerical display (A1 digital point) B. OPEN / Start button C. -
Page 50: Installation And Assembly
Installation and assembly Installation and assembly Safety instructions for installation and assembly • Installation must only be carried out by qualified technicians. • Read these installation instructions before you start installing the product. Drive and accessories AWG 22 Y-OB 2 x 1,0 AWG 22 AWG 22 AWG 22... -
Page 51: Preparing For Installation
Installation and assembly NOTICE Check the supplied screws and wall plugs to make sure that they are suitable for the structural condition on the installation site. Preparing for installation Impact or falling hazard! Persons can be hit or knocked over by the garage door. •... - Page 52 Installation and assembly Step Installation Position the toothed belt profile stop in a way that it keeps the drive head at a distance of approx. 5 cm in the end position OPEN. Fitting the rear toothed belt fastening Feed the toothed belt through the corner connection bracket and keep it taut. Put the sleeve halves around the toothed belt as shown.
-
Page 53: Disengaging The Motor Head
Installation and assembly Step Installation Installation on the left-hand door side If favoured by the structural conditions on site, the operator can also be installed on the left- hand side. Loosen the bolt on the motor head with a wrench (SW 10 17 mm). Screw it back in on the other side. -
Page 54: Connecting The Garage Door Operator To Electrical Power And Controls
Installation and assembly Connecting the garage door operator to electrical power and controls Hazardous voltage! Fatal electric shock when touching live parts. • Pull the mains plug out of the mains socket before you open the cover of the control unit. •... -
Page 55: Connection Diagram Overview
Installation and assembly 4.6.1 Connection diagram overview 180R LS 4 LS 4 LS 2 LS 2 24V- 230V~ NovoPort® IV... -
Page 56: Pulse Generator And External Safety Devices
Installation and assembly No. Terminal Description Overview of terminal assignment at the control unit Plug base for radio receiver Connector for antenna. When using an external antenna, the shield must be placed on the left adjacent terminal (F). Connector for external pulse generator (accessories, e.g. key switch or code keypad) Connection for wicket door contact (accessory) or emergency stop The drive is stopped or the start-up is suppressed via this input. -
Page 57: Routing The Antenna
Installation and assembly Routing the antenna Fig. 4-5 Routing the antenna Loosen the screw behind the service flap and remove the cover, see fig. 4-4, page 52. Loosen the two screws of the top cover and slide it out. Take the antenna out of the transport lock and push it up vertically through the feed-through. -
Page 58: Programming The Drive Head
Installation and assembly Step Installation Wicket door switch Loosen the screws of the cover and remove the cover. Break out the tab on the side of the drive head housing with a pair of pliers. Route the connection cable along the lever arm and attach it with cable ties. Make sure that the cable has sufficient freedom of movement. -
Page 59: Menu 1: Programming The Start Function For The Hand Transmitter
Installation and assembly 4.9.2 Menu 1: Programming the start function for the hand transmitter Fig. 4-7 Programming the start function for the hand transmitter Briefly press the programming button (PROG button) (D). The display shows “1”. When the display flashes, press the hand transmitter button with which you will later start the drive until the digital point (A1) on the display flashes 4 times. -
Page 60: Deleting All Hand Transmitters Programmed For The Operator
Installation and assembly 4.9.4 Deleting all hand transmitters programmed for the operator Fig. 4-9 Deleting all hand transmitters programmed for the operator Pull out the mains plug of the control unit. Press and hold the PROG button (D). Plug the mains plug into a socket while keeping the PROG button (D) pressed. 4.9.5 Menu 3 + Menu 4: Setting the end positions NOTICE... -
Page 61: Force Learning Cycle
Installation and assembly Once the garage door is at the desired end position CLOSE, press the programming button (PROG button) (D). The display shows “0”. Continue with the force learning cycle. 4.9.6 Force learning cycle Crush and impact hazard at the garage door! During the force learning cycle, the operator automatically learns the normal mechanical force required to open and close the garage door. -
Page 62: Checking The Force Limits
Installation and assembly 4.9.7 Checking the force limits NOTICE • After completing the force learning cycles, the force limits need to be checked. • The operator must be checked once a month. F< 400N 50 mm Fig. 4-13 Checking the force limits Place a force gauge or a suitable obstruction (e.g. -
Page 63: Menu 5 + Menu 6: Force Limits For Opening And Closing
Installation and assembly 4.10.2 Menu 5 + Menu 6: Force limits for opening and closing Crush hazard at the door! If the force limits are set too high, there is a risk of personal injury. The factory setting is “6” for opening and “4” for closing. •... -
Page 64: Menu 8: Door Adjustments
Installation and assembly 4.10.4 Menu 8: Door adjustments NOTICE After the setting was changed, the force learning cycle must be repeated. Select menu item “8”. After approximately 2 seconds, the display flashes and the set value appears. The factory setting is “4”. If desired, adjust the setting with the aid of the OPEN (B) and CLOSE (C) buttons. -
Page 65: Menu H: Stop-A Settings
Installation and assembly Value Description Remarks Normal operation Factory settings Normal operation Allows the ventilation of the garage. In this mode, the garage door is with ventilation approximately 10 cm wide open. To start up the ventilation setting, press the settings* second button on the hand transmitter or use a DuoControl/Signal 111 (accessories) setting* that must be programmed in Menu 2. -
Page 66: Disabling Burglar Resistance
Installation and assembly 4.11.2 Disabling burglar resistance To disable burglar resistance, proceed as follows: Place the ball handle on the pull cord so that the pull cords sits in the groove. Slide the ball handle down along the pull cord until the end of the pull cord locks into place in the ball handle. -
Page 67: Operation
Operation Operation Safety instructions for operation Observe the following safety instructions for operation: • Use only by trained persons. • All users must be familiar with the applicable safety regulations. • Comply with the accident prevention regulations and general safety regulations relevant to the field of application. -
Page 68: Opening Or Closing The Garage Door (Other Operation Modes)
Operation NOTICE When installing the system, locking elements of the garage door operator are dismantled. These should be reinstalled if the garage door has to be operated manually over a longer period of time. This way the garage door can be locked when closed. -
Page 69: Troubleshooting
Troubleshooting Troubleshooting Hazardous electrical current! • Always pull out the mains plug before working on the operator! Malfunction Possible causes Remedy Door does not fully open / close. Door mechanics have changed. Have the door checked. Closing / opening force is set too Correct the force settings low. -
Page 70: Diagnostic Display
Diagnostic display Diagnostic display Value State Diagnosis / remedy Operator starts up and The operator receives a start pulse at the START input or via a “0” goes out. transmitter. Normal operation. Garage door has reached end position OPEN. Garage door has reached end position CLOSE. -
Page 71: Restoring The Factory Settings
Diagnostic display Value State Diagnosis / remedy Motor standstill. The motor does not rotate. Call a specialist company to repair the motor. Vacation lock is The side switch for SafeControl/Signal 112 is active. activated. A reset is required. Door does not open. Wicket door contact test Check the cables and clamping connections of the wicket door failed. -
Page 72: Inspection And Test Report
Inspection and test report Inspection and test report Table 8-1 Owner / operator of the system: Location of door system: Operator data Operator type: Manufacture date: Manufacturer: Operating mode: Door data Type: Year of construction: Serial no.: Door leaf weight: Door dimensions: Installation and initial operation Company, installer:... -
Page 73: Testing Of The Garage Door Operator
Inspection and test report Testing of the garage door operator NOTICE An inspection is not the same as maintenance! After an inspection, the user must do any necessary maintenance. • Drive-controlled garage doors are to be inspected and maintained periodically by qualified, trained and experienced personnel. -
Page 74: Checklists
Checklists Checklists Checklist for door system Confirm features at start-up with a check mark. Equipment Present? Features to be tested Remarks Garage door Manual opening and closing Smooth running Fastenings / connections State / seat Pivots / joints State / lubrication Track rollers / track roller holders State / lubrication Seals / sliding contact strips... -
Page 75: Proof Of Inspection And Maintenance Of The Door System
Checklists Equipment Present? Features to be tested Remarks 5.2.1 Wicket door contact Function / state 5.2.2 Door closer Function / state Traffic light control Function / state Photoelectric sensors Function / state Closing edge safety device Function / state Documentation of the operator / owner Rating plate / CE marking complete / readable Door system’s Declaration of Conformity... -
Page 76: Maintenance / Checks
Maintenance / Checks 10 Maintenance / Checks NOTICE For your safety, we recommend that the door system be checked before initial use and as needed, but at least once a month. We recommend consulting a specialist company. Monitoring the force limits The operator control unit features a 2-processor safety system to monitor the force limits. -
Page 77: Disassembly / Disposal
Please note that the scope of the warranty is restricted to private use of the system. We define private use as a maximum of 10 cycles (OPEN/CLOSE) per day. The full text of the warranty terms can be found at: https://www.novoferm.de/garantiebestimmungen NovoPort® IV... -
Page 78: Declaration Of Conformity And Incorporation
Other applied technical EN 300220-1:2017-05, EN 300220-2:2017-05 standards and specifications: EN 301489-1:2017, EN 12453:2017 EN 60335-2-95:2015-01 / A1:2015-06 Manufacturer and name of the Novoferm tormatic GmbH authorised representative of Eisenhüttenweg 6 the technical documentation: 44145 Dortmund Dortmund, 5th June 2018 Place, date Dirk Gößling, Managing Director...
Need help?
Do you have a question about the NovoPort IV and is the answer not in the manual?
Questions and answers