Table of Contents
Advertisement
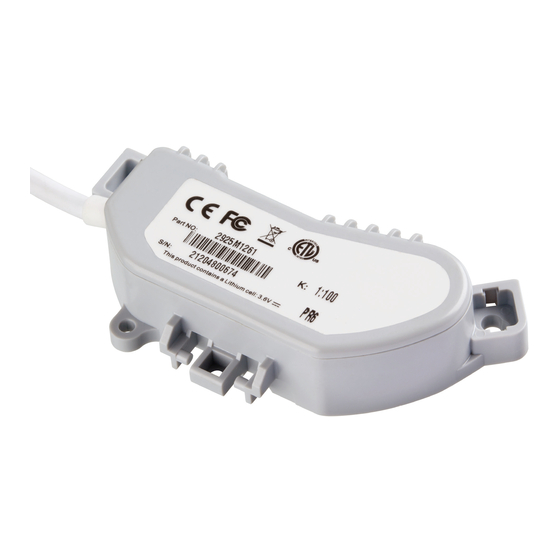
PR6 / PR7
Falcon communication modules
High data quality and flexibility
for remote metering
For ELSTER water meters with communication interface
●
Pulse modules with two outputs
●
EMERIS radio module
●
M-Bus module acc. to EN13757
●
Integrated forward and backflow detection
●
Non-reactive and tamper-resistant
●
www.elstermesstechnik.com
Business Name
Advertisement
Table of Contents

Related Manuals for Elster PR6


Summary of Contents for Elster PR6
- Page 1 PR6 / PR7 Falcon communication modules High data quality and flexibility for remote metering For ELSTER water meters with communication interface ● Pulse modules with two outputs ● EMERIS radio module ● M-Bus module acc. to EN13757 ● Integrated forward and backflow detection ●...
- Page 2 Pulse module ..............................PR6/PR6M/TPR6 PR7/PR7M/TPR7 V200 H4000 yellow V210 H4200 white S2000 PR6 / PR7 green C4000 bypass meter C4000 main meter brown C3100 main meter black Radio module Ordering number Operating temperature -15 °C up to +70 °C TPR6...
- Page 3 PR6/7 (V2) EINBAUANLEITUNG PR6/7 (V2) INSTRUCTIONS D’INSTALLATION PR6/7 (V2) INSTRUCCIONES DE CONEXIONADO IMPORTANT : These instructions only apply to Falcon V2, and you can differentiate by the V2 on the lable (see alternative instructions if there is no V2 on the label) WICHTIG: Diese Einbauanleitung ist nur für Falcon Impulsmodule Version V2 zu...
- Page 4 PR6/7 (V2) FITTING INSTRUCTIONS PR6/7 (V2) EINBAUANLEITUNG PR6/7 (V2) INSTRUCTIONS D’INSTALLATION PR6/7 (V2) INSTRUCCIONES DE CONEXIONADO PR6/PR7 FOIL Ø4*16 SCREWx2 SECURITY LABELx2 TAMPER EVIDENT CAPx2 PR6 UNIT LOCKING-PINx4 (Fig. 1) PR6 FOIL SECURITY LABELx2 THUMB SCREWx2 PR7 UNIT INSTALLATION AID (Fig.
-
Page 5: Pièces Fournies
El PR6 es entregado con una junta tórica antifraude (pre-instalada), 2 etiquetas de seguridad , 4 pasadores de cierre de plástico (2 de repuesto), 2 precintos antisabotaje, 2 tornillos M4 * 16 mm. Si el PR6 ha sido pedido para su uso con un contador C & I, usar los tornillos incluidos en el contador. -
Page 6: Cleaning And Maintenance
Il est recommandé de nettoyer l'émetteur d'impulsions avec un tissu doux et humide. Utiliser pour cela uniquement de l'eau ou une solution à base de savon doux. Attention : Ne pas essayer de démonter l'émetteur ou de nettoyer les parties internes cela endommagerait le produit. Consultez votre contact Elster si l'émetteur est endommagé ou en panne. Limpieza y mantenimiento Se recomienda que el emisor se revise y se limpie de forma regular utilizando un paño suave húmedo. - Page 7 El PR6 está diseñado para para la gama de contadores domésticos ELSTER V200 y para algunos contadores comerciales equipados con esferas plásticas. Los contadores en los que se puede instalar el PR6 están marcados en la esfera ó en el...
- Page 8 Die Demontage erfolgt in umgekehrter Reihenfolge. FR - Pour retirer le PR6, casser le haut des tiges de fixation en utilisant une pince puis revenir aux étapes 2 et 3. ES - Para separar el PR6 romper la parte superior de los pivotes de cierre utilizando unos alicates y realizar al revés las etapas 3 y 2.
- Page 9 Suitable meters are marked with PR6 on the dial face or around the rim of the shroud. Die Baureihe H4000P wird in Deutschland nicht eingesetzt. Le PR6 est destiné à la gamme de compteurs H4000P avec totalisateur plastique. sur le totalisateur ou sur le bord de la coiffe des compteurs compatibles, il est noté PR6.
- Page 10 TAMPER EVIDENT CAPS UK - Note: Do not attach the PR6 unit to the hinge on the H4000P shroud. FR - Ne pas attacher le PR6 sur la charnière de la coiffe du H4000P. ES -...
- Page 11 PR6/7 (V2) INSTRUCCIONES DE CONEXIONADO PR7– H4000 The PR7 is designed for the Elster range of commercial water meters. Suitable meters are marked with PR7 on the dial face or around the rim of the shroud. Das Impulsmodul PR7 ist einsetzbar auf ELSTER Großwasserzählern der Baureihen H4000, H4200, S2000, C4000 und C3100.
- Page 12 Para detalles sobre el cableado, ver la tabla de conexión. UK - Reverse the steps to remove the PR7. DE - Die Demontage erfolgt in umgekehrter Reihenfolge. FR - Effectuer les opérations inverses pour retirer le PR7. ES - Para desmontar el PR6 seguir el procedimiento inverso. Revision 1.0(13-Jan-2012)
-
Page 13: Technical Information
Determining the output pulse weight The PR6 and PR7 generate pulses that correspond to a set volume of water. That volume is determined by two factors: the meter’s pulse factor; and the pulse unit’s K factor. In all cases the value of the output pulse is a simple multiplication of these two numbers. - Page 14 Factor K del emisor de pulsos La mayoría de los emisores PR6 y PR7 tienen 2 factores K porque los emisores tienen 2 salidas. Estas están marcadas en el etiquetado de los emisores. El primer número es el factor K de la salida primaria y el segundo el de la salida secundaria.
-
Page 15: Cable Connections
The outputs may be connected, via pull-up resistors, to up to 30V. Maximum sink current = 30mA. * The pulse units can be used with other meters. Check the meter’s dial face or shroud for the PR6 or PR7 marking PR6/PR7 CH1P = Volumenimpulse (unabhängig von der Fließrichtung), aktiv „Low“... - Page 16 Toutes les impulsions sont de types collecteurs ouverts. Actives en signal bas. Toutes les sorties peuvent être connectées via une résistance pull up, jusqu'à 30 Volts. * Les émetteurs d'impulsions peuvent être utilisés avec d'autres compteurs. Vérifier si le totalisateur du compteur ou la coiffe sont marqués PR6 ou PR6/PR7 CH1P = Ambos pulsos directos e inversos son enviados por esta salida.
-
Page 17: Part Numbers
2925M1224 1:100 2925M1263 1:1000 2925M1264 10:100 2925M1280 25:50 2925M1283 Note : This fitting instruction process is the same for PR6/7 M (MBus) Cable Connection Table Type Part number Output (Brown) Output (White) PR6M 2925M1268 Meter Bus interface Meter Bus interface...
Need help?
Do you have a question about the PR6 and is the answer not in the manual?
Questions and answers