
Related Manuals for Ferno 24 MAXX


Summary of Contents for Ferno 24 MAXX
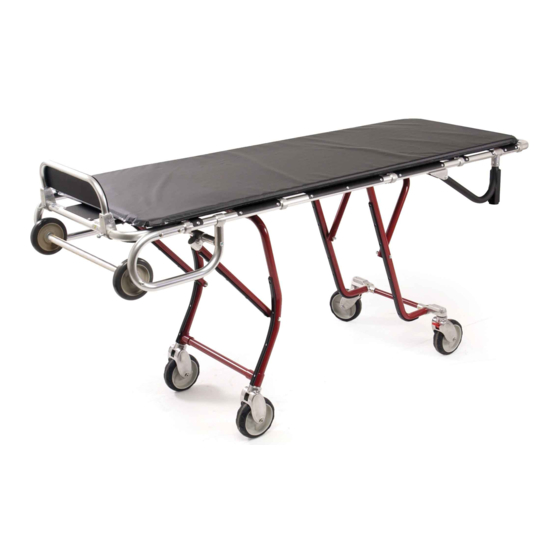
- Page 1 Users’ Manual Mortuary Cots MAXX ™ • mini MAXX ™ • mini MAXX ™ • Read this Manual November 2008 GLO and Retain for Pub. No. 234-3307-02 Future Reference...
-
Page 2: Ferno Customer Relations
Limited Warranty Statement an actual situation. The products sold by Ferno are covered by a limited Retain this manual for future reference. Include it with the warranty, which is printed on the invoice you received when product in the event of transfer to new users. -
Page 3: Table Of Contents
7.1 U.S.A. and Canada ______________________ 28 3.5 Cot Positions ___________________________ 10 7.2 Worldwide _____________________________ 28 4 - Using The Features _________________________ 11 7.3 Parts List 24 MAXX _____________________ 29 4.1 Bed Panel Slots _________________________ 11 7.4 Parts List 24-miniMAXX _________________ 30 4.2 Restraints ______________________________ 12 7.5 Parts List 24-H miniMAXX _______________ 30... -
Page 4: -Safety Information
Use For the purpose of this notice, the 24-MAXX, 24-miniMAXX, only Ferno-approved items on the cot. and 24H-miniMAXX cots and all Ferno transporters are Improper parts and service can cause injury. Use only included under the generic term, “cot.”... -
Page 5: Safety And Instruction Labels
International Standards Organization (ISO), the American National Standards Institute (ANSI), and the mortuary services industry. 1000 lb 454 kg General Warning - Potential Injury Unlocked Locked Load Limit Cot may be Operated Do Not Lubricate Read the Users’ Manual Lubricate by One Trained Operator © Ferno-Washington, Inc. 234-3307-02 November 2008... -
Page 6: Operator Skills And Training
When the legs have locked, set the cot cot and load (see Using Additional Help, page 24). on the ground. After the front legs unfold, test that they have locked by pushing them against the bumper — the legs should not © Ferno-Washington, Inc. 234-3307-02 November 2008... -
Page 7: About The Cot
Inspect the cot if the load limit has 1000 lb The cot is for professional use by one or more trained been exceeded (See Inspecting the operators. The cot is designed for use with a Ferno Model ® 454 kg Cot, page 26). -
Page 8: Components
24-MAXX. The cots differ only in width and loading height (see Specifications, page 9). USeRS’ MaNUaL To request additional free users’ manuals, contact Ferno Customer Relations, your Ferno distributor, or visit www.ferno.com. Restraints (Set of 2 Included) © Ferno-Washington, Inc. 234-3307-02 November 2008... -
Page 9: Specifications
Imperial measurements. For more information, contact the Imperial measurements. For more information, contact Ferno Customer Relations (page 2) or your Ferno distributor. Ferno Customer Relations (page 2) or your Ferno distributor. Ferno reserves the right to change specifications without Ferno reserves the right to change specifications without notice. -
Page 10: Cot Positions
ReFeReNCe PoINTS FoR SPeCIFICaTIoNS oN Page 9 Overall Frame Length Bed Surface Length 7 Level Positions Overall Folded Length Legs Overall Height Transfer Positions Legs Vehicle Position (Folded) Loading Height 24H-miniMAXX 24-miniMAXX and 24-MAXX © Ferno-Washington, Inc. 234-3307-02 November 2008... -
Page 11: Using The Features
Side-Lift Handle Side-Lift Handle Restraint Slot Restraint Slot Restraint Slot Restraint Slot Slot for Sidearm AND/OR Slot for Side-Lift Handle Slot for Sidearm AND/OR Side-Lift Handle Side-Lift Handle Figure 1 - Restraint and Accessory Slots © Ferno-Washington, Inc. 234-3307-02 November 2008... -
Page 12: Restraints
(Figure 3). To attach, use, and maintain restraints, see the restraint users’ manuals included with the restraintst. Additional free manuals are available from Ferno Customer Relations (page 28). The cot bed panel has four slots for use with the two restraints provided (Figure 1, page 11). -
Page 13: Control Handles
Both control handles for the loading-end legs are black. The control handle for the operator-end legs is red. Operator-End Leg Control Loading Handle (Black) Handle (Red) Used to Load Cot Only Figure 5 - Operator-End Control Handles © Ferno-Washington, Inc. 234-3307-02 November 2008... -
Page 14: Mattress
To raise, rotate the sidearm upward until the pin locks in place. Important Sidearms are not designed for lifting. Grasp only the main frame or side handles to lift the cot. Figure 8 - Pulling the Sidearm Release Pin © Ferno-Washington, Inc. 234-3307-02 November 2008... -
Page 15: Side Lift Handles (Optional)
11, Step 1), then swing the handle right or left until it is Figure 10 - Unfolding the Handle parallel with the cot frame (Figure 11, Step 2). Release the handle to lock it in the folded position. Figure 11 - Folding the Handle © Ferno-Washington, Inc. 234-3307-02 November 2008... -
Page 16: Using The Cot
Follow standard mortuary-service procedures when ● operating the cot. Stay with the cot at all times. ● Always use restraints. ● Read the cot fastener users’ manual for instructions on ● using the fastener. © Ferno-Washington, Inc. 234-3307-02 November 2008... -
Page 17: Changing Cot Levels With Two Operators
Figure 13 - Work Together and Use Coordinated Movements © Ferno-Washington, Inc. 234-3307-02 November 2008... -
Page 18: Changing Cot Levels With One Operator
Release the control handle and verify that the operator- end leg has locked in the new position. Repeat Steps 1-6 as needed until the cot is at the desired height. Figure 14 - Lower the Loading End First © Ferno-Washington, Inc. 234-3307-02 November 2008... -
Page 19: Rolling The Cot
Note: Although the swivel wheels are only at the operator end, steering may be easier from the loading end under certain circumstances. Follow your mortuary protocols. © Ferno-Washington, Inc. 234-3307-02 November 2008... -
Page 20: Transferring The Body Onto The Cot
For a list of accessories, see page 28. Note: Ferno recommends that you position the body with the head at the operator end of the cot, if possible. This orientation will place the body in a ‘heads-up’... -
Page 21: Loading The Cot
When the cot is completely inside the vehicle, release the control handle and set the cot on its loading posts. Figure 21 - Loading the Loading-End Legs Secure the cot in the vehicle with an approved Ferno cot fastener. Operator-End Leg... -
Page 22: Unloading The Cot
Lower the cot until all four wheels are on the ground. Roll the cot away from the vehicle. To test if Locked Keep loading wheels on floor; push loading- end legs against bumper Figure 24 - Unloading the Loading-End Legs © Ferno-Washington, Inc. 234-3307-02 November 2008... -
Page 23: Loading Or Unloading With Two Trained Operators
The right-side operator does not use a control handle. ● If more than two operators or helpers are present, see Using Figure 25 - Loading or Unloading Additional Help, page 24 for recommended placement of With Two Operators operators and helpers. © Ferno-Washington, Inc. 234-3307-02 November 2008... -
Page 24: Using Additional Help
Helpers can cause injury or be injured. Maintain 1000 lb Inspect the cot if the load limit has control of the cot, operate the controls, and direct been exceeded. See 454 kg all helpers. Inspecting the Cot, page 26. © Ferno-Washington, Inc. 234-3307-02 November 2008... -
Page 25: Maintenance
When using maintenance products, follow the manufacturers’ Minimum directions and read the manufacturers’ material safety data Maintenance Intervals sheets. You can purchase a recommended disinfectant from your Ferno distributor or Ferno Customer Relations (page 2). • Disinfecting (this page) • Cleaning (this page) 6.2 Disinfecting and Cleaning... -
Page 26: Waxing The Cot
Are restraint buckles free of visible damage and do they operate properly? Is the mattress in good condition? Do installed accessories operate properly without interfering with cot operation? Is the ambulance properly prepared for the cot, with approved cot fastener installed? © Ferno-Washington, Inc. 234-3307-02 November 2008... -
Page 27: Lubricating The Cot
I-Beam White lithium grease Steel Rod (inside leg-return spring) WRL-191-S or EZ-1 synthetic lubricant Leg Joints WRL-191-S or EZ-1 synthetic lubricant Wheels (sealed bearings) Do not lubricate Upper leg pivot points Do not lubricate © Ferno-Washington, Inc. 234-3307-02 November 2008... -
Page 28: Accessories And Related Products
7.2 Worldwide WaRNINg To order Ferno parts, and for professional cot repair, contact your Ferno distributor. Your distributor is the only agent Modifying the cot can cause injury and damage. Use authorized by Ferno to manage, service, and repair Ferno the cot only as designed by Ferno. -
Page 29: Parts List 24 Maxx
24-MAXX , 24-miniMAXX , 24H-miniMAXX Parts and Service ™ ® ™ 7.3 Parts List 24 Maxx Part Description Part Description 090-5835 Footrest frame assembly 190-1507 Operator-end leg U-frame brace (black) 190-1508 Body panel w/rivets (26 qty) w/hardware 190-1510 Label Set... -
Page 30: Parts List 24-Minimaxx
Control bar spring 090-4054 5” loading wheel w/bushing 090-5896 Loading leg, (black) complete 190-1696 Loading axle w/cover, inserts (black) 190-1761 Scuff strips for loading leg and for brace, set, 090-0983 Control bar spring w/hrdwr © Ferno-Washington, Inc. 234-3307-02 November 2008... -
Page 31: Training Record
24-MAXX , 24-miniMAXX , 24H-miniMAXX ™ ® ™ TRaININg ReCoRD Date Name Training Method MaINTeNaNCe ReCoRD Date Maintenance Performed © Ferno-Washington, Inc. 234-3307-02 November 2008...
Need help?
Do you have a question about the 24 MAXX and is the answer not in the manual?
Questions and answers