Table of Contents
Advertisement
Quick Links
Element 14 Manual
Original instructions
Nov 2019
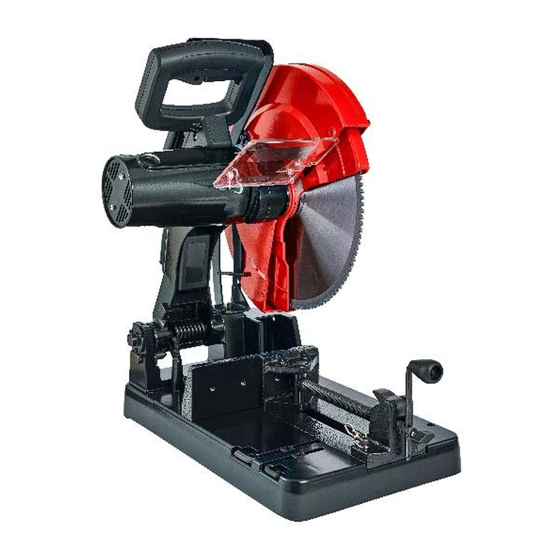
METAL CUTTING SAW
Model Number Element 14/1, Element 14/3
This machine (Serial Number ...........................) is CE approved.
Rotabroach Ltd
Burgess Road
Sheffield, South Yorkshire
United Kingdom
S9 3WD
Tel: +44 (0) 114 2212 510
Fax: +44 (0) 114 2212 563
Email: info@rotabroach.co.uk
Website:
www.rotabroach.co.uk
1
Advertisement
Table of Contents

Subscribe to Our Youtube Channel
Related Manuals for Rotabroach Element 14 1

Summary of Contents for Rotabroach Element 14 1
- Page 1 Element 14 Manual Original instructions Nov 2019 METAL CUTTING SAW Model Number Element 14/1, Element 14/3 This machine (Serial Number ......) is CE approved. Rotabroach Ltd Burgess Road Sheffield, South Yorkshire United Kingdom S9 3WD Tel: +44 (0) 114 2212 510 Fax: +44 (0) 114 2212 563 Email: info@rotabroach.co.uk...
- Page 2 Element 14 Manual Original instructions Nov 2019 Thank you for purchasing our Element 14 Chop saw. We would really like your feedback on this machine. Other Products by Rotabroach: Thank you for your purchase...
-
Page 3: Table Of Contents
Element 14 Manual Original instructions Nov 2019 CONTENTS OF THE MANUAL Page Intended use General safety rules Information plate symbols Unpacking Specification Operational safety instructions Operating instructions Changing the blade Extension cable selection Maintenance Machine breakdown Parts list Trouble shooting Warranty statement 1) IN... -
Page 4: Intended Use
Element 14 Manual Original instructions Nov 2019 1) INTENDED USE The intended use of this saw, is to cut through metals. The vice is used to hold the workpiece in place whilst the saw is functioning. It is designed for use in fabrication, construction and any other applications when cutting metal. -
Page 5: Information Plate Symbols
Element 14 Manual Original instructions Nov 2019 cutter only. 23. NEVER LEAVE TOOL RUNNING UNATTENDED. POWER OFF. Don’t leave tool until it comes to a complete stop. 24. DRUGS, ALCOHOL, MEDICATION. Do not operate tool while under the influence of drug, alcohol or any medication. -
Page 6: Unpacking
Element 14 Manual Original instructions Nov 2019 4) UNPACKING Your saw is shipped complete in one box WARNING: Although compact, this saw is heavy. To avoid back injury, get help whenever you have to lift the saw. 1. Remove the saw from the carton by lifting the saw with the carrying handle. -
Page 7: Operational Safety Instructions
Element 14 Manual Original instructions Nov 2019 RATIONAL SAFETY PROCEDURES 6) OPERATIONAL SAFETY PROCEDURES Before Using Metal Cutting Saw. To avoid injury from jams, slips or thrown pieces 。Completely assemble and align the saw. 。Learn the use and function of the ON-OFF switch, upper and lower blade guards, lock pin, and work piece clamp. - Page 8 Element 14 Manual Original instructions Nov 2019 To avoid injury from accidental contact with moving parts, don't do layout, assembly, or setup work on the saw while any parts are moving. Avoid Accidental Starting. Make sure switch is "OFF" before plugging Metal-cutting saw into a power outlet. Plan your work.
-
Page 9: Operating Instructions
Element 14 Manual Original instructions Nov 2019 Let the blade reach full speed before cutting. Don't Force the Tool. It will do the job better and be safer at its designed rate. Feed the saw into the workspace only fast enough to let the blade cut without bogging down or binding. - Page 10 Element 14 Manual Original instructions Nov 2019 4. When transporting the saw secure the motor mount to the base to prevent damage. 5. When cut-off blade comes up to full speed, push the handle to begin cutting. It is important to cut with steady and even pressure (Do Not Force) in order to obtain a uniform cut.
- Page 11 Element 14 Manual Original instructions Nov 2019 Changing the Cutting Angle The vise can be adjusted from 00 to 45° right. 1. Using the arbor wrench loosen the two bolts on the vise, then set working surface on the vise at the desired angle.
- Page 12 Element 14 Manual Original instructions Nov 2019 Locking Switch, The “OFF” Position Important: We suggest that when the machine is not in use, the switch be locked in the “OFF” position using a padlock (G) through the holes in the switch trigger (F). Work piece clamping Positions work in vise so that if jam occurs.
-
Page 13: Changing The Blade
Element 14 Manual Original instructions Nov 2019 Recommended Cutting Capacity WARNING! Use of tool for greater than recommended capacities may lead to motor burnout and possible electric shock. Note: Cutting through any cross-sectional area of material thicker than 12.7mm (1/2”) tends to load up the blade, and this will cause your tool to work harder. -
Page 14: Extension Cable Selection
Element 14 Manual Original instructions Nov 2019 9) EXTENSION CABLE SELECTION Note: Make sure the proper extension cord is used and is in good condition. The use of any extension cord will cause loss of power. To keep this to a minimum and prevent overheating and motor burnout, use the information below to deter-mine the minimum wire size extension cord. -
Page 15: Maintenance
Element 14 Manual Original instructions Nov 2019 10) MAINTENANCE DANGER: Never put injury from lubricants on the blade while it is spinning. WARNING! To avoid injury from unexpected starting or electrical shock, unplug the power cord before working on the saw. Keep the tool clean. -
Page 16: Machine Breakdown
Element 14 Manual Original instructions Nov 2019 11) MACHINE BREAKDOWN... -
Page 17: Parts List
Element 14 Manual Original instructions Nov 2019 12) PARTS LIST PART PART NUMBER DESCRIPTION. NUMBER DESCRIPTION. Q355-001 1 SAFETY COVER Q355-094 FLAT WASHER TOOTH LOCK Q355-002 WASHERCOUNTERSINK Q355-095 THREAD NUT Q355-003 HEX SOC FLAT HD SCR Q355-096 SELF-LOCKING NUT(CLIP) Q355-004 SPRING Q355-097 KNOB... - Page 18 Element 14 Manual Original instructions Nov 2019 PART PART NUMBER DESCRIPTION. NUMBER DESCRIPTION. Q355-047 HANDEL LOWER Q355-138 SPECIAL NUT Q355-048 HEX NUT Q355-139 M8X45MM HEX HD SCREW Q355-049 PAN HD SCREW M5X12 Q355-140 8MM HEX WRENCH Q355-050 LOCK WASHER Q355-141 WRENCH HOLDER Q355-051 END COVER...
-
Page 19: Trouble Shooting
Element 14 Manual Original instructions Nov 2019 PART PART NUMBER DESCRIPTION. NUMBER DESCRIPTION. WASHER Q355-091 FLATD10.5X22ODX3T Q355-218 WASHER FLAT D8 Q355-092 Q355-219 SHOULDER SCREW Q355-093 VISE JAW 13) TROUBLE SHOOTING Problem Probable Case Suggested Corrective Action Motor does not start 1.Fuse -15amp time delay fuse, or circuit breaker. - Page 20 Element 14 Manual Original instructions Nov 2019 Blade binds, jams, burns 1.Improper operation -See “ Operation” section workpiece. 2.Dull blade -Replace or sharpen wheel Rough cuts 3.Improper blade -Replace with 14” diameter wheel designed for the material being cut Tool vibrates or shakes 1.Sawblade not round -Replace wheel 2.Sawblade damaged...
-
Page 21: Warranty Statement
14) WARRANTY STATEMENT Rotabroach™ warrants its machines to be free from faulty materials, under normal usage of machines, for a period of 12 months from initial date of purchase. All other parts (excluding cutters) are under warranty for 90 days, provided that the warranty registration card (or online registration) has been completed and returned to Rotabroach™or its designated...
Need help?
Do you have a question about the Element 14 1 and is the answer not in the manual?
Questions and answers