Leister Triac AT User Manual
Hide thumbs
Also See for Triac AT:
- User manual (48 pages) ,
- Repair instructions (38 pages) ,
- Operating instructions manual (84 pages)

Related Manuals for Leister Triac AT


Summary of Contents for Leister Triac AT
- Page 1 English English TRIAC AT Leister Technologies AG Galileo-Strasse 10 CH-6056 Kaegiswil/Switzerland Tel. +41 41 662 74 74 +41 41 662 74 16 www.leister.com sales@leister.com...
-
Page 2: Table Of Contents
1.3 Intended use 1.4 Unintended use 1.5 Safety Instructions 2. Functions 3. Technical data 4. Your TRIAC AT 4.1 Overview of device parts 4.2 Control knob (e-Drive) 4.3 Display 5. Commissioning 5.1 Connect the device to the power supply (standby) 5.2 Turning the device on (operation) -
Page 3: Application
1.4 Unintended use Any other use of the TRIAC AT or any use beyond the type of use described is deemed improper use. 1.5 Safety Instructions The safety instructions for device can be found in the “Safety Instructions – Hand Tools” section in the document provided. -
Page 4: Functions
2. Functions Input in increments of 5°C / 10°F Temperature 7 [5.2.1] Cold air setting (heating OFF). Readiness Display of the temperature difference from the setpoint. 6 [5.2] Air volume Selection of five increments. 7 [5.2.2] Limitation of the working The range is defined by the temperature and air volume. -
Page 5: Your Triac At
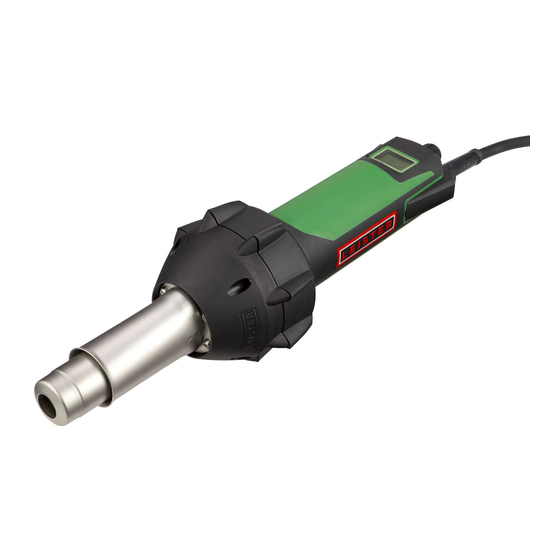
4. Your TRIAC AT 4.1 Overview of device parts 1. Heating element tube 5. Control knob (e-Drive) 2. Protective tube 6. Power supply cord 3. Soft coating for non-slip placement 7. Air filter 4. Display 4.2 Control knob (e-Drive) long press (>1s) short press (<1s) -
Page 6: Display
4.3 Display Motor 11 [8] Overheating 11 [8] Maintenance 12 [10] Cooling down 8 [6] Voltage 7 [5.2.3] Defective heating element 11 [9] Undervoltage 11 [8] Heating – cooling Temperature display 7 [5.2.1] 7 [5.2.1] e-Drive lock 7 [5.2.4] Air volume display 7 [5.2.2] Limit reached 9 [7.2.2]... -
Page 7: Setting The Temperature
5.2.1 Setting the temperature The setpoint for the temperature can be set directly by turning the e-Drive. Once there is no longer a difference in temperature (flashing arrow), the device is ready to use. ready to use 5.2.2 Setting the air volume After a short press on the e-Drive, the air volume display starts to flash. -
Page 8: Decommissioning
6. Decommissioning 6.1 Turning the device off using the cool down function A long press on the e-Drive, while the device is in operation, will start the cool down function. The device turns itself off automatically when the temperature of the device is close to the ambient temperature. 6.1.1 Cancel turn down (revert to operation) After a short press on the e-Drive while the device is cooling down, the device reverts to operation. -
Page 9: Configuration Menu
7. Configuration menu 7.1 Accessing the menu After four short presses on the e-Drive, the menu will pop up. 7.2 Menu navigation Switching between Selecting / confir- Changing the para- parameters ming parameter meter setpoint 7.2.1 Defining the unit of temperature Unit of temperature °C = Celsius °F = Fahrenheit... -
Page 10: Exiting The Menu
7.3 Exiting the menu After a long press on the e-Drive, the menu will close. 7.4 Display of a changed basic configuration Device with a changed basic configuration 7.5 Resetting to the basic configuration (Reset) Keep the e-Drive depressed, connect the device to the rate voltage and wait until RESET appears. The reset will be performed once the e-Drive is released. -
Page 11: Warnings
Device overheated (automatic cool down check the air flow, e.g. clean the air filter [10.2]), check the nozzle etc. 9. Errors and error codes Defective heating element Replace 12 [10.1] Withdraw the power plug start the device again. If the error recurs, contact your Leister service center. -
Page 12: Maintenance And Repair
10. Maintenance and repair With the exception of the following instructions, repairs may be performed exclusively by Leister-service centers. 10.1 Cleaning the air filter 10.2 Changing the heating element and mica tube Hazardous voltage: risk of injury or death when opening the device due to exposed live components and terminals. -
Page 13: Declaration Of Conformity
PLASTIC WELDING PRODUCTS | INDUSTRIAL HEATING & LASER SYSTEMS Leister Technologies AG | Galileo-Strasse 10 | 6056 Kägiswil | Switzerland phone: +41 41 662 74 74 | leister@leister.com | www.leister.com | www.weldy.com Leister Technologies AG | Galileo-Strasse 10 | 6056 Kägiswil | Switzerland phone: +41 41 662 74 74 | leister@leister.com | www.leister.com | www.weldy.com... - Page 14 © Copyright by Leister Warranty • The guarantee or warranty rights granted for this device by the direct distribution partner/salesperson apply from the date of purchase. In the event of a guarantee or warranty claim (verification by invoice or delivery note), manufacturing or processing errors will be rectified by the sales partner through replacement delivery or repair.
Need help?
Do you have a question about the Triac AT and is the answer not in the manual?
Questions and answers