Eaton BreakerVisu NZM-XMC-MDISP35-MOD Manual
Hardware
Hide thumbs
Also See for BreakerVisu NZM-XMC-MDISP35-MOD:
- Manual (88 pages) ,
- Instruction leaflet (2 pages) ,
- Instruction leaflet (2 pages)

Related Manuals for Eaton BreakerVisu NZM-XMC-MDISP35-MOD


Summary of Contents for Eaton BreakerVisu NZM-XMC-MDISP35-MOD
- Page 1 Manual 02/16 MN048013 EN BreakerVisu – Hardware NZM-XMC-MDISP35-MOD NZM-XMC-MDISP35-SWD NZM-XMC-MDISP70...
- Page 2 No part of this manual may be reproduced in any form (printed, photocopy, microfilm or any other process) or processed, duplicated or distributed by means of electronic systems without written permission of Eaton Industries GmbH, Bonn. Subject to alteration without notice.
- Page 3 Danger! Dangerous electrical voltage! Before commencing the installation • Disconnect the power supply of the device. • Ensure a reliable electrical isolation of the low voltage for the 24 volt supply. Only use power supply units complying • Ensure that devices cannot be accidentally restarted. with IEC 60364-4-41 (VDE 0100 Part 410) or HD 384.4.41 S2.
-
Page 5: Table Of Contents
USB device................... 23 2.4.5 USB Host ..................23 2.4.6 SmartWire-DT master ..............23 2.4.7 POW/AUX (power supply for SmartWire-DT)....... 24 2.4.8 RS485................... 28 Mounting..................30 2.5.1 Mounting the device ..............31 Operation ..................33 Start Device.................. 33 NZM-XMC-MDISP... 02/2016 MN048013 EN www.eaton.eu... - Page 6 Contents Switch off the device ..............33 Inserting and removing the SD card ..........34 Appendix..................35 Troubleshooting ................35 Technical data ................36 Dimensions .................. 40 Alphabetical index ..............41 NZM-XMC-MDISP... 02/2016 MN048013 EN www.eaton.eu...
-
Page 7: About This Manual
Download Center – Documentation Shortlink: www.eaton.eu/doc by entering the document number ("001210001Z" for example) into the Quick Search text field. Comprehensive and current information can be found at: • www.eaton.eu/swd • www.eaton.eu/xv • www.eaton.eu/nzm NZM-XMC-MDISP... 02/2016 MN048013 EN www.eaton.eu... -
Page 8: Writing Conventions
→ All the specifications in this manual refer to the hardware and software versions documented in it. → More information on the devices described here can be found on the Internet under: www.eaton.eu NZM-XMC-MDISP... 02/2016 MN048013 EN www.eaton.eu... -
Page 9: Description Of Device
300 A, 4-pole NZM3-4-XMC-MB 129966 XMC measuring and communication module rated for currents of up to 500 A, 4-pole NZM-XMC-AC 129968 XMC power supply, 24 V to 230 V NZM-XMC-USB485 158562 XMC USB-to-RS485 converter for configuring parameters NZM-XMC-MDISP... 02/2016 MN048013 EN www.eaton.eu... -
Page 10: Device Models
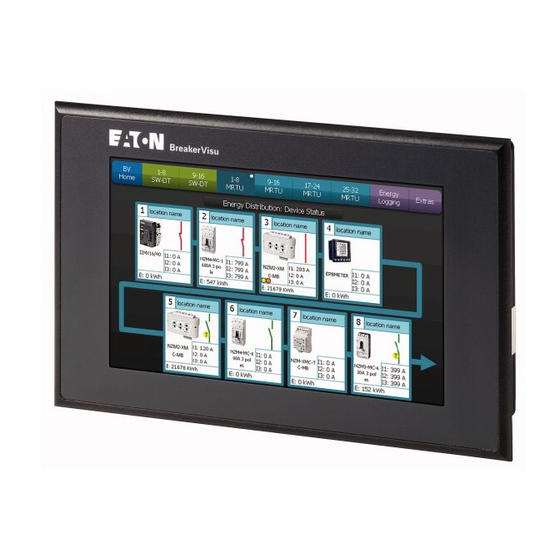
• RJ45 Ethernet NZM-XMC-MDISP35-SWD • SmartWire-DT • RJ45 Ethernet Resistive touch 7.0“ TFT LCD, 64k colors, WVGA NZM-XMC-MDISP70 • RS485 (electrically isolated) • SmartWire-DT • RJ45 Ethernet • USB Host Figure 1: Device models (schematic) NZM-XMC-MDISP... 02/2016 MN048013 EN www.eaton.eu... -
Page 11: Topology
Address 2 IZM-MMINT PKE...+ Address 2 PKE-SWD-CP(SP) NZM-XMC Address 3 NZM2... NZM3... Address 4 NZM-XMC-TC-MB Address 3 MCB-SWD-K2 Address 5 3rd party device Address 16 Address 32 SmartWire-DT Network Modbus RTU Network Figure 2: Topology NZM-XMC-MDISP... 02/2016 MN048013 EN www.eaton.eu... -
Page 12: Wiring Diagram
Lapp Kabel UNITRONIC® BUS LD Modbus and CAN cable (2 x 2 x 0.22) (recommended) d Modbus B must be routed to IZMX-MCAM terminal A → Wiring must be done on-site. There are no prefabricated cables available. NZM-XMC-MDISP... 02/2016 MN048013 EN www.eaton.eu... -
Page 13: Terminal Markings
1.4.1 Terminal markings Due to the existence of various Modbus conventions, designations A, B, +, - are not always clear or standardized. Table 2 lists various Eaton devices and third-party devices, as well as the resulting terminal combinations. Table 2: Overview of terminal designations on Modbus RTU devices Part no. -
Page 14: Equipment Supplied
Resistive touch devices do not require maintenance. However, they may require the following tasks to be carried out: • Cleaning the resistive touchscreen when soiled. • Recalibrating the resistive touchscreen if it stops responding correctly to touch. NZM-XMC-MDISP... 02/2016 MN048013 EN www.eaton.eu... -
Page 15: Cleaning The Resistive Touchscreen
1.8 Repair The device should only be opened by the manufacturer or by an authorized repair center. For repairs, please contact your distributor or Eaton‘s Technical Support. 1.9 Storage The ambient conditions (→ Section 4.2, “Technical data”, Page 37) for storage need to be met. -
Page 16: Service And Warranty
1 Description of device 1.11 Service and warranty 1.11 Service and warranty In the unlikely event that you run into a problem with your Eaton BreakerVisu display, please contact your local sales office. When you call, please have the following information ready: •... -
Page 17: Device-Specific Hazards
If necessary, route an equipotential bonding conductor, with a cross-sectional area that is several times larger than that of the cable shielding, parallel to the cable. NZM-XMC-MDISP... 02/2016 MN048013 EN www.eaton.eu... - Page 18 1 Description of device 1.13 Device-specific hazards NZM-XMC-MDISP... 02/2016 MN048013 EN www.eaton.eu...
-
Page 19: Installation
• The controls on the device's operating side, as well as the cable connec- tions, must remain accessible once the device has been mounted. • The required ambient conditions must be met (→ Page 37). NZM-XMC-MDISP... 02/2016 MN048013 EN www.eaton.eu... - Page 20 When wiring the device, follow all instructions regarding how to wire the corresponding port/interface. CAUTION Non-galvanically isolated interfaces The device may be damaged by potential differences. The GND terminals of all bus nodes must be connected. CAUTION Installation, electrotechnical expertise NZM-XMC-MDISP... 02/2016 MN048013 EN www.eaton.eu...
-
Page 21: Interfaces
2.4 Interfaces The ports/interfaces will depend on the specific device model (→ nameplate and → Section 1.2, “Device models”, page 6). Figure 4: Back of 3.5“ device (Modbus RTU) Figure 5: Back of 3.5" device (SmartWire-DT) NZM-XMC-MDISP... 02/2016 MN048013 EN www.eaton.eu... - Page 22 2 Installation 2.4 Interfaces Figure 6: Back of 7.0“ device (Modbus RTU & SmartWire-DT) NZM-XMC-MDISP... 02/2016 MN048013 EN www.eaton.eu...
-
Page 23: Preparing The Cables With The Sub-D Plug
▶ Terminate the end of the cable with the D-sub plug: The bare screen braid must be clamped onto the connector shell together with the strain relief. NZM-XMC-MDISP... 02/2016 MN048013 EN www.eaton.eu... -
Page 24: Power Supply
SELV isolation (SELV = safety extra low voltage – circuit in which no dangerous voltages will be produced under single-fault conditions). For additional properties concerning the power supply required, please refer to → Page 38. Figure 9: Power supply interface NZM-XMC-MDISP... 02/2016 MN048013 EN www.eaton.eu... - Page 25 Terminating the wiring with the plug connector Feature Description/Value Terminal type: Plug-in screw terminal Cross section 0.75 - 2.5 mm (drain wire or conductor) AWG18 - AWG12 Strip length 7 mm Max. tightening torque 0.6 - 0.8 Nm (5 -7 Lb.In.) NZM-XMC-MDISP... 02/2016 MN048013 EN www.eaton.eu...
-
Page 26: Ethernet
RJ45 plug-in con- nection is subjected to pulling. Protect the RJ45 plug-in connection from strong vibrations! Protect the RJ45 plug-in connection from tensile forces at the socket! NZM-XMC-MDISP... 02/2016 MN048013 EN www.eaton.eu... -
Page 27: Usb Device
Provide a common star point for the earth wiring. 2.4.6.1 Operating and indication elements of the SmartWire-DT master interface The image below shows the ports for a SmartWire-DT master interface. Figure 14: SmartWire-DT master interface NZM-XMC-MDISP... 02/2016 MN048013 EN www.eaton.eu... -
Page 28: Pow/Aux (Power Supply For Smartwire-Dt)
The 24 V DC supply voltage AUX must be supplied for the operation of Breaker-Visu. → For additional properties concerning the power supply required, please refer to → Page 38. Figure 15: POW/AUX power supply interface NZM-XMC-MDISP... 02/2016 MN048013 EN www.eaton.eu... - Page 29 3 A, trip type Z Fuse 3 A, utilization class gL/gG UL 508 and CSA-22.2, No. 14 Miniature circuit-breaker 24 V DC, rated operational current 2 A, trip type Z Fuse 2 A NZM-XMC-MDISP... 02/2016 MN048013 EN www.eaton.eu...
- Page 30 All SmartWire-DT modules are addressed. • The SmartWire-DT network‘s physical configuration will be stored in the device‘s non-volatile memory as a target configuration. • The SmartWire-DT master interface's SWD LED will start showing a solid green light. NZM-XMC-MDISP... 02/2016 MN048013 EN www.eaton.eu...
- Page 31 The project configuration and the stored target configuration are not compatible with each other. Green flashing The project configuration is compatible with the stored target configuration. Green continuous light The project configuration matches the stored target configuration NZM-XMC-MDISP... 02/2016 MN048013 EN www.eaton.eu...
-
Page 32: Rs485
Bus termination RS485 Modbus PIN 6, 5 V 450 - 650 Ω PIN 7, A A, + 120 Ω PIN 3, B B, - 450 - 650 Ω PIN 5, GND Figure 19: Bus termination RS485 Modbus NZM-XMC-MDISP... 02/2016 MN048013 EN www.eaton.eu... - Page 33 The bus segment must be terminated at both ends. • No more than two terminations must be provided for each bus segment. • Running the bus without the proper cable terminations may result in transfer errors. Figure 20: Bus segment with four nodes NZM-XMC-MDISP... 02/2016 MN048013 EN www.eaton.eu...
-
Page 34: Mounting
(→ Section 2.4, “Interfaces”, page 17). → The device does not have an ON/OFF switch. If the power sup- ply does not have a switch either, the device will start as soon as it is connected to the power supply. NZM-XMC-MDISP... 02/2016 MN048013 EN www.eaton.eu... -
Page 35: Mounting The Device
▶ Insert the included set screws into the holding brackets: The end points of the set screws must point towards the wide ends of the holding brackets. Figure 23: Set screw pre-assembled in holding bracket NZM-XMC-MDISP... 02/2016 MN048013 EN www.eaton.eu... - Page 36 7.0“ devices that need to meet IP65/NEMA 4X requirements when mounted will need a holding bracket at each of the eight fastening points. NZM-XMC-MDISP... 02/2016 MN048013 EN www.eaton.eu...
-
Page 37: Operation
If the device does not start and/or if an error message is shown when the device starts, please refer to → Section 4.1, “Troubleshooting”, page35. 3.2 Switch off the device To switch off the device, remove the power from it. NZM-XMC-MDISP... 02/2016 MN048013 EN www.eaton.eu... -
Page 38: Inserting And Removing The Sd Card
Push the SD card into the SD slot all the way to the stop. Release the interlock and slide the SD card a little bit out of the SD slot. ▶ Pull the SD card out of the SD slot. NZM-XMC-MDISP... 02/2016 MN048013 EN www.eaton.eu... -
Page 39: Appendix
The set screws used to mount the device are too tight. Loosen the set screws (observe the maximum torque, → Section 2.5.1, “Mounting the device”, page31) The device is faulty. Send the device in for repairs. NZM-XMC-MDISP... 02/2016 MN048013 EN www.eaton.eu... -
Page 40: Technical Data
Thickness of front plate 5 mm 5 mm Built-in depth 25 mm 33 mm Mounting cutout 123 x 87 mm (±1 mm) 197 x 122 mm (±1 mm) Weight approx. 0.3 kg approx. 0.6 kg NZM-XMC-MDISP... 02/2016 MN048013 EN ww.eaton.eu... - Page 41 1 x SDA Specification 1.00 suitable for SD cards (not for SDHC cards or suitable for SD cards (not for SDHC cards or cards of new standards) cards of new standards) Only use original accessories! Only use original accessories! NZM-XMC-MDISP... 02/2016 MN048013 EN www.eaton.eu...
- Page 42 (should only be replaced by the manufacturer or by an authorized repair center) by an authorized repair center) Potential isolation SmartWire-DT master Supply voltage U (control voltage for contactor coils) Rated operating voltage 24 V DC 24 V DC NZM-XMC-MDISP... 02/2016 MN048013 EN ww.eaton.eu...
- Page 43 Baud Rate 125 kBit/s; 250 kBit/s 125 kBit/s; 250 kBit/s Switches via SmartWire-DT 1) If SmartWire-DT modules with a total current consumption > 0.7 A are connected, a EU5C-SWD-PF2 power feeder module has to be used. NZM-XMC-MDISP... 02/2016 MN048013 EN www.eaton.eu...
-
Page 44: Dimensions
4 Appendix 4.3 Dimensions 4.3 Dimensions 136 mm (5.35") 26.5 mm 5 mm (1.04") (0.2") Figure 26: Dimensions NZM-XMC-MDISP35-… 210 mm (8.27") 5 mm 33 mm (0.2") (1.3") Figure 27: Dimensions NZM-XMC-MDISP70-… NZM-XMC-MDISP... 02/2016 MN048013 EN ww.eaton.eu... -
Page 45: Alphabetical Index
. . 17, 18 Power supply ......20 NZM-XMC-MDISP... 02/2016 MN048013 EN www.eaton.eu... - Page 46 Eaton addresses worldwide: At Eaton, we’re energized by the challenge of powering a world that demands more. With over 100 years experience in electrical power www.eaton.com management, we have the expertise to see beyond today. From groundbreaking products to turnkey design and engineering services, critical industries around the globe count on Eaton.
Need help?
Do you have a question about the BreakerVisu NZM-XMC-MDISP35-MOD and is the answer not in the manual?
Questions and answers