Table of Contents
Advertisement
Advertisement
Table of Contents

Summary of Contents for Palermo Smart Camera
- Page 1 Smart Camera Guide Read and understand this safety awareness and instruction manual thoroughly before using your camera, and keep it for future reference. If you would like to watch video setup: YYP2P: https://youtu.be/7DMNWkU1KfY YOOSEE: https://youtu.be/4puRoH34UG8...
- Page 2 24/7 PHONE SUPPORT 252-316-0108 Please note: Camera works best on normal 2.4 GHz WIFI and does not support 5GHz WIFI. Most routers broadcast both 2.4GHz and 5GHz networks simultaneously. No need to disable your 5GHz network to use the camera. RESET THE CAMERA for any reason during setup: Use included pin to place into RESET hole (see photo...
- Page 3 24/7 PHONE SUPPORT 252-316-0108 IOS Phone Users: Go to the App Store, search for YYP2P or YOOSEE and download the App. Android Phone Users: Go to the Play Store, search for YYP2P or YOOSEE and download the App. It does not matter which app you use on your mobile device. You cannot use both apps for the same account.
- Page 4 24/7 PHONE SUPPORT 252-316-0108 Do not use a phone number to register, only email addresses are used in the United States. Once you have successfully registered, you will be redirected to Account login to enter your password. - 3 -...
- Page 5 24/7 PHONE SUPPORT 252-316-0108 ****Click on (CHINA) at the top of the screen and a dropdown menu will open. Select America. The United States is not an option then Click Login**** Step 2: Add Device by tapping “+” in top right-hand corner of your screen.
- Page 6 24/7 PHONE SUPPORT 252-316-0108 Click Add New Device, to add device to your WIFI. - 5 -...
- Page 7 24/7 PHONE SUPPORT 252-316-0108 FYI: Add Online Device Option for YYP2P Only. Cannot use with YOOSEE app due to the New Sharing Feature. Note: You will need to have your camera plugged in at this point. (If you had already plugged in your camera from the start and it stopped beeping, unplug the camera from the electrical outlet and plug it back in.
- Page 8 24/7 PHONE SUPPORT 252-316-0108 Step 3: Smartlink Step:4 Enter your WIFI password, and tap next step. While camera is beeping, tap Hear the beeping. Keep phone and camera at a 30cm distance and tap next step. - 7 -...
- Page 9 24/7 PHONE SUPPORT 252-316-0108 Connection usually takes no more than 20–30 seconds. Once connected you will automatically be taken to the Connection Succeeded, screen. Enter the default codes (name the camera “example: Camera 1” & password:123), then tap save in the top right corner of your screen. - 8 -...
- Page 10 24/7 PHONE SUPPORT 252-316-0108 Tap on the Chinese writing in the grey box on the left side of your screen, you will see, “On-line”. Tap; online to see live video. Click OK to access the microphone and enjoy your camera. You should be all set and enjoying your camera.
- Page 11 24/7 PHONE SUPPORT 252-316-0108 Ethernet Connection: Step:1 Unplug and re-plug your camera from the electrical outlet so it can reload. When the camera starts beeping, connect your Ethernet cable to your router and the back of your camera. Once the Ethernet cable is plugged in, the beeping will stop and there will be a green and yellow light coming out of the back of the camera from the Ethernet cable and a dim yellow light in the front of the camera...
- Page 12 24/7 PHONE SUPPORT 252-316-0108 Once you tap Discover New Device you will see the device ID number and a blue (+) sign on the right. Tap on the blue (+) sign. Name the camera and enter passcode (use default name & passcode during initial setup). Tap on the Chinese writing in the grey box on the left side of your screen, wait for it to say “online”, and tap.
- Page 13 24/7 PHONE SUPPORT 252-316-0108 Transfer from Ethernet to WIFI Step:1 Tap the gear icon(settings) at top right corner of screen. Tap network settings. On the next screen, Do Not Click On WIFI. Find your network in the list of networks. Tap on your network and Confirm the change.
- Page 14 24/7 PHONE SUPPORT 252-316-0108 YOOSEE DEVICE SHARING INSTRUCTIONS If you are using the YOOSEE app, click on the sharing icon on the all devices screen. The icon is 3 little circles clumped as a triangle located at the upper right of the play button. It gives you the option to share your camera to 10 devices by sending a link to the person you wish to share too.
- Page 15 24/7 PHONE SUPPORT 252-316-0108 YYP2P MANUALLY ADDING MULTIPLE DEVICES. Manually Adding Devices The camera can only be smart linked once. The first mobile device is considered the initial device. Every device after that must be added manually. FYI. there can only be (1) one account per app. Meaning, all added devices must use the same account information exactly.
- Page 16 24/7 PHONE SUPPORT 252-316-0108 Tap on the word (Online) on the left side of the picture for live view. Manually Add Devices Method 2 (Connected to same WIFI as the camera) Install the app on the mobile device. Log into the app using the same login information you created for the initial setup device.
- Page 17 24/7 PHONE SUPPORT 252-316-0108 Usage Tips when using with a smart phone: Tap the camera image to connect. If it times out, wait one second and tap again. This may happen several times depending on your internet speed. Double tap the camera image to use full screen. To move the camera position, slide your finger either left to right or up to down and vice versa.
- Page 18 24/7 PHONE SUPPORT 252-316-0108 Computer Setup: Note: You must first set up your camera on your smart phone since the camera needs to be connected to your WIFI for this. 1. Turn on your computer. 2. Enter "www.yoosee.co" in the browser. Yoosee web page: Click on CMS for PC, and the Apple Icon for Mac.
- Page 19 24/7 PHONE SUPPORT 252-316-0108 Once you select your choice, the download will begin. Click on file: cmssetup.exe and click Next. Click Next again. - 18 -...
- Page 20 24/7 PHONE SUPPORT 252-316-0108 Click Install. - 19 -...
- Page 21 24/7 PHONE SUPPORT 252-316-0108 Click Finish. Depending on your software and antivirus, you may receive a warning. Please click Allow access as the program is safe. - 20 -...
- Page 22 24/7 PHONE SUPPORT 252-316-0108 3. You will be prompted to set the username and password, and add the camera. Use the default codes - User name: admin, and Password: 00000000 The user name and password for remote access is same as the mobile APP.
- Page 23 24/7 PHONE SUPPORT 252-316-0108 Right click Device List and add device. - 22 -...
- Page 24 24/7 PHONE SUPPORT 252-316-0108 Note: For "CMS" support to add a device by LAN search, you can also manually enter the 3C ID and password to add the camera. Locate your 7-digit 3C ID on the bottom of the camera. Enter this and the default password "123".
- Page 25 24/7 PHONE SUPPORT 252-316-0108 DEFENSE AREA SETTING: Note: Only some models support this function. The camera needs self-learning (coding) to match the wireless sensor (door magnet, smoke detector, PIR etc.) with the same frequency (433M) to set up the wireless alarm system.
-
Page 26: Alarm Settings
24/7 PHONE SUPPORT 252-316-0108 submenu step by step Setting, Defense Area, Hall, 1, and select “1”. Trigger the door magnet then tap OK to trigger the wireless sensor to code. It will show “operation successful” if it has been properly coded. If it shows “operation failed”, repeat the process. - Page 27 24/7 PHONE SUPPORT 252-316-0108 Set the Alarm push ID/Alarm push Email: Click the Device name on the APP, wait for the Playback / Settings / Edit menu to pop up, then access the Setting / Alarm setting submenu. In the Receive alarm message area under alarm push Email, input the email address where you want to receive alarm messages.
- Page 28 24/7 PHONE SUPPORT 252-316-0108 FACTORY SETTING RESET: Resetting your camera will clear all the settings, including the WIFI connection, saved passwords, Alarm settings, Defense area settings, etc. To reset the device: there is one RESET button (hole) on the bottom of the camera. Use the pin provided and insert it into the RESET hole.
- Page 29 24/7 PHONE SUPPORT 252-316-0108 TROUBLESHOOTING - Q&A Cannot get camera to connect, receiving an error message during the connection process. Make sure you are connected to a 2.4GHz wireless router. Camera does not support 5G HD WIFI (all 5G HD WIFI systems can run both 2.4GHz or 5GHz.) Then uninstall and reinstall the app, and while the camera is plugged in, follow the FACTORY SETTING RESET instructions and start over.
- Page 30 24/7 PHONE SUPPORT 252-316-0108 password. If you forgot the password, RESET the camera to recover to Factory Default settings. When trying to Playback a recording, I cannot find the recorded file. First check if the TF card is defective. If it is fine, then check the search time for the recorded file.
- Page 31 24/7 PHONE SUPPORT 252-316-0108 Please make sure to Format the TF card via the OSD menu step in Settings / Storage settings before recording. If the TF card still can’t record or can’t show the TF card capacity after formatting, try formatting the card on your computer first and try again.
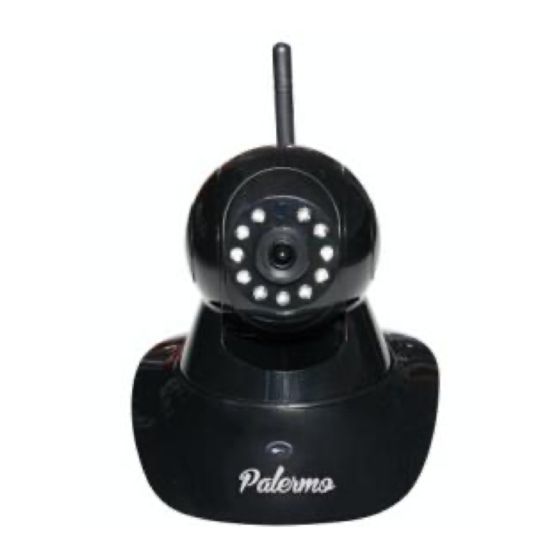
- Page 32 24/7 PHONE SUPPORT 252-316-0108 PACKING LIST Camera Power Adapter Ethernet Cable Bracket Screws Package Manual Reset Pin Antenna (Only used if purchased other motion detection and smoke alarm devices.)
Need help?
Do you have a question about the Smart Camera and is the answer not in the manual?
Questions and answers