Table of Contents
Advertisement
Available languages
Available languages
Quick Links
Datos de instalación y operación
Manual de
instalación
y operación
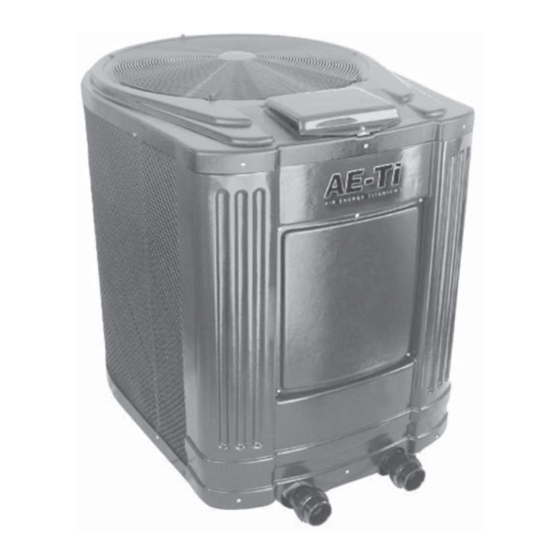
Air Energy
Bombas de calor
Modelo AE-Ti
RIESGO DE ELECTROCHOQUE O ELECTROCUCIÓN. La fuente de alimentación para este
producto debe ser instalada por un electricista licenciado o certifi cado conforme a los códigos y
ordenanzas de aplicación nacional y local. La instalación inadecuada implica un peligro eléctrico
que puede resultar en muerte o lesión grave a los usuarios de piscinas o spa, instaladores u otras
personas debido a electrochoque y también puede causar daño a la propiedad. Lea y siga las
instrucciones específi cas dentro de este manual.
™
PELIGRO
Advertisement
Chapters
Table of Contents
Troubleshooting

Related Manuals for Jandy Air Energy AE-Ti Series


Summary of Contents for Jandy Air Energy AE-Ti Series
- Page 1 Datos de instalación y operación Manual de instalación y operación ™ Air Energy Bombas de calor Modelo AE-Ti PELIGRO RIESGO DE ELECTROCHOQUE O ELECTROCUCIÓN. La fuente de alimentación para este producto debe ser instalada por un electricista licenciado o certifi cado conforme a los códigos y ordenanzas de aplicación nacional y local.
-
Page 3: Table Of Contents
Página 1 Índice Sección 1. Información general ....5 4.5.1 Conexión a un selector remoto POOL-OFF- SPA (Conexión de 3 cables) ...... 22 Introducción ............5 4.5.1.1 Instalación el Selector remoto Información al consumidor y seguridad ....5 POOL-OFF-SPA........22 1.2.1 Reglas de seguridad para Spa/Jacuzzi .. - Page 4 Página 2 Índice (Continuación) Sección 8. Solución de problemas ...33 Opciones de configuración para el servicio ..30 7.3.1 Mantenimiento de la temperatura ....30 Guía de Solución de problemas ....... 33 7.3.2 Mantenimiento de demora de Diagnósticos ............. 34 temperatura ..........
- Page 5 DECLARATION OF CONFORMITY Jandy Pool Products, Inc. Organization: Located at: 6000 Condor Drive Moorpark, CA 93021 Declare that the products identified below: Product Description: Electric Swimming Pool & Spa Heat Pumps; “AE-Ti” Series AE200Ti AE300Ti Model Number: AE400Ti AE500Ti COMPLY WITH THE RELEVANT ESSENTIAL REQUIREMENTS OF THE FOLLOWING...
-
Page 7: Sección 1. Información General
Página 5 Información al consumidor Sección 1. Información general y seguridad Introducción La serie AE-Ti de bombas de calor está diseñada Este manual provee instrucciones de instalación y fabricada para proveer muchos años de servicio y operación para las bombas de calor Air Energy™ confiable y seguro si son instaladas, operadas y modelos AE-Ti. -
Page 8: Consejos De Ahorro De Energía En Las Piscinas De Natación
Página 6 Las personas con antecedentes de enfermedades Durante el invierno o vacaciones de más de una cardíacas, diabetes, problemas circulatorios o semana, apague la bomba de calor. tensión arterial, deben consultar al médico antes Encuentre la confi guración apropiada en el control de utilizar el jacuzzi o spa. -
Page 9: Asistencia Técnica
Página 7 Todas las bombas de calor Air Energy™ deben Especifi caciones ser instaladas conforme a los códigos de construcción 1.7.1 Especifi caciones generales e instalación locales según las empresas de servicio público o las autoridades que tengan jurisdicción. Todos Ubicación de la instalación los códigos locales tienen prioridad sobre los códigos La utilización ha sido... -
Page 10: Especificaciones Técnicas
Página 8 1.7.3 Especifi caciones técnicas MODELO AE200TI-251 AE300TI-251 AE300TI-353 AE400TI-251 AE400TI-353 AE500TI-251 AE500TI-353 VOLTAJE 208-230/50/1 208-230/50/1 380-420/50/3 208-230/50/1 380-420/50/3 208-230/50/1 380-420/50/3 SALIDA 8 kW 12 kW 12 kW 15 kW 15 kW 22 kW 22 kW CONSUMO ELÉCTRICO 1,60 kW 2,66 kW 2,66 kW 2,96 kW... -
Page 11: Sección 2. Instrucciones De Instalación
Página 9 Sección 2. Instrucciones de 2.2.2 Espacio instalación La bomba de calor debe ser ubicada de forma que haya suficiente espacio en todos los lados para realizar el Información general mantenimiento y la inspección en un futuro. Véase Tabla 2. Instale las bombas de calor Air Energy™... -
Page 12: Instalaciones Al Aire Libre
CALENTADOR DE PISCINA CICLO QUÍMICO ALIMENTADOR QUÍMICO O SISTEMA DE GENERACIÓN DE CLORO OPCIONAL (SE MUESTRA FILTRO JANDY AQUAPURE) Sensors BOMBA DE PISICINA DESDE LA PISICINA O SPA VÁLVULA DE VERIFICACIÓN PARA PISICINA O SPA VÁLVULA DE PASO MANUAL Figura 2. -
Page 13: Conexiones De Agua En La Bomba De Calor
Página 11 anteriores y siguientes puede afectar la operación del CUIDADO interruptor de presión de agua de la bomba de calor. La Asegúrese de mantener los requerimientos ubicación de la bomba de calor por encima o por debajo de fl ujo y las tasas de rotación de agua de la de la superficie de la piscina también puede afectar la piscina instalando bombas de calor adicionales operación del interruptor. -
Page 14: Figura 4. Sistema De Filtrado Compartido
Página 12 Sistema de filtrado compartido Bomba de calor para calentar la piscina Piscina Bomba de calor para calentar el Spa Piscina Bomba de filtrado Válvula de tres vías Filtro Figura 4. Sistema de fi ltrado compartido... -
Page 15: Figura 5. Sistema De Bomba Dual (Sistemas De Filtrado Independientes Que Comparten Una Bomba De Calor)
Página 13 Sistemas de filtrado independiente Bomba de calor para calentar la piscina Piscina Bomba de calor para calentador el Spa Piscina Bomba de filtrado Válvula de tres vías Filtro Figura 5. Sistema de bomba dual (Sistemas de fi ltrado independientes que comparten una bomba de calor) -
Page 16: Disposiciones Del Sistema De Filtración
Página 14 Calentador Bomba de calentamiento Retorno de piscina Válvula de verificación A solar Make-Up Válvula de verificación Toma de pisicina De solar Filter Retorno de spa Drenaje de piscina Filtro de la bomba Toma de spa Drenaje de spa Figura 6. -
Page 17: Figura 7. Disposición De Plomería De Dos Bombas De Calor
Página 15 30 cm de espacio mínimo alrededor del evaporador 30 cm ¡NOTA! Las válvulas de paso son opcionales para las tomas del calentador pero ayudan al balanceo del sistema 50 mm 50 mm Extender 30 cm más del extremo de la toma del Extender 30 cm calentador para un... -
Page 18: Figura 9. Disposición De Plomería De Seis Bombas De Calor
Página 16 30 cm de espacio mínimo alrededor del evaporador ¡NOTA! Las 30 cm válvulas de paso son opcionales para las tomas del calentador pero ayudan al balanceo del sistema 50 mm 50 mm 50 mm 50 mm 50 mm 50 mm Tubería de 90 mm pvc... -
Page 19: Sección 4. Conexiones Eléctricas
Página 17 Sección 4. Conexiones eléctricas Las líneas de alimentación eléctrica deben pasar por el conducto impermeable. Pase los cables y el conducto desde la fuente de energía y conéctelos ADVERTENCIA a la conexión identifi cada como “conexión de alto PELIGRO DE ELECTROCHOQUE. -
Page 20: De Energía Monofásica Ae-Ti
Página 18 AE SERIES 208 - 230 VAC (~) SINGLE PHASE 50 Hz WIRING DIAGRAM 208/230~ 208/230~ BR/W SEE INSTALLATION AND OPERATION MANUAL FOR SYMBOL DEFINITIONS. BR BK SIEHE INSTALLATIONS UND BEDIEN- UNGSANLEITUNG ZU SYMBOLERKLÄ- RUNGEN. VOIR LE MANUEL D'INSTALLATION ET D'UTILISATEUR POUR LA DEFINITION DES SYMBOLES. -
Page 21: De Energía Trifásica Ae-Ti
Página 19 BK BK BK BK Y-OUT THREE PHASE LINE VOLTAGE AE SERIES MONITOR 380 - 420 VAC (3~)THREE PHASE 50Hz WIRING DIAGRAM 380/420~ 380/420~ BR/W SEE INSTALLATION AND OPERATION MANUAL FOR SYMBOL DEFINITIONS. BR BK SIEHE INSTALLATIONS UND BEDIEN- UNGSANLEITUNG ZU SYMBOLERKLÄ- RUNGEN. -
Page 22: De Cableado Eléctrico
Página 20 DEFINICIONES DE SÍMBOLOS BOMBA RELOJ DE LA BOMBA VENTILADOR COMPRESOR SENSOR DE TEMPERATURA DEL AGUA SENSOR DE TEMPERATURA DEL AIRE CAPACITOR DEL VENTILADOR CAPACITOR DEL COMPRESOR INTERRUPTOR DE PRESIÓN DEL AGUA INTERRUPTOR DEL LÍMITE DE PRESIÓN ALTA DEL REFRIGERANTE INTERRUPTOR DEL LÍMITE DE PRESIÓN BAJA DEL REFRIGERANTE PISCINA... -
Page 23: Mantener Temperatura Al Reloj
Página 21 MODELO INTERMATICO T1D4 DE TEMPORIZADOR MECÁNICO (NO SE PROVEE CON LA BOMBA DE CALOR) 208 - 277 V CA BOMBA MOTOR CONEXIÓN DEL RELOJ A TIERRA DEL EQUIPO COMPONENTES INSTALADOS DE CAMPO COMPONENTES DE LA BOMBA DE CALOR RELÉ... -
Page 24: Controles Remotos Opcionales
Página 22 Controles remotos opcionales Pulse el botón Subir o Bajar para mostrar CONTROL REMOTO. Aparece SELEC. El cableado eléctrico debe cumplir con todos los CONTROL REMOTO DESACTIVADO códigos y ordenanzas nacionales y locales. (predeterminado), use el botón Subir o Baxar 4.5.1 Conexión a un selector remoto para ver las opciones de control remoto. -
Page 25: Instalación Del Termostato Remoto
Página 23 4.5.2.2 Instalación del TERMOSTATO Pulse el botón Subir o Baxar para mostrar REMOTO CONTROL REMOTO. Aparece SELEC. CONTROL REMOTO DESACTIVADO Apague la energía del sistema de control piscina/ (predeterminado), use el botón Subir o Bajar spa y de la unidad de la bomba de calor. para ver las opciones de control remoto. -
Page 26: Sección 5. Operación
Página 24 Sección 5. Operación de una piscina fría, programe el reloj para funcionar la bomba de forma continua. Esto permite al sistema de filtrado y a la bomba de ADVERTENCIA calor operar de forma continua hasta que el agua alcance No utilice esta bomba de calor si alguna de la temperatura configurada en el control de temperatura. -
Page 27: Calor Opcional)
Página 25 Cuando el agua de la temperatura cae 3 grados por se muestre el valor de consigna deseado. Después de debajo de la configuración de temperatura después de 5 segundos de inactividad, se almacena en la memoria 5 minutos de demora, el control encenderá la bomba de el nuevo valor de consigna. -
Page 28: Opciones De Configuración Del Usuario
Página 26 pulse el botón Bajar hasta que se muestre MANT. 5.4.3 Confi guración del temporizador del spa ENFRIAR SPA, pulse el botón MENU . La lucecita verde a la izquierda se encenderá y la unidad mostrará Asegúrese de que el control esté en el modo OFF . SET:XXX°... -
Page 29: Bloqueo Del Valor De Consigna
Página 27 Bloqueo del valor de consigna opere de forma adecuada. Si necesita esta configuración, asegúrese de verificar que el flujo del sistema supere en cualquier Para bloquear el valor de consigna el requerimiento mínimo de 110 lpm después de haber modo de operación , pulse y mantenga pulsado los instalado el accesorio de dirección o los codos. -
Page 30: Sección 6. Mantenimiento General
Página 28 Sección 6. Mantenimiento general unidad. No envuelva los laterales de la bomba de calor con ningún plástico ni ningún otro material Química del agua que retenga calor o humedad dentro de la unidad. Los balances químicos adecuados son necesarios Encendido de primavera para condiciones de baño higiénicas así... -
Page 31: Inspección Profesional
Página 29 Unión de entrada de agua Unión de salida de agua Llave de purga (Dejar abierta hasta que la unidad esté lista para ponerse en marcha) Figura 19. Preparación para el invierno de la bomba de calor AE-Ti se encuentre accesible para operaciones de servicio Mantenga el área superior y lateral de la bomba de futuras. -
Page 32: Sección 7. Mantenimiento Y Servicio
Página 30 Sección 7. Mantenimiento y aire ambiental y más grande sea el área de la superficie del evaporador, más calor puede percibir. servicio profesional Ventilador – El ventilador de la bomba de calor Diseño de la bomba de calor produce un alto volumen de flujo de aire. -
Page 33: Remoto
Página 31 Mantenimiento de demora de la temperatura CUIDADO se utiliza cuando está conectado MANTENER Desactive el MODO DE PRUEBA después TEMP . Esta función permite una demora antes de utilizar. Si no se desactiva el MODO de que la bomba se encienda. Para seleccionar DE PRUEBA después de su utilización, la Mantener demora de temperatura, use el botón bomba de calor pasará... -
Page 34: Calibración De La Temperatura Del Agua
Página 32 7.3.8 Calibración de la temperatura Esta función determina la cantidad de tiempo del agua que la bomba de calor espera antes de encender el compresor. Para seleccionar Retraso al Asegúrese de que el control esté en el modo OFF . arranque, use el botón Subir y Bajar para mostrar Para ingresar al modo Confi... -
Page 35: Sección 8. Solución De Problemas
Página 33 Sección 8. Solución de problemas 8.1. Guía de Solución de problemas La siguiente tabla provee síntomas y soluciones de problemas generales de la bomba de calor. Síntoma ACCIÓN CORRECTIVA La bomba de calor no enciende, no se ve nada en la pantalla El disyuntor o un fusible podrían estar desconectados. -
Page 36: Diagnósticos
Página 34 Diagnósticos En caso que se abra un interruptor de presión o Por favor, consulte la siguiente tabla para obtener suceda alguna otra avería, la pantalla mostrará la avería una lista de las condiciones de diagnóstico. hasta que el problema haya sido resuelto. CONDICIÓN DE DIAGNÓSTICO DESCRIPCIÓN AVERIA-... -
Page 37: Tabla 6. Datos Técnicos De Referencia Para La Solución De Problemas
Página 35 Aire 41°F (5°C) Aire 50°F (10°C) Aire 61°F (15°C) Aire 80°F (27°C) MODELO DATOS TÉCNICOS Barias Barias Barias Barias Presión alta de refrigerante 14,4 14,8 14,8 16,9 AE200TI Presión baja de refrigerante Amperios (1 fase) Presión alta de refrigerante 15,2 15,6 16,5... -
Page 38: Sección 9. Repuestos
Sección 9. Repuestos Información para hacer pedidos Para pedir o comprar piezas para los modelos Departamento de Servicio Internacional de Jandy de bombas de calor AE-Ti, comuníquese con su ubicado en: 2735 NW 63 Court, Fort Lauderdale, distribuidor de Air Energy™ más cercano. Si no Florida, 33309 - USA, Tel: +1-954-970-4800. -
Page 39: Vista Ampliada De La Bomba De Calor Air Energy ™ Modelo Ae-Ti
Página 37 Vista ampliada de la bomba de calor Air Energy modelo AE-Ti ™ Estos interruptores de presión están instalados en la línea del refrigerante cerca del compresor DETALLE “A” DETALLE “B” Figura 21. Vista ampliada de la bomba de calor Air Energy™ modelo AE-Ti... - Page 40 Modelo Número de serie Fecha de compra Fecha de instalación Nombre del distribuidor Air Energy™ Heat Pumps 2735 NW 63 Court, Fort Lauderdale, Florida 33309, USA • 954.970.4800 FAX 954.971.8440 Litho in U.S.A. © 2006 Jandy Pool Products, Inc. 0606...
- Page 41 Installation and Operation Data Installation and Operation Man ual ™ Air Energy Heat Pumps Model AE-Ti DANGER RISK OF ELECTRICAL SHOCK OR ELECTROCUTION. The electrical supply to this product must be installed by a licensed or certifi ed electrician in accordance with applicable national and local codes and ordinances.
- Page 43 Page 1 Table of Contents Section 1. General Information ....5 4.5.2 Connection to an AquaLink RS Control System or Remote TSTAT (2-Wire Introduction ............5 Connection)..........22 Consumer Information and Safety ...... 5 4.5.2.1 Configure the AquaLink RS Control 1.2.1 Spa/Hot Tub Safety Rules ......
- Page 44 Page 2 Table of Contents (Continued) Section 8. Troubleshooting ......33 Troubleshooting Guide........33 Diagnostics ............34 Section 9. Replacement Parts ....36 Ordering Information ......... 36 ™ Air Energy AE-Ti Heat Pumps Parts List ..36 ™ Air Energy AE-Ti Heat Pump Exploded View ..............
- Page 45 DECLARATION OF CONFORMITY Jandy Pool Products, Inc. Organization: Located at: 6000 Condor Drive Moorpark, CA 93021 Declare that the products identified below: Product Description: Electric Swimming Pool & Spa Heat Pumps; “AE-Ti” Series AE200Ti AE300Ti Model Number: AE400Ti AE500Ti COMPLY WITH THE RELEVANT ESSENTIAL REQUIREMENTS OF THE FOLLOWING...
-
Page 47: Section 1. General Information
Page 5 Consumer Information and Safety Section 1. General Information The AE-Ti series of heat pumps are designed and manufactured to provide many years of safe Introduction and reliable service when installed, operated and maintained according to the information in this manual This manual provides installation and operation and the installation codes referred to in later sections. -
Page 48: Swimming Pool Energy Saving Tips
Page 6 Persons with a medical history of heart disease, Carefully monitor the water temperature of your diabetes, circulatory or blood pressure problems pool in the summertime. You can reduce heat should consult their physician before using a hot pump usage due to warmer air temperatures. tub or spa. -
Page 49: Technical Assistance
Page 7 • EMC Directive 89/33/EEC - Through the Specifi cations EN55014 & EN61000 series of standards. 1.7.1 General Specifi cations • Reduction of Hazardous Substances (RoHS) Directive, 2002/95/EC. Installation Location CE Approved for use in: • Waste Electrical and Electronic Equipment Indoor/Outdoor (WEEE) Directive, 2002/96/EC. -
Page 50: Technical Specifications
Page 8 1.7.3 Technical Specifi cations MODEL AE200TI-251 AE300TI-251 AE300TI-353 AE400TI-251 AE400TI-353 AE500TI-251 AE500TI-353 VOLTAGE 208-230/50/1 208-230/50/1 380-420/50/3 208-230/50/1 380-420/50/3 208-230/50/1 380-420/50/3 INPUT 1,60 kW 2,66 kW 2,66 kW 2,96 kW 2,96 kW 4,57 kW 4,57 kW OUTPUT 8 kW 12 kW 12 kW 15 kW... -
Page 51: Section 2. Installation Instructions
Page 9 Section 2. Installation Instructions 2.2.2 Clearances The heat pump must be placed to provide clearances on all sides for maintenance and inspection. General Information See Table 2. Install the Air Energy™ heat pumps in accordance 60 cm (24”) access in front of the heat pump with the procedures in this manual, local codes and provides adequate room for serviceability. -
Page 52: Outdoor Installations
VENT POOL HEATER CHEMICAL LOOP CHEMICAL FEEDER OR OPTIONAL CHLORINE GENERATION SYSTEM (JANDY AQUAPURE SHOWN) FILTER Sensors POOL PUMP FROM POOL OR SPA CHECK VALVE TO POOL OR SPA MANUAL BYPASS VALVE Figure 2. -
Page 53: Water Connections At Heat Pump
Excess water fl ow will damage the heat exchanger. POOL HEATER CHEMICAL LOOP OR OPTIONAL CHLORINE GENERATION SYSTEM (JANDY AQUAPURE SHOWN) FILTER Sensors CHEMICAL FEEDER POOL PUMP FROM POOL OR SPA CHECK VALVE... -
Page 54: Figure 4. Shared Filtration System
Page 12 Shared Filtration System Heat Pump to Heat Pool Pool Heat Pump to Heat Spa Pool Filtration Pump 3-way valve Filter Figure 4. Shared Filtration System... -
Page 55: Figure 5. Dual Pump System
Page 13 Independent Filtration Systems Heat Pump to Heat Pool Pool Heat Pump to Heat Spa Pool Filtration Pump 3-way valve Filter Figure 5. Dual Pump System (Independent Filtration Systems Sharing a Heat Pump) -
Page 56: Filtration System Layouts
Page 14 Heater Heat Pump Pool Return Check Valve From Solar Make-Up Check Valve Pool Intake To Solar Filter Spa Return Pool Drain Pump Filter Spa Intake Spa Drain Figure 6. Plumbing For Heating System Combinations Filtration System Layouts The Air Energy™ heat pump may be plumbed with a gas or electric heater or any combination of 3.5.1 Shared... -
Page 57: Figure 7. Two Heat Pump Plumbing Layout
Page 15 30 cm minimum clearence around evaporator 30 cm NOTE! Gate Valves are optional on heater inlets but will help for system balancing 50 mm 50 mm Extend 30 cm past end heater inlet for Extend 30 cm hydraulic past end balancing heater inlet... -
Page 58: Figure 9. Six Heat Pump Plumbing Layout
Page 16 30 cm minimum clearence around evaporator evaporador 30 cm NOTE! Gate Valves are optional on heater inlets but will help for system balancing 50 mm 50 mm 50 mm 50 mm 50 mm 50 mm 90 mm pvc pipe Extend 41-51 cm past end heater inlet for Extend 41-51 cm past... -
Page 59: Section 4. Electrical Connections
Page 17 Section 4. Electrical Connections Remove the front cover of the sheet metal junction box. WARNING Electrical supply lines must be run through watertight conduit. Run the wires and conduit from ELECTRICAL SHOCK HAZARD. This heat the power source and connect them to the conduit pump contains wiring that carries high voltage. -
Page 60: Figure 11. Ae-Ti Single-Phase Electrical Supply Wiring Diagram
Page 18 AE-Ti AE SERIES 208 - 230 VAC (~) SINGLE PHASE 50 Hz WIRING DIAGRAM 208/230~ 208/230~ BR/W SEE INSTALLATION AND OPERATION MANUAL FOR SYMBOL DEFINITIONS. BR BK SIEHE INSTALLATIONS UND BEDIEN- UNGSANLEITUNG ZU SYMBOLERKLÄ- RUNGEN. VOIR LE MANUEL D'INSTALLATION ET D'UTILISATEUR POUR LA DEFINITION DES SYMBOLES. -
Page 61: Figure 12. Ae-Ti 3-Phase Electrical Supply Wiring Diagram
Page 19 BK BK BK BK AE-Ti Y-OUT THREE PHASE LINE VOLTAGE AE SERIES MONITOR 380 - 420 VAC (3~)THREE PHASE 50Hz WIRING DIAGRAM 380/420~ 380/420~ BR/W SEE INSTALLATION AND OPERATION MANUAL FOR SYMBOL DEFINITIONS. BR BK SIEHE INSTALLATIONS UND BEDIEN- UNGSANLEITUNG ZU SYMBOLERKLÄ- RUNGEN. -
Page 62: Figure 13. Electrical Wiring Diagram Symbol
Page 20 SYMBOL DEFINITIONS PUMP PUMP TIME CLOCK COMPRESSOR WATER TEMPERATURE SENSOR AIR TEMPERATURE SENSOR FAN CAPACITOR COMPRESSOR CAPACITOR WATER PRESSURE SWITCH HIGH REFRIGERANT PRESSURE LIMIT SWITCH LOW REFRIGERANT PRESSURE LIMIT SWITCH POOL FACTORY INSTALLED 208/230 VAC 208/230~ FACTORY INSTALLED 380/420 VAC 380/420~ FIELD INSTALLED 208/230 VAC 208/230~... -
Page 63: Figure 14. Example Of Maintain Temp Wiring To The Time Clock
Page 21 INTERMATIC MODEL T104 MECHANICAL TIMER (NOT PROVIDED WITH HEAT PUMP) 208 - 277 VAC PUMP CLOCK MOTOR EQUIPMENT GROUND FIELD INSTALLED COMPONENTS HEAT PUMP COMPONENTS MAINTAIN TEMP (PUMP) RELAY (SEE HEAT PUMP WIRING DIAGRAM) NOTE: INTERMATIC MODEL T104 (NOT PROVIDED WITH HEAT PUMP) WIRE CONNECTIONS SHOWN AS AN EXAMPLE, OTHER MODELS MAY HAVE DIFFERENT CONNECTIONS. -
Page 64: Optional Remote Controls
Page 22 Optional Remote Controls Press the Up or Down button to display REMOTE. Press the MENU button. The Electrical wiring must be in accordance with all applicable national and local codes and ordinances. SELECT REMOTE OFF (default remote) appears, use the Up or Down button to scroll 4.5.1 Connection to a Remote Pool-Off- through the Remote options. -
Page 65: 4.5.2.2 Install The Remote Tstat
Page 23 4.5.2.2 Install the Remote TSTAT Press the Up or Down button to display REMOTE. The SELECT REMOTE OFF Turn off the power to both the pool/spa control (default remote) appears, use the Up or Down system and the heat pump unit. button to scroll through the Remote options. -
Page 66: Section 5. Operation
Page 24 Section 5. Operation Clean the filter at the end of this operation before starting the heat pump. When raising the temperature of a cold pool, program the time clock to run the pump WARNING continuously. This lets the filter system and heat pump operate Do not use this heat pump if any part has continuously until the water reaches the temperature been under water. -
Page 67: Pool Mode - (Optional Maintain Heat)
Page 25 To operate in spa mode with the Maintain Heat You can change the temperature set point by pressing the Up or Down button . Repeatedly press feature, press SPA , then press MENU, press the Down the Up or Down button until you reach the desired button until MAINTAIN SPA HEAT is displayed, press temperature set point. -
Page 68: Spa Mode - (Optional Maintain Chill)
Page 26 5.3.3 Spa Mode - (Optional Maintain Chill) 5.4.3 Spa Timer Setup If connected, the Maintain Chill mode allows the Make sure the control is in the OFF mode. heat pump to monitor the temperature of the water 24 To enter the User Setup mode, press and hold the hours a day. -
Page 69: Set Point Lockout
Page 27 Set Point Lockout To adjust the pressure switch: Make sure the control is in the ON mode (POOL Be sure that all valves in the system are set to or SPA). Press and hold the Up and Down buttons for allow water fl... -
Page 70: Section 6. General Maintenance
Page 28 Section 6. General Maintenance Cover only the top of the heat pump to prevent debris from falling into the unit. Do not wrap the sides of the heat pump with any plastic or other Water Chemistry material that will retain heat or moisture inside the Proper chemical balances are necessary for unit. -
Page 71: Inspection And Service
Page 29 Water Inlet Union Water Outlet Union Petcock (Leave open until unit is ready to start-up) Figure 19. Winterizing the AE-Ti Heat Pump intake coils. Keep all plants and shrubs trimmed away Inspection and Service from the heat pump. Air Energy™... -
Page 72: Section 7. Professional Maintenance And Service
Page 30 Section 7. Professional Maintenance Heat Pump Components and Their Operation and Service Evaporator - As air passes through the evaporator, the refrigerant in the evaporator absorbs Heat Pump Design heat from the ambient air. The warmer the ambient air and the larger the surface area of the evaporator the The Air Energy™... -
Page 73: Remote
Page 31 The maintain temperature delay is used when CAUTION MAINTAIN TEMP is connected. This feature Disable TEST MODE after use. Failure to allows for a time delay before the pump is turned disable TEST MODE after use will allow the on. -
Page 74: Water Temperature Calibration
Page 32 7.3.8 Water Temperature Calibration remaining time is displayed while counting down. Press POOL or SPA to exit the Service Setup Make sure the control is in the OFF mode. mode. To enter the Service Setup mode, press and hold the MENU, POOL and SPA button for 5 seconds. -
Page 75: Section 8. Troubleshooting
Page 33 Section 8. Troubleshooting Troubleshooting Guide The following table provides symptoms and solutions for general troubleshooting problems for the heat pump. SYMPTOM CORRECTIVE ACTION Heat pump will not start, no control board display. Breaker or fuse may be tripped. Reset breaker or check fuse. -
Page 76: Diagnostics
Page 34 Diagnostics In the event a pressure switch opens or another Please refer to the following table for the list of fault condition occurs, the LCD screen will display the diagnostic conditions. fault until the problem has been resolved. DIAGNOSTIC CONDITION DESCRIPTION FAULT-... -
Page 77: Reference Technical Data For Troubleshooting
Page 35 41°F (5°C) Air 50°F (10°C) Air 61°F (15°C) Air 80°F (27°C) Air MODEL DATA Refrigerant High Pressure 14,4 14,8 14,8 16,9 AE200TI Refrigerant Low Pressure Amps (1 Ph) Refrigerant High Pressure 15,2 15,6 16,5 18,5 Refrigerant Low Pressure AE300TI Amps (1 Ph) 11,9... -
Page 78: Section 9. Replacement Parts
Page 36 Section 9. Replacement Parts Ordering Information need, contact Jandy International Service Department is To order or purchase parts for the AE-Ti models of located at: 2735 NW 63 Court, Fort Lauderdale, Florida, heat pumps, contact your nearest Air Energy™ dealer or distributor. -
Page 79: Air Energy ™ Ae-Ti Heat Pump Exploded View
Page 37 Air Energy AE-Ti Heat Pump Exploded View ™ These pressure switches are installed in the refrigerant line near the compressor DETAIL “A” DETAIL “B” Figure 21. Air Energy™ AE-Ti Heat Pump Exploded View... - Page 80 AGREED THAT AIR ENERGY™ HEAT PUMPS SHALL HAVE NO LIABILITY IF THE TERMS AND CONDITIONS ARE NOT FULFILLED. Model Serial Number Date Purchased Date Installed Dealer Name Air Energy™ Heat Pumps 2735 NW 63 Court, Fort Lauderdale, Florida 33309, USA • 954.970.4800 FAX 954.971.8440 Litho in U.S.A. © 2005 Jandy Pool Products, Inc. 0605...
Need help?
Do you have a question about the Air Energy AE-Ti Series and is the answer not in the manual?
Questions and answers
Como resereo el display del modelonAE 2000?
To reset the display on the Jandy AE-Ti Series model AE 2000:
1. Make sure the control is in OFF mode.
2. Press and hold the MENU button for 5 seconds to enter User Setup mode.
3. Use the Up or Down button to scroll through the options.
4. Adjust settings such as the display light or temperature scale as needed.
5. Press POOL or SPA to exit User Setup mode.
There is no specific mention of a reset function, but entering User Setup allows changes to display settings.
This answer is automatically generated