Table of Contents
Advertisement
Quick Links
Advertisement
Table of Contents

Related Manuals for IDEAL niPRO Gbis


Summary of Contents for IDEAL niPRO Gbis
- Page 1 UniPRO Gbis User Guide 123800 issue 3 UniPRO Gbis 123800 Iss 3 User Guide...
- Page 2 Copyright Notice The information contained in this document is the property of IDEAL INDUSTRIES Ltd. and is supplied without liability for errors and omissions. No part of this document may be reproduced or used except as authorised by contract or other written permission from IDEAL INDUSTRIES Ltd. The copyright and all restrictions on reproduction and use apply to all media in which this information may be placed.
-
Page 3: Table Of Contents
Contents Care of your UniPRO Gbis ................3 Final Disposal ....................3 Safety Information..................4 Power ......................5 Display and Controls..................7 Line Connections ..................8 Checking Line Conditions ................9 SHDSL Testing ................... 10 Bonding Test....................12 Setup......................13 DSL Setup.................... -
Page 4: Care Of Your Unipro Gbis
Care of your UniPRO Gbis Although light and portable, UniPRO Gbis is robust and has been designed to operate in a protected outdoor working environment. To ensure reliable operation: • avoid very high or low temperatures - UniPRO Gbis is designed to operate between 0°... -
Page 5: Safety Information
Safety Information When using UniPRO Gbis, always take basic safety precautions to reduce the risk of fire, electric shock and injury to persons. These include the following: When connecting to the line, special care must be taken as • high voltages may be present on the line and there may be a danger of electrocution. -
Page 6: Power
For maximum life of the battery it is recommended to discharge it fully and then recharge it fully at least once a month. The battery is not externally accessible or user-serviceable. When it has reached the end of its life, contact your local IDEAL representative for service. Battery Recharging The batteries can be fully recharged in 3 hours with the tester switched ON or OFF. - Page 7 Master Reset In the unlikely event of a system lock-up which prevents the tester from being switched OFF, it may be necessary to perform a master reset. This will not delete any stored data. Remove the right hand rubber end cap •...
-
Page 8: Display And Controls
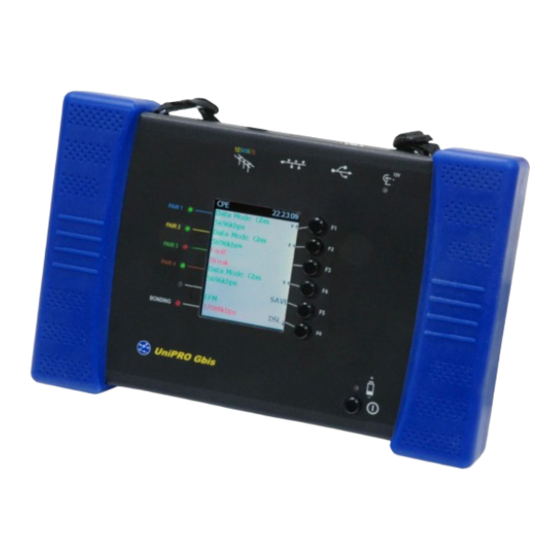
Display and Controls 2. Initialisation 1. Emulation Indicator Indicator 3. Clock 4. PAIR LEDs 6. Function 5. BONDING Keys 1. The Emulation Indicator shows that the tester is set emulate a CPE (STU-R) or a CO (STU-C) (see DSL Setup.) Note that CO Emulation is not available in all versions. -
Page 9: Line Connections
5. The BONDING LED indicates as follows: Indicates Bonding has not been established. Green Bonding has been established. Bonding has been established but its performance target has not been reached (see DSL Setup.) 6. The Function keys control the tester according to their displayed function. -
Page 10: Checking Line Conditions
Checking Line Conditions The HOME screen is displayed when the tester is switched ON (DSL only becomes available once INITIALISATION is complete): Whenever the HOME screen is displayed, UniPRO Gbis independently monitors each of the active line pairs (as selected in DSL SETUP) to check for the following conditions: Indication Meaning... -
Page 11: Shdsl Testing
SHDSL Testing When the DSL system has completed its initialisation, press F6 (DSL ) to start DSL synchronisation. Note that if a fault condition is detected on any pair, the fault continues to be displayed until the DSL sync status changes. The HOME screen displays a summary of the status of each of the active pairs: Indication... - Page 12 Below the Data Mode for each synchronised pair is displayed the trained Bit Rate. If the Bit Rate is less than the target rate (if set in DSL SETUP), the rate is displayed in red. The Function Keys associated with each synchronised pair, indicated by ++, provide access to detailed results for the pair: Result Meaning...
-
Page 13: Bonding Test
Bonding Test UniPRO Gbis can automatically bond up to 4 Line Pairs and test the performance of the aggregated service. To set up the Bonding Type, refer to DSL Setup. When Bonding has been established, the Bonding Type is displayed next to the BONDING LED, and below it the Aggregate Bit Rate, in red if the target rate has been set but not achieved. -
Page 14: Setup
Setup To set up the tester parameters, first press F4 (SETUP) from the HOME screen, with the DSL circuit disconnected. This stops all current tests and displays the main SETUP screen: Following initialisation, the following information is displayed in the bottom left corner: DSL System version number •... -
Page 15: Dsl Setup
DSL Setup To set up the test parameters, press F1 (DSL) from the main SETUP screen: The following parameters must be set to match the system under test: Parameter Meaning Emulation The tester emulates: • Customer Premise Equipment (STU-R) • Central Office (STU-C) Note that CO Emulation is not available in all versions. - Page 16 Target Meaning Rate In CPE emulation, the minimum acceptable Bit Rate for a single Line Pair . In CO emulation, the maximum Bit Rate limit allowed. Attn The maximum acceptable Attenuation Margin The minimum acceptable Noise Margin The minimum acceptable Signal Quality Tx Power The maximum acceptable Transmit Power Pwr Back...
-
Page 17: System Setup
System Setup To adjust the System settings, press F3 (SYSTEM) from the main SETUP screen, then F1 (SYSTEM SETUP): The following System settings can be adjusted: Parameter Meaning Lang The menu language Date / Time The initial setting for the clock / calendar which is used to timestamp the reports Power Save •... -
Page 18: Default Settings
Default Settings The current settings are always saved when the tester is switched OFF, provided that it is not in SETUP mode. However it is sometimes useful to make a copy of the current settings so that they can be recalled later or copied to another tester. - Page 19 Press F6 (OK) to load the current settings from Default and return to the main SETUP screen, or press F4 (CANCEL) to return to the main SETUP screen without loading the Default settings. The current settings can be uploaded to a USB memory stick plugged into the USB port.
- Page 20 from another UniPRO Gbis, then press F3 (SYSTEM) from the main SETUP screen: Press F4 (LOAD SETUP FROM USB) then F6 (OK) to download the settings or F4 (CANCEL) to return to the main SETUP screen without downloading. 123800 Iss 3 -19- UniPRO Gbis User Guide...
-
Page 21: Factory Settings
Factory Settings To clear the results store and overwrite the current and Default settings with the Factory settings, first press F5 (FACTORY) from the main SETUP screen: Press F6 (OK) then F5 (OK) to restore the factory settings, or F4 (CANCEL) to return to the main SETUP screen without restoring. -
Page 22: Saving Reports
Saving Reports The current results can be saved whenever the HOME screen is displayed. Saving creates a report of all of the current results, without stopping the tests. Note that the if the DSL circuit is disconnected (by pressing F6) before the results are saved, then they will be lost. -
Page 23: Uploading Reports
Uploading Reports Stored reports can be uploaded to a USB memory stick plugged into the USB port to enable them to be transferred to a PC and opened, for example using Excel. To upload stored reports, first insert a memory stick with 200kB of free memory into the USB port, then press F5 (SAVE) from the HOME screen: Press F6 (OK) to upload all stored reports, or press F4 (CANCEL) to return to the HOME screen without uploading the reports. -
Page 24: Firmware Updating
Software Updating The tester Software can be updated from a USB memory stick plugged into the USB port. To update the tester software, first insert a memory stick containing the required UniPRO Gbis software file into the USB port, then press F3 (SYSTEM) from the main SETUP screen: Press F5 (UPDATE FIRMWARE FROM USB) then F6 (OK) to update the software and return to the main SETUP screen, or press F4 (CANCEL) to... -
Page 25: Licensing
Licensing The license installed in the tester can be updated, for example if additional functionality is purchased. To update the installed licences in the tester, a key file is required. This is specific to the unit’s serial number, which must be quoted when ordering. - Page 26 123800 Iss 3 -25- UniPRO Gbis User Guide A subsidiary of IDEAL INDUSTRIES INC.
Need help?
Do you have a question about the niPRO Gbis and is the answer not in the manual?
Questions and answers