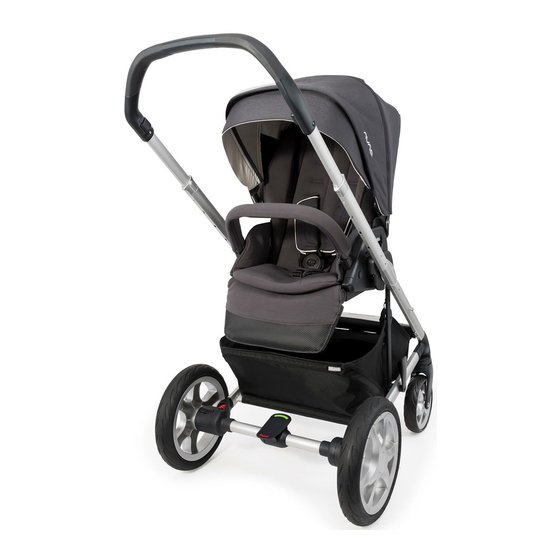
Nuna MIXX Series Manual
Hide thumbs
Also See for MIXX Series:
- User manual (13 pages) ,
- Instructions manual (20 pages) ,
- Instructions manual (64 pages)
Table of Contents
Advertisement
Advertisement
Table of Contents

Summary of Contents for Nuna MIXX Series
- Page 2 Designed around your life...
-
Page 3: Table Of Contents
Contents Product Information Product Registration Warranty IMPORTANT! Contact KEEP THESE Child Usage Requirements Warnings 6–9 INSTRUCTIONS FOR Parts List FUTURE REFERENCE: Product Set Up READ CAREFULLY Product Use Accessories Car Seat Ring Adapter Cleaning and Maintenance MIXX instructions MIXX instructions... -
Page 4: Product Information
For warranty information please visit: www.nunababy.com/warranty Contact For replacement parts, service, or additional warranty questions, please contact our customer service department. In the USA: infousa@nunababy.com www.nunababy.com 1.855.NUNA.USA MIXX instructions MIXX instructions... -
Page 5: Warnings
Overloading, incorrect folding, and using To avoid any danger of suffocation, remove all accessories other than those approved by Nuna, plastic covers before using the stroller and destroy e.g. child seats, bag hooks, rain covers, buggy or keep away from babies and children! boards, etc., may damage or make this stroller... - Page 6 Car Seat Ring Adapter STRANGULATION HAZARD Do not place items Use the car seat ring adapter only with a Nuna PIPA with a string around your child’s neck, suspend series infant car seat in combination with a Nuna strings from the stroller, or attach strings to toys.
-
Page 7: Parts List
Parts List Make sure all parts are available before assembly. If any part is missing, please contact Nuna (see page 4 for information). No tools are required for assembly. CHOKING HAZARD: Remove and immediately discard protective end caps from each wheel and wheel hub axle. -
Page 8: Product Set Up
Product Set Up Open Stroller - Pull the storage latch out. - Rotate the handle to the rear of the stroller. A “click” sound means the stroller frame is open completely. - Squeeze the recline adjustment button on the back of the seat and rotate the backrest to the upright position. -
Page 9: Front Wheels
Front Wheels - Insert the front wheel into the front leg. A “click” sound means the wheel is assembled completely. Check the wheel is securely attached by pulling out. Repeat on opposite side. click - To remove the front wheel, press the release button (1) click and detach the front wheel from the front leg (2). -
Page 10: Storage Basket
Storage Basket - Wrap the basket flap around the rear frame and fasten the 3 snaps under the basket. To access the storage basket, unfasten the zipper.* Arm Bar Always secure the child with the harness. The arm bar is not a restraint device. -
Page 11: Product Use
Product Use The parking brake MUST be engaged when the stroller is stopped and when placing and removing child. Securing Your Child Avoid serious injury from falling or sliding out. Always use the seat belt. Make sure the harness is adjusted properly and your child is snugly secured. - Page 12 Canopy - To open the canopy, pull the canopy toward the front of the seat. To close the canopy, push it back. - Position the canopy visor forward or backward as needed. When not in use, fold the canopy visor under the canopy.
-
Page 13: Recline Adjustment
Front Swivel Locks It is recommended to use the front swivel locks on uneven surfaces. - Squeeze (1) and pull out the front swivel lock (2) to lock the front wheel forward facing. You may need to move the wheel to get it to lock. - Push in the front swivel lock to unlock. - Page 14 Calf Support The calf support has 3 use positions. - To raise the calf support, lift up. - To lower the calf support, press the adjustment buttons on the sides (1), and push down (2). Full Recline Child may slip into leg openings and strangle. NEVER use in reclined carriage position unless the calf support is raised to cover the front opening and the fabric flaps are snapped to the side of the stroller seat.
- Page 15 Insert To assemble the insert, place the insert over the seat and thread the shoulder, waist and crotch harnesses through their respective slots. Attach the hook and loop fasteners. DO NOT remove the backrest tube. Storage Pocket Use the pocket on the seat back for lightweight storage. To prevent a hazardous, unstable condition, DO NOT place more than 1 lb (0.45 kg) of items in the storage pocket.
- Page 16 Fold Before folding, push the canopy to the rear of the stroller. - Squeeze the recline adjustment button on the back of the seat (1) and rotate the backrest to the stored position (2). - Pull up on the folding buttons (1) and push the stroller forward to fold (2).
-
Page 17: Accessories
- To attach the adapter to the MIXX series stroller, place the adapter onto the seat mounts until it clicks into place. A “click” sound means the adapter is attached. - To attach the infant carrier, place the infant carrier onto the adapter and press down. -
Page 18: Cleaning And Maintenance
For reasons of safety, only use original Nuna parts. Check regularly if everything functions properly. If any parts are torn, broken, or missing, stop using this product. ©2019 Nuna Baby Essentials, Inc. Nuna and all associated logos are trademarks. MIXX instructions...


Need help?
Do you have a question about the MIXX Series and is the answer not in the manual?
Questions and answers