Table of Contents
Advertisement
Available languages
Available languages
Quick Links
Owner's Manual
DVI/USB Rack-mount
KVM Switch with Audio
and Peripheral Sharing
Package Contents
Optional Accessories
System Requirements
Features
Safety Instructions
Installation
1111 W. 35th Street, Chicago, IL 60609 USA • www.tripplite.com/support
17-10-479-93370A.indb 1
Models: B024-DUA8-SL (Single-Link),
B024-DUA8-DL (Dual-Link)
PROTECT YOUR INVESTMENT!
Register your product for quicker service
and ultimate peace of mind.
You could also win an ISOBAR6ULTRA
surge protector—a $100 value!
www.tripplite.com/warranty
Copyright © 2017 Tripp Lite. All rights reserved.
2
Basic Operation
2
Specifications
2
Warranty and
Product Registration
3
Regulatory Compliance 40
7
Español
9
1
17
39
40
41
11/17/2017 2:28:56 PM
Advertisement
Table of Contents

Related Manuals for Tripp Lite B024-DUA8-SL


Summary of Contents for Tripp Lite B024-DUA8-SL
- Page 1 Register your product for quicker service and ultimate peace of mind. You could also win an ISOBAR6ULTRA surge protector—a $100 value! www.tripplite.com/warranty 1111 W. 35th Street, Chicago, IL 60609 USA • www.tripplite.com/support Copyright © 2017 Tripp Lite. All rights reserved. 17-10-479-93370A.indb 1 11/17/2017 2:28:56 PM...
-
Page 2: Package Contents
• B024-DUA8-SL or B024-DUA8-DL KVM Switch • (x2) DVI/USB KVM Cable Kits, 6 ft. • External Power Supply B024-DUA8-SL – 1-15P Plug with 5 ft. Cord (Input: 100-240V, 50/60 Hz, 0.5A; Output: 5.3V 2.4A) B024-DUA8-DL – 1-15P Plug with 5 ft. Cord (Input: 100-240V, 50/60 Hz, 0.7A;... -
Page 3: Supported Operating Systems
System Requirements Supported Operating Systems Version Windows™ 2000 and higher OS 9.0 and higher ® Linux Kernel 2.6 and higher ® Linux RedHat 9.0 and higher Linux Debian 3.1 / 4.0 Linux SuSE 10 / 11.1 and higher Linux Ubuntu 7.04 / 7.10 UNIX AIX 4.3 and higher... - Page 4 • Supports analog and digital video signals, allowing VGA computer and/or monitor connections • Supports digital video resolutions up to 2560 x 1600 (B024-DUA8-DL), 1920 x 1200 (B024-DUA8-SL), and analog video resolutions up to 2048 x 1536 (both models) • Console mouse port emulation/bypass feature supports most mouse drivers and multifunction mice •...
-
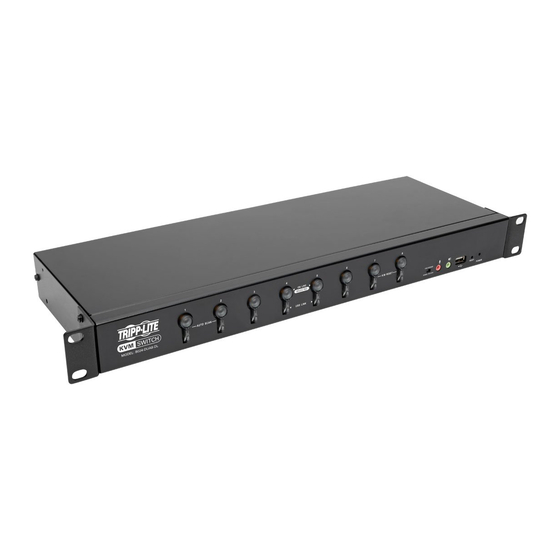
Page 5: Front Panel
Features Front Panel 5 6 7 Port Selection Pushbuttons • To simultaneously switch the focus of the KVM, audio, and USB hub to a port, press and hold its pushbutton for two seconds. • To switch the focus of the KVM and audio to one port only, press and hold its pushbutton for less than two seconds. -
Page 6: Rear Panel
Features Reset Button Press this button with a small, thin object (such as a paper clip) to perform a system reset. When the system resets, the switch will beep and the port LEDs will flash in succession until the reset is complete. Power LED Illuminates green to indicate the KVM switch is powered on. -
Page 7: Safety Instructions
• To help protect your system from sudden transient increases and decreases in electrical power, plugging your devices into a Tripp Lite surge protector, line conditioner, or uninterruptible power supply (UPS) is recommended. • When connecting or disconnecting power to hot-pluggable power supplies, observe the following guidelines: o Install the power supply before connecting the power cable to the power supply. - Page 8 Safety Instructions • If the following conditions occur, unplug the device from the wall outlet and bring it to qualified service personnel for repair. o The power cord or plug has become damaged or frayed. o Liquid has been spilled into the device. o The device has been exposed to rain or water.
-
Page 9: Rack Mount Installation
Installation Rack-mount Installation Attach the included rack-mount brackets to the KVM switch. With the user-supplied screws, fasten the rack-mount brackets to the rack. Single Stage Installation V G A USB DVI D V I KVM Cable Set USB DVI KVM Cable Set Note: Before making any connections, make sure power to all devices being connected to the KVM switch are turned off. - Page 10 Installation Connect a monitor to the KVM using one of the three following methods: a. DVI Monitor – Connect the DVI port on the monitor to the DVI-I console port located on the rear of the KVM switch. b. DVI + VGA Monitor – For monitors with DVI and VGA ports, you can connect both to the KVM switch.
-
Page 11: Cascade Installation
Cascade Installation To expand the number of computers controlled in the KVM installation, up to three levels of B024-DUA8-SL and/or B024-DUA8-DL KVM switches can be cascaded together. As many as 512 computers can be controlled in a complete three-level installation. In a three-level cascade installation, the first KVM switch in the chain is considered the first level unit;... - Page 12 Installation Note: Before making any connections, make sure power to all devices being connected to the KVM switch are turned off. Unplug any computer power cords using the Keyboard Power-On function. Connect a monitor to the KVM using one of the three following methods. a.
- Page 13 KVM switch in the installation, then plug it into an appropriate power source. To help protect your system from sudden transient increases and decreases in electrical power, plugging your devices into a Tripp Lite surge protector, line conditioner, or uninterruptible power supply (UPS) is recommended.
- Page 14 Installation Multi-Monitor Installation The multi-monitor feature connects two, three or four units to control up to seven dual-, triple- or quad-monitor computers at once. This installation requires different cabling than standard cascade configuration and offers an extra level of switching flexibility for multiple-monitor installations where multiple video cards are installed on each computer.
- Page 15 From the same computer port on the second level KVM switch that was just used to connect a computer to the first level KVM switch, connect the DVI-I port to the second DVI port of the same computer with a DVI cable (such as Tripp Lite P560- and P561-Series cables).
- Page 16 KVM switch, then plug it into an appropriate power source. To help protect your system from sudden transient increases and decreases in electrical power, plugging your devices into a Tripp Lite surge protector, line conditioner, or uninterruptible power supply (UPS) is recommended.
-
Page 17: Basic Operation
7 and 8 front panel pushbuttons. Port Selection The B024-DUA8-SL and B024-DUA8-DL KVM switches provide three port selection methods to switch between computers on the installation: manual pushbuttons, OSD (on-screen display), and keyboard hotkey commands. The manual pushbutton method is as simple as pressing a pushbutton on the KVM’s front panel that corresponds with... -
Page 18: Osd (On-Screen Display) Operation
Basic Operation OSD (On-Screen Display) Operation The On-Screen Display (OSD) is a text-based interface that allows control and administration of the KVM switch. When logging onto the KVM switch, the OSD Main Menu is the first screen to appear after entering the username and password. First Time Logging In The KVM switch features two-level security, with one Administrator and four User accounts. -
Page 19: Osd Main Screen Headings
Basic Operation OSD Main Screen Headings Header Description This column lists the port ID number for all KVM ports on the installation. The easiest method to access a particular computer is to move the high- light bar over it, then press Enter. If a port has been selected for quick view scanning (see the Set Quick View Ports section in this manual for details), an arrowhead displays in this column. -
Page 20: F1 Go To (Goto)
Basic Operation F1 Go To (GOTO) Click the F1 field or press [F1] to activate the GOTO function. GOTO switches directly to a port, either by typing in the port’s Name or its Port ID. • To use the Name: press [1], type the port’s Name, then press [Enter] •... - Page 21 Basic Operation Position the Port ID identifier anywhere on the screen. The PORT ID DISPLAY default setting is the upper right corner. Use the mouse, or a combination of the arrow keys and [Pg Up], [Pg Dn], [Home], POSITION [End] and [5] (on the numeric keypad with [Num Lock] off) to position the Port ID display.
- Page 22 Basic Operation F4: ADM F4 is an Administrator-only function that allows the Administrator to configure and control the OSD’s overall operation. To change a setting, either double-click, or use the up and down arrow keys to move the highlight bar over to it, then press [Enter]. After selecting an item, a submenu appears with further choices to select.
- Page 23 Basic Operation If there is no input from the console for the time duration set SET LOGOUT TIMEOUT within this function, the User is automatically logged out. A log in is necessary before the console can be used again. This enables other users to gain access to a computer when the original User is no longer accessing it, but has forgotten or has not logged out.
- Page 24 Basic Operation SET QUICK This function allows the Administrator to select which ports to include as quick view ports. VIEW PORTS • To select/deselect a port as a quick view port, click on it or move the cursor over to highlight it and press [Spacebar]. •...
- Page 25 Basic Operation SET CONSOLE Sets the console video output type. If the computer attached to the KVM is VGA output, this can be set to display on either a VIDEO OUTPUT VGA or DVI console monitor. Options are: • DVI-A to VGA – select this option if there is one DVI monitor with a DVI-D plus VGA connector, or if there are two monitors (1 x DVI, 1 x VGA) •...
- Page 26 Basic Operation F5: SKP Clicking the F5 field or pressing [F5] invokes Skip (SKP) mode. This function enables backward or forward to easily switch the console focus from the currently active computer port to the previous or next accessible one. •...
- Page 27 Basic Operation F7: SCAN Clicking the F7 field or pressing [F7] invokes Auto Scan mode. This function automatically switches among the available computers at regular intervals so you can monitor their activity without having to go through the task of switching manually. •...
-
Page 28: Hotkey Setting Mode
Hotkeys switch the functionality focus between ports using only the keyboard, as well as configure KVM switch settings. The following section describes the hotkey functionality available for the B024-DUA8-SL and B024-DUA8-DL. Hotkey Setting Mode All hotkey operations begin by entering Hotkey Setting mode. All commands in Hotkey Setting mode begin by entering the Hotkey Setting Mode Activation Command. - Page 29 Basic Operation To access a computer using hotkeys: 1. Activate Hotkey Setting mode using the aforementioned command. 2. Key in the port ID. The port ID numbers display on the command line as you type them in. If you make a mistake, use [Backspace] to erase the wrong number. 3.
-
Page 30: Auto Scan
Basic Operation Auto Scan Initiate Auto Scan Mode Auto Scan automatically switches between ports at a default of five-second intervals, accessing only ports that have been set as accessible under Scan–Skip Mode (see the Scan–Skip Mode section of this manual for details). To initiate Auto Scan mode: 1. -
Page 31: Skip Mode
Basic Operation Skip Mode This feature allows you to switch between computers in order to monitor them manually. You can stay on a particular port for as long as desired, as opposed to auto- scanning, which automatically switches after a fixed interval. To initiate Skip mode: 1. -
Page 32: Restore Default Settings
Basic Operation Alternate OSD Invocation Hotkey Command By default, the OSD Invocation Hotkey is [Scroll Lock] [Scroll Lock]. To toggle between [Scroll Lock] [Scroll Lock] and [Ctrl] [Ctrl], perform the following steps: 1. Activate Hotkey Setting mode using the aforementioned command. 2. - Page 33 Basic Operation Hotkey Setting Mode Command Summary Table After invoking Hotkey Setting mode, type one of the following key combinations to perform the corresponding function: Action [PN] [Enter] (PN = Port ID Number). Switches KVM, Audio, and USB focus to the corresponding port.
-
Page 34: Mac Keyboard Emulation
Basic Operation Mac Keyboard Emulation The PC-compatible (101/104 key) keyboard can emulate the functions of the Mac keyboard using the PC keystrokes shown in the table below. Note: When more than one key is required on the PC keyboard to emulate the Mac keyboard, press and release the first key, then press and release the second key. -
Page 35: Firmware Upgrade Utility
Basic Operation Sun Keyboard Emulation The PC compatible (101/104 key) keyboard can emulate Sun keyboard functions using the PC keystrokes shown in the table below. Note: When more than one key is required on the PC keyboard to emulate the Sun keyboard, press and release the first key, then press and release the second key. - Page 36 Basic Operation 4. Access the OSD as an Administrator, and navigate to the F4 ADM menu. Select the Firmware Upgrade option from the list, and type [Y] to initiate Firmware Upgrade mode. 5. On the computer where the firmware upgrade file is saved, run the Firmware Upgrade Utility file by double-clicking on it or by opening up a command line and typing the path.
-
Page 37: Osd Configuration Backup/Restore
Basic Operation OSD Configuration Backup/Restore The Firmware Upgrade Utility allows back up of the KVM’s current OSD configuration and the ability to restore it when necessary. Storing OSD configuration settings is useful when deploying more than one installation using the same settings. Backup To store a backup file to a local computer, follow these steps: 1. - Page 38 Basic Operation Restore To restore a backup file from a local computer, follow these steps: 1. Make sure the computer the configuration is backed up to is connected to the KVM switch. 2. Connect the firmware upgrade cable between the KVM’s firmware upgrade port and your computer’s DB9 communication port.
-
Page 39: Specifications
Specifications Feature B024-DUA8-SL B024-DUA8-DL Computer Ports DVI Technology DVI-I Single-Link DVI-I Dual-Link Expandable Cascade Cascade (Cascade/Daisy chain) Form Factor Rack mount Rack mount Port Selection Hotkeys, Pushbuttons, OSD Hotkeys, Pushbuttons, OSD Console Keyboard/ (x2) USB A Female (x2) USB A Female... -
Page 40: Warranty And Product Registration
3-Year Limited Warranty TRIPP LITE warrants its products to be free from defects in materials and workmanship for a period of three (3) years from the date of initial purchase. TRIPP LITE’s obligation under this warranty is limited to repairing or replacing (at its sole option) any such defective products. -
Page 41: Manual Del Propietario
Requisitos del Sistema Características Instrucciones de Seguridad Instalación Operación Básica Especificaciones Garantía Cumplimiento de las Normas English 1111 W. 35th Street, Chicago, IL 60609 EE. UU. • www.tripplite.com/support Copyright © 2017 Tripp Lite. Todos los derechos reservados. 17-10-479-93370A.indb 41 11/17/2017 2:29:04 PM... -
Page 42: Contenido Del Empaque
• (x2) Juego de Cables de KVM DVI / USB, 1.83 m [6 pies] • Fuente de Alimentación Externa B024-DUA8-SL – Clavija 1-15P con Cable de 1.52 m [5 pies] (Entrada: 100V ~ 240V, 50 Hz / 60 Hz, 0.5A; Salida: 5.3V 2.4A) B024-DUA8-DL –... - Page 43 Requisitos del Sistema Sistemas Operativos Permitidos Versión Windows™ 2000 y superior OS 9.0 y superior ® Linux Kernel 2.6 y superior ® Linux RedHat 9.0 y superior Linux Debian 3.1 / 4.0 Linux SuSE 10 / 11.1 y superior Linux Ubuntu 7.04 / 7.10 UNIX AIX 4.3 y superior...
- Page 44 VGA • Permite resoluciones de video digital de hasta 2560 x 1600 (B024-DUA8-DL), 1920 x 1200 (B024-DUA8-SL), y resoluciones de video analógico de hasta 2048 x 1536 (ambos modelos) • La Función de emulación / derivación de puerto de mouse de la consola soporta la mayoría de los controladores de mouse y mouses multifunción...
-
Page 45: Panel Frontal
Características Panel Frontal 5 6 7 Botones para Selección de Puerto • Para alternar simultáneamente el objetivo del KVM, audio y hub USB a un puerto, presione y sostenga por dos segundos su botón. • Para alternar simultáneamente el objetivo del KVM y audio a un puerto único, presione y sostenga por menos de dos segundos su botón. -
Page 46: Panel Posterior
Características Botón de Restaurar presione este botón con un objeto pequeño y delgado (como un clip para papel) para ejecutar una restauración del sistema. Cuando se restaura el sistema, el switch sonará y los LEDs del puerto destellarán en sucesión hasta que la restauración esté... -
Page 47: Instrucciones De Seguridad
(UPS) de Tripp Lite. • Cuando conecte o desconecte la alimentación a fuentes de alimentación de conexión directa, respete las siguientes observaciones: o Instale la fuente de alimentación antes de conectar el cable de alimentación a la... - Page 48 Instrucciones de Seguridad • No intente dar servicio al dispositivo. Dirija cualquier servicio al personal de servicio calificado. • Si ocurren las siguientes condiciones, desconecte el dispositivo del tomacorriente de la pared y llévelo al personal de servicio calificado para reparación. o El cable o la clavija de alimentación se han dañado o desgastado.
-
Page 49: Instalación
Instalación Instalación en Rack Fije los soportes de instalación en rack incluidos con el KVM. Con los tornillos suministrados por el usuario, fije los soportes de instalación en el rack. Instalación en Una Sola Etapa V G A Juego de Cables KVM D V I USB DVI Juego de... - Page 50 (UPS) de Tripp Lite. Encienda todas las computadoras y dispositivos conectados. 17-10-479-93370A.indb 50...
- Page 51 Instalación en Cascada Para aumentar el número de computadoras controladas en la instalación del KVM, pueden instalarse en cascada hasta tres niveles de KVM B024-DUA8-SL y/o B024- DUA8-DL. Pueden controlarse hasta 512 computadoras en una instalación completa de tres niveles. En una instalación en cascada de tres niveles, el primer KVM en la cadena se considera la unidad de primer nivel;...
- Page 52 Instalación Note: Antes de efectuar cualquier conexión, cerciórese que estén apagados todos los dispositivos que se estén conectando al KVM. Desconecte los cables de alimentación de cualquier computadora que tenga la función de encendido de teclado. Conecte un monitor al KVM usando uno de los siguientes tres métodos: a.
- Page 53 (UPS) de Tripp Lite. Conecte la fuente de alimentación incluida a cada KVM de segundo nivel, entonces enchúfela en un supresor de sobretensiones, acondicionador de línea o...
- Page 54 Instalación Instalación de Múltiples Monitores La función multi-monitor conecta dos, tres o cuatro unidades para controlar hasta siete computadoras con doble, triple o cuádruple monitor a la vez. Esta instalación requiere de un diferente cableado que el de la configuración estándar en cascada y ofrece un nivel adicional de flexibilidad de conmutación para instalaciones de monitores múltiples en donde están instaladas múltiples tarjetas de video en cada computadora.
- Page 55 KVM de primer nivel, conecte el puerto DVI-I al segundo puerto DVI de la misma computadora con un cable DVI (Como los cables de las Series P560 y P561 de Tripp Lite). Repita el paso 10 para cada KVM adicional en la instalación.
- Page 56 (UPS) de Tripp Lite. Repita el paso 13 para el KVM de segundo nivel, después para cada KVM sucesivo en la instalación.
-
Page 57: Operación Básica
Selección de Puerto Los KVMs B024-DUA8-SL y B024-DUA8-DL KVM proporcionan tres métodos de selección de puerto para alternar entre computadoras en la instalación: botones manuales, OSD (menú en pantalla) y comandos de tecla rápida del teclado. El método de botón manual es tan simple como presionar un botón en el panel frontal de KVM que corresponde... - Page 58 Operación Básica Operación con OSD (Menú en Pantalla) El Menú en Pantalla (OSD) es una interfaz basada en texto que permite control y administración del KVM. Al ingresar en el KVM, el Menú Principal del OSD es la primera pantalla en aparecer después de ingresar el nombre del usurario y la contraseña. Ingreso por Primera Vez El KVM cuenta con seguridad de dos niveles, con una cuenta de administrador y cuatro de usuarios.
- Page 59 Operación Básica Encabezados de la Pantalla de Menú del OSD Encabe- Descripción zado Esta columna lista el número de ID del puerto para todos los puertos de KVM en la instalación. El método más fácil para acceder a una com- putadora en particular es colocar la barra de realce sobre ella, entonces oprimir Enter.
- Page 60 Operación Básica F1 Ir A (GOTO) Haga click en el campo F1 o presione [F1] para activar la función GOTO. GOTO cambia directamente a un puerto, ya sea escribiendo el nombre del puerto o su ID de Puerto. • Para usar el Nombre: presione [1], escriba el nombre del puerto, después presione [Intro] •...
- Page 61 Operación Básica Coloque el identificador ID de Puerto en cualquier lugar de la pantalla. La POSICIÓN DE VISUALIZACIÓN configuración predeterminada es la esquina superior derecha. Utilice el mouse o una combinación de las teclas de flecha y [Re Pág], [Av Pág], DE LA ID DE PUERTO [Inicio], [Fin] y [5] (en el teclado numérico con [Bloq Num] desactivado)
- Page 62 Operación Básica F4: ADM F4 es una función únicamente del administrador que permite al administrador configurar y controlar el funcionamiento general del OSD. Para modificar una configuración, haga doble click o utilice las teclas de flecha arriba y abajo para mover la barra de realce a ella, luego presione [Intro].
- Page 63 Operación Básica Si no hay entrada de la consola durante el tiempo determinado CONFIGURACIÓN DE EXPIRACIÓN en esta función, automáticamente expirará la sesión del usuario. Antes de que se pueda volver a usar la consola, es DE SESIÓN necesario un inicio de sesión. Esto permite a otros usuarios tener acceso a una computadora cuando el usuario original ya no esté...
- Page 64 Operación Básica CONFIGURAR Esta función permite al administrador seleccionar qué puertos incluir como puertos de vista rápida. PUERTOS DE VISTA RÁPIDA • Para seleccionar o deseleccionar un puerto como un puerto de vista rápida, haga click o mueva el cursor sobre él para resaltarlo y presione [barra espaciadora].
- Page 65 Operación Básica CONFIGURAR Establece el tipo de señal de vídeo para las computadoras conectadas a cada puerto del KVM. Las opciones son DVI-A y LA ENTRADA DE VIDEO DE LA DVI-D. COMPUTADORA CONFIGURAR LA Establece el tipo de salida de vídeo de la consola. Si la computadora conectada al KVM tiene salida VGA, puede SALIDA DE VIDEO establecerse para mostrarse en monitor de consola VGA o DVI.
- Page 66 Operación Básica F5: SKP Haciendo click en el campo F5 o presionando [F5] se invoca el modo Omitir (SKP). Esta función permite atrasar o adelantar para cambiar el enfoque de la consola desde el puerto de la computadora activo actualmente al anterior o siguiente accesible. •...
- Page 67 Operación Básica F7: ESCANEAR Haciendo click en el campo F7 o presionando [F7] se invoca el modo de Escaneo Automático. Esta función cambia automáticamente entre las computadora disponibles a intervalos regulares por lo que puede monitorear su actividad sin tener que pasar por la tarea de alternar manualmente.
-
Page 68: Teclas Rápidas
Las Teclas Rápidas cambian el enfoque de funcionalidad entre puertos usando solo el teclado, así como configurar los parámetros del KVM. La siguiente sección describe la funcionalidad de combinación de teclas disponible para el B024-DUA8-SL y B024-DUA8-DL. Modo de Configuración de Teclas Rápidas Todas las operaciones de tecla rápida empiezan ingresando al modo de configuración... - Page 69 Operación Básica Como acceder a una computadora con las teclas rápidas: 1. Active el modo de configuración de teclas rápidas mediante el comando ya mencionado 2. Escriba el ID de puerto. Los números de ID de Puerto se muestran en la línea de comandos como se escriban.
-
Page 70: Escaneo Automático
Operación Básica Escaneo Automático Para iniciar el Modo de Escaneo Automático: La Escaneo Automático alterna automáticamente entre los puertos en un valor de intervalos predeterminados de 5 segundos, accediendo sólo los puertos que se han definido como accesibles en modo Escaneo Automático (Para detalles, consulte la sección Modo de Escaneo Automático de este manual). - Page 71 Operación Básica Modo Omitir Esta función le permite alternar entre computadoras a fin de monitorearlas manualmente. Usted puede permanecer en un puerto en particular por tanto tiempo como desee, a diferencia de la escaneo automático, que cambia automáticamente después de un intervalo fijo. Para iniciar el modo Omitir: 1.
- Page 72 Operación Básica Comando de Teclas Rápidas Alternas de Invocación del De forma predeterminada, las teclas rápidas de invocación del OSD son [Bloq Despl] [Bloq Despl]. Para cambiar entre [Bloq Despl] [Bloq Despl] y [Ctrl] [Ctrl], ejecute los siguientes pasos: 1. Active el modo de configuración de teclas rápidas mediante el comando ya mencionado 2.
- Page 73 Operación Básica Tabla Resumen de Comandos de Modo de Configuración de Teclas Rápidas Después de invocar el modo de Configuración de Teclas Rápidas, teclee una de las siguientes combinaciones de teclas para ejecutar la función correspondiente: Tecla Acción [PN] [Intro] (PN = Número de ID de Puerto).
- Page 74 Operación Básica Emulación de Teclado Mac El teclado compatible con PC (101 / 104 teclas) puede emular las funciones del Teclado Mac usando las secuencias de teclado de PC en la tabla siguiente. Nota: Cuando se requiere más de una tecla en el teclado de PC para emular el teclado Mac, presione y suelte la primera tecla, después presione y suelte la segunda tecla.
- Page 75 Operación Básica Emulación de Teclado Sun El teclado compatible con PC (101 / 104 teclas) puede emular funciones del Teclado Sun usando las secuencias de teclado de PC en la tabla siguiente. Nota: Cuando se requiere más de una tecla en el teclado de PC para emular el teclado Sun, presione y suelte la primera tecla, después presione y suelte la segunda tecla.
- Page 76 Operación Básica 4. Acceda al OSD como Administrador y navegue al menú F4 ADM. Seleccione la opción de actualización de Firmware de la lista y escriba [Y] para iniciar el modo de actualización de Firmware. 5. En el equipo donde está guardado el archivo de actualización de Firmware, ejecute el archivo Herramienta de Actualización de Firmware dando doble click en él o abriendo una línea de comandos y escribiendo la ruta.
- Page 77 Operación Básica Respaldo / Restauración de Configuración de OSD. La Utilidad de Actualización de Firmware permite respaldar la configuración actual del OSD y la capacidad para restaurar, cuando sea necesario. Guardar los parámetros de configuración del OSD es útil al implementar más de una instalación con la misma configuración. Respaldo Para guardar un archivo de respaldo en una computadora local, siga estos pasos: 1.
- Page 78 Operación Básica Restauración Para restaurar un archivo de respaldo desde una computadora local, siga estos pasos: 1. Asegúrese de que la computadora en que la configuración está respaldada esté conectada al KVM. 2. Conecte el Cable de Actualización de Firmware entre el puerto de Actualización de Firmware del KVM y el puerto de comunicación DB9 de su computadora.
-
Page 79: Especificaciones
Especificaciones Característica B024-DUA8-SL B024-DUA8-DL Puertos de Computadora Tecnología DVI DVI-I de Conexión Única DVI-I de Doble Enlace Ampliable Cascada Cascada (Cascada / Encadenado) Factor de Forma Instalación en rack Instalación en rack Selección de Puerto Teclas Rápidas, Botones, OSD Teclas Rápidas, Botones, OSD... -
Page 80: Cumplimiento De Las Normas
Garantía limitada por 3 años TRIPP LITE garantiza por tres (3) años desde la fecha de compra inicial que este producto no tiene defectos de materiales ni de mano de obra. La obligación TRIPP LITE bajo esta garantía está limitada a la reparación o reemplazo (A su entera discreción) de cualquier producto defectuoso.
Need help?
Do you have a question about the B024-DUA8-SL and is the answer not in the manual?
Questions and answers