
Subscribe to Our Youtube Channel
Related Manuals for Black Box ServTray KVT417A


Summary of Contents for Black Box ServTray KVT417A
- Page 1 © Copyright 2008. Black Box Corporation. All rights reserved. 1000 Park Drive • Lawrence, PA 15055-1018 • 724-746-5500 • Fax 724-746-0746...
- Page 2 Order toll-free in the U.S.: Call 877-877-BBOX (outside U.S. call 724-746-5500) FREE technical support 24 hours a day, 7 days a week: Call 724-746-5500 or fax 724-746-0746 SUPPORT Mailing address: Black Box Corporation, 1000 Park Drive, Lawrence, PA 15055-1018 INFORMATION Web site: www.blackbox.com • E-mail: info@blackbox.com...
- Page 4 FCC AND IC RFI STATEMENTS FEDERAL COMMUNICATIONS COMMISSION and INDUSTRY CANADA RADIO FREQUENCY INTERFERENCE STATEMENTS Class B Digital Device. This equipment has been tested and found to comply with the limits for a Class B computing device pursuant to Part 15 of the FCC Rules. These limits are designed to provide reasonable protection against harmful interference in a residential installation.
- Page 5 SERVTRAY INSTRUCCIONES DE SEGURIDAD (Normas Oficiales Mexicanas Electrical Safety Statement) 1. Todas las instrucciones de seguridad y operación deberán ser leídas antes de que el aparato eléctrico sea operado. 2. Las instrucciones de seguridad y operación deberán ser guardadas para referencia futura. 3.
- Page 6 TRADEMARKS USED IN THIS MANUAL TRADEMARKS USED IN THIS MANUAL BLACK BOX and the Double Diamond logo are registered trademarks, and ServTray and ServSwitch are trademarks, of BB Technologies, Inc. Centronics is a registered trademark of Centronics Corporation. PS/2 is a registered trademark of International Business Machines Corporation.
-
Page 7: Table Of Contents
Calling Black Box........ -
Page 8: Specifications
CHAPTER 1: Specifications 1. Specifications Active Display Area: KVT415A: 9"H x 12"W (22.8 x 30.4 cm); KVT417A: 10.6"H x 13.3"W (27 x 33.8 cm); KVT419A: 11.8"H x 14.8"W (30.1 x 37.6 cm) Approvals: CE, FCC for the product; UL ® , TUV, CE for power supply Backlight Unit: KVT415A: 2 CCFLs edge-light (top/bottom);... - Page 9 SERVTRAY Power Consumption (maximum, typical): KVT415A: 33 watts; KVT417A: 37 watts; KVT419A: 40 watts Power: 12 VDC (from external 100–240-VAC power adapter), 47–63 Hz Size: KVT415A: 1.75"H (1U) x 15"W x 19.5" to 39.5"D (4.4 x 38.1 x 49.5 to 100.3 cm); KVT417A: 1.75"H (1U) x 17"W x 19.5"...
-
Page 10: Overview
CHAPTER 2: Overview 2. Overview 2.1 Introduction Each ServTray Kit includes a ServTray ™ (KVT415A, KVT417A, or KVT419A), a KVM module (KVT4S1UV, KVT4S8PV, KVT4S8UV, KVT4S16PV, or KVT4S16UV), and a Rear Bracket Extension Kit (RMB1, RMB2, RMB3, RMB4, or RMB5). This manual describes how to use the ServTray and the Rear Bracket Extension Kit, and a separate manual (included with your kit) explains how to use the KVM module. -
Page 11: What's Included
SERVTRAY 2.2 What’s Included • (1) ServTray 15", 17", or 19" LCD console (LCD panel, keyboard, and mouse pad console drawer) • (1) KVM module with power supply (based on product code) • (1) rear rail kit (depth based on product code) •... - Page 12 CHAPTER 2: Overview Rear Rear 39.5"D (100.3 cm) 19.5"D (49.5 cm) Front Front Figure 2-3. ServTray maximum and minimum depths.
-
Page 13: Installation
SERVTRAY 3. Installation 1. Choose a proper position in the cabinet for the rack drawer. Using 10-32 or 12-24 hardware (not included), mount the rear brackets (from the Rear Bracket Extension Kit [RMB01–RMB05], included with your ServTray Kit) and lightly fasten them onto the rear vertical poles. (See Figure 3-1.) Both rear brackets will be removed later. - Page 14 CHAPTER 3: Installation 3. Slide the console drawer into the rack cabinet from the front. Then insert the console drawer’s two slide rails into the rear brackets’ pockets. See Figure 3-3. Slide rail Rear Slide rail bracket Rear pocket bracket Figure 3-3.
- Page 15 SERVTRAY 5. Remove both of the loosely connected rear brackets and slide the console drawer out halfway to balance its weight. (See Figure 3-5.) The front brackets are now supporting the console drawer. Vertical rail Vertical rail Console drawer Rear bracket removed Rear bracket...
- Page 16 CHAPTER 3: Installation b) Insert the console drawer’s two sliding rails into the tight space formed by the rear brackets and the extensions. With both hands, push in the KVM module evenly on the right and left sides. 8. Push the rear brackets all the way in and fasten them. 9.
- Page 17 SERVTRAY 13. Once the ServTray is installed in the 4-post rack or cabinet, you can connect it to a computer. The KVM module’s connectors attach to the KVM connectors on a PS/2 CPU via the 3-in-1 (PS/2, PS/2, VGA) Cable (included) or they connect to the HD15 and keyboard/mouse connectors on a USB CPU via the 2-in-1 (USB, VGA) cable (included).
-
Page 18: Operation
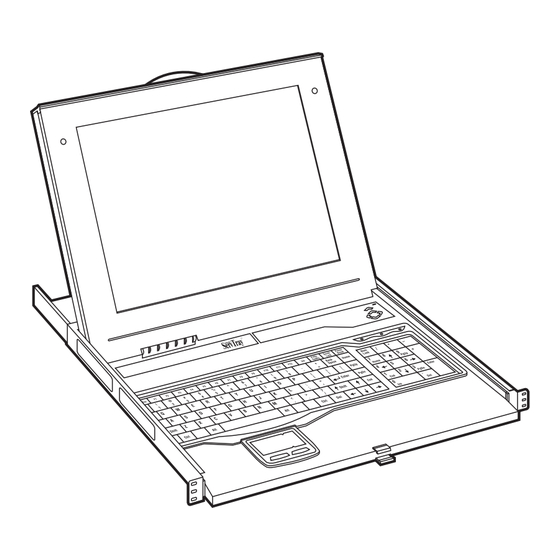
CHAPTER 4: Operation 4. Operation Once the ServTray is installed and connected to a PS/2 or USB CPU or ServSwitch, it’s ready for operation. Control the unit via the buttons on the LCD panel (labeled 1 and 2 in Figure 4-1) and the LCD panel power switch (labeled 3 in Figure 4-1). -
Page 19: Troubleshooting
• Package it carefully. We recommend that you use the original container. • If you are shipping the ServTray for repair, make sure you include everything that came in the original package. Before you ship, contact Black Box to get a Return Authorization (RA) number.
Need help?
Do you have a question about the ServTray KVT417A and is the answer not in the manual?
Questions and answers